
The Curse of Blackmoor Manor
Credits
The Curse of Blackmoor Manor is a computer game published by HER Interactive based on the Nancy Drew book series by Carolyn Keene. This module adapts the premise, setting, and select puzzles for 5e D&D. Characters and names have been altered.
Maps included in this module were created using DungeonDraft with assets from 2-Minute TableTop.
Cover image is by Peter Herrmann via Unsplash. Character art and handouts produced by the author.
Thanks to hearden (@thebanhdot_com), Timor Sol, Aralorn, 🎊A Sweet Clown🎊, and all my other players for the playtest and additional feedback before publishing.
Images, References & Tokens
A google drive folder includes all the image files within this document as well as additional resources: drive.google.com/drive/folders/1vY5MimU6vMjN9_3V1aESQgaHhJbv4HUy
- Full map, plus map of each floor
- Owlbear.Rodeo file of map set up with all tokens, handouts, and Dragon, Column Pipes and Forge Key interactive puzzles.
- Maps of individual rooms
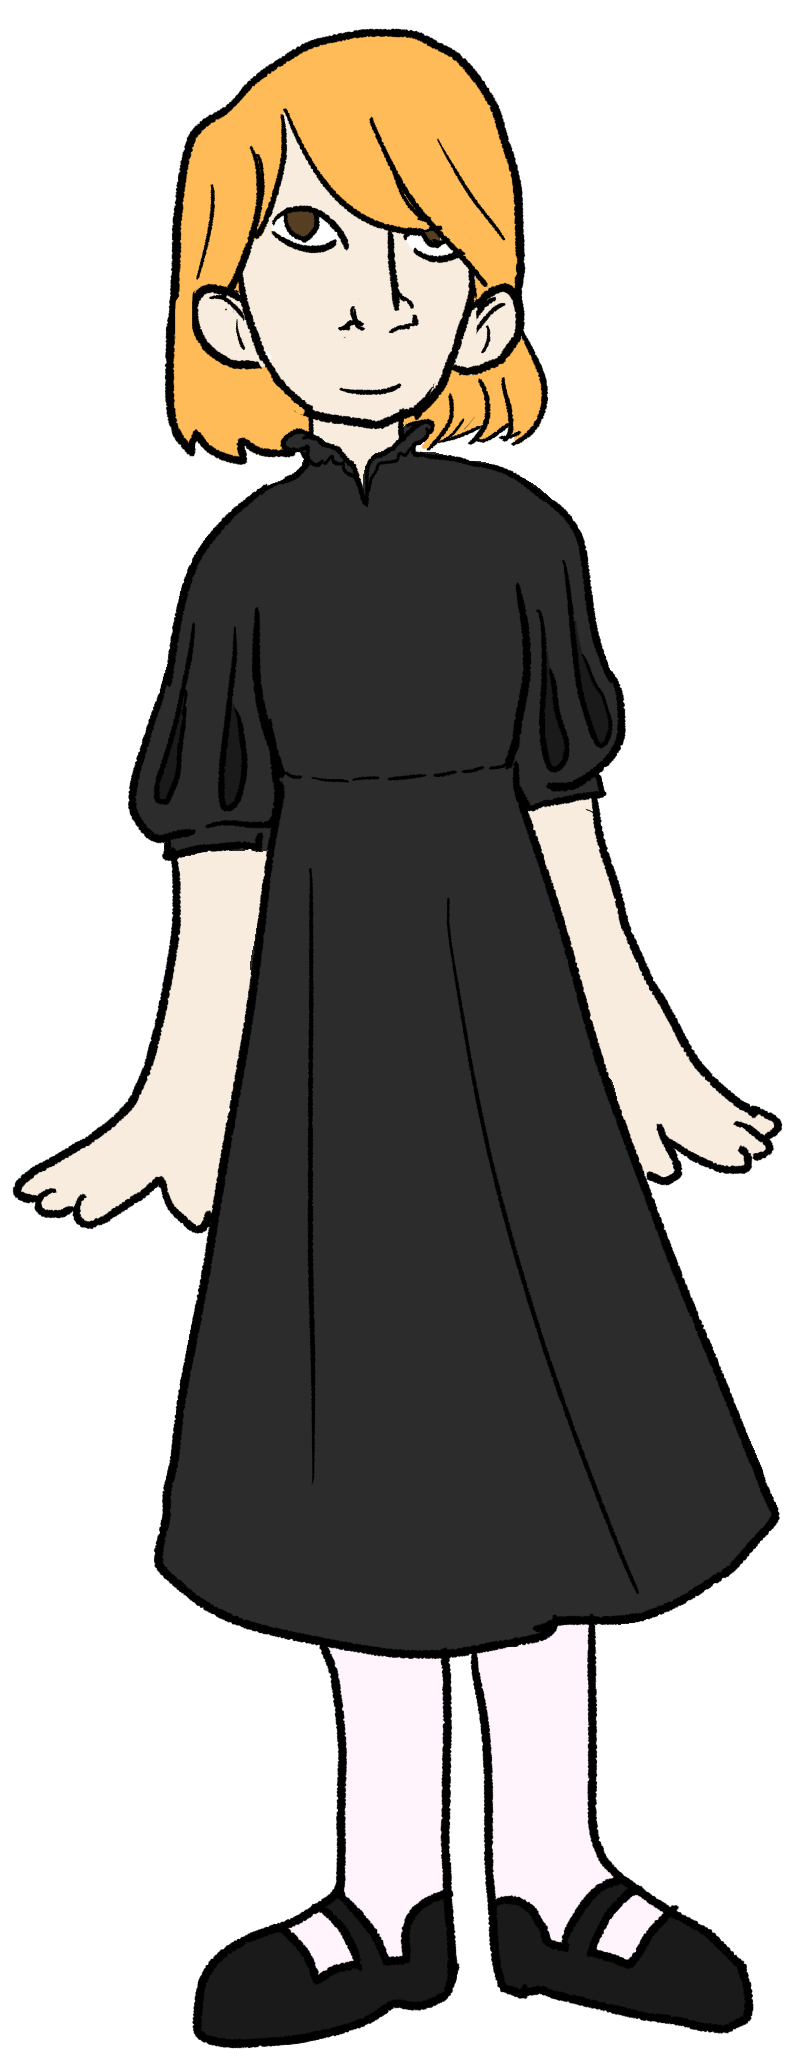
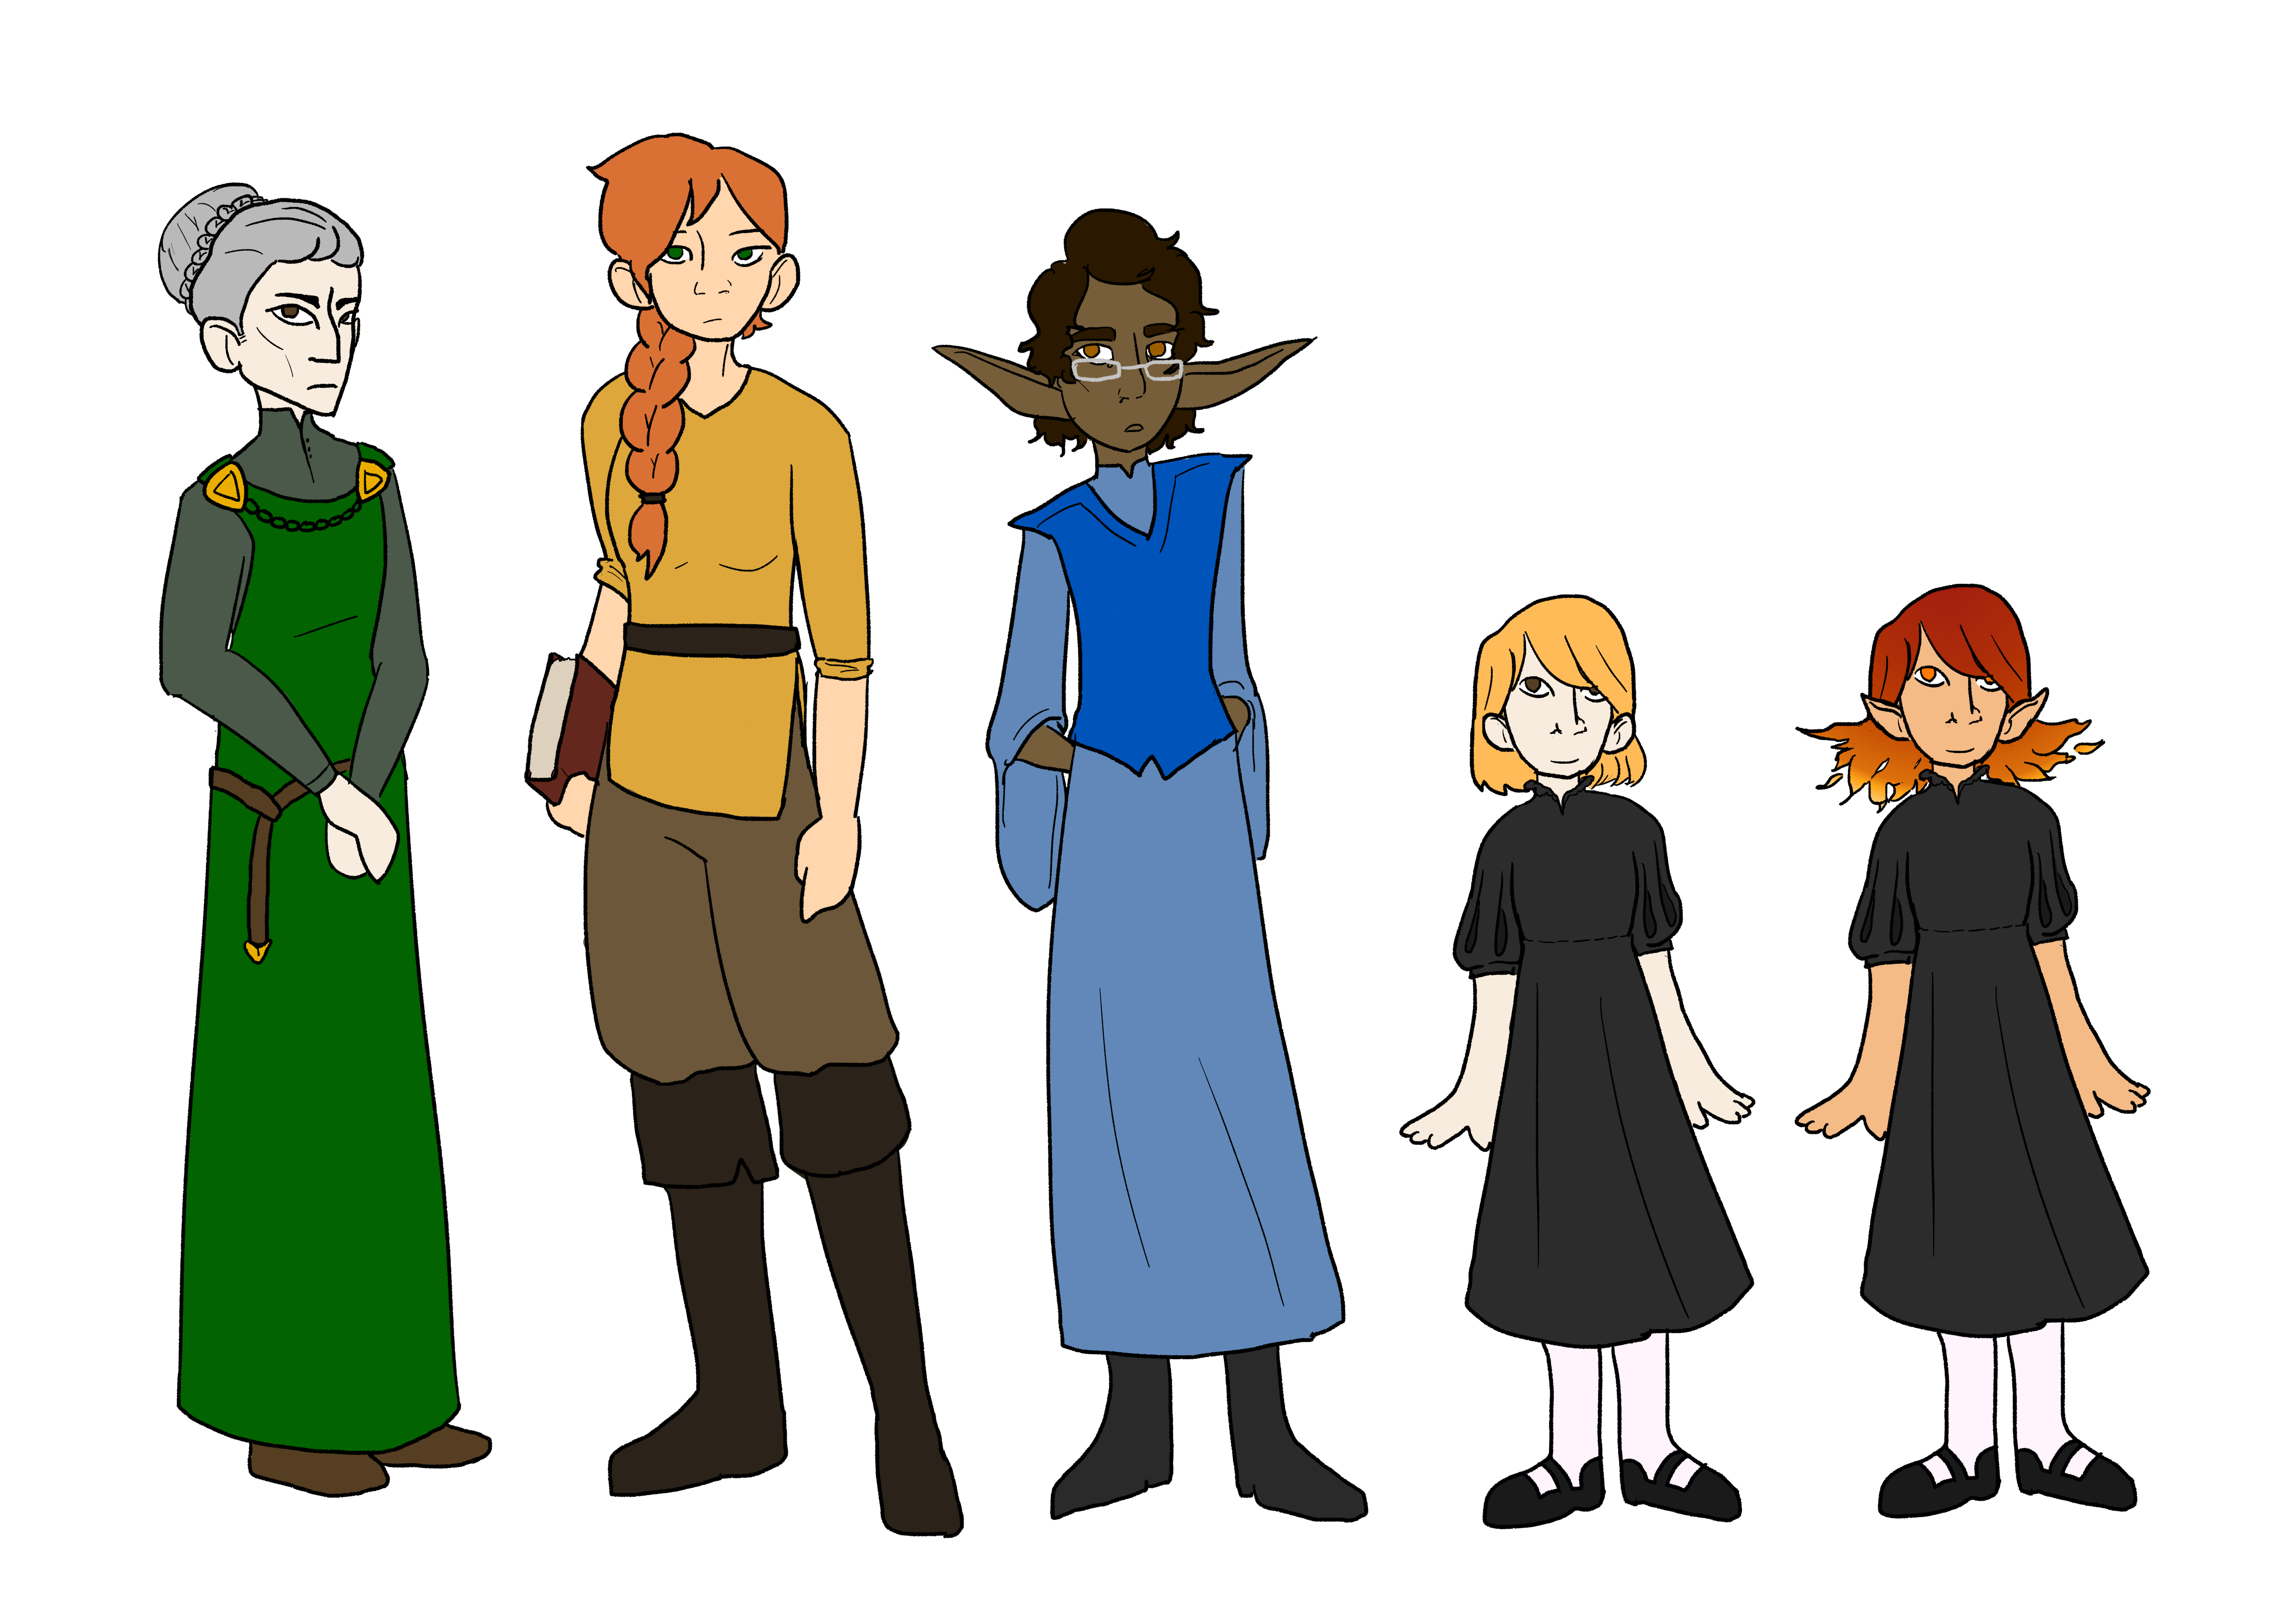
- Full body art and tokens for Lady Drake, Nigel, Ethel, and two variants for Jane (human, fire genasi)
- Puzzle Handouts: Jane's Door, Betty's cards, Constellation Box, Mural Symbols, and Alchemy Door
- Interactive puzzle individual pieces for the Dragon Statue, Column Pipes, and the optional Forge Key
- The Mutus Liber hint book, as individual pages, spreads, and zine format for printing
- Coats of Arms for every Penvellyn in the main hall
Owlbear.Rodeo is a free VTT. To import files, click 'Start Game', then the settings gear in the bottom left, 'Import', then upload the .owlbear file. Using "Select Map" on the right sidebar and selecting Blackmoor Manor will open the map with everything in place.
Runtime & Level Recommendation
The first playtest was in person, wth 5 level 3 players, running for 5 hours, and the second virtually with 5 level 11 players, running 7 hours, with large amounts of content cut for time. As such, while I do believe it can be run as a oneshot, especially in person, adding any optional encounters will make this better suited for a multi session adventure.
This adventure is not written with level in mind - puzzles can be solved without magic, and combat is entirely optional. However, it is recommended that the module as written be kept in low or mid tier play, as the puzzles alone do not add enough resource drain for a high level party. High level parties may be better suited to running one of the alternate versions with the Penvellyns absent and the manor instead host to monsters, increasing levels of combat and traps to provide a better challenge.
Table of Contents
- Mystery Overview.......................................................................4
- Main Floor...................................................................................5
- Main Hall.........................................................................6
- Library & Parlor.............................................................8
- Study.................................................................................9
- Conservatory.................................................................10
- Upper Floor...............................................................................11
- The East Wing..............................................................12
- Jane's Room...................................................................13
- Master + Lady Drake's Room....................................14
- Secret Passages.......................................................................15
- Forge...........................................................................................17
- Endgame....................................................................................18
- Appendix: Optional Encounters............................................19
- Appendix: Journal.....................................................................20
- Appendix: Mutus Liber............................................................22
- Appendix: Penvellyn Family...................................................24
Running a Puzzle-focused Game
The biggest challenge with puzzles in role-playing games is simple: the characters may and will be smarter than the players. In order to keep things moving, and present puzzle fatigue, when players become stuck, allow for Intelligence or Wisdom checks to either get hints or to solve completely.
Don't be afraid to change the solution on the fly! If a player seems to have come to a reasonable conclusion that doesn't precisely match the content as written ()
Note on Passive Skills
Passive skills are meant for instances where a player would roll but the DM does not want them to - such as when an enemy is attempting to make a stealth check. However, most games and players assume that 'passives' are always up and will apply to investigating rooms. It is Your Choice as the DM whether passive perception applies for noticing secret passages and the like.
DCs are set for all secret passages. If you find that none of your players are reliably reaching these goals, or are constantly finding them, you may want to raise or lower the DCs. Similarly, NPCs (namely, Jane) are available to assist in locating the main passages.
Getting Started
Playing with the Penvellyns
The puzzles of Blackmoor Manor can be solved without the assistance of any NPCs present, but NPCs offer hints as to where to go next, such as discovering the location of the two secret passages and offering insight into the family history. The module is written to assume that the Penvellyns are present, but can be easily modified to have them absent.
The Searching for Treasure hook is prone for completely removing the Penvellyn family - instead investigating the puzzles in an abandoned estate. It is recommended to further emphasize the Mutus Liber and notes in the Forge to replace the other hints provided.
Alternatively, the Penvellyns may be present in a more nefarious manner; the legend of the Beast of Blackmoor may be true, and the Penvellyns (or simply Ethel Bosinny) lycanthropes or a fiendish cult, presenting a threat to adventurers.
A Note on Character Names
The names provided here are mostly a match with those found in the original game, with Mrs. Drake amended to Lady Drake, and Nigel's surname given the slightly more accurate anglicization of Mukherjee over Mookerjee. However, some names may feel too modern for a higher fantasy campaign.
When I ran this in Exandria (in the German-inspired Dwendalian Empire), the names I used were: Hubrecht, Jeanne, and Lina Penvellyn.
Abandoned Estate
For a more combat-focused game, the Penvellyns may be absent, and instead only the puzzles (and various monsters) remain. Ignore any references to the Penvellyns. This option removes the ability for NPCs to assist; therefore, you may want to have Nigel or a similar scholar NPC on hand to answer questions about the local lore, or have additional clues available upon defeat of an enemy.
Traps may be added to the Abandoned Estate, both intentional on doors to certain areas, or unintentional, such as decayed flooring in the upstairs hall. The conservatory is liable for poisonous plants with area effects, and various molds/environmental hazards outlined in the DMG may be placed in the Library, Kitchens, and halls to create a more decrepit feel.
The Optional Encounters Appendix provides inspiration for enemies that may be encountered. By my personal reccomendation, choose a theme: Ethel and her cult for mostly human (or lycanthrope) enemies trying to protect the Blackmoor Ruins, Beast of Blackmoor for fiendish / monstrous enemies left over from the Penvellyn's dark rituals, or Haunted House for various ghostly spirits.
Adventure Hooks
Hired by Hugh Penvellyn
Hugh is an important diplomat who may have previous connections with the party from work that got attention from the upper echelons, or else has been recommended them by an NPC they did work for.
While currently called away on assignment, Hugh is concerned about the emotional and physical state of his wife, Linda. Multiple doctors and clerics have confirmed she is in good health, but she has locked herself in her rooms and refuses to see anyone. The pair have been married for less than a year and only recently moved into the Penvellyn family's historic home.
Hugh requests that the party discern what is wrong with Linda and find some sort of solution to what ails her.
If the party hasn't attracted attention from nobility or don't seem like likely candidatesto work for a diplomat, instead they may be hired by Linda's mother, who recently visited and found her daughter in poor health.
The Beast of Blackmoor
The area surrounding Blackmoor Manor has long been home to folktales about a mysterious creature with glowing red eyes that stalks the night. It was thought the beast had been chased off centuries ago, if it ever existed at all.
Over the past few months, sightings have cropped up again of shadowy figures with glowing red eyes, spotted on the grounds around the Manor. While no one has gotten a good view of the creature, rumors have quickly spread among the locals, not helped by the fact that the new lady of the manor has fallen mysteriously ill and the Penvellyns have cut off all social events for the forseeable future.
The party may be hired by locals to go investigate, or simply hoping to seek glory in hunting the beast. It may be easiest to expand upon the various clues found outside or leading towards the Manor. If the Penvellyns are in residence, it may require a check for them to be granted entry inside.
This plot hook may be added as part of additional research when the party is hired to investigate Lina.
Searching for the Treasure
In ancient times Randulf the Red uncovered an ancient treasure, that was said to bring him great prowess in battle - eventually earning him the Penvellyn lands. Although the details remain tightly guarded, rumors have circulated ever since, bolstered further by the strange and dark magics and alchemies the Penvellyns have often been known to deal in.
The party may have heard of this treasure from any number of places, from local taverns to books to research on specific items needed. While as written the Penvellyn treasure is not worth much to others, this adventure may be a useful source for a macguffin in an ongoing campaign. If the Penvellyns are in residence, it may require a check for them to be granted entry inside.
This plot hook may be added as part of additional research when the party is hired to investigate Lina.
Mystery Overview
The Beast of Blackmoor
Blackmoor Manor is not cursed, nor is Linda Penvellyn transforming into the Beast of Blackmoor. The mysterious happenings are the direct influence of Jane Penvellyn trying to frighten and terrorize her stepmother.
Jane has discovered both secret passages, but only made it so far as the locked panels. When she saw Linda enter the West passage, she slipped into the Master Bedroom and left the text of the curse from the panel on the nightstand.
She has also been slipping a hair growth potion into Linda's skin care regimen to simulate the monstrous transformation, and adding Lady Drake's potions to Linda's food, leaving her out of sorts.
Jane walks the halls of night in a black cloak and has an enchanted set of goggles with glowing red eyes - or manifests illusions of similar. She will also make various attempts to scare off, dissuade, or distract the party from uncovering what she has done.
Secret Passages
East Passage
The hands on the dragon statue in the East Wing are able to move freely. Turning them to match the direction of the six symbols on the coat of arms opens the secret passage.
Going down the stairs, the passage ends at a door with half of a dragon's face. Both this door and the door in the West passage must be unlocked to move forward.
This passage may be found through investigation checks for secret passages or by asking Jane Penvellyn - who tries to avoid having the party discover the passage with the curse.
West Passage
The gargoyle in the corner of the upstairs hall spins freely. Turning it in the directions of Corbin's coat of arms (the gargoyle is in his portrait) opens the passage.
At the end of the hall, a curse instructs you to enter the name of the Penvellyn burned as a witch - Elinor.
Going down the stairs, the passage ends at a door with half of a dragon's face. Both this door and the door in the East passage must be unlocked to move forward.
This passage may be found through investigation checks for secret passages in the hall, or by talking with Linda Penvellyn and convincing her to explain how she was cursed.
Passage to Forge
To reach the forge, one must traverse the moving chambers. Every time a door is opened and closed, the four inner chambers rotate clockwise, and the outer room moves along the path.
The door to the Forge is locked by a set of alchemy symbols. The symbol for Liquor Hepatis sits in a cauldron, and several other symbols are displayed to the side. Pressing the symbols for Distillation, Sal Ammoniac, Sulfur, and Vitriol opens the door.
An Intelligence (Artificer's Tools) check of DC 17 can be used to open the door, or a book can be found in the library.
Activating the Forge
Air
On the wall of the forge is a map of the room marked with buttons to move the Automaton, who can capture the four winds to bring air to the forge.
Earth
In order for the oil poured in the center of the main hall to reach the Forge, each of the columns needs to be opened and the pipes within correctly oriented. Each column is locked by a key, a missing piece of the engraving, hidden elsewhere throughout the manor, as detailed below:
| Column | Key | |
|---|---|---|
| Love | Arrow | Automaton card game, activated by symbols seen through red lens. |
| Moon | Full Moon | Locked bench in Study, opened with the red lens. |
| Magic | Wand | Held in the hand of the library statue, released by rotating statue North. |
| Time | Clock | Hit the target in the slide passage unlocked by pulling lever in East Wing. |
| Storms | Lightning | Press the stone panels over the door, activated by key in Singing Stairs. |
| Battle | Helmet | In the mouth of the fountain frog, available when fountain is refilled. |
Fire
Once the oil is activated, the Wand must be used to light it. Waving the wand over the gargoyle in the main hallway, then the two smaller gargoyles in the East wing and Main Hall, before waving over the hole for the oil will light the forge.
Water
Next to the entrance to the moving chambers is a puzzle that unlocks the water to both the conservatory fountain and the forge, requiring water to be poured among goblets.
Making the Key
The forge is already set up to make the key, with the mold resting on the side. A DC 14 (Smithy Tools) check does this successfully.
Once the key has been forged, the lock in the Forge can be opened, revealing the treasure - a piece of meteorite. Removing it from its pedestal, however, causes a large metal box to fall from the ceiling, trapping the 10 ft by 10ft space next to the lock. A Dexterity Saving Throw of DC 20 allows one to jump back in time to avoid being trapped.
The cage weighs 800 pounds, but can be lifted through the use of the Windseeker Automaton by directing it into place through the controls on the wall.
Coming up the cobblestone path towards the wrought iron gates, you press forwards towards the tall, imposing figure of Blackmoor manor. The dark stone building stands stark and high against the moors, and even the handful of trees and plants carefully tended around it can't make it less ominous.
As you knock on the doors, a sound in the grass catches your attention - and you see a pair of red glowing eyes from a shadowed figure, peering out through the grass. Before you can move to reach it or react, the door opens, revealing an older human woman - and the eyes and figure have vanished.
Castle Grounds
While the party iis free to explore the castle grounds (although Lady Drake is firm that mud must not be tracked through the halls), thre is not much to find. Some potential clues that may be uncovered are
- The Beast's Tracks - or, rather, the lack of them, as it was one of Jane's illusions by the gate. The stone it was connected to, now faded, may be found.
- The fountain out back is dry as well, until the water to the forge is restored; inspecting it may find the center has an exhaust pipe for the forge below.
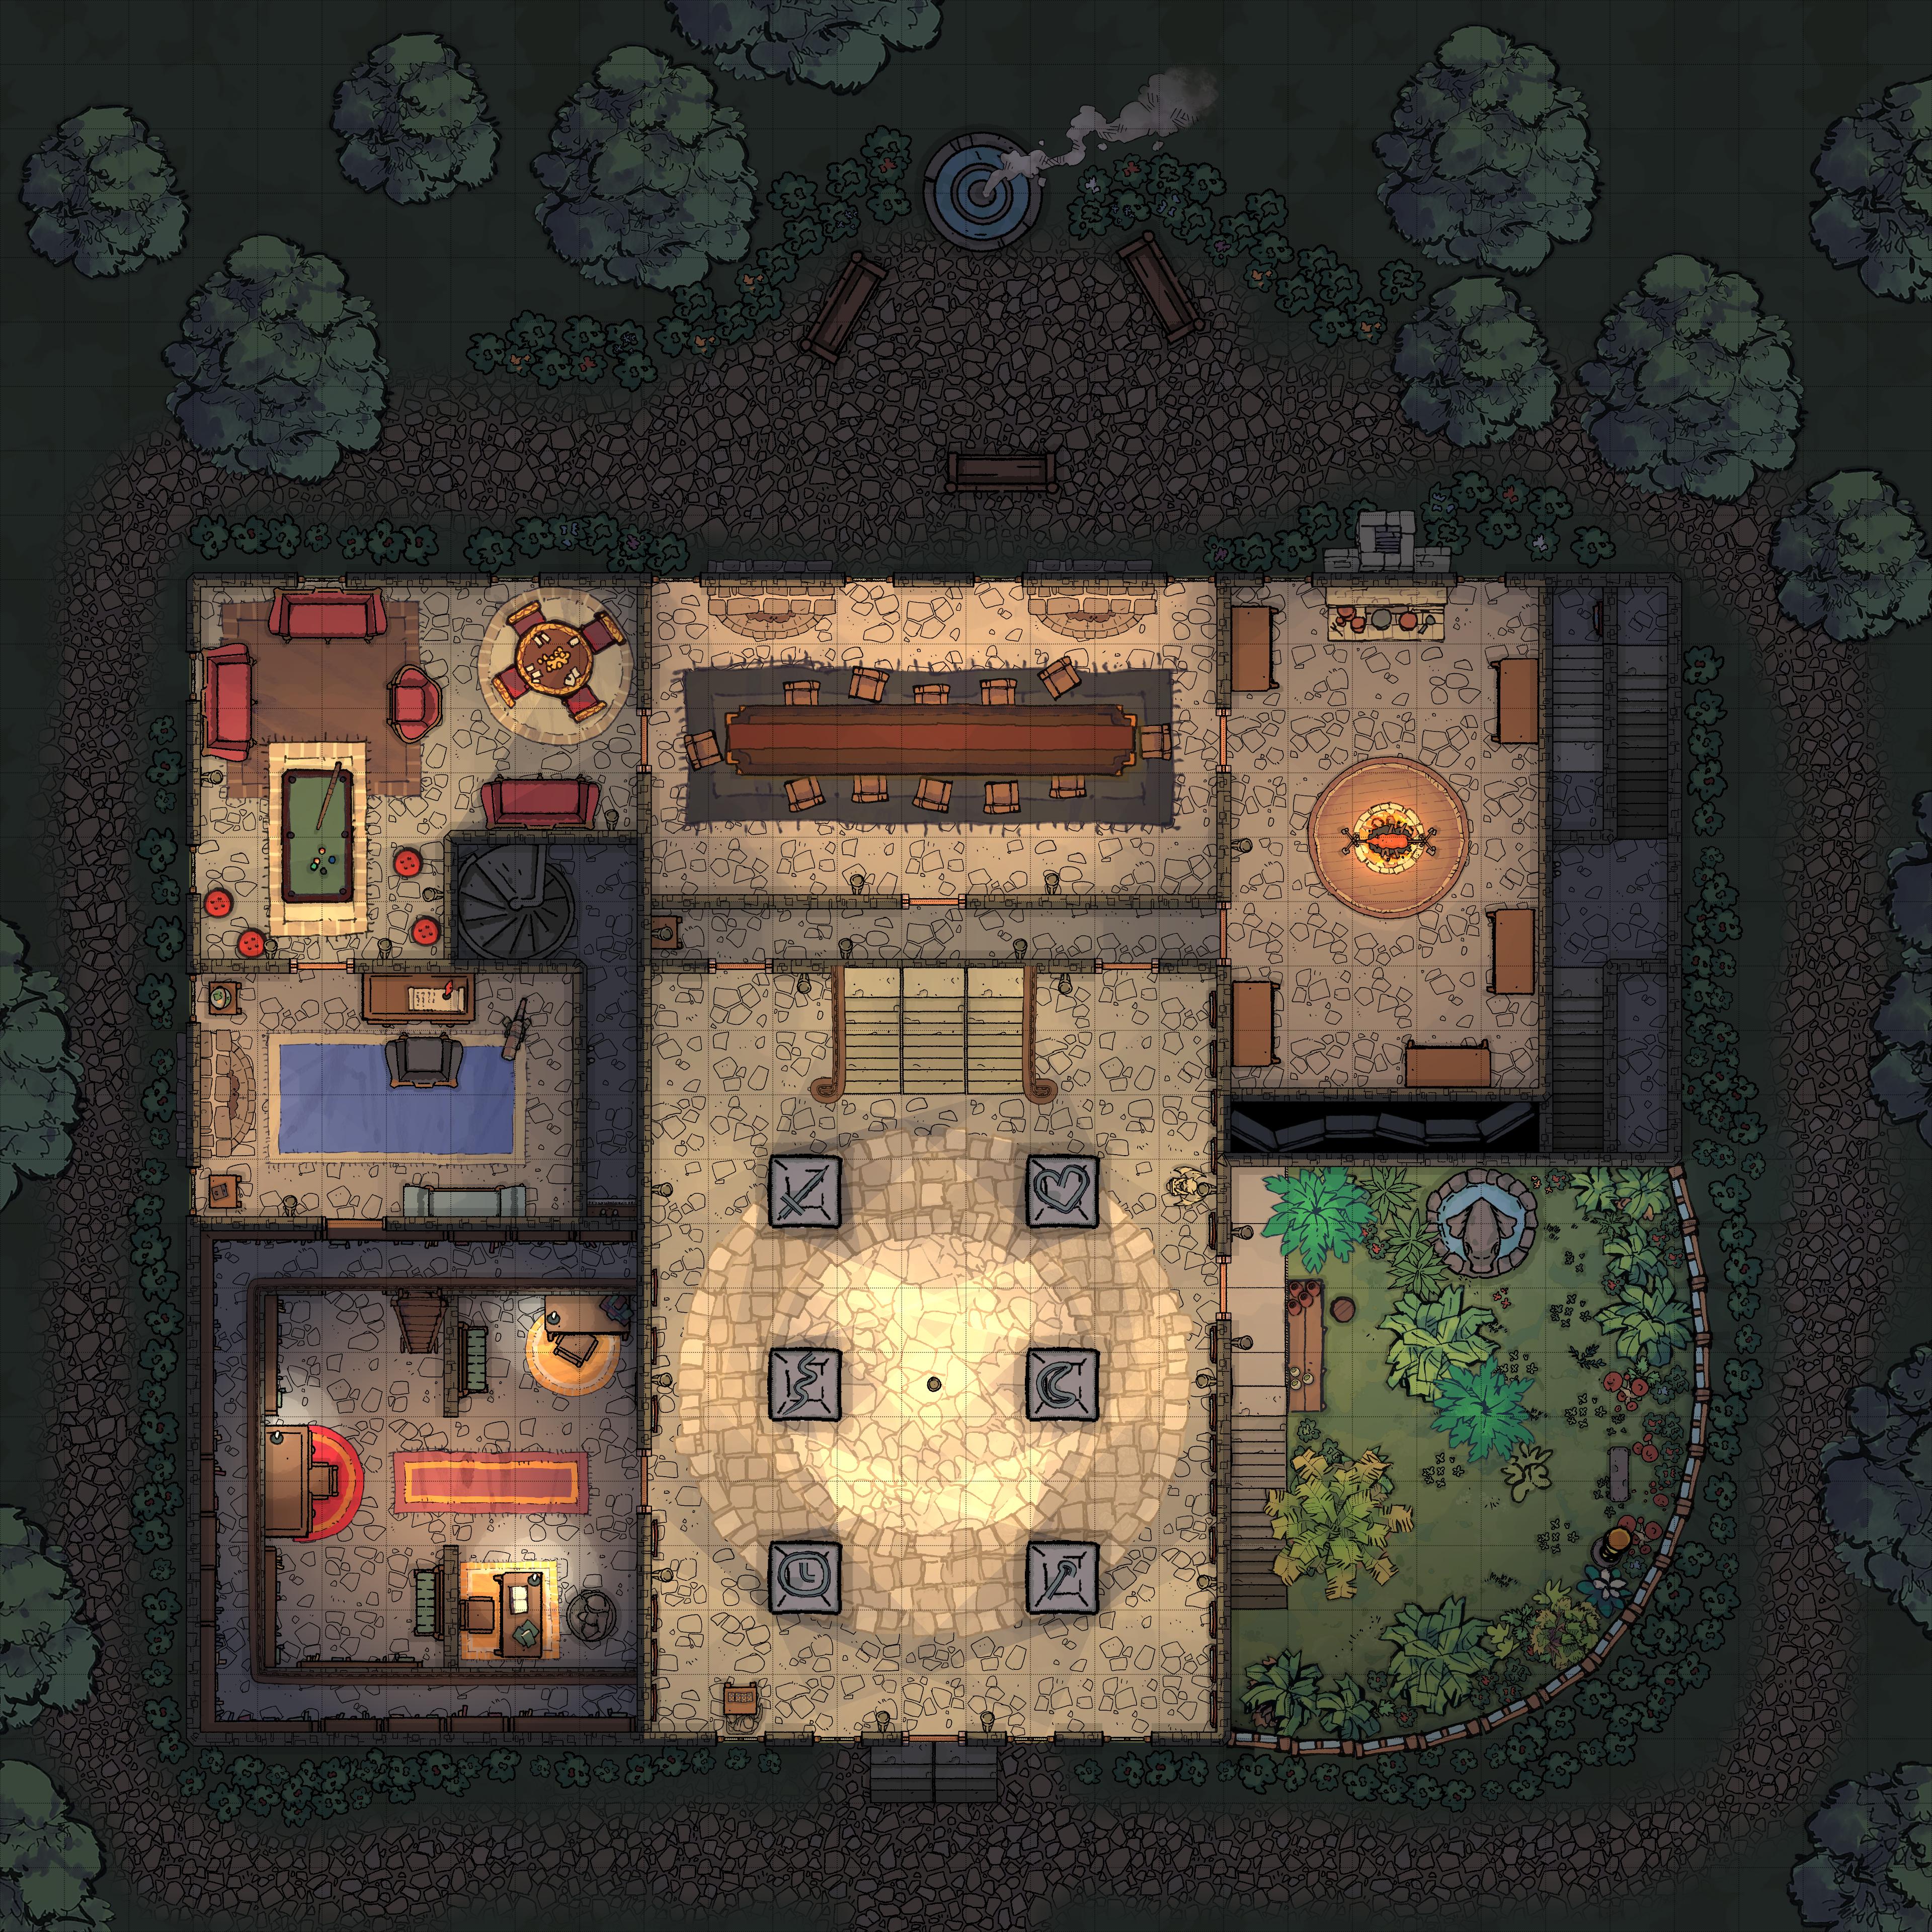
Main Hall
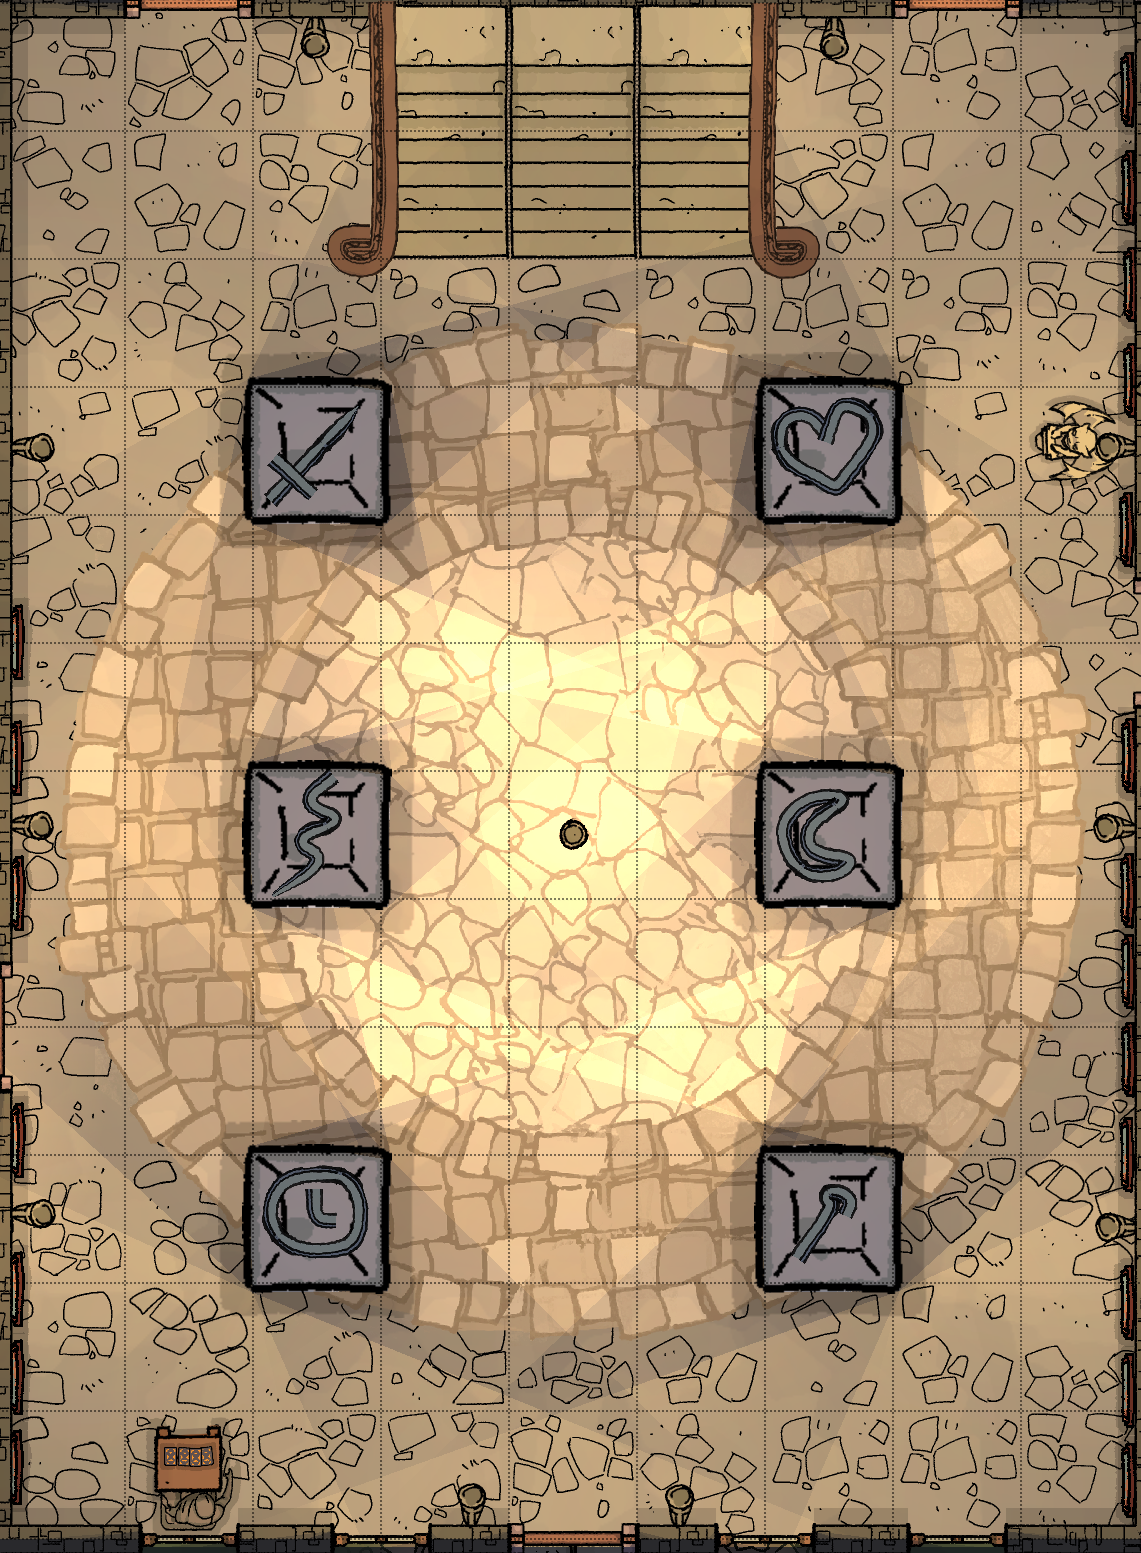
You step inside to the main hall of Blackmoor Manor. This elegant room is mostly empty, but beautifully crafted, the floor an elaborate circular mosaic. Six pillars hold up the vaulted ceilng, each carved with murals. The walls are lined with portraits and coats of arms.
To the left are a set of ornate wooden doors; to the right is a smaller metal door, and before you are the large stairs leading to the upstairs hall, with small doors below to either side.
The only pieces of furniture or decor here in the main hall are a gargoyle statue in the back right and an automaton set to the left of the door. The room is lit by a large chandeler.
Characters with a passve perception of 15 or higher, or who investigate the floor or center of the room with a Wisdom (Perception) or Intelligence (Investigation) check of DC 12 notice that there is a small hole in the center of the mosaic - a metal pipe. Anyone who puts their nose to the hole smells oil.
Gargoyle
The gargoyle sits across from the Magic pillar, and next to Corbin's portrait.
When the Wand is waved over the gargoyle's head, its eyes flash red as part of the Taming of the Gargoyles.
The Six Columns
Each column depicts a god and has a small item missing from the center panel. When inserted, it opens, revealing a section of pipe that must be rotated to allow the oil to reach the forge.
Love
The image on all four sides of this column are of a god of love. On the center side, a piece is missing - the arrowhead of the god's bow.
The arrowhead is hidden by Betty the automaton and must be won from her in a game of cards after entering the symbols seen in the study through the red lens.
Moon
The image on all four sides of this column are of the phases of the moon. On the center side, a piece is missing - the full moon.
The full moon is hidden in a locked bench in the study, opened by the red lens in the constellation box.
Magic
The image on all four sides of this column are of a god of Magic. On the center side, a piece is missing - the wand. Unlike the other columns, this has a track to slide into place, with only the gem head of the wand visible.
The wand is held by the statue of the god of Magic in the library, and is released when the statue is turned to face north by the keys in the West passage.
Time
The image on all four sides of this column are of a god of Time. On the center side, a piece is missing - the face of a clock.
The clock face is found in the slide from the East Wing down to the main hall, when the target is hit.
Storms
The image on all four sides of this column are of a god of Storms. On the center side, a piece is missing - a lightning bolt held in hand.
The lightning bolt is behind the panels above Jane's door, unlocked by the singing stairs and tapestry poem.
Battle
The image on all four sides of this column are of a god of battle. On the center side, a piece is missing - the helmet.
The helmet is in the Conservatory Fountain Frog Statue, unlocked by the water puzzle in the tunnels below.
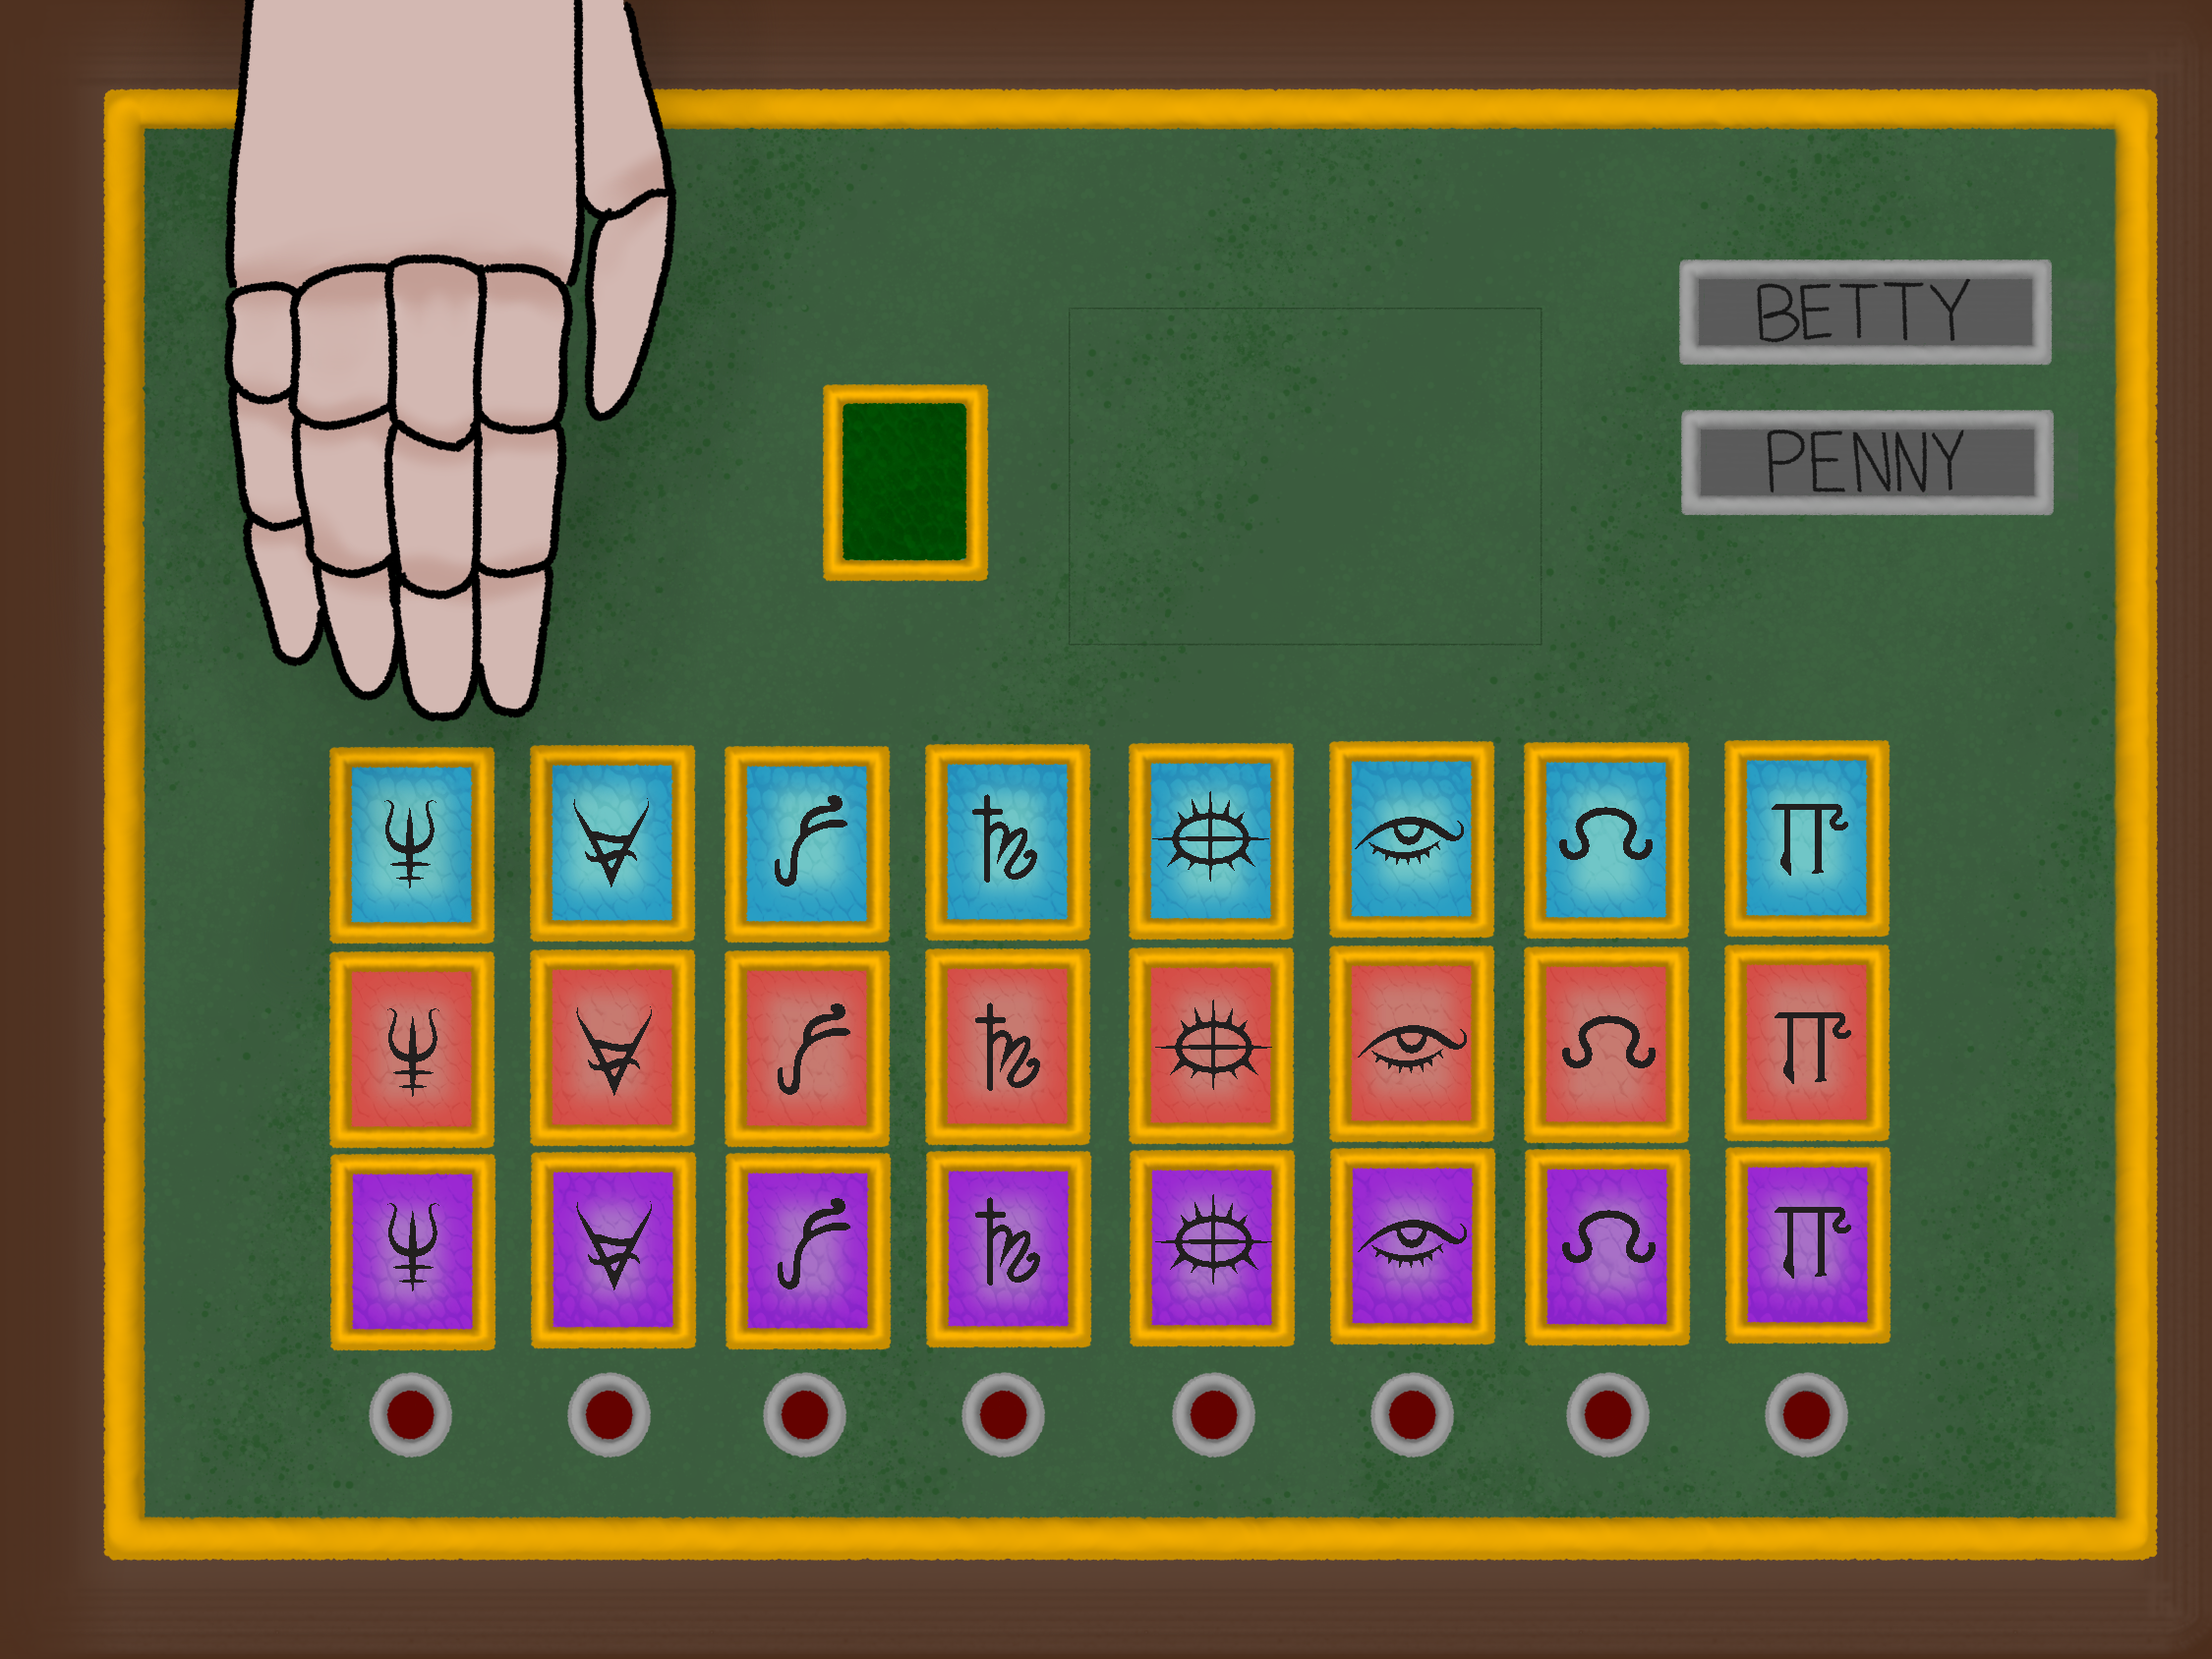
Betty
Next to the front door sits a clockwork automaton, only the top half of the body visible, in front of a table where a set of cards are visible. It is styled as an old-fashioned noblewoman.
By winding the crank, the automaton, Betty will play a card game. This may be simulated as a real card game or by a Intelligence or Wisdom (Cards) check of DC 12.
A set of cards are built into the table as buttons, with a suit for each school of magic. Pressing the symbols seen through the telescope on the mural in the study causes Betty to bet the Arrow key to the Love column.
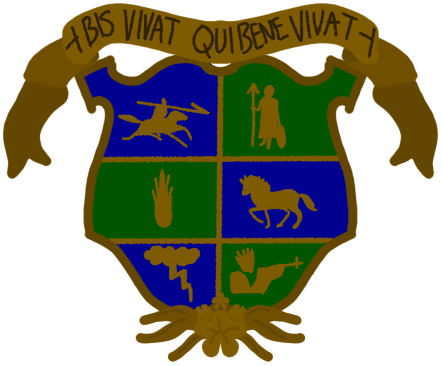
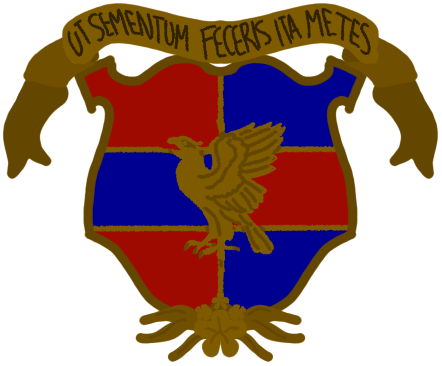
Coats of Arms
On all of the walls of the main hall are portraits of the Penvellyns who inherited Blackmoor Manor and their coats of arms. These are detailed in the appendix: Penvellyn family.
The arms start with Randul Penvellyn in the bottom right corner of the main hall. The first six portraits are absent, so the coats of arms are double stacked. The arms proceed in order along the wall towards the stairs, ending in Brigitte's - there are no arms or portrait for Edmund. They then continue from the bottom left corner with Richard's, ending with Hugh, who has a portrait but no arms.
Corbin's portrait sits next to the gargoyle, and has the Master Gargoyle of the upper floor in the background. Elinor's portrait is eerily similar to the description Jane gives of the Lady in Black. Penelope's coat of arms has a faint circular seam around it - it is the end point of the slide from the East wing.
Penvellyn Ritual
At midnight on certain evenings, Jane Penvellyn and her tutor Ethel Bosinny perform a certain ritual. Wearing elaborate jewelry, they march down the stairs towards the center chantng, then Jane pours a pitcher of oil into the hole. After it ends, they return to normal demeanor.
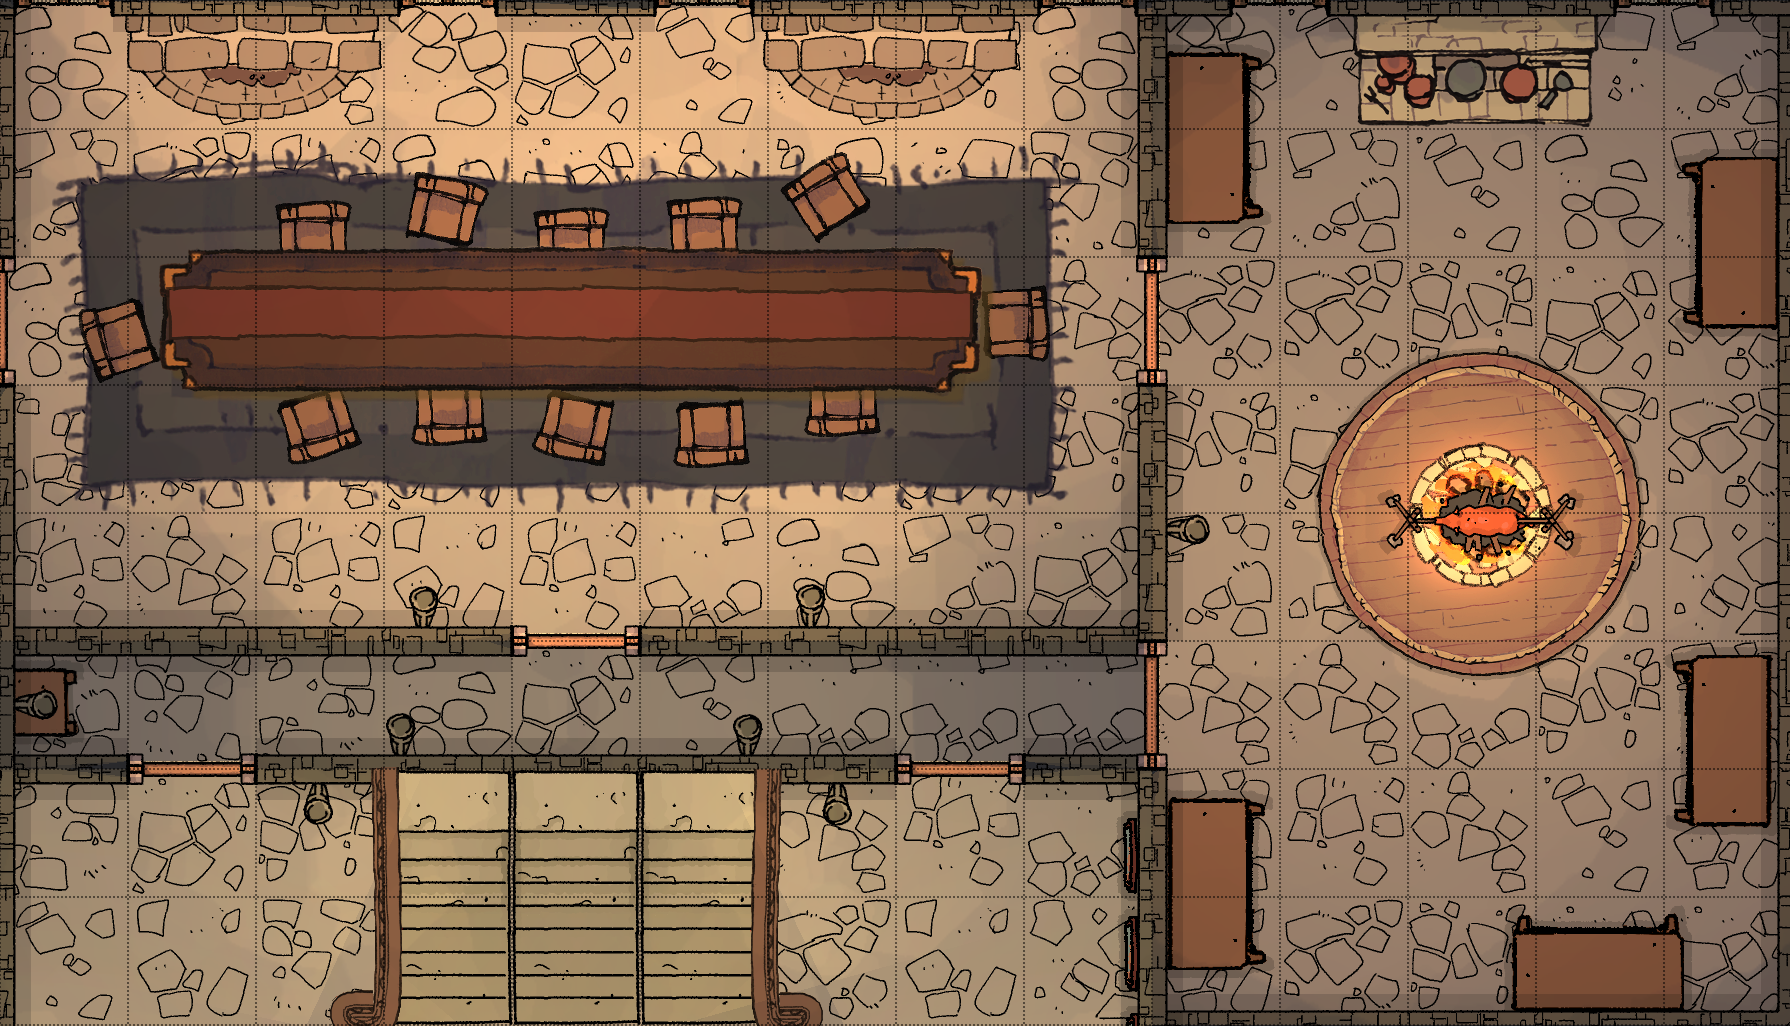
Kitchens & Dining
Stepping through the doors by the stairs, you enter into a long hall. At one end is a prestigious sport trophy Brigitte Penvellyn won, potentially to be used on the slide target.
Doors here lead to the dining room and the kitchens. The Penvellyns have no staff besides Ethel, which means that these are mainly empty, as only Lady Drake, Jane, and Nigel are currently ever them. There are stores of food that can be accessed.
Secret Rooms
A DC 20 Wisdom (Perception) or Intelligence (Investigation) check can locate a discrepancy in the walls - two small peepholes on the left wall, leading to the East Passage.
It is a DC 30 Wisdom (Perception) check to get a sight line for teleportation.
- No key without toil, no fire without oil (repeated)
- My actions ensure that my name will endure til the end.
- Penvellyn.
Library
The library holds a vast collection of books on various subjects. It can be used in place of Intelligence (Arcana, History, Nature, Religion) checks given sufficient time.
Statue
The statue of the god of magic stands facing the desk, arm raised high above with the Wand. Attempts to pull loose the Wand fail - as does anything short of destroying the statue. Instead, it must be released by playing on the Alarm Bells mechanism in the West passage.
Nigel Mukherjee
Nigel is a historian and guest at Blackmoor, making use of their extensive library. He is researching a complete history of the Penvellyn family to date, and as such, is able to answer questions. He knows less than Jane and Ethel do, but is more willing to share information.
Additionally, Nigel has heard the rumors of the Penvellyn treasure. He believes (correctly) that none of the current Penvellyns know of it's location - Lady Drake doubting it ever existed - and is hoping to find clues in his research, expecting it to be buried somewhere on the mansion's grounds.
Nigel is not a brave man. If he is present for the movement of the Statue in the library he will flee, fearing ghosts.
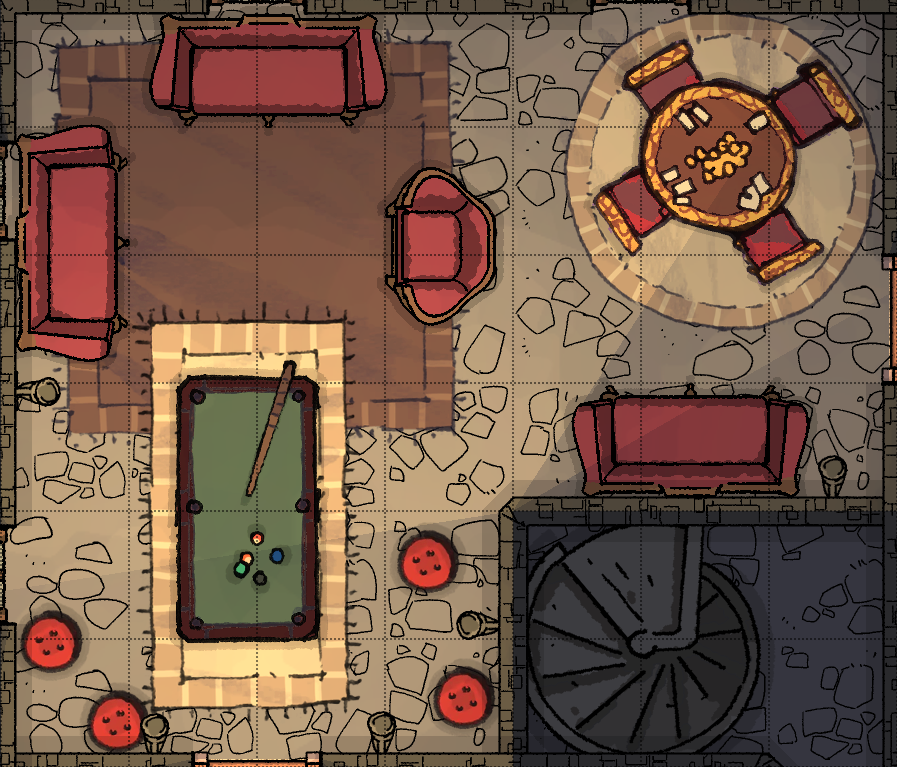
Parlor
Jane Penvellyn
Jane is most often here when not in her room. Bright, cheery, and above all very lonely, Jane hasn't been able to interact with many people since her father's remarriage and moving here aside from her family and tutor, Ethel.
Jane is also the one who knows the most about what's going on, as the Penvellyn Initiate, having reached the combined passages but not the Forge, and as the one behind Linda's illness. She is balancing the fine line between keeping the party here as interesting new people to talk to, and trying to keep them from uncovering her secrets.
As such - she is eager to distract the party by having them stay in the safe areas of the Manor and entertain her, and will eagerly try and convince them to play games with her.
Playing Pool
Credit to u/Triscuit5764 for the basic rule set!
For each hit, roll an Intelligence check to plan your move. Then make a Dexterity check, with a DC equal to 22 minus the value of the Intelligence check. On a success, one ball sinks, on a nat20 on one roll, two, and a nat20 on both, three.
When 15 balls are sunk, the player with the most wins.
Playing Cards
Queen's Call is a card game developed from Critical Role.
Players roll 3d6 and hide the results. They then may choose to call, fold or up the ante, adding to the pot and rerolling 1d6. When every player has either folded or has the same amount in the pot and called, the cards are revealed.
The hands, from high to low, are: Three of a Kind, Straight, Evens, Odds, Two of a Kind, High Roll.
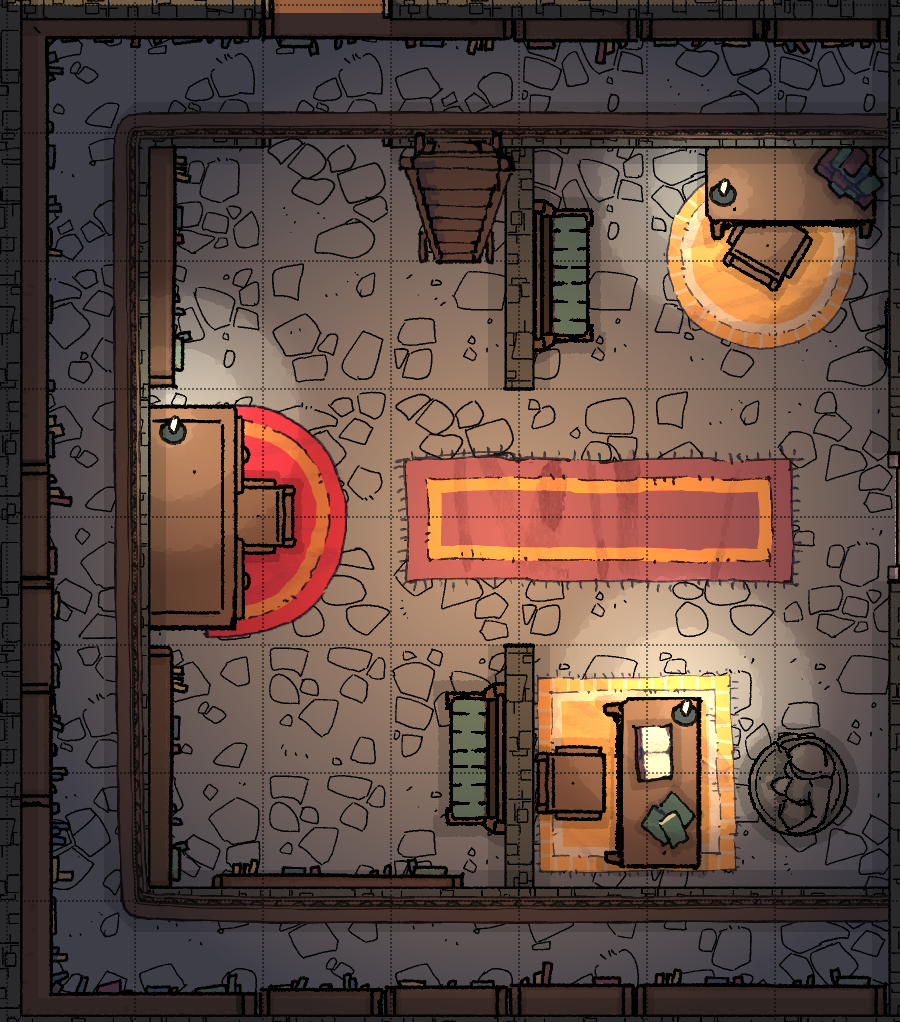
Study
You enter into the study. A fireplace dominates one wall, a coat of arms above it and two windows to each side. A desk is against one wall, a set of beautfully illustrated star charts hanging above them, a telescope beside it.
The wall across from the desk has an extensive mural of a scene from mythology, with a sofa beneath it. On a small table next to the fireplace is a strange looking box.
There is also another door across from where you entered.
The Arms above the fireplace belong to Brigitte Penvellyn and are identical to those seen in the Main Hall; a DC 15 Intelligence (History) check or asking any NPC can determine Brigitte was a famous astronomer - this room was built and designed by her.
The unusual symbol on the top right has no significance to anyone who hasn't opened the panels on the constellation box; any Intelligence check after will determine the connection.
It has five circles - the top Full Red; the left Blue with the left quarter Black, the center Black, the right Red with the right quarter Black, and the bottom Green with the left half Black, the manner reminiscent of moons.

Secret Passage
A DC 20 Wisdom (Perception) or Intelligence (Investigation) check can locate a discrepancy in the walls - two small peepholes in the upper right. It is a DC 30 Wisdom (Perception) check to get a sight line for teleportation.
Star Charts
The star charts show four images of the sky, each with specific constellations highlighted in a cross pattern. An Intelligence (Nature) check of DC 12 determines these are the skies at the Summer and Winter solstices and the Vernal and Autumnal equinoxes.
| Season | Top | Left | Center | Right | Bottom |
|---|---|---|---|---|---|
| Spring | Lynx | Twins | Rabbit | Hero | Crow |
| Summer | Rabbit | Swan | Crow | Horse | Dragon |
| Fall | Crow | Eagle | Dragon | Bull | Lynx |
| Winter | Dragon | Fish | Lynx | Lion | Rabbit |
Constellation Box
The constellation box has five panels - a Lynx, a Dragon, a Lion, a Fish, and a Rabbit. Opening each panel shows a circle that can be changed to represent the phases of the moon, and a lever to change the color between red, green, and blue.
The strange cross symbol in Brigitte's arms is the key to the box. The Dragon should be set to the top symbol, Red Full, the Fish the left, Blue Waxing Gibbous, the Lynx the center, Any New, the Lion the right, Red Waning Gibbous, and the Rabbit the bottom, Green Waxing Quarter.
When all have been correctly set, the box opens, revealing a lens for a telescope with red glass.
Bench
A Wisdom (Perception) or Intelligence (Investigation) check of 12 discovers that there is a compartment beneath the bench. It has a peculiar circular lock designed to fit the lens from the Constellation box. A DC 25 Dexterity (Thieves Tools) check can also open the compartment.
Within the compartment is the Full Moon key.
Telescope & Mural
The telescope stand is set up to look at the mural across the room. If the red lens from the Constellation Box is used, five numbered symbols can be seen on the mural as well. A DC 10 Intelligence (Arcana) check recognizes them as schools of magic.
The five symbols,
in order, are:
Conjuration,
Illusion,
Transmutation,
Evocation,
Abjuration
Conservatory
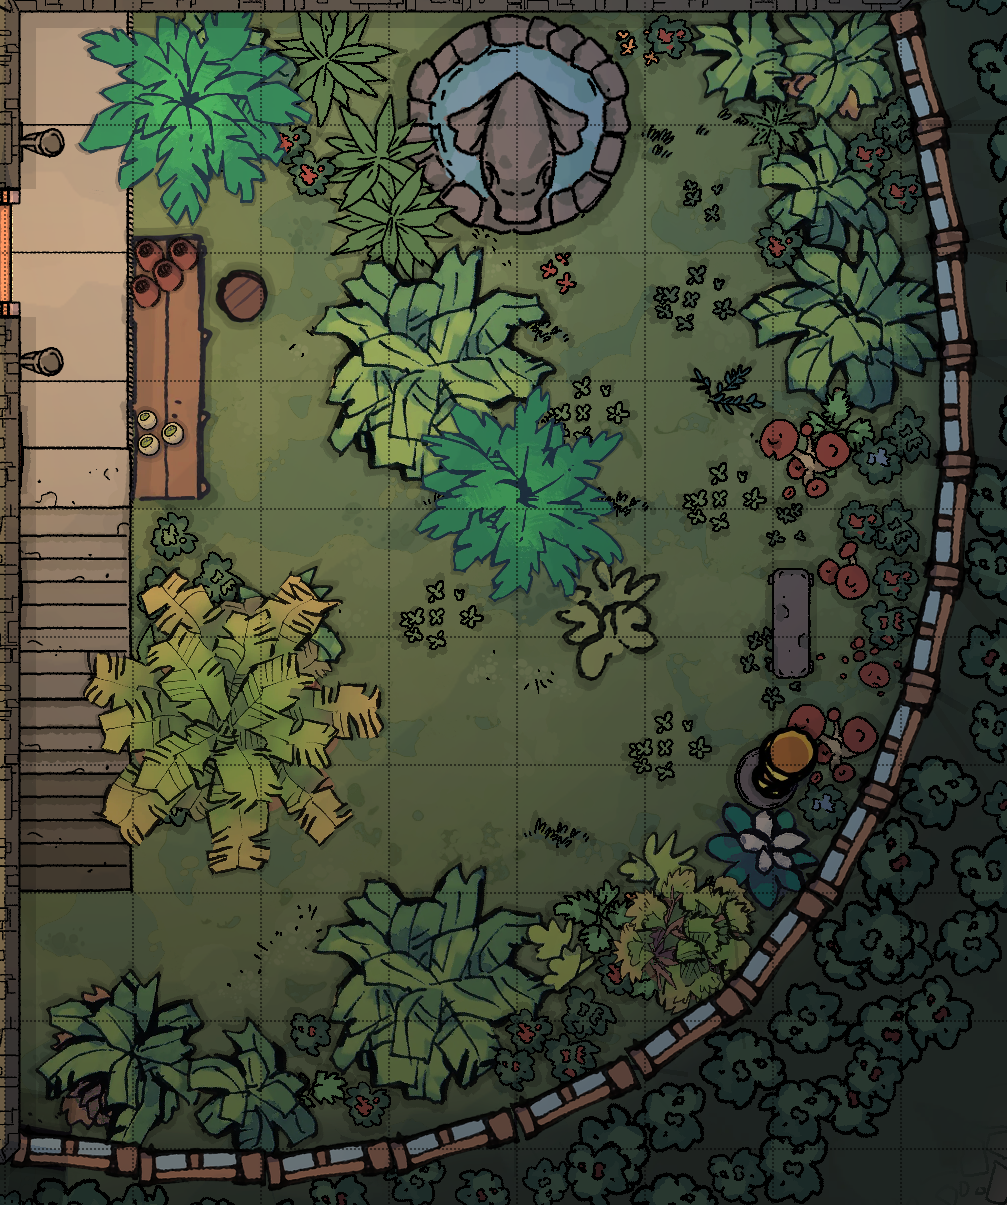
The Workbench
Lady Drake's workbench is covered with small pots and soil, as she seems to be working with a new shipment of seedlings. To one side, there are various collections of herbs, some out and being bundled. A DC 15 Intelligence (Nature) or Wisdom (Medicine) check can determine that these are components for some sort of medicine or minor nature magic - Lady Drake, uncertain what to do, is trying to craft some sort of charm to help with Linda's condition.
There are also a selection of mixtures she has created to help with her general aches and pains; a DC 15 Intelligence Investigation check determines that several are missing, askew from the orderly fashion Lady Drake seems keen to maintain, and a DC 13 Wisdom (Medicine) check reveals that they are pain medication - not able to act as health potions, and liable to cause side effects such as drowsiness and mild hallucinations. These have been stolen by Jane, the cause of some of Linda's symptoms.
The Trophy
In the south right corner, there is a bench and a golden trophy, dedicating the conservatory to John Penvellyn, Lady Drake's brother, and commendng his research.
The Fountain
This large stone fountain has a statue of a frog at the center. It is dry unless the water to the forge has been turned on in the tunnels below.
Kissing the frog on the head - or, a DC 22 Wisdom (Perception) check to notice the faint button there) - causes the mouth to open if the water has been activated, revealing the Helmet Key.
Poisonous Plants
Not all of the plants here in the conservatory are safe. Following the main path is fine, but stepping through the plants (or, if the conservatory is overgrown, approaching the fountain) activates poisonous spores. Drake will warn the party to be cautious if present.
Characters within 5ft must make a DC 13 Constitution Saving Throw or be poisoned for the next hour. They may also take damage as follows:
| Low | Mid | High | Epic |
|---|---|---|---|
| 1d10 | 2d19 | 4d10 | 10d10 |
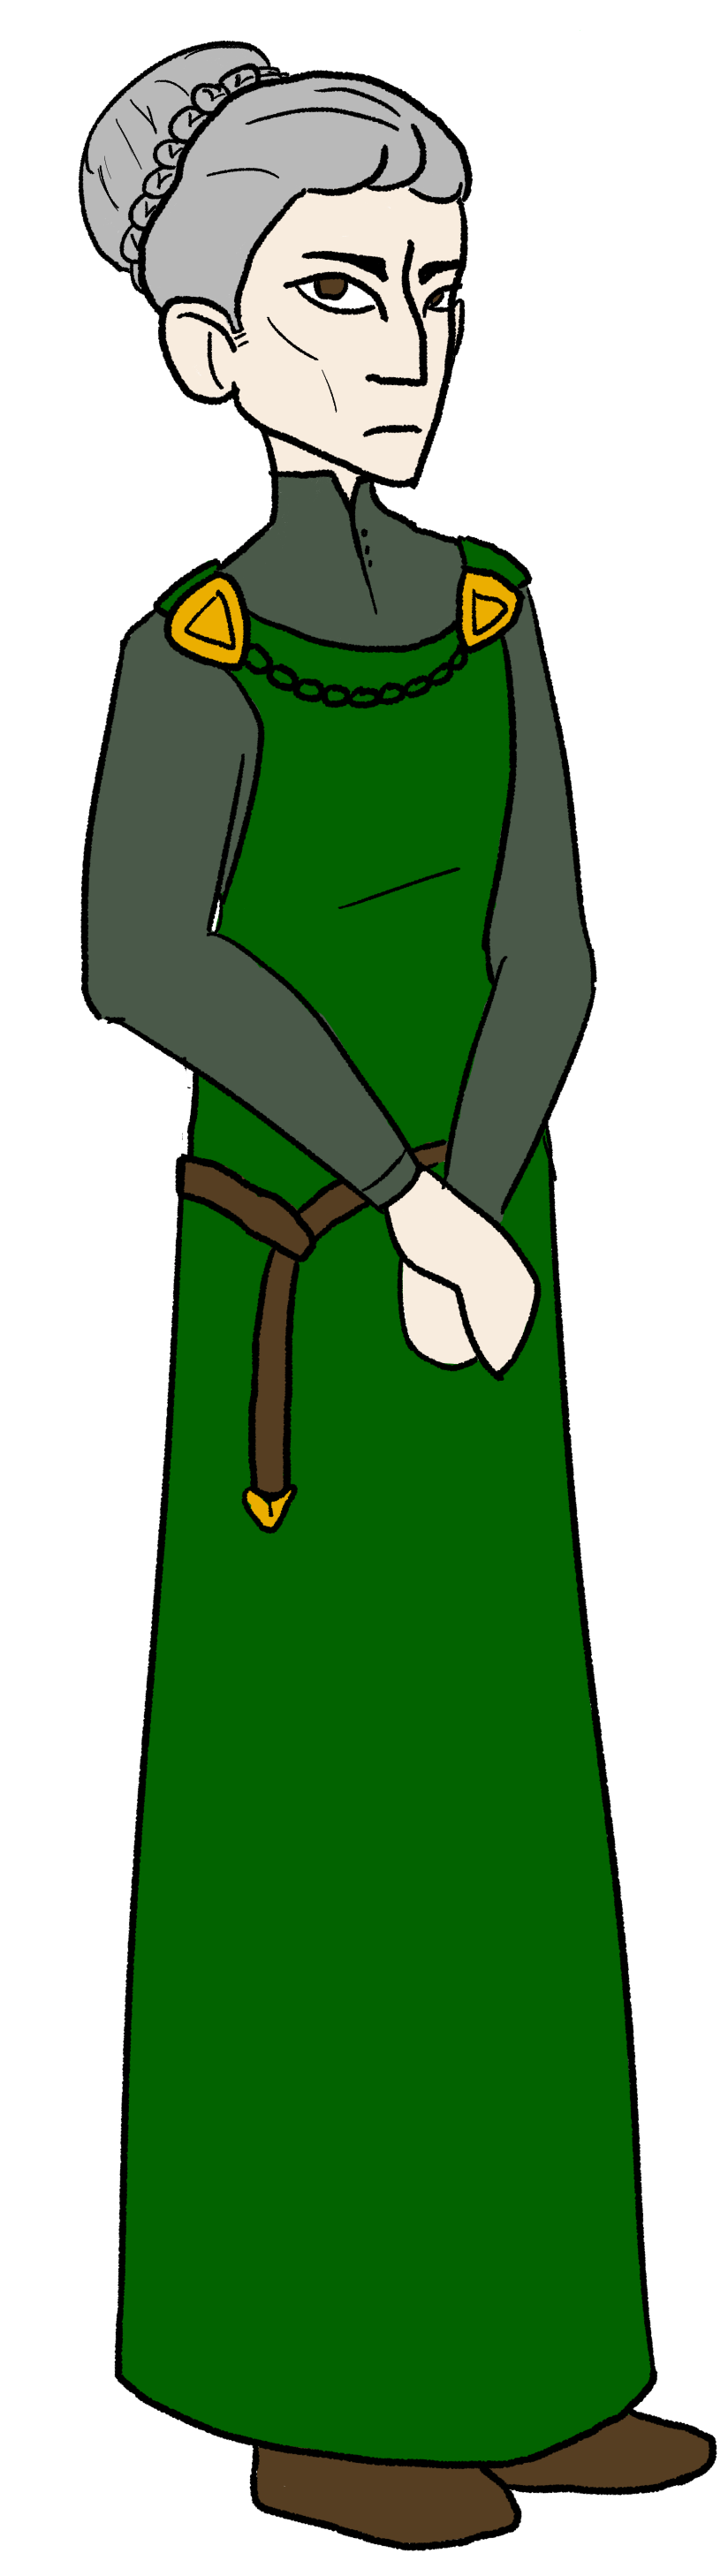
Leticia Drake
Lady Leticia Drake is Hugh's aunt. Following her husband's death and nephew's return to Blackmoor, she has moved back in. With Linda's illness, she acts as head of the manor.
Stern, proper, and reserved, Drake is not one for tomfoolery or shenanigans, much to Jane's
chagrin. However, she is fiercely protective
of her family, and genuinely wants to see
Linda cured. She is helpful towards the party,
but is not interested in assisting with secret
passages or uncovering the treasure, which she
does not believe exists.
Lady Drake is not an initiate, her older
brother John taking that role and keeping it
from her. She would, however, have been a
very keen one; she takes after Elinor and
Albert in her skill with alchemy, albeit
focused more on herbs.
- The Penvellyns are a proud, self-sufficient
family. Although temporary staff is hired for
special events and repair work, the only true
employee they have is Ethel, Jane's tutor. - With Hugh away and Linda and Jane still
adjusting to the wedding and move, only a
handful of people have visited, and since
Linda fell ill, only her mother. - The East Hall is locked to prevent Jane
from breaking anything; not seeing the
relevance, Drake will not let you have a key. - The Fountain has been dry since shortly
after her brother John (Hugh's father) died. - She was the one who made the lotion
Linda has been using; she does not think
there is anything special about it, and
has no more of the batch, although she
does have her pain-dampening potions
(of which a few are missing)
Special Events
Jane will attempt to further support her 'Linda has been cursed' pretense at various times that seem to be relevant, most often in the evenings. These may include:
- Sending her image dressed as Elinor Penvellyn to walk the halls
- Clawing at the guest room door and leaving deep gashes in the wood
- Leaving threatening notes
- Using her magic or the alarm chimes to play eerie sounds
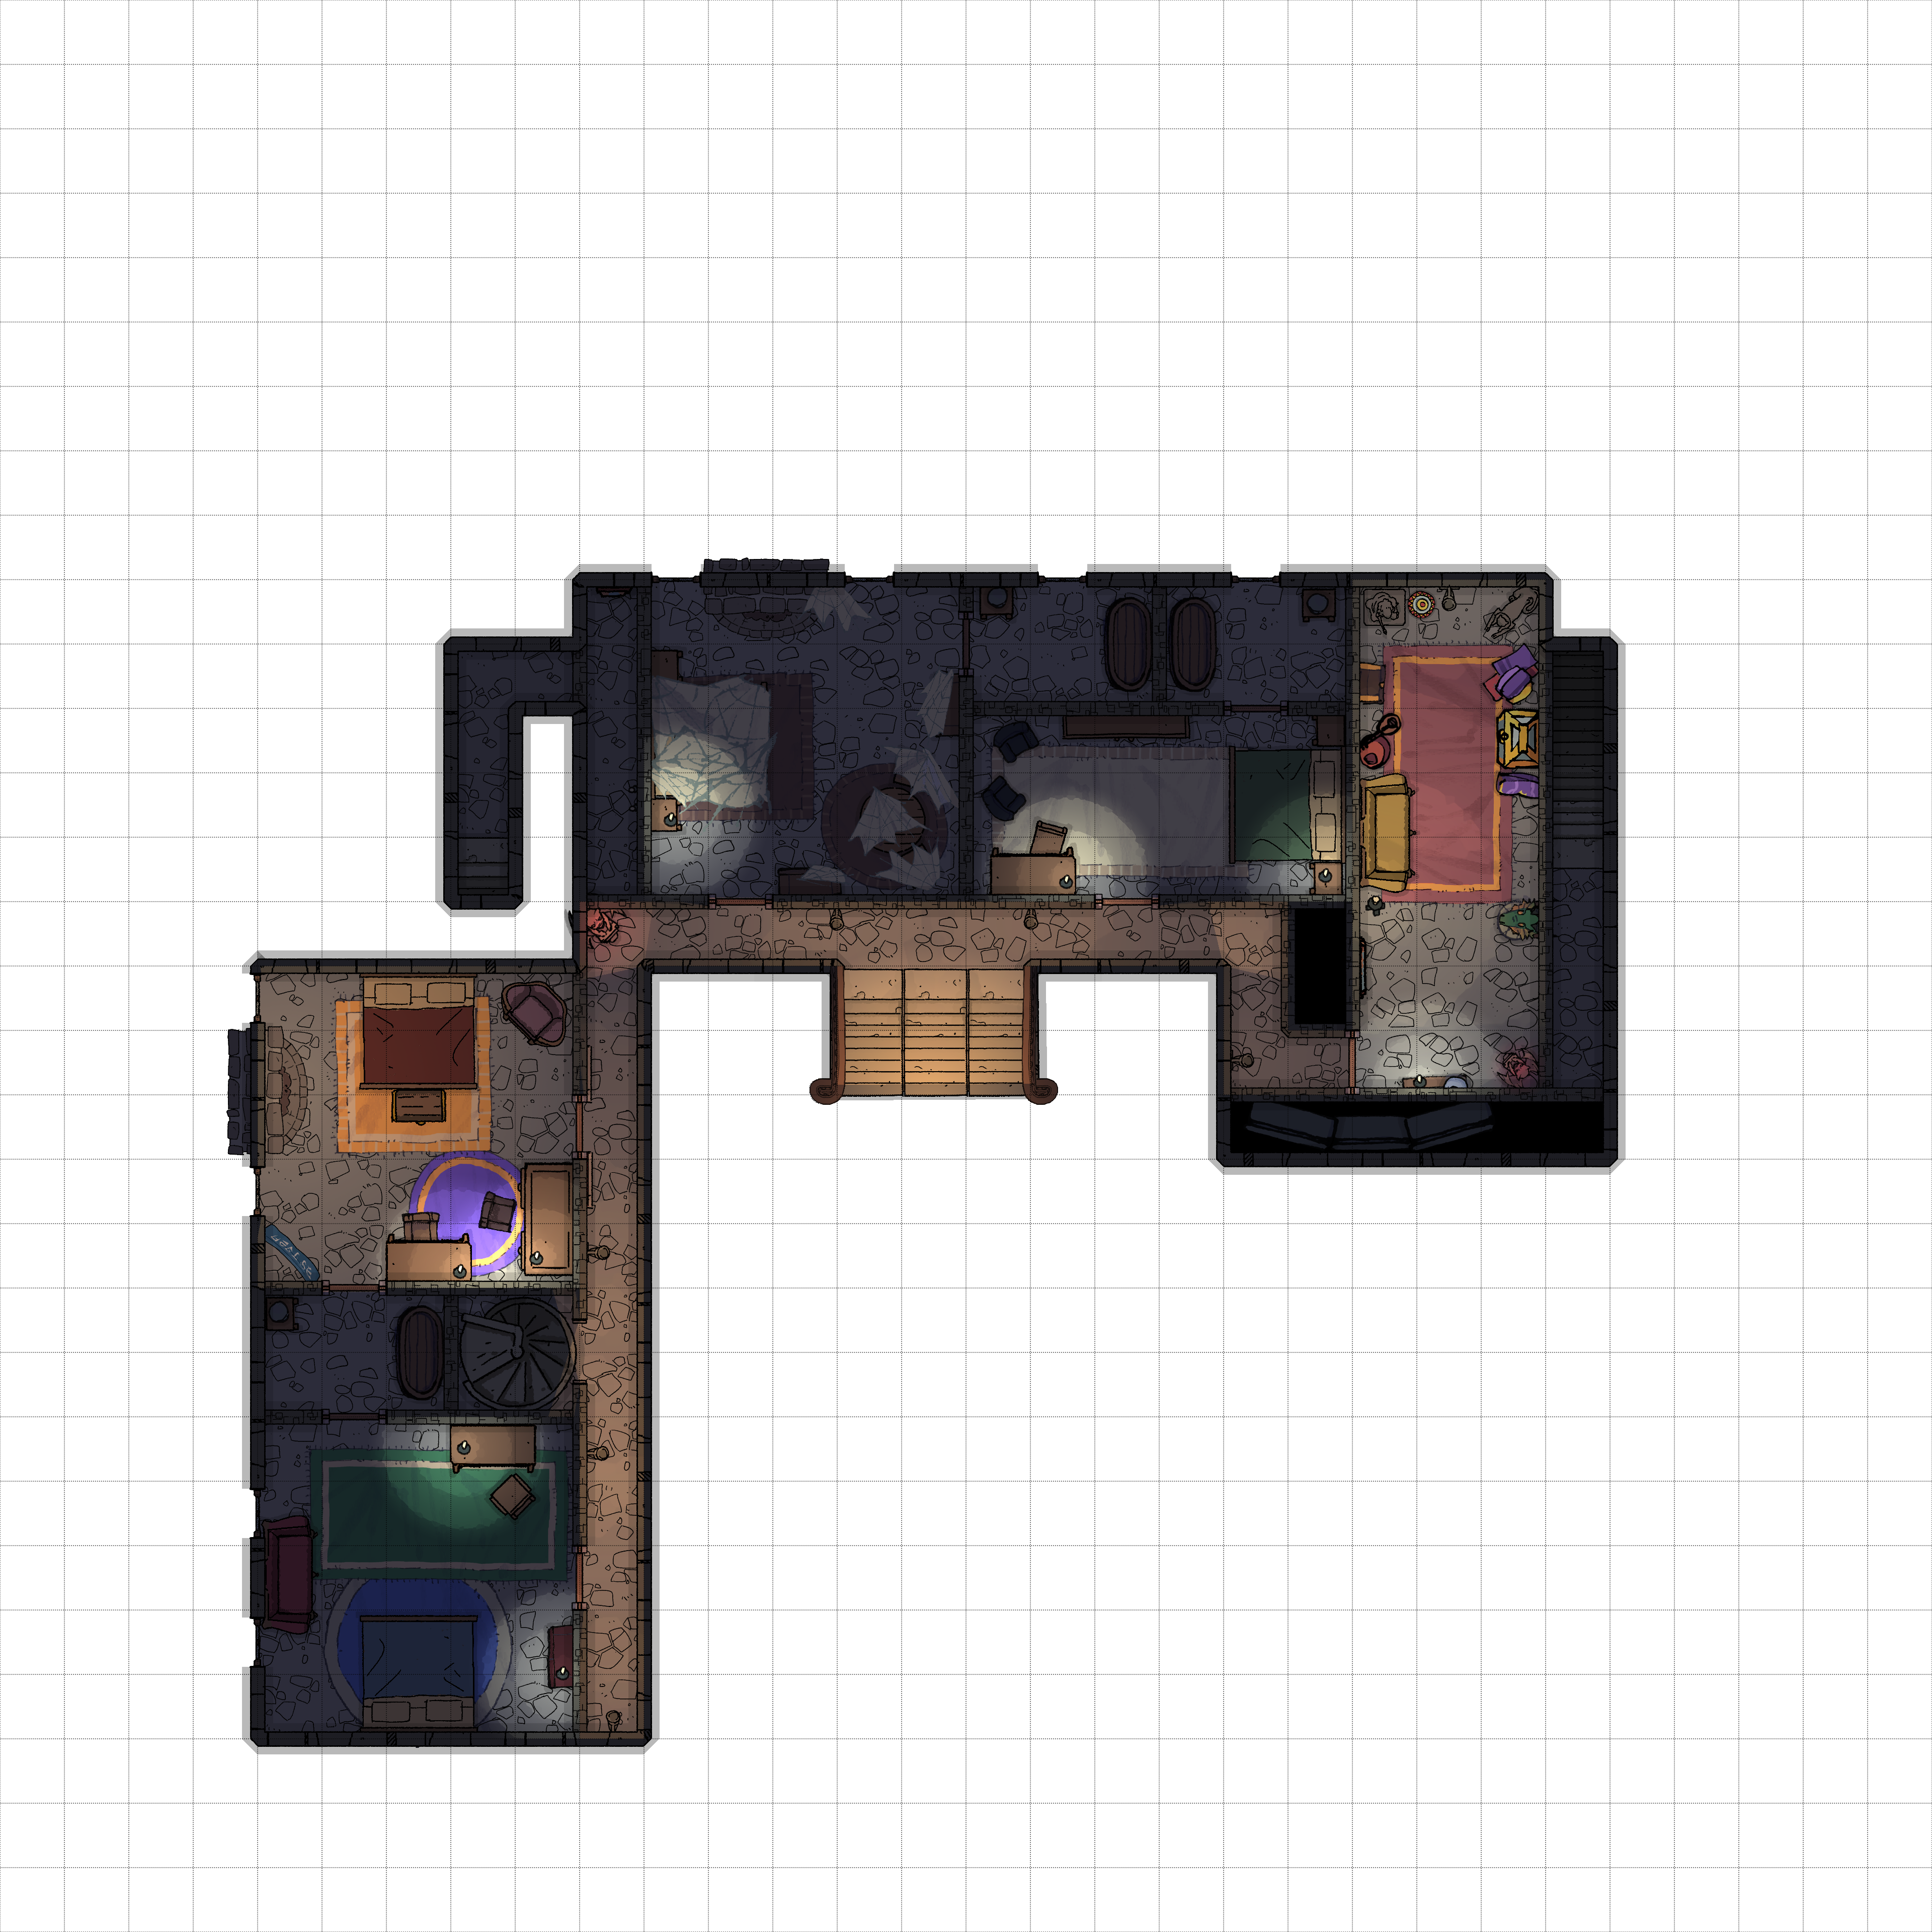
Upper Floor
Singing Stairs
A set of spiral stairs sits in the center of the west upstairs hall. Stepping on the stairs plays a set of sounds: Bling, Whoop, Waah, Bla-ding, Whoop, Waah, Bang, Bang, Bang
At the top of the stairs are a set of levers, which, from left to right, make the following sounds:
Whoop, Bling, Waah, Bla-ding, Bang, Tik-tok.
Pulling the levers in the same order as the sounds heard on the stairs opens up a small panel containing a key, which unlocks the tiles above Jane's door.
Jane's Door
The top of this door is surrounded by several stone tiles:
a hand with a coin, a sun, a moon, a weightlifter, a clock, three glasses, a jester, an angel, a compass, and a knight.
Gargoyle
The gargoyle sits in the corner to the west of the stairs. It is able to be freely rotated. When it is rotated in the pattern depicted on Corbin Penvellyn's coat of arms (right, right, left, right, left, left, right) it reveals the West passage.
When the Wand is waved over the Gargoyle's head, its eyes glow red, and it starts the timer for the Gargoyle Taming. The wand must be waved over the heads of the two smaller gargoyles and the hole in the center of the great hall within 30 seconds (5 rounds) in order to light the forge.
Once the levers on the Singing Stairs have been pulled correctly, these tiles can be pressed in. Pressing them in the order of the tapestry in Jane's room reveals the Lightning key.
The East Wing

Door
Blazoned across the door is a set of arms -
identical to Edward's in the Main Hall.
The door to the East Wing is locked -
Lady Drake doesn't want Jane breaking
any of the items within. However, she has lost
the key - Jane having stolen both copies.
Jane is willing to trade one for a game.
Picking the lock requires a DC 20 check.
Secret Rooms
A DC 20 Wisdom (Perception) or Intelligence (Investigation) check can locate a discrepancy in the walls - two small peepholes in the wall across from the couch. This is the East Passage. It is a DC 30 Wisdom (Perception) check to get a sight line for teleportation.
This check also determines the locations of the door to the East Passage to the right of the dragon statue and the opening to the slide by the Gargoyle.
Gargoyle
This smaller Gargoyle sits in the bottom left corner of the room. When the Wand is waved over its head, its eyes flash red as part of the Taming of the Gargoyles
Secret Slide
The shelf to the right of the Gargoyle has two supports, but one of them is false - a lever that opens the way to a slide down to the Main Hall, in front of Penelope's coat of arms and to the left of the Gargoyle.
Going down the slide does not cost any movement. As one does, however, a target will appear. A ranged attack roll to hit, AC 20, and at advantage if using a ball or other throwable object instead of a weapon, hits the target, dropping the Time Key onto the slide.
Dragon Statue
This jade statue is of a coiled Lung dragon, six clawed hands facing outwards, three on the left and three on the right. The hands rotate freely.
When the hands are turned so that they match the directions of the symbols on the coat of arms (In order top to bottom, left to right: Left Up Down Right Down Right) the wall to the left of the dragon statue opens up into a dark tunnel - the East Passage.
Wall Safe
Optionally, any amount of treasures or magical artifacts may be stored in this wing as potential loot and rewards for your party. These may be found loose in the room, locked within the chests, or behind the painting's wall safe across from the Dragon statue.
Otherwise, this safe holds the regalia for the Penvellyn ritual Ethel performs with Jane. It is a DC 15 check to unlock the safe.
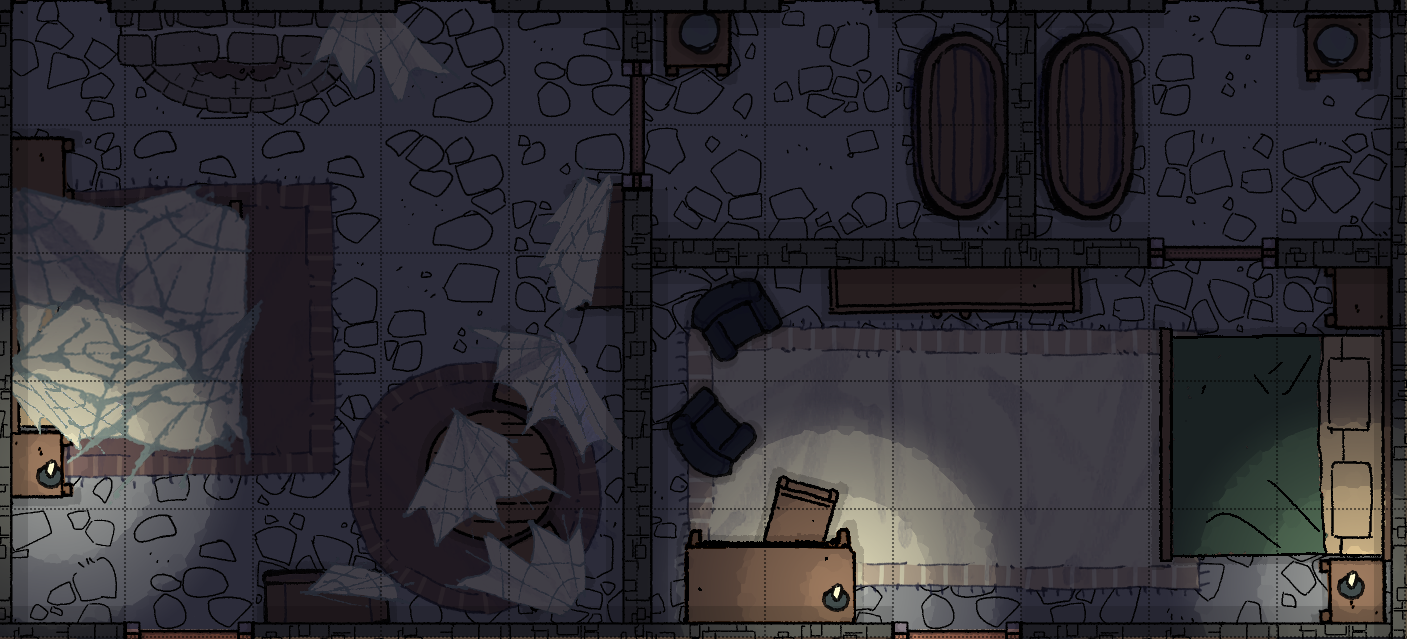
Jane's Room
Chest
The chest beside Jane's bed holds a collection of games she has gathered, including several decks of cards, dice, a dragonchess set, and more unusual board games. As soon as anyone comes near the chest, she will be excited, asking if they want to play a game with her.
Tapestry
A blue tapestry hangs in one corner of the room, a poem embroidered on it in gold text.
As the moon rises upon thee, fear not, but draw upon the strength of absent friends, and toast to their memories in happiness and wonder.
With the stalwart heart of a knight, let Charity be thy guiding angel. Stay firm in knowledge as a dedicated geometer and fear not the ravages of Father Time.
For, dear child, as you learn the lessons of folly, the secrets of this world shall dawn in thy soul.
A DC 12 Intelligence check can connect these to the symbols on the door outside. Jane doesn't know the significance; Ethel hung the tapestry up in here shortly after she moved in.
Pressing the symbols above Jane's door in the order mentioned here reveals the Lightning Key.
Desk & Papers
Jane's desk is covered with papers and notes related to her tutelage. She isn't opposed to characters snooping through them, but doesn't know why - they're all boring.
- A list of draconic runes and corresponding letters in common
- A full Penvellyn family tree - Jane has memorized a basic blurb for everyone on it.
- A basic primer on Alchemy and its notations
- Beginners magical studies - a DC 17 Wisdom (Insight) shows Jane has a talent for illusion magic.
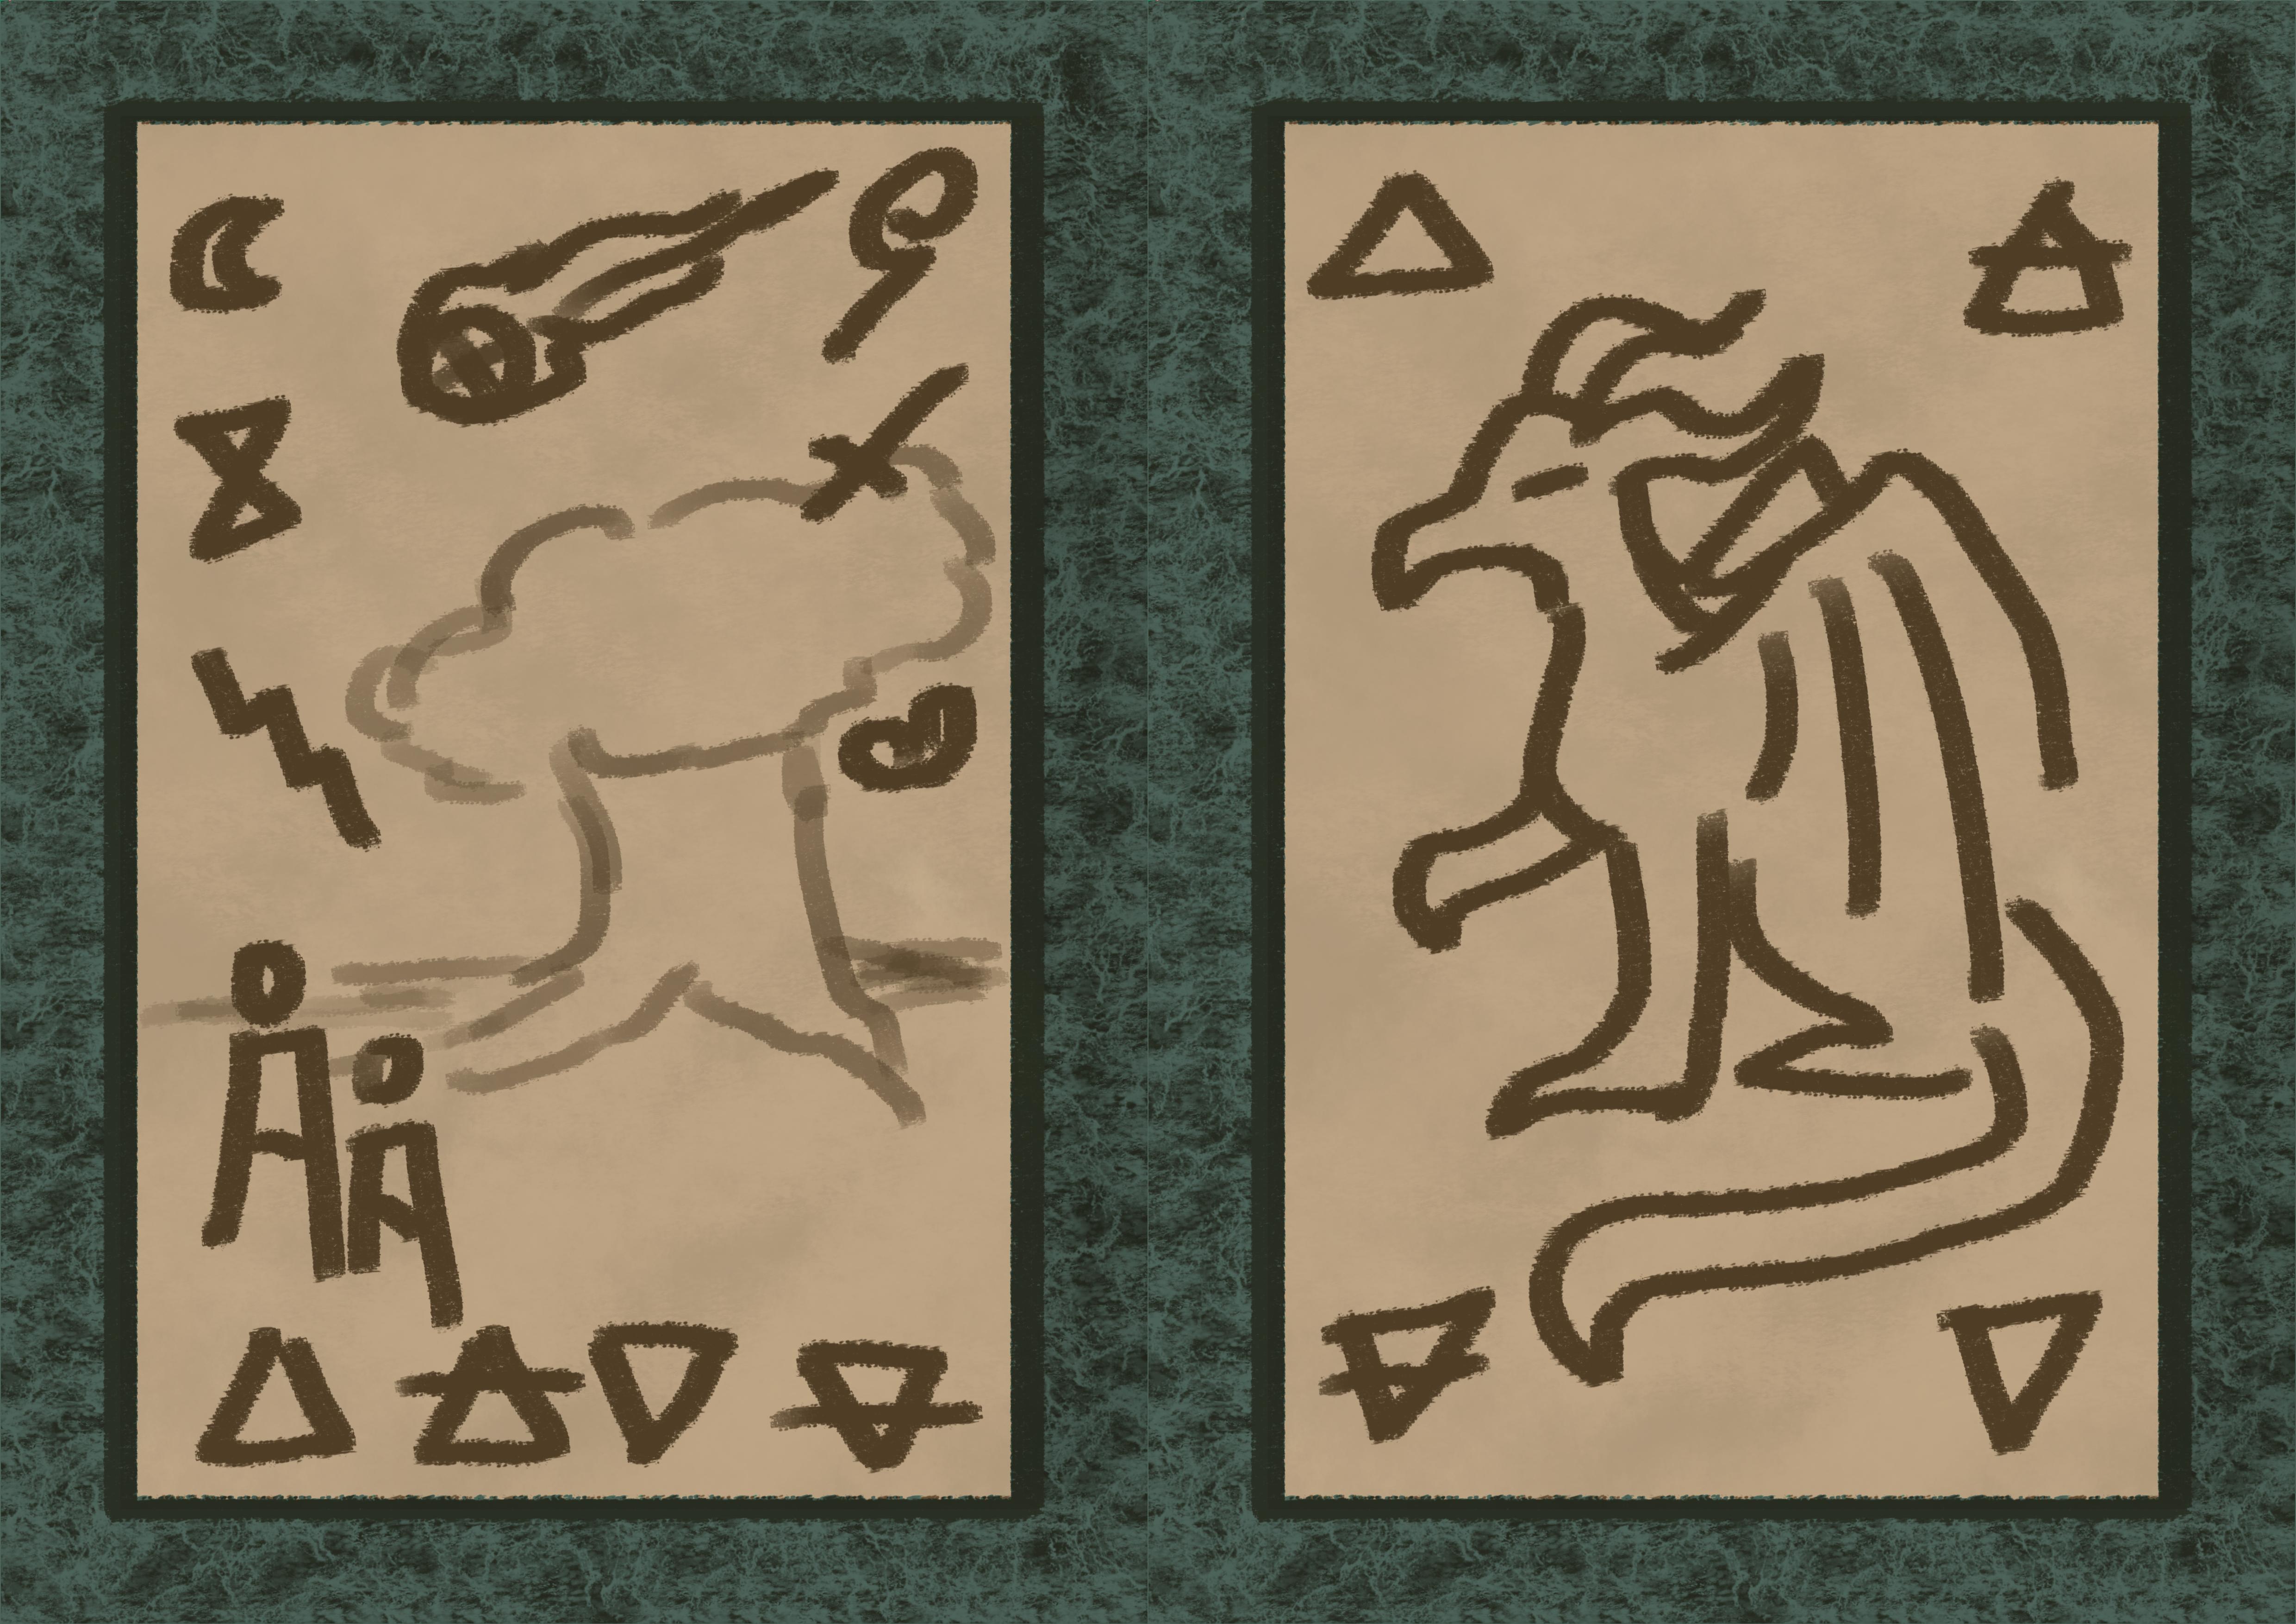
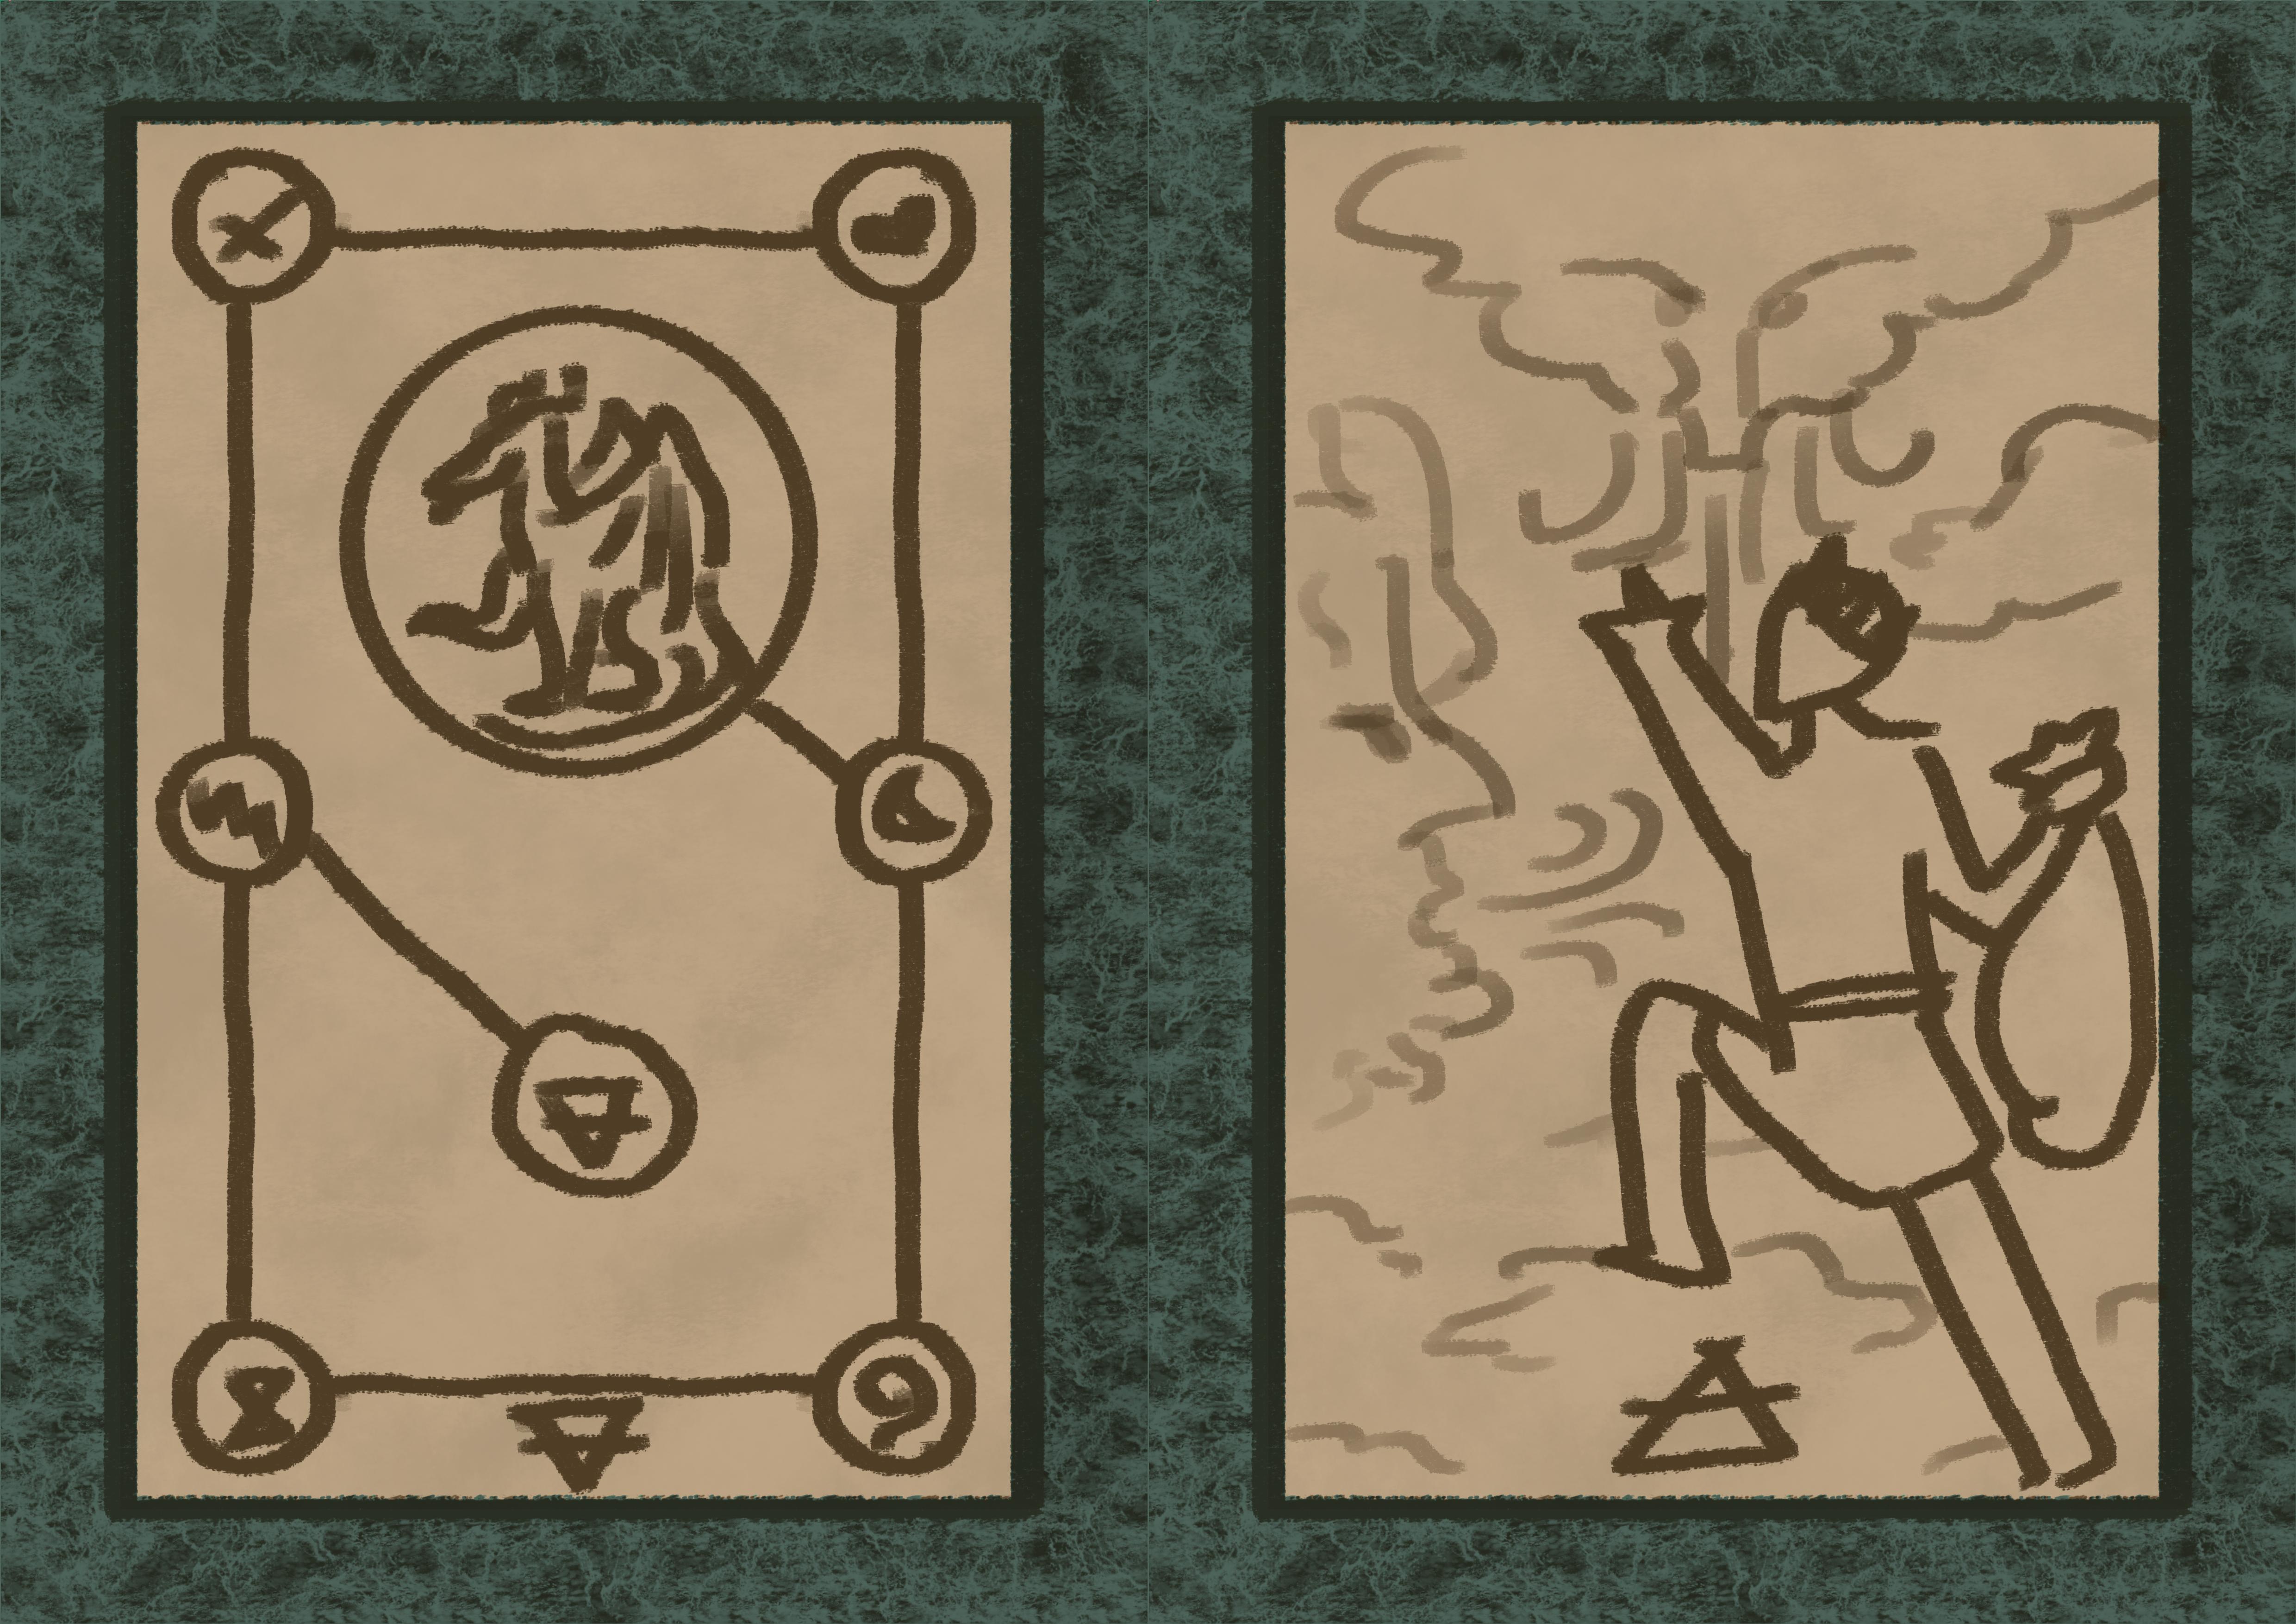
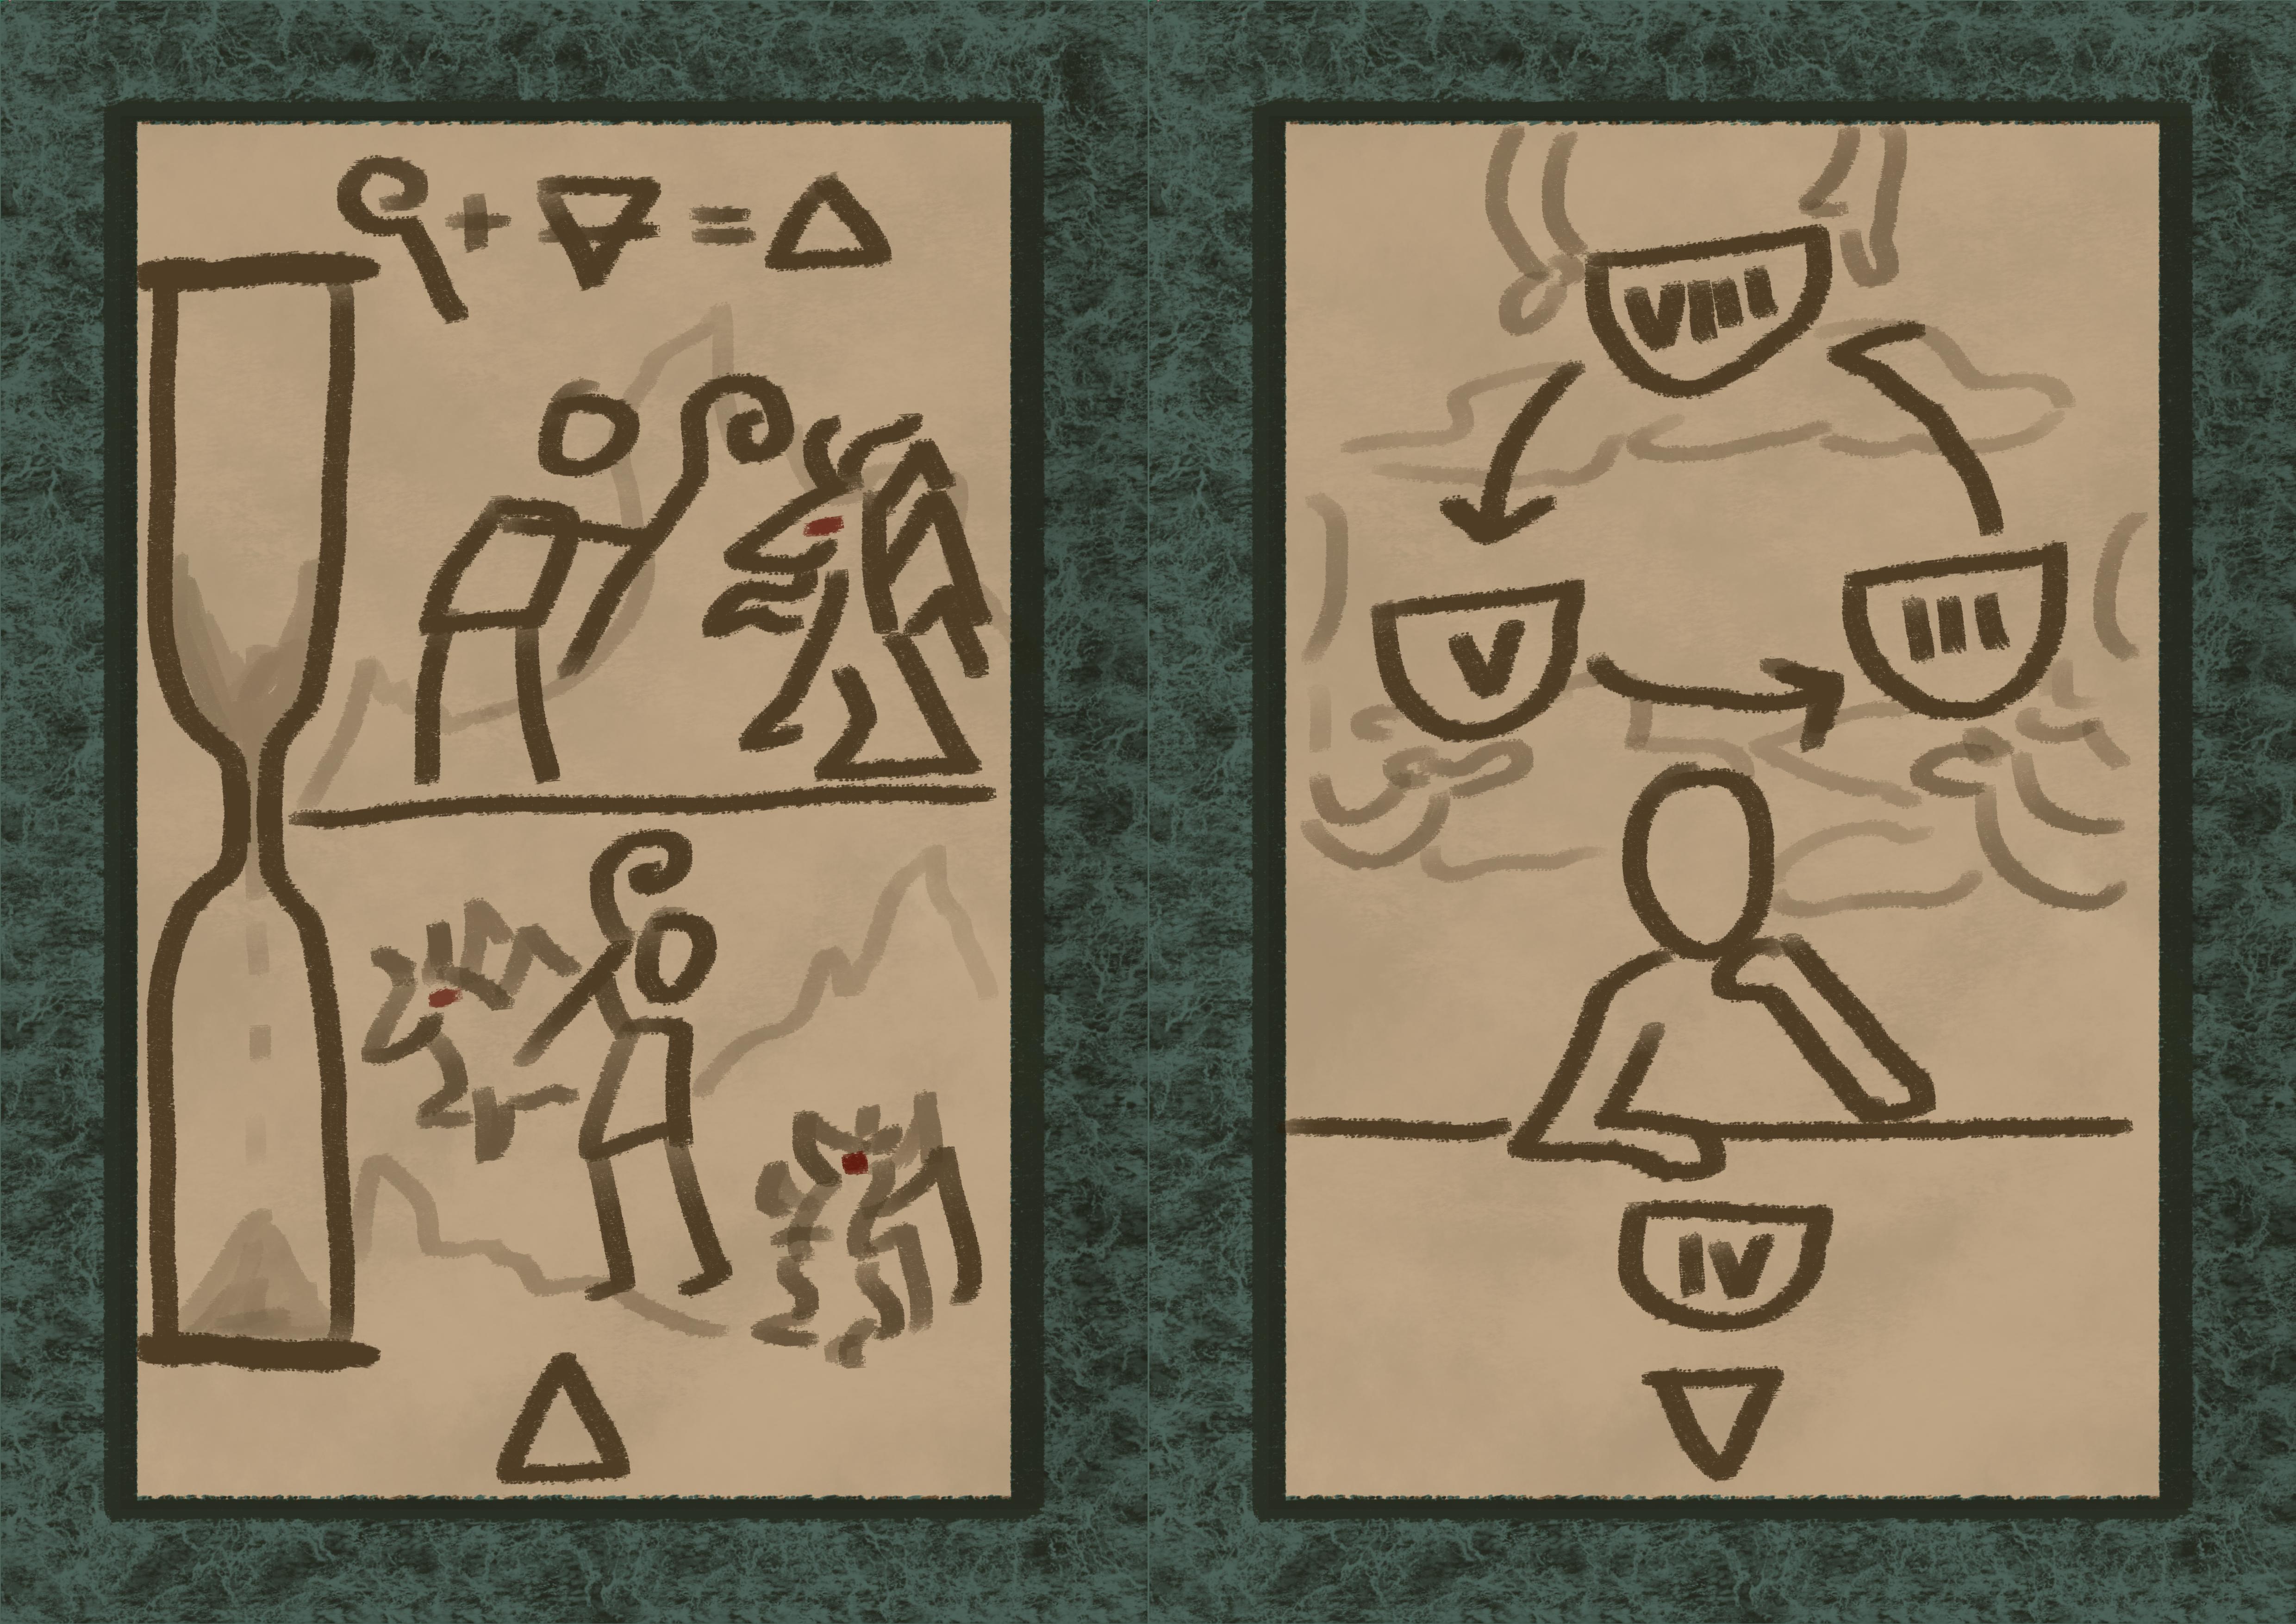
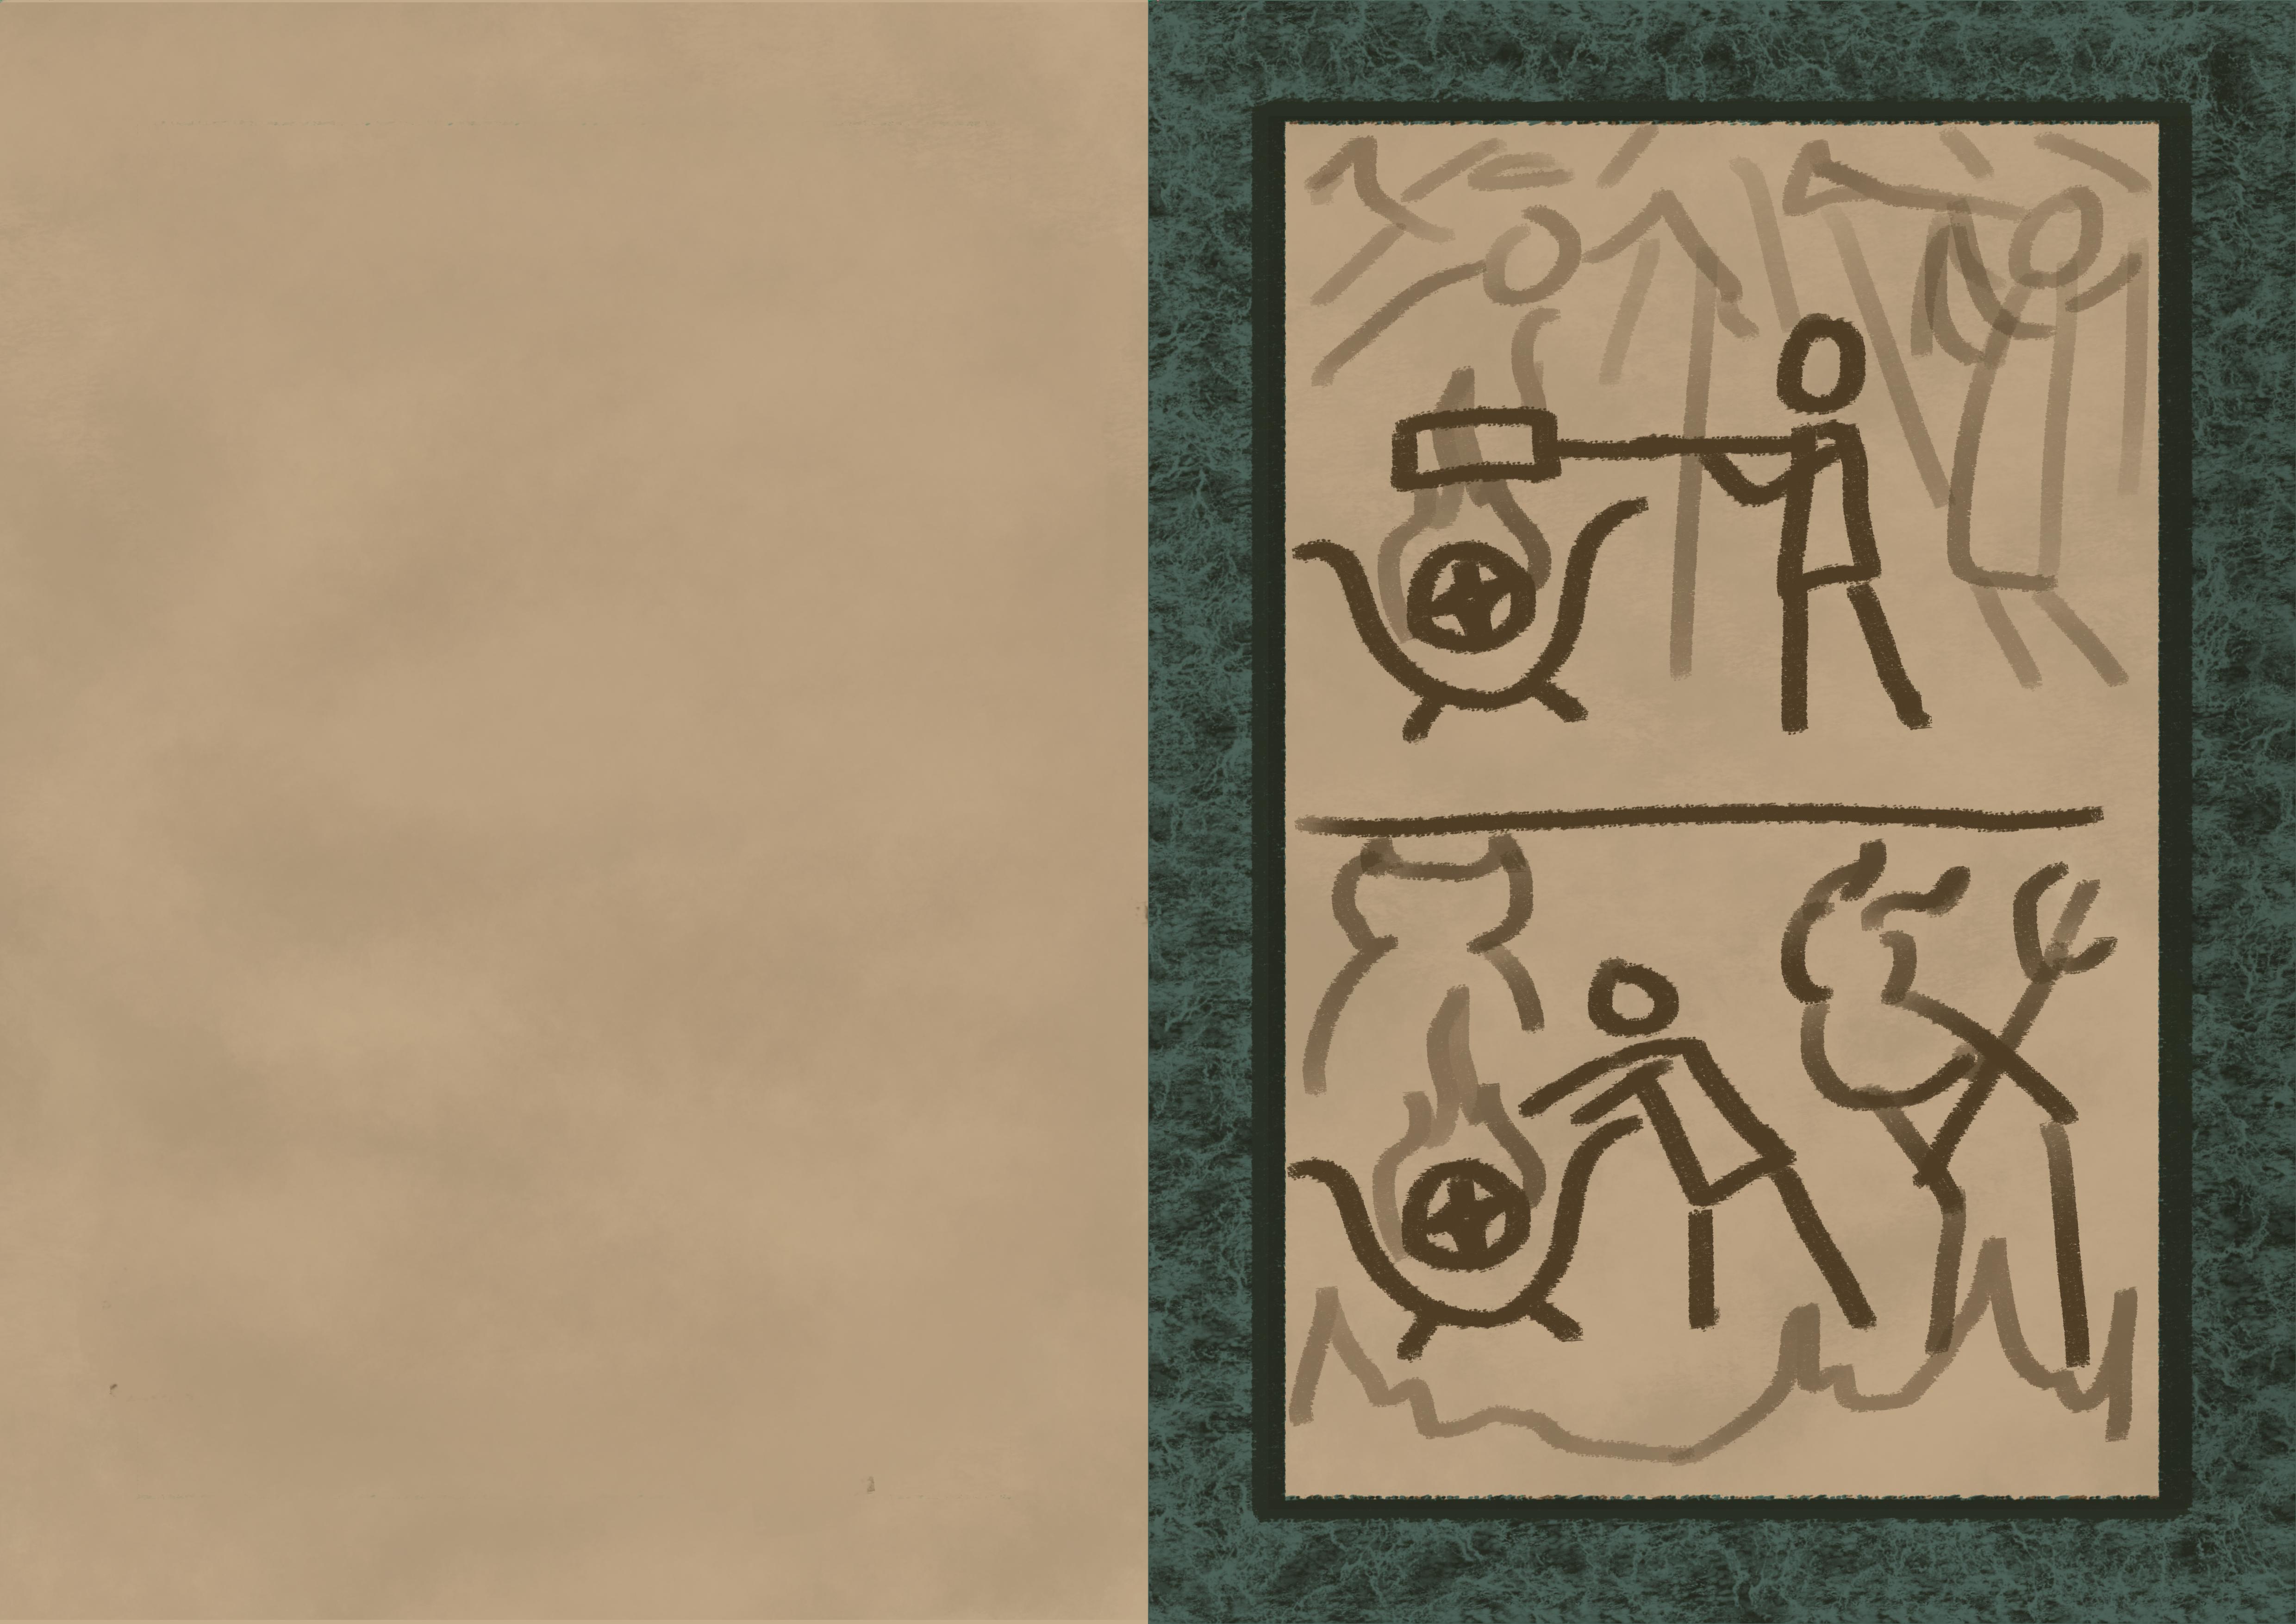
The Mutus Liber
This book sits on the chair by Jane's bed. It has no words, but a series of illustrations, all in different art styles - and a DC 12 Calligrapher's Tools check determines they have been done at wildly different times, and bound into the book separately over centuries.
This books is designed to act as a guide to the initiate - and therefore further reinforce clues for the party.
- A shooting star above a tree - symbols for each column to either side and the four alchemical symbols below it
- A dragon, the four alchemical symbols around it
- A line map of the pipes, with Storm connecting to the symbol for Earth in the center and Moon to the dragon.
- Alchemical symbol for water, with 8, 5, 3 cups over the 4.
- Alchemical symbol for air, showing a man catching clouds.
- Alchemical symbol of fire over an hourglass and an image of a figure presenting a wand to a large gargoyle, then several smaller gargoyles. Beneath it Wand + Earth = Fire.
- Sketch of the key
- Two drawings of a person forging the key - the top is surrounded by angels and is done safely; the bottom reaches in to touch the fire and is surrounded by devils.
Jane
Jane is most often here, either being tutored by
Ethel, studying, or working on her own plots.
Bright, cheery, and above all very lonely, Jane
hasn't been able to interact with many people
since her father's remarriage and moving here.
Jane is also the one who knows the most
about what's going on, as the Penvellyn Initiate,
having reached the combined passages but not
the Forge, and as the one behind Linda's
illness, adding hair growth cream to her
lotion and slipping Lady Drake's potions into
her food to cause drowsiness and stupor.
She is balancing the fine line between
keeping the party here as interesting new
people to talk to, and trying to keep them
from uncovering her secrets.
Jane can easily be convinced to come with
the party, if asked to show how the East Wing
passage works (she won't reveal the West) or
to translate the Draconic runes. Once with the
party, she may be difficult to get rid of, fascinated
by the secrets they uncover which she hasn't yet
found and hoping to keep them off her trail.
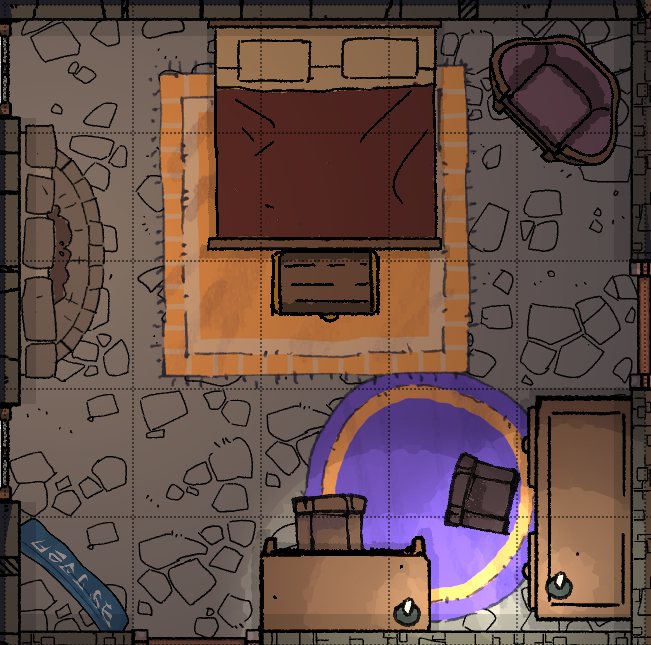
The Master Bedroom
Linda
Linda Penvellyn believes she is turning into a monster, having been cursed for her hubris. Given that no priest has been able to reverse what is happening, she has given up hope, varying between anger and depression.
It takes a DC 15 Charisma check to convince Linda to explain what happened: she went exploring in a secret passage, and at the end found the panel that cursed her. She won't lead the party to where it is lest they too be cursed - but either stating they have been into a passage (or a DC 20 Charisma (Deception) check) will have her explain it opened up when she moved the Gargoyle, trying to stop it watching her door.
Linda refuses to be looked at, but if the party does inspect her, they will find her to be in good health. Her symptoms manifest as being tired, dry mouth and skin, and hair growth on her arms (caused by Jane messing with the salve for her dry skin). No disease or curse is there to be removed, nor is she, strictly, poisoned.
If her privacy is broken, Linda will demand the party leave the room, and the Manor - something that Drake won't necessarily enforce so long as Linda is not bothered again; once this has happened, it will take a DC 25 Charisma check to be able to talk with Linda about anything useful.
Secret Rooms
A DC 20 Wisdom (Perception) or Intelligence (Investigation) check can locate a discrepancy in the walls - two small peepholes in the wall above the nightstand. This is the West Passage. It is a DC 30 Wisdom (Perception) check to get a sight line for teleportation.
Lady Drake's Room
Lady Drake keeps her room locked - only a DC 12 to open. There is nothing especially of value among her personal effects, most of it sentimental from her time living with her husband.
There are some of her notes on herbalism and medicine, in addition to a few of her potions to relieve pain.
Sat by her bed is a book, the Author John Penvellyn - a fairy tale about a frog who falls in love with a Princess as she came to visit the pond. With the help of a fairy, he rescues her - and when she kisses his forehead, he is transformed into a human. The dedication reads: to Tish. I forgive you for pushing me in the pond.
Spare Bedroom
The spare bedroom located at the end of the hall may be inhabited by Ethel, Nigel, or be available for the party to spend the night.
If it is Nigel's room, the DC on the lock is 12; if it is Ethel's, the DC is 20. A bedroom without any occupants will be unlocked. The connecting bath to Jane's room has a DC 15 lock, but may be open depending on Jane's position in the manor and whether she currently has any evidence.
Nigel will have a collection of books and extensive research notes, indicating his efforts to find the Penvellyn treasure, mostly for nought but which may be used to provide clues.
Ethel will keep the room spartan. She may have a locked box or drawer (DC 20) containing cultist regalia, but will have no notes, committing her rites to memory.
The East Wing Passage
The East Wing Passage is unlocked by rotating the six hands of the dragon statue to match Edward Penvellyn's coat of arms, across from it in the wing.
On the downstairs level, there is a peephole in to the kitchens, looking out at the main fire.
In the lower levels, the passage ends at a locked door with the right half of a dragon's face, that can be unlocked without a check. Both this door and the other half in the West Wing must be unlocked to progress.
The West Wing Passage
The East Wing Passage is unlocked by rotating the Gargoyle in the upstairs hall to match Corbin Penvellyn's coat of arms.
At the end of the hall is a panel with the following curse:
- Only the Blameless shall pass here.
- All others shall transform into beasts.
- Tooth and nail shall grow long, and hair shall turn coarse, til their aspect be as loathsome as their cold hearts.
- Prove thy worthiness and memorialize here the innocent one so wrongly condemned for saving lives.
- Else consider thyself right and truly cursed.
There are a set of Draconic runes beneath the panel. Pressing in the letters for Elinor unlocks the door to the stairs below. If an incorrect answer is used, the person who entered it takes necrotic damage as follows:
| Low | Mid | High | Epic |
|---|---|---|---|
| 1d10 | 2d10 | 4d10 | 10d10 |
On the upstairs level, is a peephole in to the Master Bedroom, looking out at the bedside table. If Linda is awake, someone staring in can see her grab for the lotion - nails long, arm covered in thick hair.
On the downstairs level, there is a peephole into the Study, looking out at the desk. At the end of the hall are a peephole into the library and the Alarm Bells.
In the lower levels, the passage ends at a locked door with the left half of a dragon's face, that can be unlocked without a check. Both this door and the other half in the East Wing must be unlocked to progress.
The Alarm Bells
The Alarm Bells sit at the end of the passage, looking into the Library. They consist of a set of keys, with each key playing ominous chimes somewhere else in the Manor. When a person walks through one of those areas, the chime also plays in this location; each has a different note, and can be differentiated with a DC 12 Intellegence (Performance or Musical Instrument proficiency) check.
A jewel like button, when pressed, makes the keys instead move the Statue of Mars in the library. A DC 12 Charisma or Dexterity (Performance) check plays a tune that has the statue release the Wand. Alternatively, spending five minutes pressing random keys will unlock the statue.
Combined Passage
After entering the combined passage, there is a door with a panel depicting several alchemical symbols, and a side passage leading ato the Fountain Puzzle.
The Alchemy Door
The door has a panel, decorated with several alchemical symbols and the Ourobouros symbol.
A DC 15 Intelligence (Arcana or Alchemist's Tools) check determines the identity of each symbol: by the cauldron is the symbol for Liquor Hepatis, with a grid of symbols for: Distillation, Vinegar, Fire, Vitriol, Sal Ammoniac, Cinnabar, Air, Spirit of Salt, Letharge, Nitre, Sulfur, and Quicklime.
A DC 17 Intelligence (Alchemist's Tools) determines that, to make Liquor Hepatis, one needs to Distill Sal Ammoniac, Sulfur, and Vitriol. Pressing these symbols in any order unlocks the door. This check can be repeated in the Library.
The Fountain Passage
At the end of this passage is a mosaic of a fountain bursting with water and a set of three stone goblets filled with water, one small, one medium, and one large. On the medium goblet, a line has been drawn. When the goblet is filled to that precise mark, everything glow blue and water moves to the Forge and the Fountains.
Effectively, these hold 8, 5, and 3 units, and must solve for 4. The puzzle can be solved by pouring the goblets in the order seen in the Mutus Liber:
| 8->5 | 5->3 | 3->8 | 5->3 | 8->5 | 5->3 |
| 3 5 0 | 3 2 3 | 6 2 0 | 6 0 2 | 1 5 2 | 1 4 3 |
Alternatively, a DC 20 Dexterity check can pour the precise amount in one go, or water may be added with a DC 20 Dexterity or Spellcasting Modifier check.
Moving Rooms
Any time a door is opened and then shut, the chambers move. Only one door may be opened at any time, and the doors will close automatically after 6 seconds.
The North, South, East, and West chambers all rotate counter-clockwise 90 degrees following the door being closed. As such, with each movement, they alternate between connecting the exits and the center chamber and connecting the four corner rooms.
The outer chamber(s) also moves 90 degrees counter-clockwise along the outer track. To prevent the party from being trapped in one location, you may choose to have four outer chambers, one at each point; for a more difficult and potentially deadlier puzzle, there may be only one. The outer chambers are not pictured on the map below; in the gallery is the file for the individual rotating rooms.
In the center chamber, a table is set up with a diagram of the moving chambers. Anyone who can see this table can determine their precise location and where each door will lead. Determining this while not looking requires a DC 20 Intelligence check, but the check is made with advantage after studying the map or reading notes within the Forge.
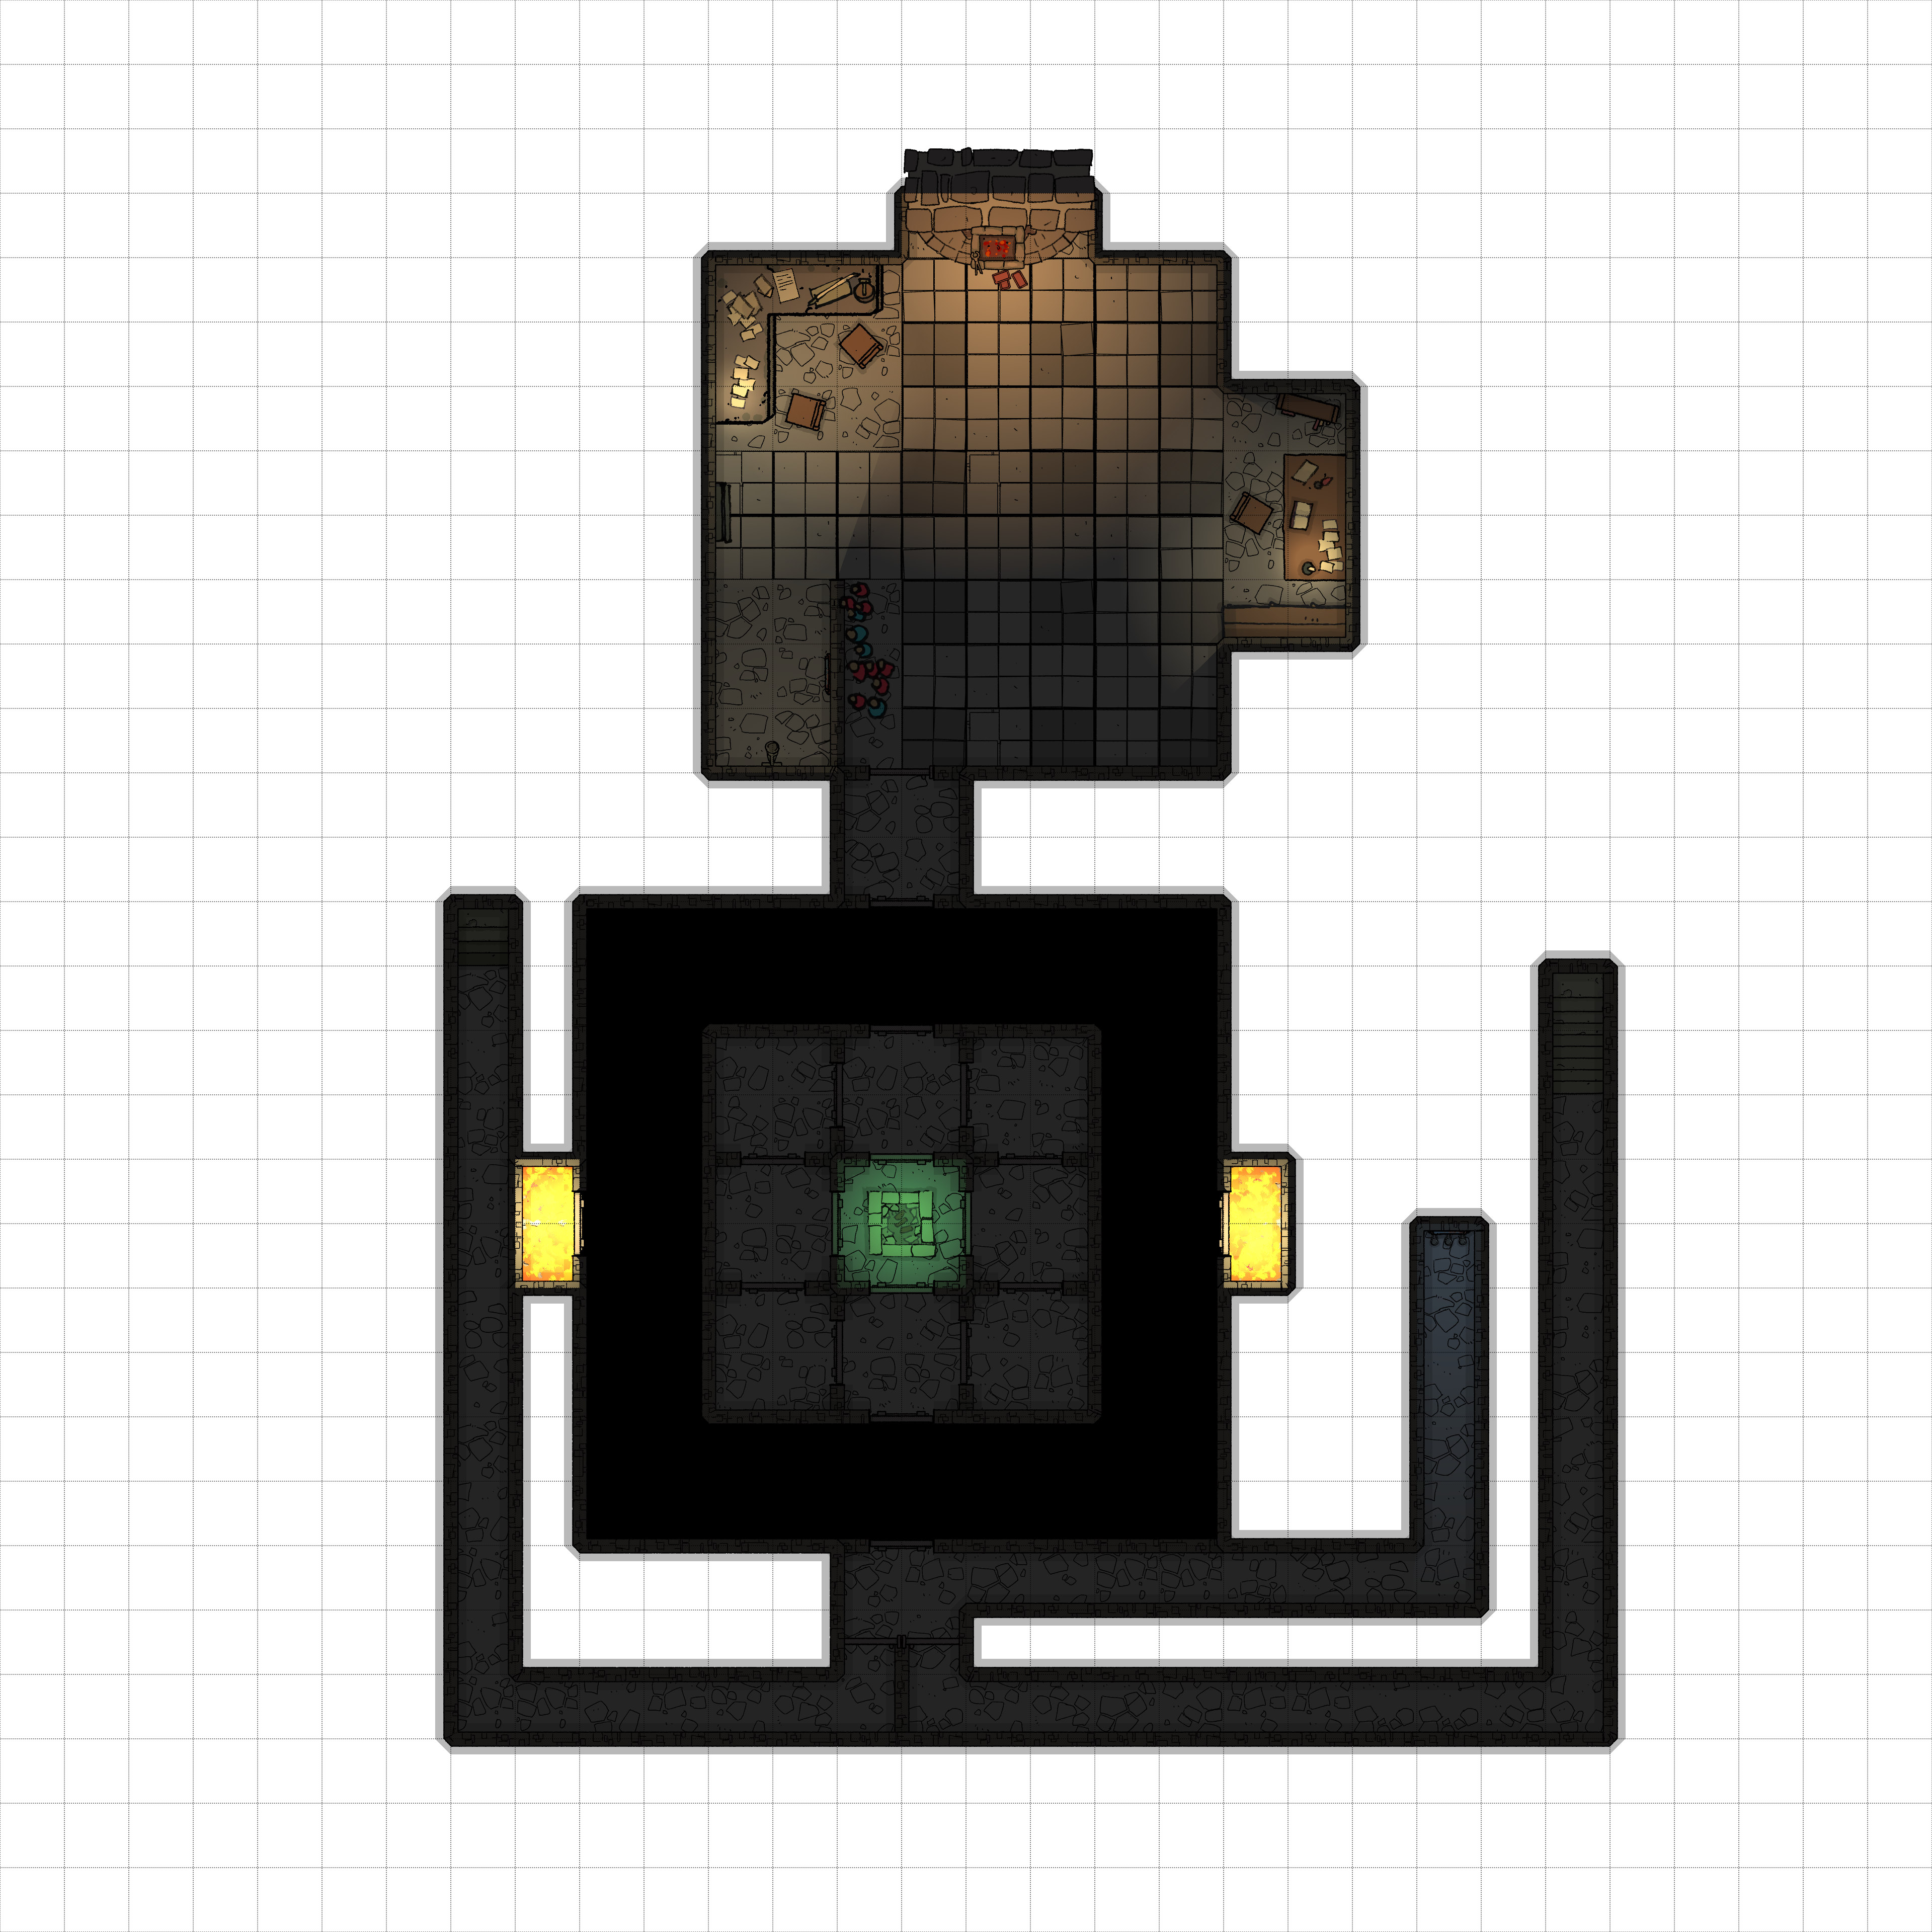
Starting at the Alchemy Door, stepping into the room and closing the door behind activates the moving chambers. Now, moving forward leads to the East chamber, and moving backwards to the fire trap. Stepping into the East chamber, moving forward now goes to the Southeast, and backwards to the Northeast.
The quickest path through the chambers is to: enter the moving chamber, rotate, open the door (not to the fire but to the center) and close it without passing through, rotate, and exit. Characters who make it to the forge can find a paper detailing this, make an Intelligence check, or be assumed to understand. In Initiative, this means that passing through the moving rooms requires 2 rounds.
To the West and East are two flame traps - the 'Hell' chambers. When the door to these is opened, everyone in the outer chamber must make a DC 18 Dexterity Saving throw or take fire damage as detailed below, or half as much on a success. The door then automatically closes, and the chambers move once more.
| Low | Mid | High | Epic |
|---|---|---|---|
| 2d10 | 4d10 | 10d10 | 18d10 |
Holding a door open requires a DC 13 Strength check, and does not allow for additional doors to be opened. Destroying a door allows for another door to remain open, but if that door would connect to the fire traps, the saving throw against is at disadvantage. If the fire trap is activated and the door is destroyed between the outer chamber and an interior chamber, then the trap will affect whoever is in the interior room as well.
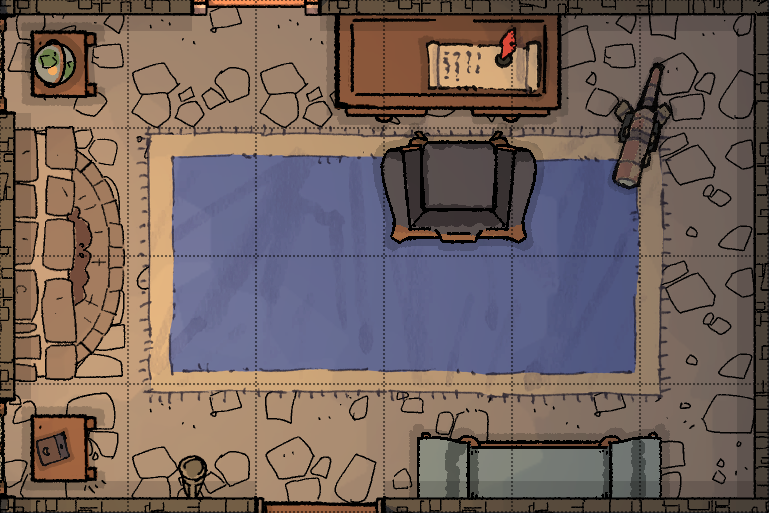
The Forge
The Forge
The forge is inactive; to light and use it, the four elements must be brought together, as shown in the Mutus Liber.
- Air is provided by solving the Windcatcher puzzle, here
- Earth is provided by the oil poured in the Penvellyn ritual. Opening the columns and turning the pipes (following the diagram in the Mutus Liber) allows it to flow to the forge
- Fire is provided by using the Wand to tame the gargoyles, then waving it over the hole in the center of the Main Hall where the oil is poured
- Water is provided by the Fountain puzzle, in the section of tunnel before the moving chambers
Papers
The desk are littered with notes from the various Penvellyn initiates to their future heirs. The most critical of these is the Journal to Future Initiates, which lies open on the desk to the right. These letters (see Appendix: Journal to Future Initiate) explain the nature of the puzzles found elsewhere in the manor, as well as offering hints to their solutions.
Other clues and hints may be found here as well, including maps of the passages, instructions to operate the Alarm Bells, and the Mutus Liber if it was avoided in previous sections. Additionally, a great deal of alchemical research is here: not relevant to the current mysteries but potentially useful for future endeavors.
The Windcatcher Puzzle
In the bottom right is a large, golden automaton, culpted to appear as if wearing a breastplate. In the bottom right section, there is a panel showing a simplified map of the room, from which the automaton can be controlled.
When the main button is pressed, the automaton moves to the center space (6,5) on the light square, and four spirits manifest - the four winds.
On initiative count zero, the automaton moves as directed by the panel, one or two spaces in any direction. If the automaton steps onto one of the darkened squares, it becomes trapped, the panel sinking down so that the automaton cannot roll. The puzzle may be reset, raising the pitfalls back up and allowing the automaton to roll out (alternatively, the players may endeavor to rescue the automaton themselves).
The four winds then move. The north and south winds always stay in rows 2 and 8 (the first and last with the black squares) and the east and west in columns 4 and 8 (the outer two with black squares). Roll a d4 for the north and south and a d6 for the east and west to determine what square they manifest in.
The winds then blow: starting with the North, then the South, then the East, then the West - blowing towards the center. If the automaton or another creature is in their path, that creature must make a DC 15 Strength save or be pushed until it hits a wall. The automaton automatically fails this save. A creature who is pushed onto one of the pitfall and takes 1d6 bludgeoning damage (or, for a deadlier challenge, piercing damage, as follows
| Low | Mid | High | Epic |
|---|---|---|---|
| 2d6 | 4d6 | 8d6 | 16d6 |
When the automaton lands on the space where a wind is situated, it absorbs the magical energy, imbuing it with the glow. All four must be captured to light the forge.
The spirits are considered elementals, and can be subjected to spell effects, such as those that would force it to remain in place, move to a specific place, or not blow. The automaton may also be impacted and assisted - pushing it to a different place, or allowed to bypass or return from pitfalls.
If time is low or the party is experiencing puzzle fatigue, the puzzle may be simplified, by having the winds blow only a certain number of spaces instead of to the wall, by the removal of the pitfall traps, or by allowing the party to capture the winds simply by killing them.
The Key
To the left is a panel - in fact, a keyhole, designed so that the mold sitting by the forge is the only way to open it.
Once all elements have been supplied to the forge, it can be used to mold. This required a DC 10 Smithy Tools check to do successfully (otherwise the key will be too rough to function properly)
Once the party moves to approach the lock, endgame triggers.
Endgame
"Out of the way - that's my birthright!"
You see Jane march into the room, and push you to the side, opening the lock itself, revealing inside a small pedastal, on it, a large, unassuming chunk of rock.
"That's it?" She says. "Just some stupid rock? No, it's got to be underneath-" She moves to lift the rock to the side, and as she does, you can hear the sound of gears above.
The Treasure
The Penvellyn Treasure is a shooting star - a fallen meteor that Randulf the Red uncovered and which he believed granted him his luck in battle.
It may or may not have magical properties, or imbue special abilities into items forged from its metal - but, visually, it is simply a cool rock, and not the fascinating treasure that Jane was expecting.
Hoping to find the 'real' treasure, Jane will move to remove it from it's pedestal, which activates the trap.
The Trap
Everyone in the 10 ft by 10 ft square in front of the treasure must succeed on a DC 13 Dexterity Saving Throw or be trapped as a metal cage falls from the ceiling; for the person who removed the treasure, it is a DC 20; Jane automatically fails.
The cage is solid metal, one inch thick, and has no holes to see inside. It weighs 800 pounds, and has a bar on the right side opposite the wall. While it may be difficult or impossible for the party to lift, the Windseeker Automaton has the strength to raise it if so controlled by the puzzle in the left nook.
Jane's Confession
While trapped; Jane begins to have a panic attack, begging for the party to let her out - and apologizing for everything she's done, explaining that she is the one who has been poisoning Linda, in addition to faking the various signs of the Beast the party may have encountered around the manor.
Jane is repentant after her brush with death, being a child who had not thought of the consequences of her actions. The party has the option of whether to reveal to her father and stepmother what she's been up to, as well as whether to reveal the Penvellyn secret, which her father is unaware of (as initiates skip a generation). Alternatively, they can let Jane get away from her crimes, faking a cure to Linda in order to receive their payday.
If the party has befriended Jane and involved her on the adventure up to this point, she may confess even without being caught in the trap, having become so caught up in the adventure she now finds herself feeling guilty for deceiving the party.
Alternate Endings
As written, this adventure doesn't end in combat. But many parties are interested in a boss fight - so to compensate, some alternate endings are presented below.
Due to the location, it is possible for someone to flee from the Forge and enter into the Moving Chambers. This could make for a deeply frustrating fight - or for a highly memorable one. Be cautious with this, and if the players disliked the Moving Chambers, make sure to keep the fight localized at the forge.
Fight with Jane
As written, Jane is a non-combatant, who the party can and will easily kill, being a child. However, some parties may do so regardless.
If the adventure has aged Jane up to a late teen or young adult, or if the party has no compunction murdering a child, the encounter with Jane may involve combat. Ignore her activating the trap, instead, she's here to fight the party for their horrible crime of unlocking the Manor's secrets before she could.
Depending on the level of the party, Jane may be an apprentice wizard, an illusionist, or have access to the Blackmoor Curse or control of the Windseeker Automaton and other minions to assist her.
Fight with Ethel
Ethel is sworn to protect the Penvellyn secrets from outsiders at all costs. Upon catching the party snooping, either in general or in the Forge, or finding them stealing the treasure, she attacks to defend the Penvellyns.
Depending on the level of the party, Ethel and her cult may be simply cultists or cult fanatics, or may be lycanthropes, summon fiends, or be fiends in disguise.
If you have limited time, triggering a combat with Ethel is the simplest way to end the adventure while remaining somewhat satisfying, even if the Treasure has not been discovered or Jane has not been discovered - taking it as read that Ethel was behind the curse (whether or not she was).
Treasure Guardian
Instead of activating the trap, unlocking the treasure incorrectly, or as not a Penvellyn, or on some other reasonable trigger, may activate a guardian to defend it, who must be defeated or fled from. The Windseeker Automaton may come to life using any golem statblock; alternatively, elementals from the forge may be summoned as part of the magic that powers it.
Appendix: NPCs
Hugh Penvellyn
Hugh is the current Penvellyn heir and owner of Blackmoor Manor. He works as a diplomat, which is how he met both his former and current wives. Frequently out of the country for his work, Hugh is not currently in residence at Blackmoor.
Linda Penvellyn
Linda has been married to Hugh for a handful of months, and moved into Blackmoor manor shortly after the wedding. She is neither nobility nor native to this country, and while she fell deeply in love with Hugh in the year up to their marriage, she is out of sorts and uncomfortable at Blackmoor.
After finding the West Passage, Linda believes she has been cursed to turn into the Beast of Blackmoor - a werewolf.
Leticia Drake
Hugh's aunt and John Penvellyn's younger sister, Leticia Drake has been a widow for almost a decade. A stern woman, she accepts no nonsense or tomfoolery, and in Hugh's absence keeps a close hand at maintaining Blackmoor Manor, her childood home.
Lady Drake is a trained herbalist, with some skill at potions and alchemy, which she uses to create minor remedies.
As a child, she was quite the hellraiser, frequently tormenting her brother and messing with the manor's mysteries. She refuses to acknowledge this reckless past lest it encourage Jane.
Jane Penvellyn
Hugh's daughter by his former wife, Renee, an opera singer who divorced him and is out of the country on tour. Jane did not grow up in Blackmoor, but abroad, traveling with both parents. As such, she chafes at being cooped up in the manor, isolated from everyone but her family and tutor.
Jane is a bright girl, but refuses to focus on important things; she is a talented illusionist for her age, and a quick study of games, which she wants to learn how to design. Frequently involved in pranks, Jane has a childish cruelty resulting from never truly facing consequences - leading her to poison and gaslight her stepmother.
Ethel Bosinny
Ethel is Jane's tutor. Her family has a standing contract with the Penvellyns, nominally as tutors but secretly to ensure the Penvellyn legacy stays secure.
As such, Ethel is the only person alive currently aware of the secrets of Blackmoor, although she only knows vague details - what clues must be maintained, and the locations of secret passages. She has not visited the forge, nor does she know what the treasure is.
If Ethel has a cult, she has inherited the Blackmoor curse, and passed it on to a select few. This group is aware of the secrets of the manor, but with less detail than Ethel, and may believe they act at the accord of some power greater than the Penvellyn family.
Nigel Mukherjee
Nigel is a researcher, studying the Penvellyn family and making use of their library to do so. He is fascinated by rumors of the Penvellyn treasure, and hopes to find some clue to its location on the grounds.
An easily frightened individual, Nigel has no taste for the supernatural and as such has not explored much of the manor, kept away by the Alarm Bells.
Appendix: Optional Encounters
Combat Encounters
Ethel (and cult)
Ethel and her cult are a set of potential villains to be used to add more combat. They may appear for the endgame, be filtered throughout the manor, or simply be summoned by Ethel once she feels the party has
Ethel is sworn to protect the Penvellyns, but not to obey them - and the only person she truly needs to keep safe is Jane. Putting Jane in danger will enrage her, and she and her cultists will not target Jane, even if she assists in the fight.
For lower levels, Ethel's cult should be simple cult members or cult fanatics, with Ethel as a cult fanatic or other spellcaster. At higher levels, Ethel may be represented by various lycanthrope or fiend statblocks, with cult members being cult fanatics or less powerful fiends and lycanthropes.
At higher levels, or where cult members are lycanthropes, it is reccomended to set Ethel apart from the rest as a boss, granting her magical abilities, healing, additional movement, and dependent on the level legendary actions or resistances. The presence of a villainous Ethel makes her an easy slot for a dramatic and final fight.
The Beasts of Blackmoor
If the curse is real, then Linda may actually be turning into a werewolf; she could require a combat encounter to calm down or restrain her, especially if interrogations go awry.
Alternatively, the Manor itself is plagued by monsters. Liable to only emerge in the dark of night to haunt the grounds, breaking into the Manor itself at dramatic moments. Those previously cursed, the Beasts of Blackmoor may be dire wolves, hell hounds, or lycanthropes.
If the party seems interested in exploring the grounds outside Blackmoor, the Beast may stalk them, either pushing them back indoors to find means to defeat it (such as the treasure) or requiring them to wait until daylight. It may also be useful to allow the Beast to be tracked, leading either in a long loop back to the Manor (as the source of the corruption or sign of Jane's involvement) or to a graveyard on the grounds implying their unnatural existance.
Legends of the Beast may also refer to devils summoned by Eleanor Penvellyn (for which she was executed) and remain bound to these lands. Hiding in the hallways and secret passages, these fiends are tasked with the protection of the Penvellyn legacy and will attack those who interfere or try to uncover it.
Devils, even if they only be imps, may be trying to corrupt Jane as the Penvellyn heir; whether or not they are bound to obey her commands, they will want to turn her soul to the Hells. Jane may therefore become the center of a fight as the party tries to protect her, or the fiendish influence could lead to Jane becoming an enemy to fight as well.
Carniverous Plants
The Conservatory is home to many exotic plants - and as Lady Drake will warn you, not all of them are safe.
As written, some of the plants are poisonous. Enemy plants may replace this trap, or they can be added in conjunction for a fight that requires more careful positioning. Alternately, replacing poisonous plants with spores that cause charm, confusion, or other effects can similarly complicate a fight.
The Mantrap and Bodytaker plant are recommended as two options for the more pitcher-plant style swallowing plant; additionally the Assassin Vine, Carniverous Flower, and Corpse Flower would make sense as being found in the Conservatory, although any animated plant could work.
If Lady Drake is present for a fight, she will assist in protecting the party and attempt to 'calm' the dangerous plants. While she will not forbid killing the attacking plant, any use of fire or damage to the other plants is liable to lose any good graces with her.
Haunted House
As old a house as it is, surely you know the Blackmoor Manor is haunted?
Ghosts are minor enemies to add flavor to exploring the manor at night; in dark and quiet spaces, they may emerge. As this is a puzzle-focused adventure, I don't imagine them as a true hassle, but provide a consequence to exploring at night to balance out the social consequences that may occur when exploring by day.
Ghosts may be the spirits of the past Penvellyns protecting their home, or the remnants of either those who tried to take it from them or victims of Eleanor. Regardless, add flavor to their appearance to make them more useful as tools to explain backstory, especially if the manor they haunt is abandoned and there is no one present to explain the details of the family lore.
Puzzle Encounters
Loulou's Door
Loulou the parrot sits in her cage in the eastern corner of the upstairs hall; she likes to scare those unaware of her presence, can offer helpful hints and translations (if bribed with food), and is necessary for the door in the East Passage.
In the middle of the East Passage, on the main floor, the way is blocked by a panel, depicting Loulou (or a similar parrot) and a speech bubble. The first word is 'Barber' and there are dials to enter in a four to six letter word below.
Loulou provides the answers, but only after being told the 'secret word' - which Lady Drake will inform you is 'Loulou is a very, very clever and beautiful bird'. Further responses will require a bribe of treats. The word pairs are as follows:
| Prompt: | Barber | Picture | Baby | Hour | Ant |
| Response: | Leech | Book | Bonnet | Glass | Hill |
Optionally, an incorrect response may provoke necrotic or lightning damage as follows:
| Low | Mid | High | Epic |
|---|---|---|---|
| 1d10 | 2d10 | 4d10 | 10d10 |
Ghost Hunt
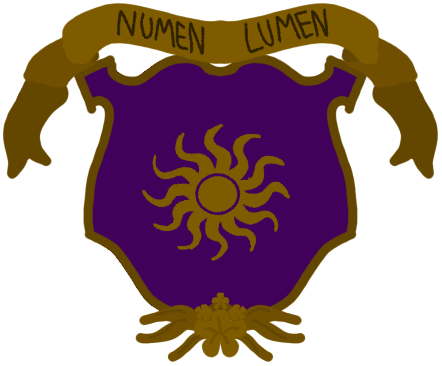
On the back desk in the library is a computer (or an enchanted spellbook) locked by a password. Anyone will inform you this was Alan Penvellyn's computer (adding an initiate between John and Jane), but no one knows the password besides Jane, who will tell you it's on the coat of arms.
Alan's coat of arms are as seen to the side: entering (or speaking) 'purgamentum' will activate the program, unlocking Alan's ghost hunt.
The ghost hunt will only activate at a 'quiet time of night' and will inform that the ghosts are found in 'quiet' locations. These are as follows:
- by the library door in the main hall
- 3 in hallway
- by right door in main hall
- back of Moon column
- trophy in Conservatory
- by door of Conservatory
- left post of
- by East Wing door
- Opposite Drake's door
- by Nancy's door
- At top of Spiral stairs
There are two variants: in the first, all ghosts must be located and touched within 1 minute (10 rounds of combat). For a larger party, this may be shortened. In the second, this may become a combat-puzzle encounter (like the Windcatcher puzzle) where the ghosts must be 'defeated' - low HP, but able to move once found and 're hide'. On a failure, the puzzle can be reset in the library.
When completed, receive the following message:
When you are facing the Green Dragon, look to the left and pull below the vase with a tree. But a word to the wise - if you're wearing a hat, hold on!
Additionally, add this to the Journal to Future Initiates
- My [computer] will help you find the Saturn key. Be not afraid! I share the sentiments of our dear distant grandmother Penny; I too wish to have known you, oh, my children. Be strong and just in all that you do.
- Alan
- PS: A great shortcut through Albert's moving rooms is to open and close the door two times without advancing to the next room. Then, turn around - and voila - you're home!
The Key
Getting the forge running is only step one - there is also the forging of the key itself. The mold in the Forge has a set of 12 cross symbols, which can be adjusted to make the symbols
-|- , |, -|, |- , - - , or be blank. The arms of every initiate has one of these symbols on it, and a page in the Mutus Liber shows the layout of the key, with symbols from those arms sketched onto it. The blank spot should be left blank, but if Haunted House is being used (or otherwise Alan exists) his arms and symbol fill that spot.
Provide the images to all coats of arms to the party (as found below, or in this gallery), as well as the page from the Mutus Liber showing the outcomes. The party can have multiple attempts to forge the key, but incorrect attempts may be used to activate a trap to deal damage, or to drop the box as removing the meteorite would.
Appendix: Journal to Future Initiate
Charles
- Welcome, dear Initiate, Pride of the Penveyllen Heritage! Here you will face many Trials - but persevere! For your Reward shall be the Knowledge of those who have passed before you, and the Honor of those to come.
- You have demonstrated your worthiness by negotiating the moving rooms and mastering the Alchemy test which our father Albert created to protect his laboratory. Now, you will help protect our Heritage by creating yet another test for initiates to pass.
- For my part, I have set this tradition in motion with the establishment of the rules of Penvellyn inheritance and have enlisted the Bosinny family to oversee our efforts and discoveries.
- There are six columns in the great hall, each hiding a brave knight who will direct the movement of the Oil of Enlightenment to this forge in which a Key shall be created to reveal the secret of our Father, Randulf.
- The secret must be well guarded. Hide the final solution to unlock this secret in your coat of arms and in the Silent Book.
- Let my Words woven in Cloth be the guide to finding the first Key to open the column decorated with [the Storm God's]’s mighty bolt.
- Charles, 443
Thomas
- Lacking my grandfathers wit and wisdom, I can only add to his genius. The panels are now locked; the key is to be found near a staircase that sings!
- But the forge cannot work without being tempted by water. A devious lock hidden in the passages underneath the manor will return it to its watery state.
- Thomas, 476.
Elinor
- Dear Friends! Dear Penvellyn!
- I fear my time is soon ended; my efforts to protect Those in need will soon seal my doom. I have constructed a column to represent [the god of Magic] with whose blessing would that I could escape these trying times. By moving the hands that protect my home with their alarm chimes, my father’s work will release the wand.
- Elinor
Corbin
- My return to our ancestral home is welcomed with neither gladness nor the embrace of family. But no force of a misguided man can destroy our tradition. I have endeavored to make our secrets even more firm.
- To bring fire to the forge, take the master guardian gargoyle and his two companions with my grandmother’s wand - but be of fleet foot! Time is of the essence.
- Once you have completed this task, apply the wand to the depository for the forge’s fuel. There, oil and fire will mix.
- C, 599
Penelope
- What a curiosity! What a fortune! What a dream! To know that these strange riddles and puzzles have endured so many generations - what an honor to contribute! And how busy I have been sending the joy of discovery to you, my children's children!
- My playful companion hides the loving points of Love’s arrow. With this point you will assist in the ordering of the knights who block the passage of oil to the forge, and how can a forge work without the sweet essence of air to fan its flames? Seek the curious puzzle in this room to help this poor hero capture the unruly winds.
- How I wish I could have met you!
- Penny 671
Brigitte
- So many years have passed since I first stepped into this strange universe. Using my coat of arms and star charts, you will soon discover how to open my Constellation Box Box and find the special lens hidden inside. Use this lens in my telescopes to see five special muses. Select each one in the correct order and Betty will wager grandmother's key.
- With the very same lens find the secret panel hidden in my room, there you will discover the key to the column of Moons.
- [December 21], 732, Brigitte
Edward
- After discovering countless wonders around he world, what joy is it to find such mysteries at home. My dear grandchild John, on this day, your first birthday, I complete my destiny.
- A dragon now watches over the Manor, and a column dedicated to Time. With time you will discover the passage hat hides it’s key behind a target. Aim well and throw with force, and the key shall be yours.
- How sad that only a few will revel in this secret.
- Edward, August 770
John
- It is I who completes the key to guard the last column? So be it. Help my dear amphibious friend in the conservatory pond and the [War] key shall be yours.
- John Charles Harold Penvellyn.
Appendix: Penvellyn Family
Randulf Penvellyn (???-297)
 Randulf the Red was a notable warrior,
who's prowess in battle earned him
the Penvellyn lands, where he built
Blackmoor manor, taking the name
for his family. He found the Penvellyn
Treasure and kept it tightly secure.
His motto translates to "in this sign
(you will conquer)".
Odo Penvellyn (250-300)
 Odo helped to develop the lands of
Blackmoor manor and was an
amateur historian, collecting many
papers and manuscripts.
His motto translates to "prosperity."
Milo Penvellyn (272-319)
 Milo Penvellyn was a warrior in his
grandfather's style and earned
more lands for the Penvellyns.
His motto translates to "the
conquered shall envy the dead".
Hugo Penvellyn (297-362)
 His motto translates to "what
the gods want happens soon."
Albert Penvellyn (323-404)
Albert was a famed alchemist and
arcanist, which led to him being
widely feared by the locals. He
constructed the forge beneath the
manor in addition the moving rooms
to hide his secrets.
His motto translates to "ignorance is
the cause of fear."
Edmund Penvellyn (343-395)
 Edmund was a prolific agriculturalist.
His motto translates to "as you
sow, so you shall reap."
Charles Penvellyn (374-449)
 Charles was a judge who wrote
several important legal treatises.
He began the Penvellyn tradition,
constructing the columns of the
Great Hall and hiding the Lightning
Key above the room with his tapestry.
His motto translates to "the smallest
things are the most important."
Gillian Penvellyn (397-480)
 Gillian became the heir after the
tragic death of her twin brother.
She returned home to raise her
son Thomas at Blackmoor.
Her motto translates to
"the gods are our light."
Thomas Penvellyn (422-480)
 Thomas was a poet and a romantic.
He constructed the Singing Stairs
to lock the puzzle to the
Lightning Key.
His motto translates to
"in all that you do, do your best."
James Penvellyn (454-546)
 James was a sculptor and artist,
and never married. he adopted his
sole child, Elinor, after she was
left on the manor doorstep.
He carved the statue in the library.
His motto translates to
"art is forever."
Elinor Penvellyn (526-546)
 Elinor was believed by many to be
a fairy-child or cangeling after she
was found on the doorstep of
Blackmoor Manor. She was
executed for the belief se practiced
dark magics and summoned devils,
although it was likely more due to her
outspoken political views.
She constructed the Magic column and hid the Wand in her father's statue at the library.
Her motto translates to "fortune favors the bold."
Edward Penvellyn (343-395)
Edmund was raised by his father away from Blackmoor after his father's death. He was a notable historian and translator.
Neither his arms nor his portrait hang in the halls of Blackmoor Manor.
Corbin Penvellyn (566-637)
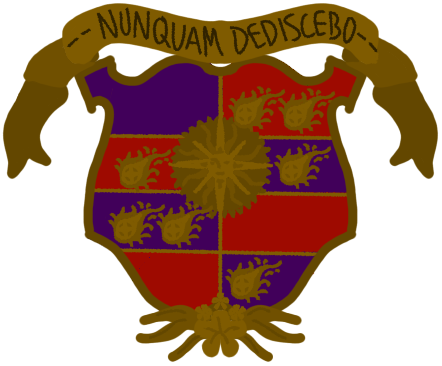 Corbin was a spy, and returned to
Blackmoor Manor in secret for his
own initiation. He constructed the
gargoyles, locked the West Passage
with Elinor's curse, and altered the
wand so as to light the forge.
His motto translates to "never forget".
Philippe Penvellyn (585-673)
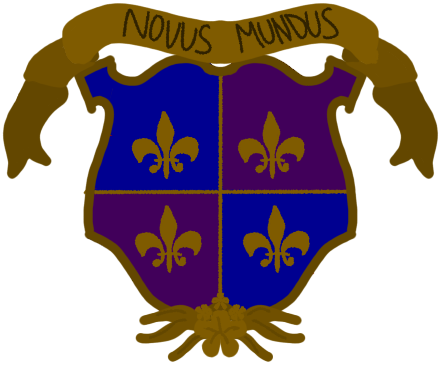 Philippe was rumored to be a pirate;
his travels abroad earned him
enough wealth to buy back the
confiscated lands of Blackmoor
Manor.
His motto translates to "a new world."
Penelope Penvellyn (610-679)
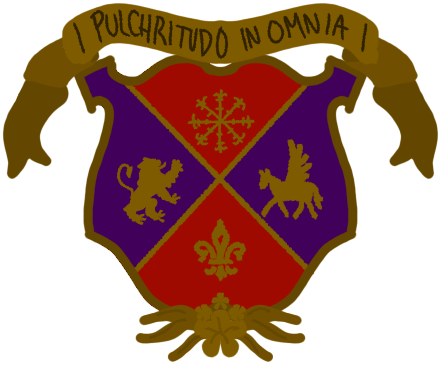 Penelope was a prominent socialite
and patron of the arts, and in her
tenure the manr hosted many
famous parties. Penny constructed
the Love column and hid its key with
her card-playing automaton, Betty.
She also added theWind-catcher puzzle
to provide air to the forge.
Her motto translates to "there is beauty in all things."
Martha Penvellyn (634-687)
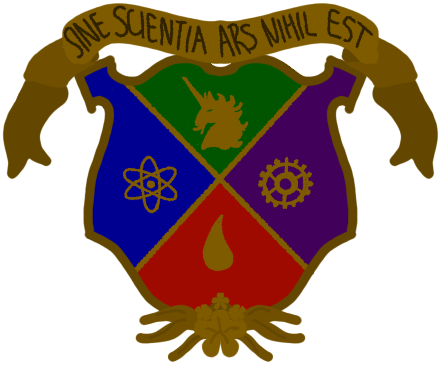 Martha was an eccentric similar to
her mother,, notable for her bizarre
outfits and unusual parties, as well
as her funding of many pieces of
peculiar arcane research.
Her motto translates to
"without understanding art is nothing."
Brigitte Penvellyn (655-729)
Brigitte was an astronomer. She
never married and passed on the
manor to her nephew. Brigitte
constructed the Moon column
and hid its key, as well as hiding the
code to activate the automaton
within a mural.
Her motto translates to
"sport without fun is not sport."
Richard Penvellyn (683-711)
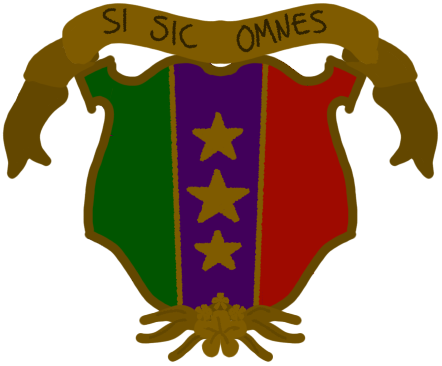 Richard was a soldier.
His motto translates to
"if only this could last forever.
Edward Penvellyn (705-800)
Edward was an explorer who traveled
the world and collected the artifacts
stored in the East Wing. He built
the Time Column and the secret
slide that conceals its key. He hid the
East Passage behind his dragon statue.
His motto translates to
"whoever lives well lives twice."
William Penvellyn (729-797)
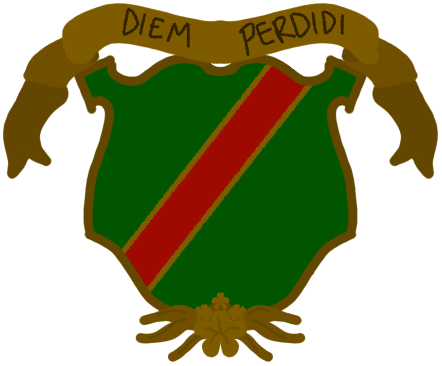 William was an explorer like his
father; the two did not get along.
His motto translates to
"another day wasted."
John Penvellyn (769-838)
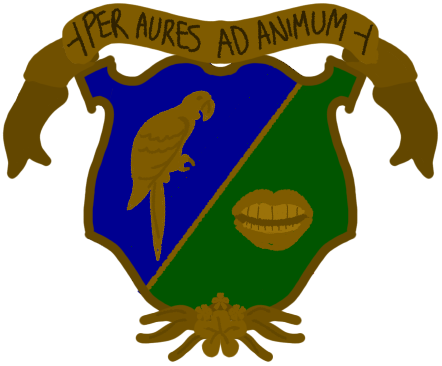 John was a naturalist and explorer,
who studied tropical biomes, as
well as an amateur linguist. He
constructed the fountain (and the
conservatory) and the Battle column,
and hid the Helmet Key within a stone
frog's mouth in the fountain.
His motto translates to
"through the ears to the spirit."
Hugh Penvellyn (805-)
Hugh is a diplomat, and the current Penvellyn heir.
Jane Penvellyn (832-)
Jane is Hugh's daughter by his first wife, Renee, an opera singer.
Penvellyns of Exandria
While the adventure is designed to be played anywhere, it was originally playtested in Exandria circa 844 PD, and the years used reflect this setting.
Blackmoor Manor was located in the Marrow Valley in Wildemount. Elinor Penvellyn was executed shortly after the end of the Marrow War, for either her outspoken protest against Manfried Dwendal or for the belief she consorted with the devils, as had the Julous Dominion. Her husband and son fled south to the Menagerie Coast, where they lived until Phillipe Penvellyn, a sailor and pirate in the Lucidian Ocean, gained enough wealth and respect to return home.