
Contents
-
3Introduction
-
4Character Creation
-
5Class Modifications
-
6Starting Equipment
-
6Lineages
-
6Feats
-
6Character Subclasses
-
9Area Descriptions
- 9Northern Undead Asylum
- 13Firelink Shrine
- 18Undead Burg
- 25Undead Parish
- 29Darkroot Garden
- 33Darkroot Basin
- 36Lower Undead Burg
- 39The Depths
- 43Blighttown
- 51Valley of Drakes
- 53Northern Undead Asylum Revisit
- 58Sen's Fortress
- 62Anor Londo
- 71Painted World of Ariamis
- 75New Londo Ruins
- 79Catacombs
- 84Tomb of Giants
- 88Duke's Archives
- 95Demon Ruins
- 99Lost Izalith
- 103Great Hollow
- 105Ash Lake
- 107Oolacile Sanctuary
- 112Oolacile Township
- 115Chasm of the Abyss
- 118Kiln of the First Flame
-
120Items
-
121Wondrous Items
-
137Blacksmithing
-
140Spells
-
148Appendix A : NPCs
- 148Alvina of the Darkroot Wood
- 148Anastacia of Astora
- 150Big Hat Logan
- 150Blacksmith Andre of Astora
- 150Blacksmith Rickert of Vinheim
- 151Blacksmith Vamos
- 152Crestfallen Merchant
- 153Crestfallen Warrior
- 154Crossbreed Priscillan
- 155Darkstalker Kaathe
- 156Daughter of Chaos
- 156Domhnall of Zena
- 157Dusk of Oolacile
- 158Eingyi
- 159Elizabeth
- 159Giant Blacksmith
- 160Griggs of Vinheim
- 161Hawkeye Gough
- 161Ingward
- 162Kingseeker Frampt
- 163Knight Lautrec
- 163Laurentius of the Great Swamp
- 164Nico of Thorolund
- 165Oswald of Carim
- 166Trusty Patches
- 167Petrus of Thorolund
- 168Quelana of Izalith
- 169Reah of Thorolund
- 170Shiva of the East
- 171Sieglinde of Catarina
- 172Siegmeyer of Catarina
- 173Solaire of Astora/span>
- 174Undead Male Merchant
- 175Undead Female Merchant
- 176Vince of Thorolund
-
177Summoning & Invasions
-
183Appendix B - Bestiary
-
267Appendix C - Covenants
-
272Credits
Introduction
In the Age of Ancients the world was unformed, shrouded by fog. A land of gray crags, Archtrees and Everlasting Dragons. But then there was Fire and with fire came disparity. Heat and cold, life and death, and of course, light and dark. Then from the dark, They came, and found the Souls of Lords within the flame. Nito, the First of the Dead, The Witch of Izalith and her Daughters of Chaos, Gwyn, the Lord of Sunlight, and his faithful knights. And the Furtive Pygmy, so easily forgotten
With the strength of Lords, they challenged the Dragons. Gwyn's mighty bolts peeled apart their stone scales. The Witches weaved great firestorms. Nito unleashed a miasma of death and disease. And Seath the Scaleless betrayed his own, and the Dragons were no more.
Thus began the Age of Fire. But soon the flames will fade and only Dark will remain. Even now there are only embers, and man sees not light, but only endless nights. And amongst the living are seen, carriers of the accursed Darksign.
Yes, indeed. The Darksign brands the Undead. And in this land, the Undead are corralled and led to the north, where they are locked away, to await the end of the world... This is your fate.
The Age of Fire
The Age of Fire is coming to an end. It will be up to you to decide whether it should be rekindled, or if the Age of Dark should follow in its place. Dark Souls : Age of Dragons is a Dungeons & Dragons adventure for four player characters of 1st to 13th level.
Running the Adventure
To run this adventure, you need the D&D fifth edition core rulebooks: Player's Handbook, Dungeon Master's Guide, and Monster Manual.
Appendix B contains stat blocks for most of the creatures found in this adventure. All other necessary stat blocks are found in the Monster Manual. If a stat block does not appear in Appendix B, the text tells you so.
Spells and equipment mentioned in the adventure are described in the Player's Handbook and Chapter X, Items & Equipment. Magic items are described in the same chapter, as well some in the Dungeon Master's Guide.
Area Descriptions
Lordran is a densely connected maze of connecting zones and locales. Each zone has its own maps and and descriptions for discrete areas within it.
Character Advancement
The characters begin their journey in the Undead Asylum, and are quickly dropped into Firelink Shrine afterwards. From Firelink, the characters will be able to quickly access many areas beneath the golden city of Anor Londo. While they will be pointed to the Undead Burg to begin their journey, they may choose to enter areas they may be unprepared for with their meager power. This is part of the experience Dark Souls provides, let them do so. The cost of failure is minimal to an undead. They can always retreat and return later, or continue forward and seize greater power in the process.
The table below details the expected level of a four-character party for each zone within Lordran. This is not prescriptive, and characters should be free to explore in any direction they desire.
| Area | Character Level |
|---|---|
| Undead Asylum | 1 |
| Undead Burg | 2 |
| Undead Parish | 3 |
| Darkroot Garden/Basin | 4 |
| Lower Undead Burg/Depths | 5 |
| Blighttown | 6 |
| Sen's Fortress | 7 |
| Anor Londo | 8 |
| Each Lord Soul | +1 Level |
| Oolacile | 13 |
| Chasm of the Abyss | 14 |
| Kiln of the First Flame | 15 |
Advice to DMs
This adventure is closer to a large-scale dungeon crawl than a sprawling open world journey. Social encounters are few, and non-combat encounters are even fewer. The crux of the fun of this adventure is the characters pushing through punishing combat, learning and growing with each passing death. If your group loves overcoming impossible challenges, Age of Dragons will scratch that itch near constantly. If you and your group do not enjoy tactical combat or dark fantasy aesthetics, this adventure may not be for you.
Fairness is a crucial component of running this adventure. Players will end up having to fight through the same encounters multiple times in a row. This allows them to demolish even near impossible challenges as they iterate on their tactics with each death. It is therefore vital that the DM is consistent with rulings and tactical considerations. When each iteration of the encounter is not predictable, the fights will end up being long, pointless, and worst of all, boring. If you and your table do not know a ruling, err on the side of looking it up before continuing. If a mistake is made in your rulings or you wish to change a game mechanic after the fact, make sure that this change is clearly communicated before the party next encounters it. This method is not intended to compromise the DM's ability to tell a compelling story or keep play moving quickly. It is meant to maintain the satisfaction of having mastered an encounter.
Game Changes
In order to best reflect the dark, hostile life of an undead exploring Lordran's ruins, this section outlines changes to the rules of fifth edition, both for the players and the DM.
The purpose of these changes is to best recreate the feeling and atmosphere of playing the original Dark Souls 1. Combat should be difficult but fair. Exploration should be fractal and interconnected. Social encounters are brief and often hostile.
If the rules of fifth edition, or the changes below, clash with this atmosphere, change the former before the latter. Just make sure to clearly communicate your ruling with as much notice as possible.
Bonfires & Resting
- Characters can no longer take short rests.
- Long rests only take an hour.
- Long rests can only be taken next to a bonfire.
- A bonfire is a small hearth, into which a coiled sword is stabbed. The sword cannot be removed from the hearth. * When a long rest is finished, most of the creatures in Lordran have time to recover and recuperate as well. As such, most enemies respawn after the characters finish a long rest.
- The module will state when monsters do not respawn, but assume any creature that leaves behind a Great Soul will not respawn afterwards.
- When a character dies, it leaves behind a bloodstain containing any humanity and souls the character possessed. A character can use an action to recover their bloodstain if they are within five feet of it.
- If a character dies and has not recovered their bloodstain, the bloodstain vanishes permanently.
- When a character finishes a long rest, any deceased, sane, characters return to life near the bonfire the character rested at.
- Time is convoluted in Lordran. Most changes to the physical environment do not persist beyond a long rest. Exceptions are called out specifically in the description of an area.
Tactical Combat Changes
- Creatures cannot move the spaces of other creatures unless they are more than two size categories smaller or larger.
- Creatures who take the Disengage action can temporarily move through other creatures' spaces for that turn.
Souls
Souls are the universal currency of Lordran. In terms of game mechanics, they replace both experience and gold. Souls can be used during a long rest to level up at a bonfire. Souls are spent upon leveling up, so a level 1 character can spend 900 souls to reach level 3 as if they had 900 experience points, but unlike experience, those souls are taken from the character in the process. A character advancing from level 3 to level 4 for instance would only need to spend 1800 souls. Souls can also be spent to acquire items from NPCs. Souls can be exchanged between player characters as well.
The most common way to acquire souls is to slay creatures in battle. When a non-PC creature dies, it releases souls according to its CR, which are split equally between the party. A character receives souls for all encounters they participate in, even if they die before it ends. Most enemies respawn after the characters finish a long rest.
Humanity and Hollowing
A distinction is drawn between undead, human, and hollow as creature types. The PCs and most of the NPCs within this adventure are Undead, cursed humanoids branded by the Darksign. The first time an undead dies, it becomes hollow, a shriveled husk with degrading sanity. A hollow can become human by consuming a humanity sprite or otherwise retrieving someone else’s humanity. If a hollow loses hope completely, it “goes hollow” and loses its mind completely. Generally speaking, an undead is either human or hollow at all times.
Character Creation
In order to best recreate the type of fantasy Dark Souls provides, character creation has been substantially changed. The character creation process is detailed below.
- Choose your class. Modifications to the standard fifth edition classes are detailed below.
- Choose your ability scores. Use 30 point-buy to determine your scores.
- The maximum score for a starting ability score is 16, which costs 12 points.
- Choose a lineage. This represents both your race and your background.
- Choose your equipment.
- Choose a feat
Character Modifications
- All PCs start with tattered traveling clothes. Characters gain certain equipment from their class, and can choose more later in character creation.
- Each PC begins play with a feat of their choice.
- Each PC has a Sanity score that begins play at 10.
Sanity
Each time a hollow dies, it moves one step closer to the state of insanity called Hollowing. A hollow loses all of their memories and almost all mental functions. It seeks only to destroy the living.
To represent this with your character, you have a 7th ability score called Sanity (note, this does not use the Sanity rules in the DMG). You enter the game with a score of 10. Your Sanity can raise or lower in several circumstances.
You lose a point of Sanity whenever you die.
You gain a point of Sanity whenever:
- You recover your bloodstain
- Whenever you obtain a Great Soul (aka kill a boss)
- You consume a humanity sprite
Class modifications
All Classes
- The only playable classes allowed are: Cleric, Fighter, Rogue, Sorcerer, and Wizard.
- All classes gain proficiency with simple and martial weapons
- Only a limited subset of subclasses are available for each class, listed below.
Spellcasting
- Spellcasters do not learn spells by leveling up, spells must be learned by either finding magical secrets or being taught by a tutor. Most spells are found in the form of scrolls. Scrolls can only be used to learn a spell, they cannot be used to cast it directly. Once a spellcaster learns the spell, the scroll is destroyed.
Cleric
Subclasses:
- Life
- Knowledge
- War
Spellcasting
- Clerics prepare spells as normal, but do not receive domain spells.
- Clerics do not learn cantrips
- Clerics begin knowing and preparing only the cure wounds spell.
Starting Equipment:
- talisman (holy symbol)
- mace
- chain shirt or ring armor if proficient
- shield
Fighter
Subclasses
- Champion
- Battlemaster
- Eldritch Knight
Starting Equipment:
- any melee weapon
- shield
- ring mail or leather armor
Rogue
Subclasses
- Thief
- Assassin
- Arcane Trickster
- Swashbuckler
Starting Equipment:
- two daggers
- leather Armor
Sorcerer
Subclasses
- Lost Flame
- Draconic
Spellcasting
- Sorcerers do not learn cantrips.
- Sorcerers do not have a maximum number of spells known
- Sorcerers begin knowing only the minor fireball spell.
Starting Equipment:
- handaxe
- pyromancy flame (arcane focus)
Wizard
Subclasses
- Dragoncrest Scholar
- Hexcrafter
Spellcasting
- Wizards prepare spells similar to 3.5/Pathfinder. Spells are prepared into individual spell slots, and when expended that spell cannot be recast unless it was already prepared into another slot. Wizards begin knowing and preparing only the soul arrow cantrip and the heavy soul arrow spell.
Starting Equipment:
- Dagger
- Sorcerer catalyst (arcane focus)
Starting Equipment:
The next step is to choose the starting equipment for your character. Each character can choose one of the following items to begin the game with:
- 1x divine blessing
- 5x Black Firebombs
- 1x Humanity
- Traveler’s Pendant
- Tiny Being’s Ring
- Old Witch’s Ring
- 3x Green Blossom
Lineages
Your character’s lineage represents both your character’s race and background. The combination of the two shapes your character as they begin their journey. The list of lineages available is as follows. As of now, lineages do not provide any benefits or detriments.
Commoner
Delta Farmer
Astora Noble
Dragon Scholar
Thorolund Cleric
Jubilant Catarina
Dubious Carim
Classic Zena
Eerie Great Swamp
Far East Traveler
Feats
The last step in character creation is to choose a feat. Feats cannot be chosen instead of ASIs, so this is the only feat you will receive in the game. The following feats are allowed:
Charger
Crossbow Expert
Crusher
Defensive Duelist
Dual Wielder
Great Weapon Master
Heavily Armored
Heavy Armor Master
Magic Initiate
Martial Adept
Medium Armor Master
Moderately Armored
Observant
Resilient
Sharpshooter
Shield Master
Tavern Brawler
Tough
War Caster
Character Subclasses
Dragoncrest Scholar

Studious Pupil
Beginning when you select this school at 2nd level, the souls you spend to buy and learn wizard spells from merchants are halved.
Lore Keeper
Dragoncrest Scholars are well versed in the secret histories of the world. Beginning at 2nd level, a Wizard that has chosen this school can study an object for 1 minute and learn the quoted text in its item description.
Soul Sorcerer
Beginning at 6th level, when you cast a spell that deals force damage of 1st level or higher, you may add your intelligence modifier to one damage roll of that spell.
Incantation Versatility
Starting at 10th level, you may use an action to replace a spell you’ve prepared with another you have learned. Once you use this ability a number of times equal to your proficiency modifier, you may not use it again before you finish a long rest.
Master of Arcane Arts
A master of sorcery knows that his power lies in his study of all it is capable of. Beginning at 14th level, you gain the following benefits while you do not have multiple slots with the same spell prepared. Casting a spell removes it from your prepared list for the purposes of this feature.
-
Your AC increases by 2
-
Your Spell Save DC and Spell attack bonus increase by 1
Hex Crafter

Soul Eater
Beginning when you select this school at 2nd level, you may draw more power out of the souls you absorb. You may use a bonus action to consume souls, such as when you would use a soul of a lost undead. When you do, the next spell you cast is treated as if it were cast using a one level higher spell slot.
Hexer
At 2nd level, you add the hex spell to your spellbook, if it is not there already. You can cast hex without expending a spell slot. Once you cast hex in this way, you can’t do so again until you finish a long rest, though you can still cast it normally using an available spell slot. hex is a dark spell for you.
Hex Adept
At 6th level, you add the dark orb spell to your spellbook, if it is not there already.
When you kill a creature with that you have cursed, you may absorb his souls and subsume them into your form. You may choose to have that creature not drop their souls upon their death, instead channeling that energy into yourself, healing yourself an amount equal to the creature’s hit dice.
Scion of Dark
Beginning at 10th level, you may leverage your humanity to create more potent magics. When you consume a humanity sprite, you regain a spell slot of 3rd level or lower. You must prepare a dark spell in that slot.
Lord of Darkness
Starting at 14th level, while you are human, any damage you deal ignores the damage resistances or immunities of the affected creature or object.
Lost Flame Bloodline

Studious Pupil
Beginning when you select this bloodline at 1st level, you are given a pyromancy flame, a spellcasting focus for your pyromancy spells. While you hold the flame, your unarmed strikes use your Charisma in place of your Strength for attack rolls and deals 1d4 fire plus your Charisma modifier on a hit.
Imbue Flame
Starting at 6th level, you can channel your pyromantic energy into your weapons. As a bonus action, you can imbue a non-magical melee weapon, or 5 pieces of non-magical ammunition, you touch with chaos flame for one minute. The weapon or ammunition deals an additional 1d8 fire damage on a hit. A weapon so-imbued is considered magical for the duration. You regain use of this ability after you finish a long rest. You can expend a spell slot of 2nd level or higher to regain use of this ability before you finish a long rest.
Overchannel
Starting at 14th level, you can increase the power of your simpler spells. When you cast a Sorcerer spell of 1st through 5th Level that deals damage, you can deal maximum damage with that spell.
The first time you do so, you suffer no adverse effect. If you use this feature again before you finish a Long Rest, you take 2d12 necrotic damage for each level of the spell, immediately after you cast it. Each time you use this feature again before finishing a Long Rest, the necrotic damage per Spell Level increases by 1d12. This damage ignores Resistance and immunity.
Child of Chaos
Starting at 18th level, when you cast a chaos sorcerer spell you regain hit points equal to the spell's level. Also, any metamagic you use when you cast a chaos spell is reduced in cost by 1 (minimum 1 point).


Northern Undead Asylum
"Thou who art Undead, art chosen... In thine exodus from the Undead Asylum, maketh pilgrimage to the land of Ancient Lords... When thou ringeth the Bell of Awakening, the fate of the Undead thou shalt know..."
The last surviving undead asylum lies in the far north. It is a prison for the undead branded with the Darksign, eternally reanimating after death. The undead are corralled and led here, meant to rot until the end of the world. Ancient legends say that one day, a Chosen Undead will escape the asylum and go on a pilgrimage to the land of ancient gods.
The player characters are undead, near the state of hollowing that befalls all of their kind eventually. Containing the hollow scourge of their kind is the Asylum's purpose. Their lives before imprisonment are mere memories, only vague urges that drive the character forward. Each has died so many times they've lost count, and sit inches away from the brink of their own insanity.
Escaping from a cell does not guarantee freedom, as the Asylum Demon watches over the Asylum's gate. The demon wields a massive hammer carved from a stone archtree, a wicked weapon that has crushed thousands of undead to dust. One of Velka's Ravens waiting outside is the Firelink Messenger, guiding the undead to Lordran.
Getting Started
The creaking hinges of the trapdoor above their cell awaken the characters in Area 1. A knight in tarnished plate armor, who the players will soon learn is Oscar of Astora, drops a desiccated corpse into the cell below. He shuffles away, shutting the trap door behind him.
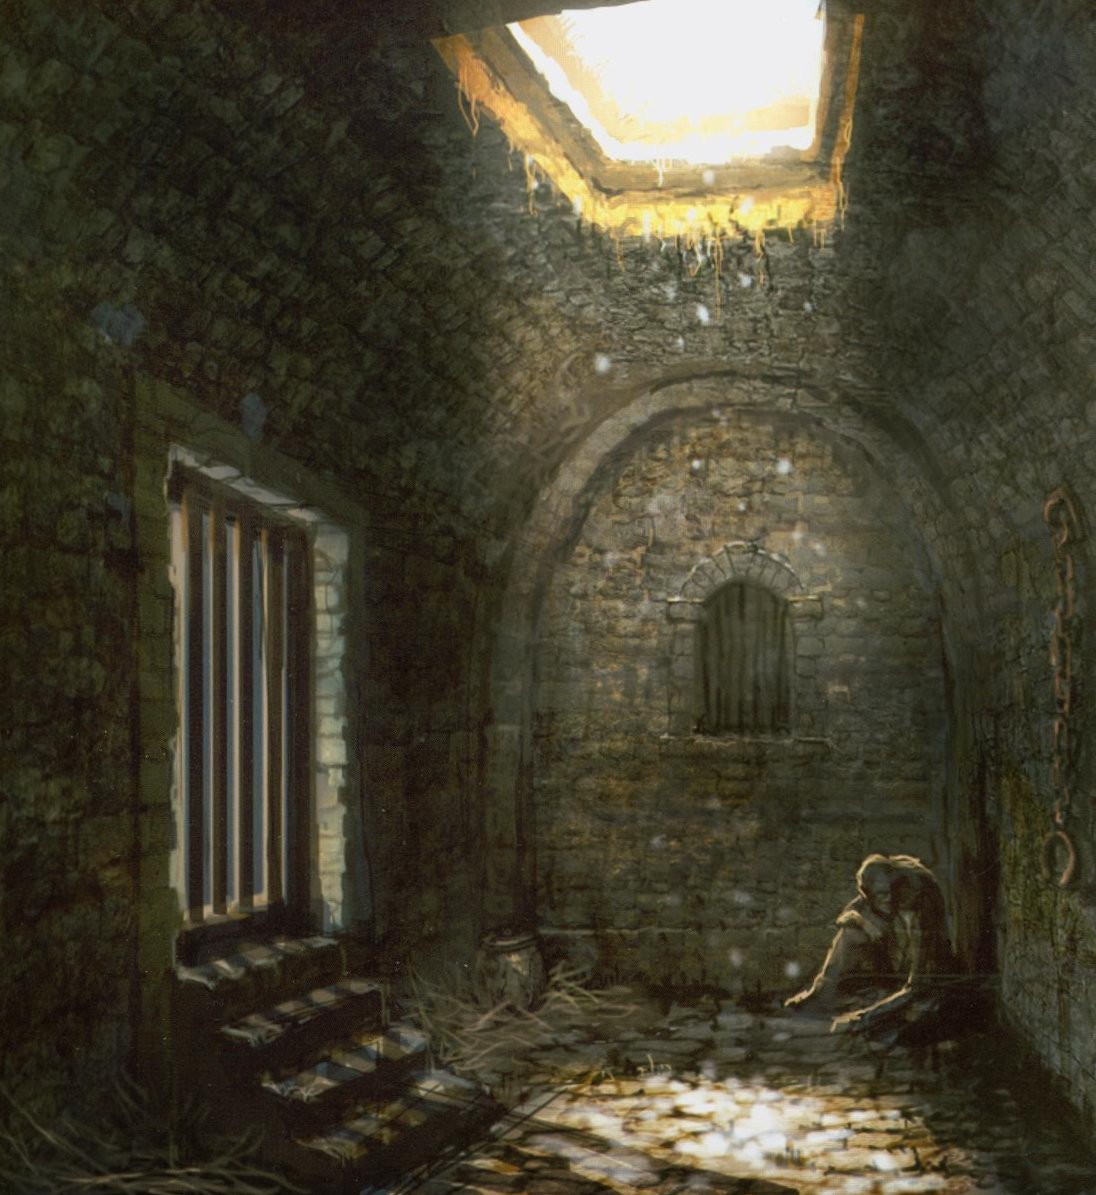
1. Deepest Cell
The characters begin their journey in this dingy cell. The floor and the walls are made of the same thick cobblestones. Clumps of straw gather in the corners. Broken jars and pots litter the space. The bars on the window have been pried off over time, and a 2-foot-deep hole has been carved into the rock surrounding the cell. Small beetles crawl over long broken shackles and chains on the floor. A low rhythmic rumble occasionally shakes the room.
The corpse Oscar dropped wears only a tattered loincloth with a rusty key ring dangling from it. The key opens the cell door to Area 2.

2. Cell Block Hallway
Beyond the cell is a long corridor that leads to a set of stairs that lead towards area 3. To the left are a series of cells occupied by long-hollowed undead. Some are slowly rocking back and forth, others futilely claw at the wall of their cells. To the right is a set of iron bars that separate the hallway from area 11. The source of the pounding is quickly identified as the footsteps of the Stray Demon prowling beneath area 5. A steady stream of water from Area 2A drains into a small hole in the floor halfway up the hallway.
Five unarmed broken hollows sit and stand frozen in madness between the cell and the hallway. They will not attack unless attacked first and put up a meager fight. One more sits in a shallow pool of water at the top of the stairs, staring at the players as they move to area 2A.
2A. Well
The water in the previous room flows from a small tunnel that leads to the bottom of a well. A ladder attached to the side of the well leads up to Area 3.
3. Asylum Courtyard
A small archway sits at the top of the well which leads into a wide courtyard. The courtyard is filled with dead grass, shattered bricks, and a faint dusting of snow.
Sitting in the middle of the grass is a bonfire. To the north, there is a set of heavy oak doors that lead to area 4. To the northeast, a locked iron door that leads up to area 7. The key to this door are carried by Oscar of Astoria in area 6a.
4. Great Hall
The oak doors give way to a destroyed great hall. Most of the heavy stone columns that held up the now-collapsed ceiling lie in chunks on the floor. The east and west sides have four columns space evenly north to south (8 total) five feet away from the respective east/west walls.
After the characters move more than 20 feet away from the door, the Asylum Demon will leap down and attack, surprising unaware PCs. Characters who have a passive Wisdom(Perception) score of 15 or greater will notice the demon before it drops down. A key within the demon's belly unlocks the heavy steel door to the north. The only method of escape is a small portcullis on the eastern wall.
When a character moves through the portcullis, it immediately slams down behind them, trapping the other players in the room. At the end of the next creature's turn, the doors to the south close as well, locking behind them. A character can use their action to make a DC 20 Athletics check to raise the portcullis, restraining the creature until they drop it. The creature can drop the portcullis as a free action and must hold it with both hands.
After defeating the demon, its body will rot away over the course of a few seconds. In its place is the big pilgrim's key to the northern doors along with humanity sprites equal to the number of PCs.
Hiding behind a pillar grants three-quarters cover from the demon's hammer swings. The demon destroys the pillar in the process if it attacks a character taking cover behind one. Broken pillars reconstruct themselves after the characters finish a long rest.
5. Archer's Corridor
A bonfire waits at the bottom of a short staircase leading from the portcullis. The bonfire is in a cramped, flooded room with an archway that leads up a steady incline to Area 6. A pair of shortbow-wielding broken hollows wait at the far end of the hallway. They begin shooting at anyone they see entering the corridor.
In a small room east of the corridor entrance, a pile of bodies lies half submerged. The corpses wear the shields the players chose during during character creation. On a similar pile of corpses at the end of the corridor are their melee weapons. Beyond the hollow and weapon pile, a staircase leads up to Area 6.
6. 2nd Floor Balcony
A wide balcony has been built above Area 3. Iron bars are set into the small stone railing blocking someone from jumping into the courtyard below. A character can pass through a seven-foot hole in the fencing to jump down into Area 3 10 feet below.
To the east is a collapsed staircase. The only intact bit of it is 14 feet from the ground. Climbing up to the staircase requires a successful DC 18 Athletics check. The remains of the staircase lead to a corpse wearing a rusted iron ring. A locked door leads to Area 8.
To the west is a staircase down to the locked door to Area 3, as well as a staircase up to Area 7. A sword-wielding broken hollow at the top of the staircase pushes a 5-foot wide iron ball down it if any character moves more than ten feet up. The ball rolls down the staircase and crashed through the wall at the bottom. Any creature in the boulder's path must succeed on a DC 12 Dexterity saving throw or take 3d6 bludgeoning damage. This trap is reset after the characters finish a long rest.
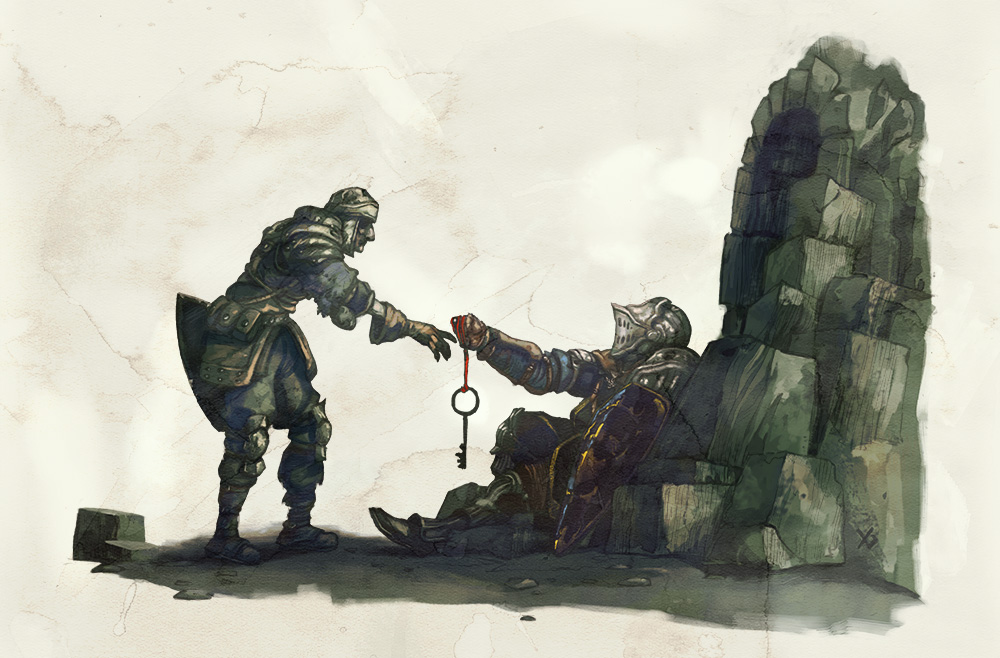
6a. Oscar's Rest
After the boulder crashes through the wall, it reveals a small alcove where Oscar of Astora sits dying atop a pile of collapsed stone. Oscar challenged the Asylum Demon on the roof and was defeated for the last time. He is clearly on the verge of death, and what's worse, hollowing.
Oscar is a knight from the far away land of Astora who went in search of Lordran when he was first branded by the Darksign. It is his hope that rescuing an undead from the Asylum will result in the ringing of the Bells of Awakening. This, he tells the characters, is to realize a prophecy passed down through his family:
"Thou who art Undead, art chosen. In thine exodus from the Undead Asylum, maketh pilgrimage to the land of Ancient Lords. When thou ringeth the Bell of Awakening, the fate of the Undead thou shalt know."
If the characters agree to pursue the prophey, he will reward them with a treasured estus flask and the Undead Asylum F2 East Key to the nearby doors leading to Area 3 and 7. He dies soon after. If slain, he drops both as he fades away. In either case, Oscar will hollow after this and prowl the halls of Area 6 if the characters return to the Undead Asylum.
7. Asylum Battlements
The battlements of the Asylum show the most natural wear of any area. Straight north, the battlements overlook the cliffside that leads to the Raven's Nest in Area 9. Four broken hollows patrol the archway, two wielding broken swords and two wielding shortbows.
Beyond the battlements is Area 8, while a large fog door stands in the archway behind the balcony above Area 4. A message is scrawled in amber light on the ground in front of the fog wall. Upon inspection, it reads "Take the Plunge". Passing through the fog door, the characters will move onto a ledge overlooking the Asylum Demon below them. The demon is considered surprised regardless of whether the characters rolled a stealth check. If the characters drop down on the demon from above, they may make a melee attack at advantage against the demon. On a hit, the attack is an automatic critical hit and the characters do not take any falling damage. On a miss, the characters take 1d6 bludgeoning damage from the fall.
A series of sharpened iron spikes have been driven into the northern railing. Any creature that climbs over them takes 2d6 slashing damage and falls 30 feet to the ground in front of the large door in Area 4.
8. Battlements Antechamber
This small, rectangular side room holds a locked door that leads to Area 6 and two hollow soldiers. The key waits in Firelink Shrine.
9. Cliffside
Velka's Crow waits at the end of this wide cliff. If the characters walk to the north end, the crow will fly down and grab each character in its talons. The characters will then be taken to Firelink Shrine, and their adventure truly begins.
Tucked away to the left of the path is a corpse with a soul of a lost undead.
To the right of the path is a small nest, containing an invisible raven named Snuggly. Snuggly makes shrill requests: "Give me, warm. Give me, soft". When certain items are dropped in the nest, other items will be left behind the next time the characters go to the nest after a long rest, gifts from Snuggly. Only one item may be placed in Snuggly's nest at a time. She will tell the characters immediately if she dislikes an offering. (Just look up the tables somewhere, I promise to only do this for Snuggly and Frampt)


10. Stay Demon's Cistern
This cistern is beneath Area 4, accessible only when the characters revisit the Undead Asylum after escaping. The Stray Demon prowls the beneath Area 4, a more powerful, magic-wielding sibling to the Asylum Demon. The Stray Demon immediately attacks any characters that drop into its lair.
When defeated, the Stray Demon's corpse rots away to reveal a titanite slab and humanity sprites equal to the number of PCs.
A ladder on the northern wall leads to a small walkway. At the end of the walkway is a small trap door that leads to a secret exit to Area 2.
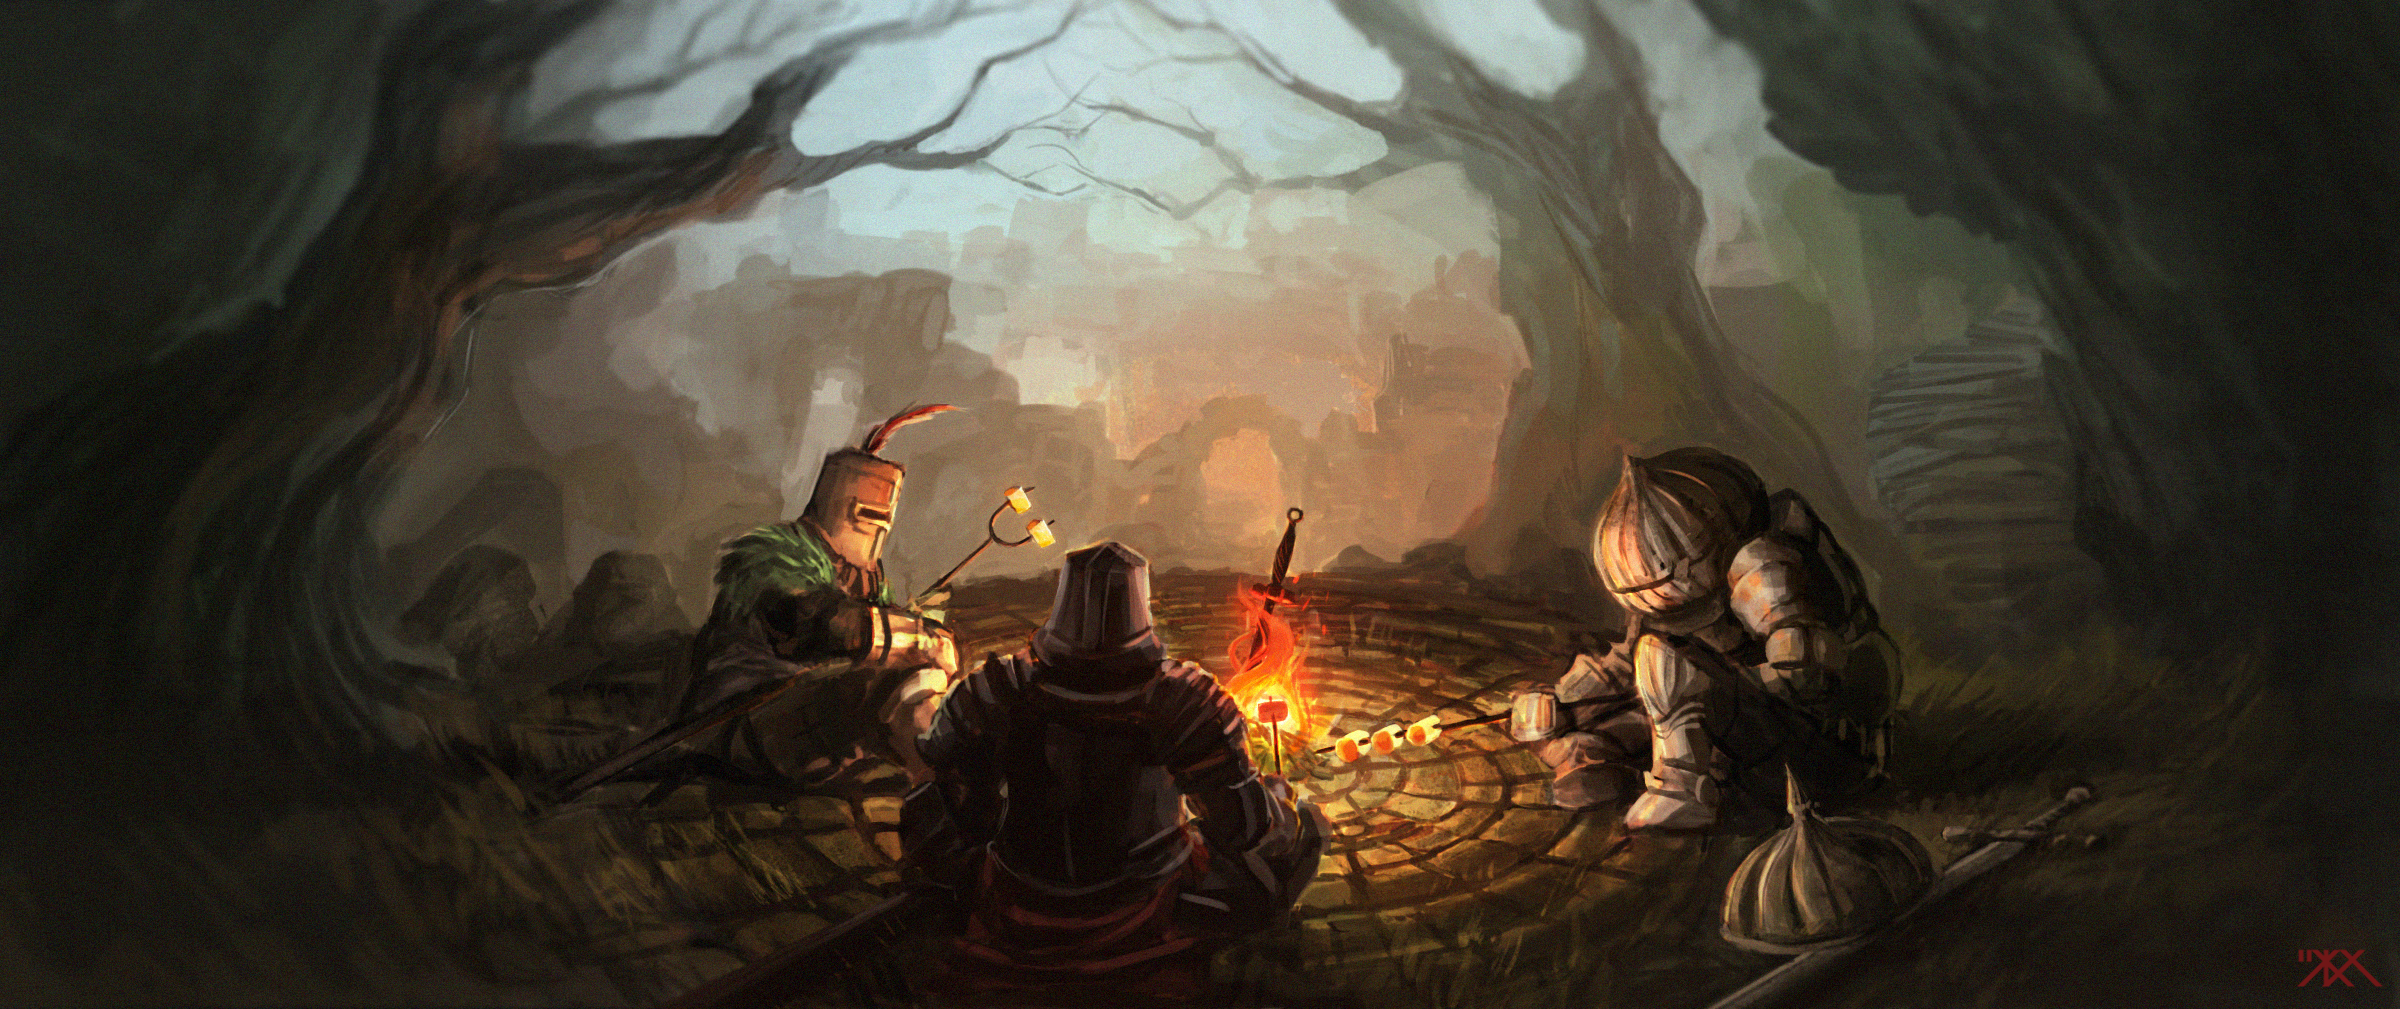
Firelink Shrine
"Well, what do we have here? You must be a new arrival. Let me guess. Fate of the Undead, right? Well, you're not the first. But there's no salvation here. You'd have done better to rot in the Undead Asylum… But, too late now."
Firelink is a holy shrine that sits at a crossroads between many different sites in Lordran. The Undead Burg, Catacombs, the ruins of New Londo, and the high wall guarding Anor Londo are all within view of the shrine. Travelers from all across the land make their way to Firelink as a place of rest during their journeys.
The Shrine’s history as a holy site is esoteric knowledge. Even clerics from the Way of White who visit usually do so as a place of rest before plunging into the catacombs. Firelink was built above the Kiln of the First Flame, the site where Gwyn offered his own soul to the Flame in a vain attempt at prolonging the Age of Gods.
Firelink Shrine comprises three sections, the Bonfire to the west, the cemetery to the east, and the broken church between them. The Bonfire and church are safe for the characters so long as they do not anger one of the other travelers resting there. The church is hallowed ground although the structure has fallen to ruins. The cemetery to the west has nearly every available space occupied by tombstones, and skeletons patrol the area until they reach the church.
Tucked behind the church is a pair of archways before elevator platforms. When the characters first arrive, they are both stuck at the top of the shaft in the church in the Undead Parish. Once activated in the church, the characters can use the elevator as a shortcut up to the parish. A staircase near Anastacia’s cell leads to another elevator platform that descends into the ruins of New Londo. A staircase carved into the cemetery cliff face leads down to the Catacombs. Finally, a pathway on the south cliff face leads up to an aqueduct that can take the players into the Undead Burg, or the Depths later on.
Arrival at Firelink
Velka’s Crow drops the characters next to the bonfire at the center of Firelink Shrine, area 1. The crow returns to its nest at the top of the ruined church afterwards. At this point, the players are free to travel wherever they wish. It would be wise of them to begin by spending souls to level up, explore the shrine, and trade with nearby travelers.
When the players arrive, the following NPCs will have made their home in the shrine:
The Crestfallen Warrior, seated by the bonfire in Area 1.
Anastacia of Astora, the shrine’s Fire Keeper imprisoned below the bonfire in Area 2.
Petrus of Thorolund, teacher of miracles found near the altar in Area 10.
As time goes on, the population of Firelink Shrine will grow and shrink. Reah, Vince, and Nico of Thorolund will arrive in Area 10 after the first Bell of Awakening is rung. The trio will leave after the party speaks with them and Petrus.

Knight Lautrec of Carim will arrive outside the firekeeper’s cell after he is freed from his cell or the characters ring the first Bell of Awakening. He will leave after the second bell is rung.
Griggs of Vinheim will arrive after being freed from the Lower Undead Burg. He leaves after Big Hat Logan departs and all of his spells have been taught to one of the PCs.
Big Hat Logan arrives in Area 1 once he is freed from his cage in Sen’s Fortress. He leaves after the characters first encounter Seath, the Scaleless.
Laurentius of the Great Swamp will arrive after being freed from the Depths. He will leave if the players tell him the location of a tutor of chaos pyromancy.
Kingseeker Frampt will arrive after both bells of Awakening are rung. He will leave if any of the players join the Darkwraith covenant.
Appendix A details the personalities, backgrounds, and knowledge of the NPCs in Firelink.
1. Shrine Maiden's Bonfire
A roaring bonfire, larger than the ones in the Undead Asylum, sits in the middle of a stone circle. The Crestfallen Warrior waits on the remains of a fountain against the east wall. A small staircase next to him leads down to the Firekeeper’s cell in Area 2. The long ruined church to the east obscures the view of the rest of the Shrine. To the south is a well, where a body slumped over the edge still clutches three humanity sprites. A southwest pathway the Crestfallen Warrior points out leads to an aqueduct running straight into the Undead Burg.
The bonfire at Firelink Shrine is bolstered by the Fire Keeper below it. The Bonfire is kindled without the need for the players to use their own humanity. If Anastacia is killed, the bonfire ceases to burn and cannot be relit until she is brought back to life.
2. Anastacia's Cell
Beneath the bonfire is an undead woman in a dingy robe imprisoned in a hollowed-out hole beneath the hill. She is Anastacia of Astora, though the residents of Firelink know her as the Ash Maiden. A set of thick iron bars block her from leaving. She sits in the dirt wearing the tattered dress of a priestess. Anastacia's people removed her tongue long ago. It doesn’t appear she wishes to speak with the characters even if she could.
A nearby staircase carved into the cliff face leads further downward to Area 3.
3. New Londo Elevator
Far beneath the bonfire is an elevator platform. A creature weighing more than 100 pounds can stand in the center of the platform to activate it. The elevator descends down into the ruins of New Londo.
4. Shrine Yard
Worn ground and long grass cover the entrance to the church. A small dead tree to the north will one day serve as the canopy of Laurentius’s campsite. The stairs up to the church have been so worn down that the individual steps are hard to make out. A small set of stairs to the left is an antechamber to the church, Area 5.
A long-dead corpse lies behind a half-wall to the south. It still grips a pouch containing five firebombs.
5. Broken Church
A foot-thick layer of water has collected inside this sunken church. Moss grows on every surface, including the large statue on the far end of the room. Light streams through the shattered ceiling. Players looking up will make eye contact with the giant crow nesting above them. A character who succeeds on a DC 20 Religion check recalls that the statue is of Gwyn’s Wife and his firstborn Son. Information about the former is sparse. Gwyn's wife is known to be a kind, benevolent, and devoted mother. Gwyn purged all records of his firstborn after he betrayed his father.
The sole exit is a small set of stairs that lead to Area 6.
6. Cliffside Overlook
This small bit of land outside the church looks out onto the townships below the shrine. A staircase built into the outside of the church leads to Area 7, the collapsing second floor of the church.
This area represents the last bit of hallowed land protecting the rest of the shrine from the skeletons patrolling the cemetery. The skeletons refuse to cross from the cemetery into this area. Forcing the skeletons into the hallowed ground does not harm them. A small staircase descends into the cemetery.
7. Second Floor
The ceiling collapse destroyed most of the church’s second floor. Only a small ring supported by the columns around the area below survives. At the end of the ring is a corpse with a soul of a lost undead.
8. Undead Cemetary
The cemetery is the largest area of Firelink Shrine, dominating the western cliffside. Every inch of the graveyard is covered in gravestones. A character moving more than ten feet into the graveyard awakens its inhabitants, nine catacombs skeletons and one giant skeleton. A character must succeed on a DC 15 Dexterity(Stealth) check to move through the cemetery without the skeletons noticing. The ground in the cemetery is difficult terrain imposed by the gravestones.
The fight down to the catacombs is not an easy one. The skeletons respawn at the end of their next round in combat if they are not slain by radiant damage. But the skeletons are bound to the cemetery, and won’t pursue the characters beyond Area 9.
The remains of previous undead litter the ground. A winged spear with a vicious bard near the tip sits on the southern cliff face. A Zweihander greatsword on the southern tip. A wooden shield emblazoned with twin snakes coiled around the outer perimeter lies off the path down to the Catacombs in Area 9. Ten feet from the Zweihander is a corpse hanging over the edge of the cliff with a set of binoculars. The binoculars function as a spyglass when used. Two large souls of a lost undead sit on corpses on either end of the cemetery.
9. Catacombs Threshold
A large staircase is carved into the northern cliff face that leads down to the Catacombs.
10. Church Antechamber
An antechamber south of the ruined church. Petrus of Thorolund spends most of his days pacing around the chamber. Reah and her guardians will camp here before their journey to the catacombs. To the right, a staircase leads up to the elevators in Area 11.
11. Parish Elevator
Tucked behind the church is a pair of elevator platform entrances. Both are stuck at the top of the shaft in the church in the Undead Parish when the characters first arrive.
A character riding the elevator will briefly pass above the archway's roof. Creatures can move off of the elevator to land on the roof above this area. From here, the creature can maneuver onto the topmost floor of the church. A corpse on this walkway carries the Undead Asylum F2 West Key. From here, the staircase winds up to what remains of the church’s roof, where Velka’s Messenger roosts. A tip from the Crestfallen Warrior may suggest to the characters that they can curl into a ball within the nest. A character must wait for a full minute while curled into a ball to summon the crow. The crow will then grab the creature and take them to revisit the Undead Asylum.
A character can drop 10 feet down into the alcove below if an elevator platform isn’t blocking it. A creature who succeeds on a DC 10 Acrobatics check can negate the falling damage. A small walkway underneath the area drops down yet again to hidden Area 12.
A small staircase leads further upwards to a corpse clutching a soul of a lost undead.
12. Darkwraith Cache
Area 12 is a secret cache left by followers of the Darkwraith Covenant. Members are encouraged to take materials when necessary and leave supplies for other members doing their work in the shadows. Four chests are scattered around the area, and a path north leads to a small cliff that drops 20 ft. down into Area 8.
The chests contain:
- 5x homeward bones
- 5x red eye orbs
- talisman
- morning star
13. Aqueduct Cliffpath
A long cliffside path from the Bonfire leads to the southern Aqueduct. More powerful undead guard the entrance. Two hollow soldiers sit at the base of the steps, while a hollow knight stands ready 15 feet behind them. Two more hollow soldiers wait at the top of the staircase, one carrying firebombs. The other guards the entrance to the aqueduct. The hollows attack anything that moves within 30 feet of them.
A creature can make a DC 13 Acrobatics to leap from the cliffside over to the thin walkway surrounding the under-bridge platform. On a failed check, the creature plummets to its death. On a success, the creature lands safely on the walkway and can leap back to the cliffside without a check. A corpse on the far western end of this platform wears a ring of sacrifice.
14. Undead Burg Aqueduct
The 5-foot wide aqueduct leads to the Undead Burg. Further up is a locked door that connects the Aqueduct to the Undead Burg. To the left is a giant rat that chews on a long dead corpse. The corpse still clutches a humanity sprite.


Undead Burg
"Things are getting treacherous in these parts. A horrible goat demon has moved in below. And up above, there's that humongous drake, and a bull demon too. If you stick around this place, it might end up being your grave! Nee hee hee hee hee!"
The Undead Burg is connected to Firelink Shrine by the southern aqueduct. This former human settlement is now completely overrun with undead, though a scant few are not as hostile as they might appear. The Taurus Demon guards the bridge leading up to the parish, as does the fearsome Hellkite Drake. The Burg represents the first major challenge that must be overcome before they ring the Bell of Awakening. The lessons learned here will serve as a foundation for the party’s entire journey to fulfill the Undead Prophecy.
1. Aqueduct Entrance
Underneath the Undead Burg runs a fetid aqueduct leading out to Firelink Shrine. Near the entrance to the Burg is a sturdy iron door blocking further progress inside it. The door is locked from the other side. When unlocked, it leads to the bottom of the Lower Burg, near the entrance to the Depths.
A large staircase connects the aqueduct to Area 2.
2. Burg Rooftops
This is the first real glimpse of the Undead Burg the characters receive. Much of the traversable area involves walking across rooftops and balconies. It’s clear that the burg wasn’t as much planned as it was grown over years and years.
Three hollow soldiers wait in Area 2. When engaged, two more wielding firebombs leap from Area 2B to defend their allies.
A collection of barrels in the northern end of Area 5 conceals a break in the stone railing large enough for a medium-sized creature to squeeze through. There is a short drop to a small platform ten feet above the walkway to Area 3. A corpse on the platform carries a soul of a lost undead.
A shattered wooden bridge was used to connect the second floors of Area 2A and 2B. Characters who can make a 15-foot jump across the gap can move between the two floors.
2A. Abandoned Home
A long-abandoned house has decayed over the years. The stairs have long collapsed. If someone can reach the 2nd floor, they can find a corpse gripping a light crossbow and 15 bolts on the balcony. This is most easily done by jumping from the roof of the building in Area 2B.
2B. Northern House
Another decaying residence. A staircase leads up to Area 4.
3. Underroof Walkways
A walkway beneath Area 2 leads to two small houses. Inside of the hovel beneath Area 2 is a corpse dangling halfway outside a window carrying a soul of a lost undead. The larger room to the east is unoccupied.
.png)
Two broken hollows wait to ambush any creatures moving between the two houses. A DC 12 Perception check alerts the characters to their presence. Characters who beat the hollows on an initiative roll can make a contested Strength(Athletics) check to pry a hollow from the railing. On a success, the hollow is sent it plummeting a hundred feet into the lower burg.
The walkway to the south is an ambush point for a group of four more broken hollows dangling from the railing. The ladder they guard leads up to a walkway above the aqueduct. At the far end of the walkway is a corpse clutching a humanity sprite. It’s only a small leap down back into Area 1.
4. Drake Ambush
A stone bridge connects areas 2 and 4. As the characters approach to cross it, the hellkite drake swoops down by and perches upon the bridge for a moment. It pays the characters no mind before it flies off to its roost above the Undead Parish.
Four hollow soldiers patrol the courtyard ahead. A light crossbow-wielding hollow knight sits perched at the top of the northern staircase. The battlements it crouches behind provide it half-cover from attacks in the courtyard.
The two hollow knights in Area 5 do not move across the bridge to Area 4 until one of the characters does so.
5. Merchant's Hovel
Two hollow knights sit atop a house, one of the few occupied by a sane owner. Once they are killed, the characters can go downstairs and speak with the Undead Merchant. Appendix A describes him. A hollow soldier hidden behind a bookshelf on the first floor comes to the merchant's defense if the characters attack him.
A small walkway to the east leads to a ladder up to the bridge to Area 4. The walkway is guarded by six broken hollows wandering aimlessly. A character with a passive Wisdom(Perception) score equal to or higher than ten will notice a corpse on the roof carrying a light crossbow and 15 bolts.
6. Ambush!
To the south is a staircase leading down to Area 4. Across a short bridge to the west is Area 7, with the area’s only Bonfire. To the northeast is a long bridge to Area 8. A pair of hollow soldiers in Area 9A character wait to ambush travelers crossing the bridge. A character must succeed on a DC 12 Strength(Athletics) or Dexterity(Stealth) check to cross safely. On a failure, they take 2d6 fire damage, but any other character can cross without making a check during that round.
7. Bonfire Chamber
A much-needed place of rest in the Undead Burg. A Bonfire rests in this broken tower. The stairs up to the second landing have long since collapsed. The only method of ascension is an iron ladder, though a creature at the top of the landing can drop it down. Afterward, the characters can use it as a shortcut to the bridge guarded by the hellkite drake.
Long-ago, a cleric of the Way of White rested here. She was unable to progress further into the burg, and her corpse sits in the corner of the room.
8. Lower Burg Access
This wide, covered antechamber houses three hollow soldiers and a hollow knight.
An iron door leads down into the Lower Undead Burg, but the characters cannot open it from this side of the door. The only exit to the room leads west towards Area 8A.
8A. Pantry
This pantry and dining room hold two hollow soldiers. One hides in the eastern nook, surprising any player that goes to explore it.
In a backroom to the north is a wooden chest containing 5 black firebombs.
.png)
9. Burg Courtyard
A large courtyard connects areas 8, 10, 11, and 12. Three hollow soldiers wait to attack anyone coming up the stairs. One carries firebombs and the other two wield longswords. The door to Area 11 is locked. The residence key can be bought from the Undead Merchant in Area 5 can sell the key, or the characters can take it from his corpse. The crossbow-wielding hollow knight atop the tower (Area 10) is not visible from here. It will ambush characters engaged in combat down the stairs to Area 12. The southern ladder leads up to Area 9A, where the characters can take revenge on the hollows firebombing the bridge.
9A. Revenge
A rickety wooden platform has been built above Area 8A. Three firebomb-wielding hollow soldiers attack all travelers they can see. They can be easily pushed down the staggering drop into the Lower Burg.
10. Crossbow Knight's Tower
A 30-foot spiral staircase leads up a small tower. A solitary light crossbow-wielding hollow knight waits to ambush unwary travelers. The knight is hidden from view anywhere except the stairs leading down to Area 12. The battlements still provide ¾ cover from ranged attacks below.
11. Untouched Residence
The door lock has kept intruders from the home for quite a while. The room gives a glimpse of what life in Burg may have looked like before the Undead Scourge. Through the backdoor is a small grass yard with a wooden chest containing three gold pine resins. A ten-foot drop below will put the characters in Area 12.
12A. North Burg Staircase
Three hollow knights wait at the base of the stairs, guarding the tower leading to the taurus demon. The three act in concert, taking advantage of the choke point provided by the staircase down the Area 10.
A staircase leading up to the massive tower to the north has a hollow soldier waiting behind an oiled barrel at the top of the stairs. When a character begins to move up the stairs, the soldier ignites the barrel and sends it hurtling down the stairs towards them. Each character on the staircase must succeed on a DC 14 Dexterity saving throw or take 3d6 bludgeoning damage + 2d6 fire damage on a failure.
12. The Burnt Guardian
A bit of the remaining street is below Area 12. The northern stretch drops off straight into the Lower Burg. To the south is a black knight of gwyn guarding a corpse carrying a blue tearstone ring. The knight will fight to guard the corpse and brooks no quarter with interlopers.

13. Havel's Tower
F6 - The top floor of the tower. Two hollow knights with crossbows wait to ambush anyone who encounters the taurus demon. A ladder is the only route to F5.
F5 - At the top of the staircase is a fog door blocking passage onto the taurus demon’s bridge. A ladder beyond the fog gate leads up to F6. A staircase leads down to F4.
A small collection of barrels hides a titanite lizard. Any creature who investigates the barrel pile will spook the creature. Afterward, it will scurry down the stairs and vanish as soon as possible.
F4 - A pile of empty barrels is the only item to distract from the two staircases leading to F3 and F5.
F3 - The archway to the East leads out into the Undead Burg. A staircase leads up to F3, and a locked iron door bars the entrance to a stairwell to F2. The key has been lost to time, but the lock can be flipped from the other side.
F2 - This room is completely empty.
F1 - A staircase leads to F2 up to F2. Havel the Rock, long hollowed, waits at the bottom of the staircase. He uses his dragon tooth to obliterate any who come across him and will be an essentially unbeatable foe for a low-level party. An iron door locked leads out to the Darkroot Basin. The key is guarded by the Moonlight Butterfly.
14. Taurus Demon’s Bridge
The bridge looks more worn down than the rest of the town. Gore and viscera hang off the side of the battlements, and man-sized craters litter the ground. This is the hunting grounds of the taurus demon. It took up residence after the scourge of undeath took hold and now it slaughters any who would cross his bridge into the Undead Parish.
The taurus demon is a brutal foe that will likely be a lethal threat for a low-level party. It is likely on their first encounter they will not notice the hollowed archers before it is too late. If the party slays the hollows first, the fight becomes much more even.

The Demon’s footing on the bridge is tenuous. If all but 1 member of the party (minimum 1) succeed on a shove check, they can push the demon into the chasm below. The check can be made even though the demon is likely two size categories larger than the party. The fall is fatal, and souls are still awarded as normal for its defeat.
Once defeated, the party can move on to the next bridge, guarded by an even more fearsome foe.
15. Tower Staircase
A set of stairs lead down to the Hellkite Drake’s Bridge (Area 16). A set of crates on the far end of the hallway are stacked on top of a corpse carrying a large soul of a lost undead. The door on the bottom of the stairwell leads out to the Bridge. The iron door across the way is locked, the key is on a corpse in the Undead Parish. Beyond the door is a long ladder down to the Lower Burg.
16. The Hellkite Bridge
The Hellkite Drake has claimed it as its hunting grounds, scorching the surface of the bridge thousands of times. The Hellkite Drake uses the statistics of a young red dragon, except that it’s a huge creature. The drake is not at its roost above the gatehouse when the players arrive, giving them a chance to rush towards safety halfway across. Characters rushing across the bridge from the west side must succeed on a DC 13 Strength (Athletics) check to make it to the stairwell safely. On a failure, the Hellkite Drake returns before they can reach the stairwell and unleashes its breath weapon. Four hollow soldiers patrol the eastern end, constantly returning to life.
On the far end of the bridge is a gatehouse (Area 18). It can serve as a shortcut into the Undead Parish if the players can reach it alive. There is also an intact greatsword and a soul of an unknown soldier near the far end of the bridge.
After the players cross, the drake stays perched above the gatehouse. It uses its breath weapon whenever a creature attempts to cross the bridge. An observant player may notice the drake cannot always reuse its breath weapon immediately. If they provoke the drake’s wrath, the others may be able to cross to the gatehouse while the breath weapon recharges. It will leap to the bridge on its turn to engage the party in melee if the drake’s breath weapon does not recharge immediately. It will not pursue them once they reach the gatehouse, flying off to another roost in the mountains.
Beneath the bridge is an alcove that leads to the top of the ladder in Area 3, which can now be dropped down.
17. The Sun Knight
The patio on the near side of the drake’s bridge features a lovely vista of distant lands with the sun shining through the clouds. The first time the players visit, the view is enjoyed by Solaire of Astora. Appendix A describes Solaire in more detail.
18. Gatehouse
A gatehouse connecting the bridge to the Undead Parish. A set of heavy levers can be used to raise and lower the two gates. A Bonfire sits in front of a copy of the same statue in Firelink Shrine’s cathedral. If a character opens the northern gates, they can continue on to the Undead Parish or go up the staircase to fight the black knight in Area 22.
18A. Broken Statue
The courtyard outside the gatehouse has a broken statue of a divine warrior. A creature with a Wisdom score of 17 or higher can commune with the statue and join the Warriors of Sunlight covenant. Each time a character uses the white sign soapstone to help another undead slay a boss reduces the required score by 1. Appendix C gives more information on the Warriors of Sunlight covenant.
19. An End at the Beginning
A set of staircases lead up to the Drake’s Bridge, and down to the Bonfire in Area 3. A small archway allows access to the struts under the bridge. The characters can follow it to the northern area beyond the gatehouse without needing to brave the drake. From here, the ladder down to Area 3 can be dropped.


.png)
20. Underbridge Pathway
The underside of the bridge is separated into chunks by wide pillars. Narrow walkways connect them on the outside edges. A hollow knight waits in the furthest section. Another wielding a spear waits on the eastern walkway to Area 21. Any creature that takes melee damage on one of the 3-foot walkways must succeed on a DC 12 Dexterity(Acrobatics) check or fall down into the chasm below.
.png)
21. Infested Sewer
Six giant rats infest this cistern underneath the corridor to the Undead Parish. A ladder on the far end of the cistern leads up to the tower beyond the northern exit of the gatehouse.
22. Tower Guardian
At the top of the tower near the gatehouse is a solitary black knight of gwyn wielding a wicked Greatsword. When it is slain, it leaves its black knight greatsword behind.
Undead Parish
“Don't get yourself killed, neither of us wants to see you go Hollow.”
The first Bell of Awakening sits at the top of the Undead Parish’s cathedral. But the players have a grueling gauntlet ahead of them. They may not even reach a bonfire until they are near the end of the trial. However, there are many rewards to be reaped from careful exploration. Fortune, as always, favors the bold.
1. Corpse Fire
The entrance to the Undead Parish is as heavily guarded as anywhere in the Burg. Eight hollow knights prowl this open courtyard. What’s more, an armored tusk blocks the way through the gate on the far end. When the guards notice the characters, one of the knights uses its first turn to run behind the portcullis. During their second turn, they pull the lever near the gate and close it, trapping the players on the other side. If the players cannot make it through in time, the only way forward is down into the Area 3A cellars.
A previous adventurer left a small pile of 3x alluring skulls at the end of the eastern walkway.
2. Parish Cathedral
The entire parish is built around the massive cathedral in the center. The bell gargoyles sit perched atop the church spire where a Bell of Awakening sits. Time has not ravaged the Cathedral to the degree its surroundings are. Statues of saints and prophets line the halls. Towering over the altar is a much larger version of the statue found in the Gatehouse and Firelink Shrine.
2A. Church Steps
The steps leading up to the cathedral have only a single hollow knight guarding the gate's lifting mechanism. Next to the lever is the basement key that unlocks the door on the east-end of the drake’s bridge. A halberd in working condition is near the top of the staircase to the north.
2B. Atrium
Three balder knights guard the entrance into the cathedral. They will not advance beyond the front door. They will pursue interlopers anywhere inside the cathedral. balder knights are more intelligent than normal hollows and make use of cover and tactical strategy.
2C. Cathedral Altar
A berenike knight blocks exploration of the cathedral. Its steel armor and shield make it a formidable foe in melee combat. The entire first floor of the cathedral is open to loot once the characters slay it. The north wall holds two elevator platforms. When a creature activates it by standing inside, it transports its occupant down the shaft to Firelink Shrine. A staircase next to the elevator cars leads up to Area 2E. The corpse curled up onto the altar carries a rare fire keeper soul.
2D. Courtyard
Two hollow knights join the berenike knight in defending the courtyard south of the cathedral. Once dispatched, the path south leads down to Andre’s Tower, Area 5.
.png)
.png)
.png)
.png)
2F. Gargoyle's Rooftop
From the roof of the Cathedral, the characters can see the Bell of Awakening almost within reach. Most of the large gargoyles that perch on the cathedral’s roof are inanimate. A duo of powerful guardians have prevented many undead from ringing it. When the players pass through the fog door, a bell gargoyle breaks out of its stone shell and descends to attack the players.
The gargoyle makes use of its flight and powerful fiery breath to destroy its foes. When the gargoyle is reduced to half its maximum hit points, a lesser bell gargoyle joins its allies at the beginning of its next turn.
When both gargoyles are dead, the way to the Bell of Awakening is left unguarded. A character that climbs the 50-foot ladder to the top of the bell tower will have no difficulty ringing it. It's toll echoing through the land. If the characters have already rung the bell in Quelaag’s Domain the gates of Sen's Fortress creak open. The loud groaning sound will attract the character's attention to the nearby fortress.
3. Parish Cellars
The cellars underneath the Undead Parish.
3A. Cellar Common Room
At the base of the stairs, a lone broken hollow waits for creatures to move down. Any creature it sees will send it fleeing north further into the room. Four more broken hollows waiting beyond the door ambush characters giving chase. Two more broken hollows join the fray from the top of the staircase when the fight begins in earnest. Another two broken hollows hold their position on the eastern landing between Areas 3A and 3B. They guard a corpse carrying a large soul of a lost undead.
An observant player might notice a corpse hanging from the rafters above. Once they’ve ascended the second ladder to the northeast, a character can attempt to retrieve a large soul of a lost undead hanging from it. A creature can make a DC 15 Dexterity(Acrobatics) check to retrieve it. On a failure, the creature plummets fifteen down to the floor below. A corpse on the first landing carries the mystery key to Lautrec’s cell.
3B. Misleading Passage
This room is an unremarkable passageway from Area 3A to Area 4. A seek guidance spell cast in this room will show soapstone messages erroneously warning of secret doors in the walls of the room.
4. Parish Battlements
A series of corridors branch from Area 3. The route eastward leads down a corridor that hits a dead-end guarded by a balder knight. A corpse sits collapsed on the far side, still carrying a polished steel shield. To the far west, another balder knight waits for the characters to try and cross to the cathedral. Down the southeast corridor, the last knight patrols east and west while a hollow knight waits to ambush unwary adventurers. A rickety bridge to the east connects this portion to Area 5.
.png)
5. Andre's Tower
The sound of hammers against steel echoes through this broken tower.
5A. Crumbling Rooftop
A long, narrow, stone bridge connects Andre’s tower to the cathedral in Area 2. The roof has long caved in, and shattered stone covers the mossy floors. A wooden staircase leads down to a place of rest in
5B. Fortress Overlook Bonfire
A cherished Bonfire overlooks the gates to Sen’s Fortress. A walkway stretches east to the gates. The sound of forging echoes through the tower, the source of which is down the stairs in Area 5C.
5C. Andre's Smithy
Andre of Astora is one of the greatest blacksmiths in Lordran, and an even better ally. He is immediately friendly towards the party so long as they don’t threaten him. Andre can repair and reinforce their equipment. He can also imbue them with certain magical enchantments if given a proper ember. Appendix A describes Andre in more detail. The Blacksmithing chapter has rules for Blacksmithing and weapon ascension.
A small stairway leads down to Area 5D, where an ancient evil blocks the way to Darkroot Garden.
5D. Prowling Demon's Hunting Grounds
After the unnamed blacksmith deity passed away, the prowling demons were born from its scattered legendary slabs. One has made its home a few dozen yards from Andre. The demon has no particular goal, only to destroy whatever crosses its path. The party may be able to slip by it, but any forays into Darkroot Garden are going to be hampered until it is dealt with.
If the characters can make it to the other side, they will reach the border of Darkroot Garden.

Darkroot Garden
“Is it not so that thou art new? Thou fared well to find me. But cometh thee not for the grave of Sir Artorias? My advice true, forget this! The legend of Artorias art none but a fabrication. ...Traversing the dark? 'Tis but a fairy tale. Have thine own respect, go not yonder knocking for nothing, I say!”
Beyond the Undead Parish is an ancient wood, untouched by the growth of the undead settlements above. Darkroot Garden is a dangerous place indeed, and the guardians of its treasures will fight to protect them.
1. Garden Threshold
The entrance to Darkroot Garden sits outside of the Prowling Demon’s hall, near Andre the Blacksmith. A layer of fog sits over the entire area, lightly obscuring everything more than fifteen feet away. Small glowing flowers provide dim light throughout. If plucked from the ground, their light goes out immediately. The only path forward leads out to the east, deeper into the forest.
Near the entrance to the Undead Parish is a fork in the road guarded by two vine ents. The path to the right leads to the Darkroot Basin. The path left leads deeper into the Garden.
The wider area to the north holds two more vine ents pacing up and down the corridor. Another is buried in the ground, joining the fray when the other two attack. A large soul of a nameless soldier waits behind a rock.
3. Deep Garden
The garden opens up to a large wood crawling with vine ents and stone guardians. They guard the path to the moonlight butterfly in Area 4.
A small branching pathway to the north leads to a dead end. A corpse on the far end leaning against a tree clutches a partizan pike. Unfortunately, a tree lizard has concealed itself around the tree. If an unaware creature attempts to grab the pike, the lizard attacks and surprises the party. A character with a passive Wisdom(Perception) score of 16 or higher notices the lizard before it attacks.
Careful characters can avoid provoking the guardians of the wood. If the party wants to try sneaking through, they can attempt a DC 14 Stealth check to move through unnoticed. A failure awakens two vine ents and one stone guardian who will attack the party. The creatures will not leave Area 3, and will not chase the party up the stone tower in Area 3B. Each failure after the 1st awakens three more vine ents and another stone guardian. Characters that hug the western edge will be better obscured, giving the party advantage on their Stealth checks. A DC 14 Wisdom(Survival) check or a seek guidance spell will reveal this information. If the party slays or more three stone guardians, they can safely loot the entire area. Of particular note is a corpse wearing a set of Elite Knight plate armor. A DC 10 Intelligence(History) check reveals it is of the same origin as Oscar of Astora's.
A creature that makes a successful DC 15 Nature or Perception check near the entrance from Area 2 will notice an odd tree nearby. If the tree takes any fire damage, it will writhe and burn away, revealing a path to Area 5.
3A. Ancient Tower
A small, square tower has a winding staircase up to the moonlight butterfly's bridge.
4. Butterfly's Roost
The moonlight butterfly guards this bridge and roosts on the tower beyond it. A potent herb grows on the sides of the bridge. The Butterfly can use an action to feed on while perched on the bridge. The butterfly floats down from its perch and fires down at characters who cross the bridge. The Butterfly won’t stray too far from the bridge. It prefers staying within a single round’s movement of it to replenish itself with the herb's nectar. If the butterfly uses an action to drink the nectar, it regains 6d6 hit points. Otherwise, it stays outside of melee and prefers to lob magical attacks at the characters. If enough of the party is weakened, it will finish them all off with a soul beam.
4A. Ember & Key
A long-petrified blacksmith clutches waits at the top of the staircase on the far side of the bridge. It clutches the Divine Ember to its chest. Andre the Blacksmith can imbue the character's weapons with radiant energy if the characters give it to him. Resting on an anvil nearby is the watchtower basement key. It unlocks the door on the bottom floor of Havel’s Tower in the Undead Burg that leads out to Darkroot Basin.
5. Lower Garden
A small path under Area 2 leads lower into the garden. The area is swarming with 8 frog-rays who attack intruders in the area. Two more frog-rays guard a soul of a proud knight in an alcove to the west. A collapsing archway frames a stone path leading north, at the end of which is a corpse wearing a wolf ring.
6. Darkroot Wood
Once the characters use the Crest of Artorias to unlock the gate in Area 2, it allows access to hallowed ground guarded by the Forest Hunter covenant. A group of seven guardians hunt intruders in the wood: an archer, priest, bandit captain, veteran, lordran mage, and swashbuckler. The knight, hunter, and warrior are all wearing cat covenant rings, clues that they are in fact invaders from other worlds. Once slain, the three do not return after a long rest. The hunter in particular drops the black bow of pharis, as well as pharis’s hat which functions as a pair of bracers of archery.
To the north is a small tower, within which resides Alvina of the Darkroot Wood. Appendix A describes her in more detail. Once a player joins the Forest Hunters, Shiva of the East and his assassin bodyguard join her nearby. Both are friendly to the players as long as one has an unbroken oath to the Forest Hunters.
6A. Abandoned Eastern Armor
To the far east is a set of eastern armor, which functions as splint armor of slashing resistance. Ten vine ents guard the armor set. A small stone bridge to the north leads to Area 7A.
7. Mushroom Family
The deep garden is just beyond Alvina’s bridge. If the alcove underneath the stone tower holding up the bridge is explored, the characters will find a corpse wearing a set of stone armor. A family of 10 mushroom children and 2 mushroom parents guard a precious treasure chest. It is half-submerged in a pool of water in the center of the area. The mushroom children are not hostile, but their parents will fight to protect their children and the chest. The chest is unlocked and contains the Enchanted Ember. If it is given to Rickert of Vinheim, he can ascend Magic weapons to Enchanted status.
That last bridge to the north leads to a massive iron door that bars the way to Area 8, and the Grave of Artorias.

7A. Feline Gulch
Beyond the bridge in Area 6A is a sunken valley that leads up to Area 7. Three great felines wait to ambush the party if they move into the valley. At the very north of the valley is a large soul of a brave warrior.
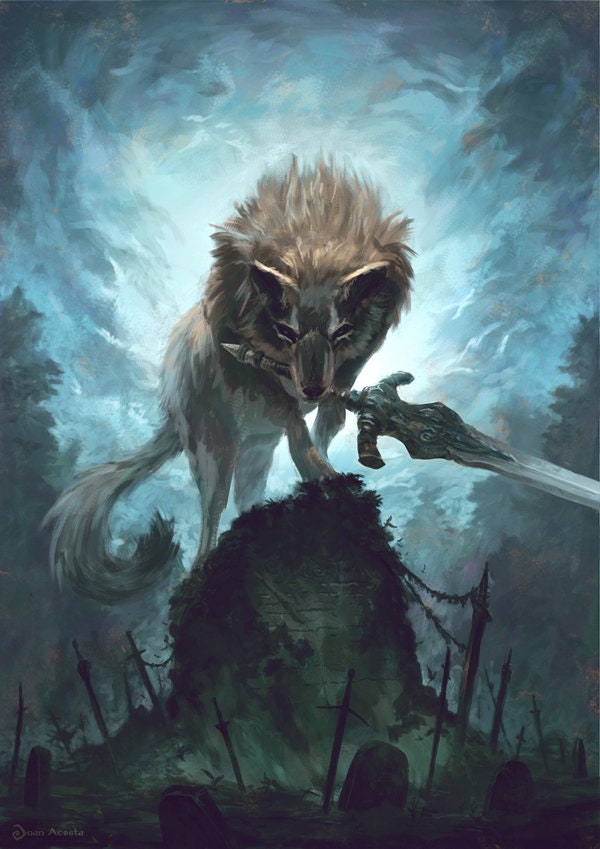
8. Grave of Artorias
A massive gravestone dominates this field of swords. Around the gravestone are dozens of weapons impaled into the ground. Some are long-rusted while others are gleaming and polished. A handful of small waterfalls empty into a ring of knee-deep water around the outside edge.
A character that moves within five feet of the central gravestone will awaken the Darkroot Gardens’s guardian, Sif, the Great Gray Wolf. Sif was once the companion of Knight Artorias the Abysswalker. After his death, Sif has sat vigil over his grave, safekeeping the ring Artorias used to traverse the abyss. The wolf wields Artorias’s Greatsword, swinging it in broad arcs with its mouth and leaping across the arena to engage ranged folks in melee combat. Sif will protect the grave until her death. Once slain, she will dissolve away leaving the Covenant of Artorias in her wake. Behind the gravestone is a long-dead corpse wearing a hornet ring.
Darkroot Basin
“My heartfelt thanks. I am pleased beyond words. Then, I shalt engrave my signature. If thou art in need, pray summon me from my signature. It seems that my time is done. May the great flames guide thee.”
Darkroot Basin is one of the most ancient areas beneath the walls of Anor Londo. It’s history stretches back centuries to the invasion of the Abyss in Oolacile. A vicious hydra guards a forgotten princess, and a friend to the gods has stalked his prison tower ever since he betrayed them.
1. Basin Cliffside
A branching path early in Darkroot Garden leads to Darkoot Basin. A narrow path juts out from the cliff face to the north, descending deeper into the basin.
2. Snaking Shelf
Further down the pathway is protrusion deeper into the cliff face. A titanite lizard sits at the edge of the protrusion. If the lizard notices a character move within 50 feet of it, it will immediately try to flee and teleport away. It leaves behind a twinkling titanite chunk as well as additional materials determined by the titanite lizard drop table. The path snakes its way down the cliff face. It branches at the very end of Area 2, with the southern path leading to Area 3. The northern branch ends in a drop-off to a small ledge. A corpse wearing a set of black studded leather armor, a longbow, and 20 arrows with white feather fletchings waits on the ledge.
3. Prowling Knight
The cliff face path branches once again before ending in Area 4. The southern branch leads further down into the basin. A black knight of gwyn guards the bonfire, patrolling with a halberd. At the very bottom of the pathway is a corpse still wielding a grass crest shield. Further up, ancient laborers bored a path through the cliff face leading to Area 6.
4. Golem Copse
Four crystal golems wander this copse. The terrain is hilly and open. A soul of a nameless soldier sits on top of a small boulder in the center. A creature that engages in a fight with the golems risks provoking the wrath of the darkroot hydra in Area 5. At the end of each round of combat, there is a cumulative 10% chance that the fight will alert the Hydra. The Hydra does not move from the lake, preferring instead to attack foes at range. At the edge of the water is a knight wearing a set of plate armor. Tinges of rust appear at the edges of the armor, but it is otherwise in good condition.
The watchtower basement key, guarded by the Moonlight Butterfly, unlocks the door to the tower to the southwest. The tower leads up to Area 13 of the Undead Burg, where a now hollowed Havel the Rock waits eternally.
5. Flooded Basin
This entire area is flooded, with a sharp drop-off that descends deep into the darkness below.
.png)
.png)
.png)
5A. Hydra's Domain
The darkroot hydra waits in a deep lake on the southern edge of this area. A shallow pool surrounds the lake, imposing difficult terrain. Using it’s Water Jet attack exhausts the creature quickly, so the Hydra prefers to attack with its jaws. The hydra is easier to attack if characters ready attacks for when the hydra uses its bite.
After the characters defeat the Hydra, it dissolves away. It leaves a single dragon scale in its wake, atop which is a ring of dusk. The scale floats across the water towards the nearest character.
5B. The Ancient Princess

On the far side of the lake is a solitary golden crystal golem tucked away. The golem will fight to defend itself. It dissolves away after its death, leaving behind Dusk of oolacile. Appendix A describes Dusk in more detail. Dusk is happy to assist the players in learning the magic of her land. She leaves a summon sign on the ground where the characters can summon her back from her time.
Once the characters place the Lordvessel at the Kiln of the First Flame, Dusk is taken by Manus back in time. This removes her summon sign until the characters rescue her. A swirling vortex of dark magic is left in her place. If a creature approaches while possessing the broken pendant, Manus's hand bursts forth and grabs them. He then takes them to the entrance of Oolacile Sanctuary. This incursion leaves behind a portal other characters can use to reach them.
If the characters rescue Dusk, her summon sign will reappear in Darkroot Basin. She expresses hazy memories of her imprisonment, along with a certain sympathy for her abductor.
6. Tunnel Bonfire
Halfway down this tunnel through the cliff, a solitary bonfire sits unlit. At the very end is a circular elevator platform that leads down into the Valley of Drakes.
7. Garden Shortcut
A set of tall ladders lead up from Darkroot Basin to Area 4 of Darkroot Garden. A small stone bridge over a rushing river that feeds the lake below separates the two. A soul of a brave warrior waits at the base of the second ladder.
Lower Undead Burg
“I regret meeting you under such compromising circumstances. At least we both made it back unscathed. Incidentally, would you care to learn any sorceries?”
The Lower Undead Burg sits between the Undead Burg and the Depths. It has long since falled to brigands and demons.
1. Lower Burg Landing
A small landing stands at the crossroads of three paths in and out of the lower burg. A staircase to the south leads up to Area 8 of the Undead Burg. A ladder to the West connects this area to the Hellkite Drake’s bridge, Area 16 of the Undead Burg. The key to the bridge door is in the Undead Parish. A staircase down to the east leads to the Lower Burg proper.
Three undead attack dogs patrol Area 2. They notice and attack any creature that does not succeed on a DC 13 Stealth check.
2. Corpse Pyre
Travelers into the courtyard below are immediately greeted by a large stack of corpses lit aflame. The area appears to be unoccupied after the characters slay the dogs. Unbeknownst to them, three undead assassins waiting in ambush in the houses to the east and west. A character that can detect them with a DC 17 Wisdom(Perception) check before they attack. The assassins surprise any creature that fails.
2A. The Trapped Sorcerer
Characters within 20 feet of this house will hear knocking and yelling from within. Trapped in the home is Griggs of Vinheim. Appendix A describes him in more detail. The Residence Key purchased from the Undead Merchant can unlock the door. Once freed, he will make his way to Firelink Shrine and teach sorcery to intelligent characters.
3. Mob Hunt
Seven torch hollows prowl this area. They attack any creature who seeks the treasure they guard. A character can claim a twin humanity sprite from a corpse on the southern edge once the dogs are dealt with.
4. Alleyway Ambush
A narrow street forces would-be intruders into an unavoidable ambush. Another three undead assassins wait in the residences flanking the walls. Two undead attack dogs waiting by the fog door to Area 5 join the fray after the assassins leap out. A staircase to the northeast leads down to Area 6. Two empty homes contain a large soul of a lost undead as well as a set of thief studded leather armor. The armor acts as a cloak of elvenkind.
5. Capra Demon's Hunting Grounds
The capra demon’s lair is a tiny but effective death-trap. Characters who enter the room are immediately assaulted by both the demon and its two undead attack dogs. The three act in unison where possible, knocking intruders prone and finishing them off with the demon’s machetes. The capra demon needs to squeeze to move up the staircase and archway, offering surviving characters a chance to even the playing field.
The demon guards the Key to the Depths, which unlocks the northern door in Area 6.


6. Depths Perimeter
A pair of undead assassins wait in a final ambush before yielding the way towards the Depths. At the far northern edge of the area is a single corpse in possession of a large soul of a lost undead.
6A. Aqueduct Column
A spiral staircase runs up the edge of this wide tower. A single broken hollow wielding a shortbow fires down on enemies from above. At the top of the tower, a small archway leads to the far side of the Undead Burg aqueduct. The door can be opened from this side and leads all the way back to Firelink Shrine. Against a grate in the archway nearby is the Female Undead Merchant, detailed in Appendix A.

The Depths
“Good bye then. Be safe, friend. Don't you dare go Hollow.”
The Depths are the sewer system for the entire Undead Burg. Fearsome creatures have adapted
1. Lower Burg Landing
A long, narrow staircase leads down into a wood landing above the Butcher Shop in Area 2.
1A. Dining Hall Attic
Three broken hollows wait at the base of the staircase leading upwards. Down the southern corridor is a crate containing a corpse with a soul of a nameless shoulder. Another staircase to the north leads down to a gang of hollows ready to swarm.
1B. Dining Room
Three broken hollows and three torch hollows patrol the dining area. A final staircase leads down into the Butcher’s Shop, Area 2A.
2. Butcher Shop
The bottom floor of the Depth’s Entrance is a charnel house where the Butcher Sisters do their grisly work.
2A. Grisly Kitchen
Two undead attack dogs prowl the kitchen, where a butcher sits behind a set of wood tables. Heaped upon the tables are slabs of unidentifiable meat. The butcher is hostile to anyone it notices descending the stairs. A chest next to the butcher’s table contains the large ember. Andre can reinforce mundane weapons to +2 if the characters give it to him.
A stack of crates on the north wall obscures a hole in the floor. Below is a walkway ten-feet above the Sewer King's lair, Area 6. At the far end of the walkway is a corpse wearing a spider shield.
2B. Drowned Pantry
This lower section of the kitchen has flooded over time. The water is difficult terrain. Two undead attack dogs and three broken hollows wading in the water attack characters who enter it. A section of the wall has collapsed. Characters can scale the fallen bricks upwards to the southern hallway. Two small archways offer passage to the east and west.
2C. Back of House
The butcher identical sister waits on a platform above this hallway. When creatures near the small passage to the north, the butcher drops to the ground and attacks them from behind. A second smaller hallway further ahead holds a corpse with a soul of a lost undead. The corpse is bait from the ochre jelly attached to the ceiling. It attacks any creature who attempts to take the soul off of the body.


2D. The Pyromancer Who Would Be Lunch
A creature who approaches Area 3 hears shouting from far inside this room. It is coming from a bound laurentius of the great swamp placed among dozens of barrels waiting for the butchers to make use of him. Appendix A describes Laurentius in more detail. He expresses his thanks for the party and heads off to Firelink Shrine if freed.
2E. Flooded Hallway
Another waterlogged hallway connects Area 2C and 2E. A single torch hollow blocks the way further.
3. Ooze Sewer
All natural light vanishes as the characters transition into the Depths. A long hallway stretches to a locked door at the far end, as well as a short staircase east next to it. A single torch hollow blocks the door, while seven ochre jellies attached to the ceiling wait to ambush unwary intruders.
3A. Filthy Bonfire
The sole bonfire of the Depths is tucked away in this small stone room behind Area 2E’s locked door. A corpse in the Sewer King's domain, Area 6, holds the key to it.
4. Filthy Sewer Tunnel
Down a short staircase, a pile of crates covers a ladder leading to the staircase down to Area 8. The characters cannot open the door at the base of a staircase downwards from the side. Another staircase above the ladder leads further down to a T intersection. To the right, five giant rats pick apart a corpse holding a greataxe. They pay no mind to creatures who do not interfere with their meal. To the left, a set of stairs leads to the northern section of Area 5. Another giant rat hides in a crate near the turn eastward, bursting out to ambush unwary travelers. Another backs itself off a short ledge down into Area 5.
5. Lair Overlook
The last giant rat in Area 4 backs into the small northern alcove of this area, where three more giant rats devour a corpse. An iron fence blocks the path into Area 6, where observers can note the presence of the sewer king. A narrow hallway to the south drains the water standing in the room downwards below Area 6 into Area 5A.
The hallway to the east bends southward out to a wooden platform overlooking Area 11. A channeler and three giant rats wait on the balcony ahead. The channeler seeks to kill the party and abduct female clerics in the same manner as the one in the Undead Parish. It bolsters the rats and sends them into melee. The channeler will attack at range if the characters challenge the Gaping Dragon. before killing it.
The balcony extends to the east. Two crates conceal another two giant rats guarding a large titanite shard at the very end. A passageway west leads to the twisting sewer of Area 5A.
5A. Sewer Drainways
These narrow hallways disguise large drains that explorers can vanish through. A DC 13 Perception check reveals the drains due to the constant rush of water through them. A creature can make a DC 10 Acrobatics check to cross over each drain if they notice them. On a failure, or if the creature didn’t notice the drains, they fall into Area 9. The hallway in the northwest corner has a waterlogged corpse carrying a soul of a nameless soldier. From the corpse, the characters can hear the scraping and clawing of the Sewer King in the next room.
6. Sewer King's Demesne
The Sewer King has amassed a hoard of corpses and a bit of treasure to boot from explorers into the Depths. The Sewer King is a massive rat, scarred from countless battles. Swords and spears stick out of its hide. A previous battle left the Sewer King with a battleaxe embedded in its right eye. Nonetheless, it will viciously fight any who cross it. The battleaxe will remain after the characters defeat it, as well as a humanity sprite. Two corpses in the room carry the sewer chamber key to the bonfire room, Area 3A, and a soul of a nameless soldier. The only exit from the room is a spillway to the south. A character who descends the spillway must succeed on a DC 12 Acrobatics check or take 2d6 bludgeoning damage dropping to Area 7 and lands prone. A creature who succeeds takes no damage and does not land prone.

7. Spillway
The spillway in Area 6 empties out in this T intersection. Four giant rats hide in crates to the west against the bend in the wall. They ambush characters with passive Wisdom(Perception) score of 17 or less. Once dispatched, a small staircase will lead the characters up to Area 8.
The southern branch contains a single basilisk that blocks the way to Area 9. Basilisks appear almost comical on the character’s first encounter with one. Its bulging red sacks above its face are false eyes, distracting from its petrifying breath.
8. Blighttown Gate
Two ochre jellies and two giant rats patrol this wide corridor. The characters can unlock the door up to Area 4 from this side. A set of heavy bars have been long side pried apart. At one point they sealed off Blighttown from the burg above. Domhnall of Zena sits cross-legged beyond in front of the heavy iron door to Blighttown. Appendix A describes Domnhall in more detail. The key to the iron door is currently deep within the Gaping Dragon's belly.
A hallway east leads out to the balcony, Area 10.
9. Sewer Backtunnels
A labyrinth of iron bars and cobblestone winds its way through the Depths. From this area, three of the four basilisks in Area 9A cautiously observe the party. They remain in 9A until the characters cross into it. The hallway connecting the two areas has a corpse with a soul of a nameless soldier.
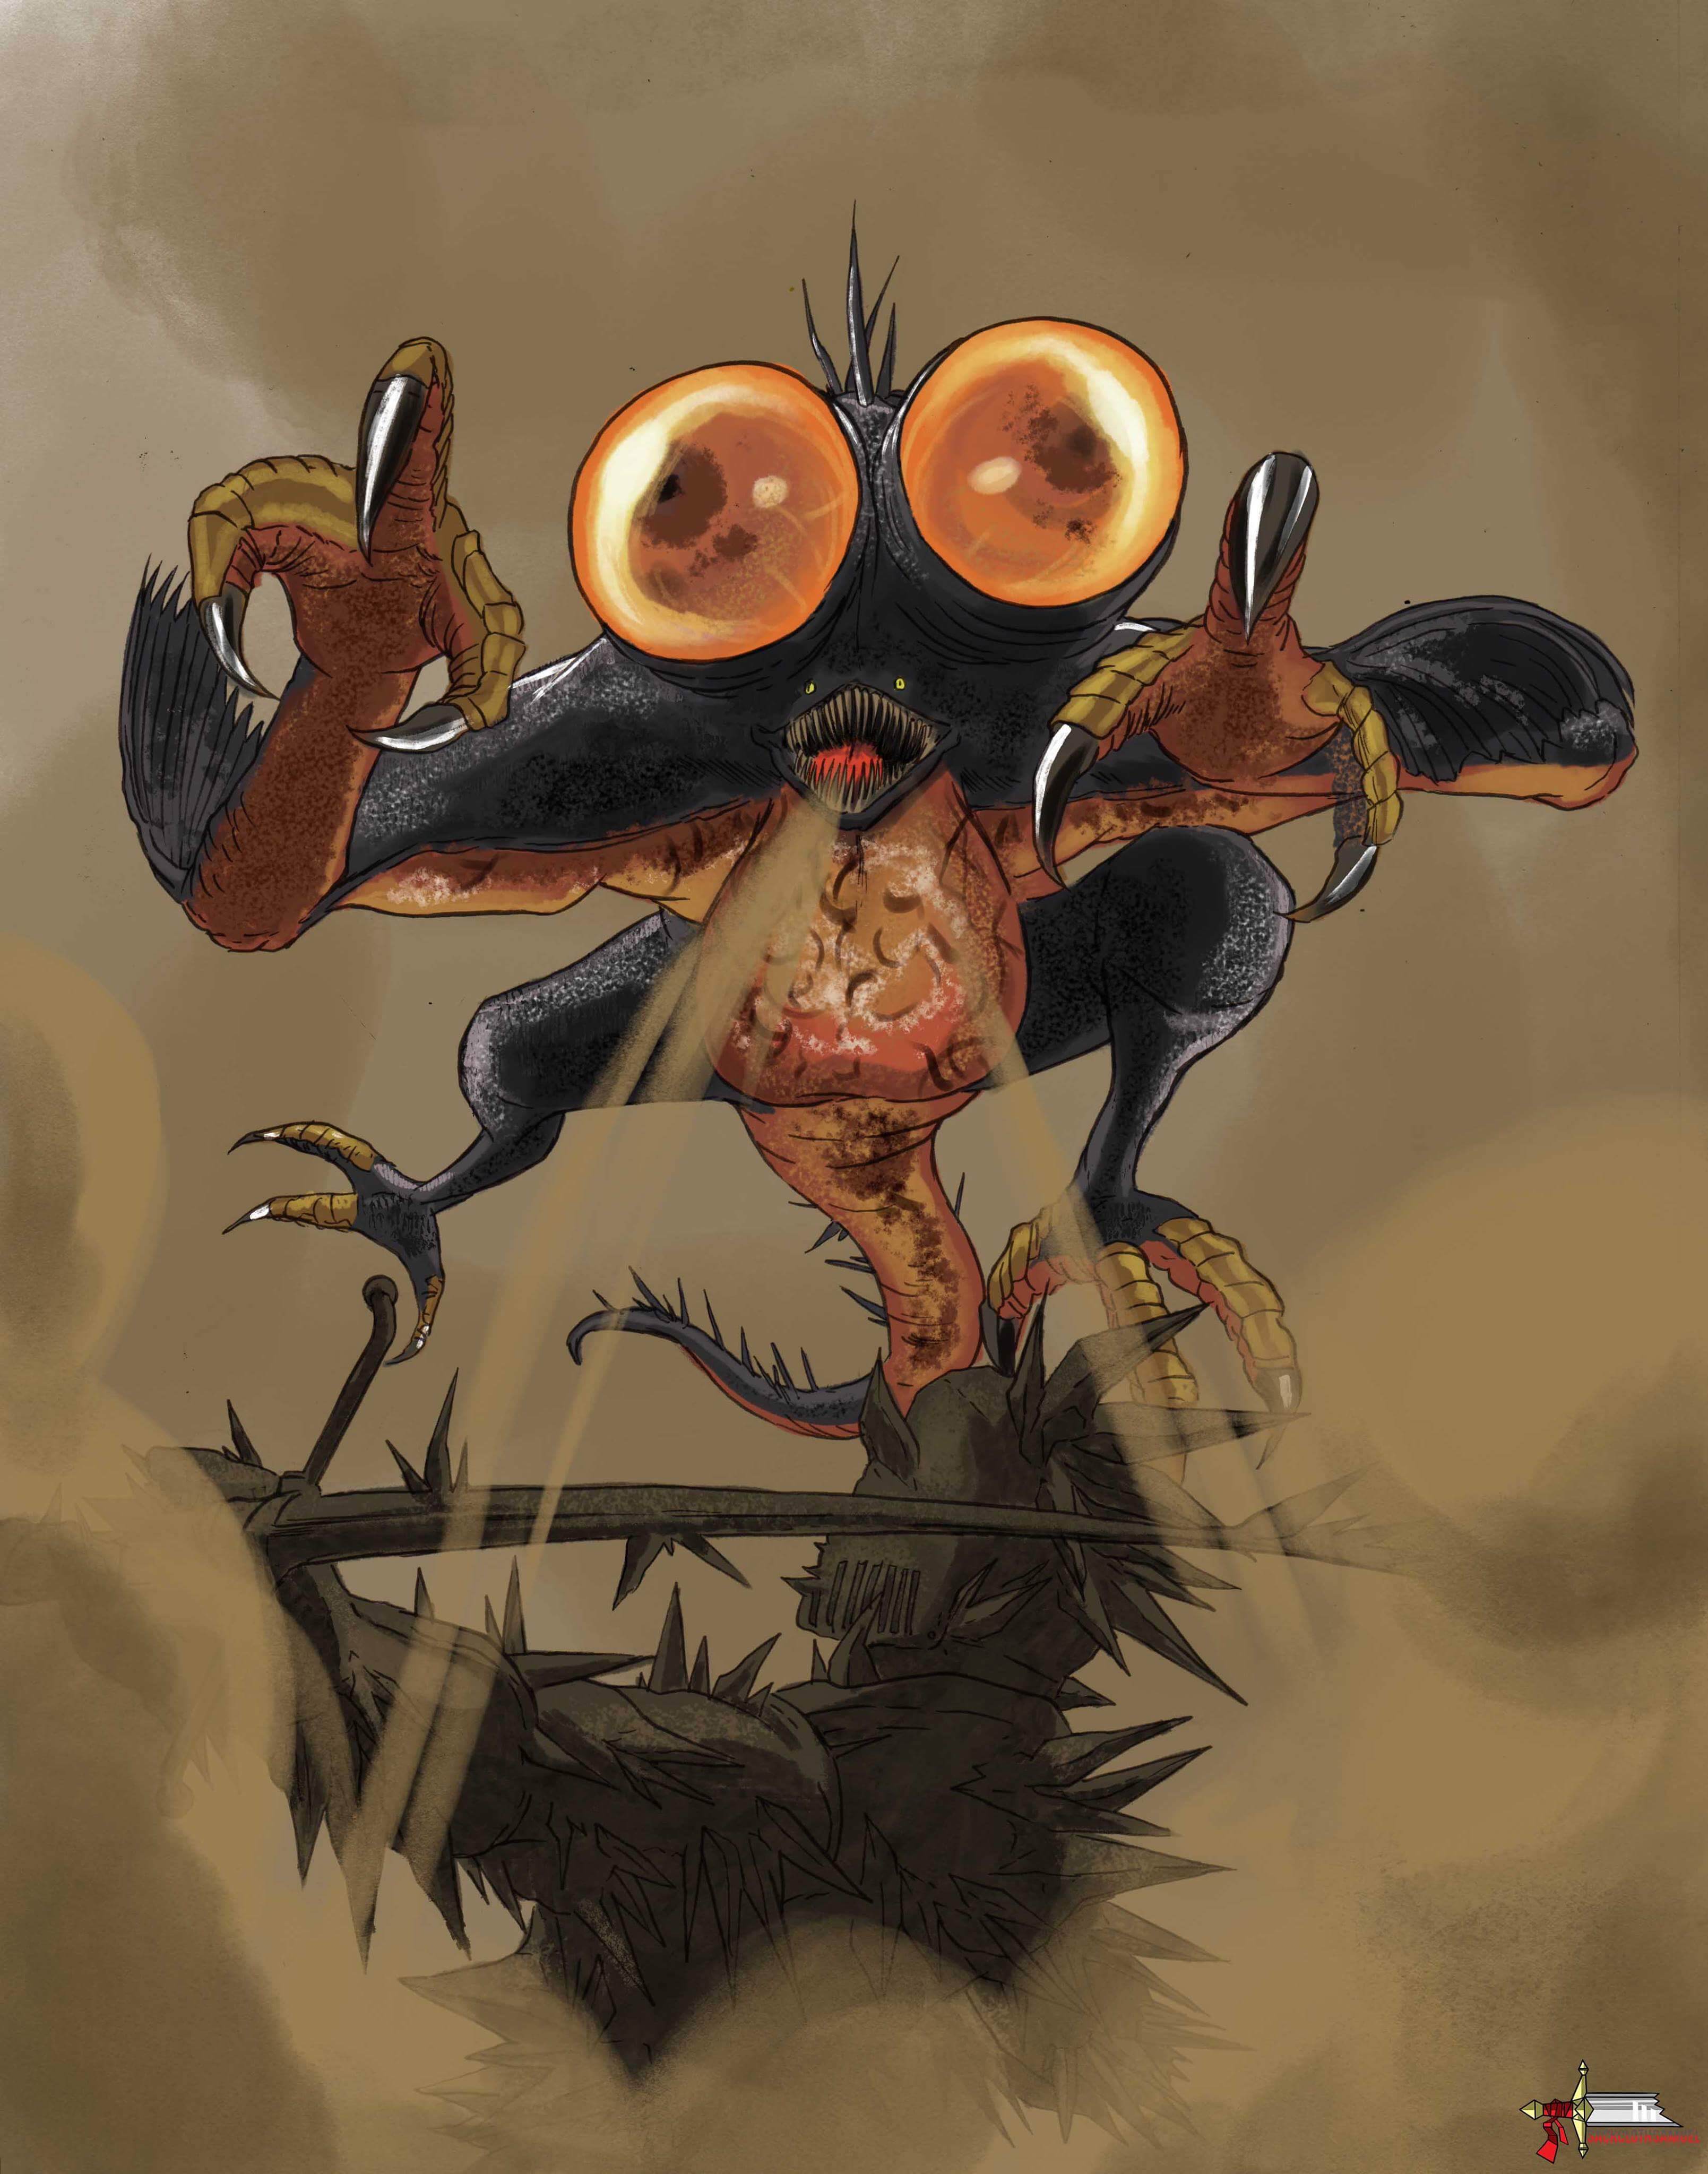
9A. Basilisk Ambush
When the characters move through the narrow hallway in Area 9, all four basilisks lurking in the room attack them. Basilisks are quadropedal, frog-like monsters with massive eyes that can exhale a petrifying breath. A character who moves down the stairs, or falls through the floor through the southern stairs ends up in Area 10. At the base of the southern stairs is a corpse carrying a large soul of a nameless soldier.
10. Fallen Down
Three basilisks wait at the bottom of the stairs to Area 9A. The small antechamber to the south contains another two basilisks. Characters who fall through the hole in the middle of 9A end up here. The tunnel to the south ends at an iron grate with a corpse carrying a ring of the evil eye and a humanity sprite.
11. Lair Balcony
The second floor balcony gives a wide view of the Gaping Dragon's lair. A set of stairs leads to the lowest balcony, where a corpse sits wielding a heavy crossbow with 20 bolts. Another set of stairs leads down to the fog wall to Area 12.
12. Gaping Dragon's Lair
Many adventurers have made their way to the Depths on their way to the second Bell of Awakening. Nearly all of them have found themselves in the belly of the Gaping Dragon. The dragon crawls up from the eastern spillway and reveals its enormous form once the characters cross through the fog door. Untold years of gluttony have warped this descendant of the everlasting dragons, mutating its jaws to extend all the way down its torso. It stands over 30 feet tall and desires only to consume anything that enters its domain.
If the characters have not killed the channeler in Area 5, it will use ranged magic to attack the characters from above.
Once the dragon has been slain, it leaves a twin humanity sprite, a homeward bone, and the Blighttown Key in its wake. Its lair also contains a corpse wearing a set of relatively unharmed studded leather armor.

Blighttown
“Hmm... A mere Undead, yet you can see me? Fascinating...”
Blighttown is a terrible, terrible place.
1. Depths Gates
The door to the Depths opens out to a wide shaft bored through the rock deep into Quelaag’s Domain. A small path encircles the shaft, with a ladder that leads down to a rickety wooden platform across it. The last ladder drops down to a wooden bridge to a large opening to the tunnel in Area 2.
2. Spillway Bridge
Wooden posts, beams, and the occasional piece of naval wreckage are all relics of the inhabitants of this bleak swamp. Their efforts to make a life above the desolate poisonous landscape have rotted away over the years. The first settlers used all manner of reclaimed building materials to craft platforms embedded into the cavern walls.
The entrance to Blighttown is heavily guarded. Three infested barbarians, three infested ghouls, and a blowdart sniper assault anyone who moves across the gap from Area 1. The sniper, like the rest in Blighttown, does not respawn once slain.
A small ladder to the east leads to a platform below, Area 3.
Two narrow bridges connect Areas 2 and 4. Creatures that attempt to cross either provoke the ghouls in Area 4. The bridge to the north is in worse condition than its southern neighbor. Any creature who attempts to walk across it must succeed on a DC 11 Acrobatics check or fall from the platform hundreds of feet to their deaths. Creatures can cross the southern bridge without a check.
A creature looking out from the southern end of Area 2 can see a corpse carrying a gleaming curved blade. Area 2A. A creature must succeed on a DC 18 Athletics check to jump to the roof. On a failure, the creature drops 90 feet down to the western end of Area 7.
2A. Fallen Warrior
A corpse on this roof is only accessible from Area 2. The blade it is carrying is the Iato, a +1 katana. From the roof, a creature can drop down 10 feet to Area 6, or take a more significant plunge 60 feet down to Area 7.
3. Ghoul Cabal
A long platform hugs the eastern cave wall. Three infested ghouls guard a corpse holding a soul of a proud knight.


4. Ruined Homestead
Only a handful of remaining walls is the only evidence that this ruin was once a house. Four infested ghouls, perhaps the original inhabitants, attack anyone approaching them. A staircase connects the top floor to the 10 ft. below it. A corpse in the room underneath clutches a large soul of a nameless soldier. Another ladder leads further down towards a wooden bridge. A character descending the ladder provokes two more infested ghouls on the other end. A final ladder beyond the ghouls drops down to Area 6. Thorough exploration to the south reveals a short gap over to Area 5. Medium creatures can jump over the gap with no check necessary.
A dirt path behind the building hugs the cliffside, terminating at a sheer drop 20 feet down to the highest platform in Area 5.
5. Slipshod Suburb
Balconies and platforms have been haphazardly stacked on top of each other, connected by decaying ladders. Traversing the area requires travelers to leap from platform to platform. The lowest platform has only a short drop down to Area 6.
The highest platform holds a corpse wearing shadow leather armor. A series of ladders descend deeper down along the cliffside towards the swamp. A soul of a proud knight is easily accessible by anyone traveling between either end of the area. Another dangles off the edge of a crumbling floor. A character can retrieve it with a DC 14 Acrobatics check, with a would-be thief falling to their doom into the swamps below on a failure.
6. Support Columns
Two rows of massive pillars support the roof of Quelaag’s Domain. One could mistake the cavern as a natural formation otherwise. Ancient settlers built wooden platforms long ago to bridge the pillars. The eastern bridge has a bonfire in the center, with a ladder on the far end to Area 7. The far western end connects to Area 8.
7. Prowling Ambush
Two infested ghouls and a flaming attack dog wait at the bottom of the ladder. They wait in silence before ambushing anyone who reaches the bottom. They prefer to attack individuals while others are climbing down. Nearby the ladder is a corpse clutching a blooming purple moss clump. A long, crumbling bridge connects the western area. A character must make a successful DC 14 Acrobatics check to cross it without plummeting to their deaths into the swamp below.
Two more flaming attack dogs wait in the western area, guarding a corpse clutching a humanity sprite.
8. Hunters on the Bridge
The far eastern end of this walkway is built onto the same pillar as the western end of Area 7. Characters moving from Area 7 will provoke an infested ghoul and two flaming attack dogs. The only route deeper into Blighttown is west towards Area 9, connected by a ladder.
9. Vertical Crossroads
Three ladders connect this crossroads to others. The southern ladder climbs up to Area 8, while the northern one drops down to Area 11. A shorter ladder to the east leads to Area 10, where a soul of a proud knight waits next to it.
10. Sniper Nest
A hidden blowdart sniper halfway along this platform shoots at creatures moving down the ladder. An infested ghoul rushes forward to protect the sniper if it is threatened. Another one waits in ambush further down. An eagle shield waits on a corpse sitting on the far south end. A creature who falls off this thin walkway plummets 140 feet down into the swamp below.
A ramp to the east leads down to an opening in the cliff face that leads to another shaft stretching up and down out of sight. An infested barbarian and an infested ghoul wait in the tunnel to attack trespassers. A small ladder a bit into the shaft descends to another exit to Blighttown-proper. A corpse next to a second ladder further up holds a large soul of a nameless soldier. The ladder descends to Area 13.
A spillway stretches across the chasm, but it can only be accessed by a ladder up higher in Area 12. It leads out to a gap in the wall where the parasitic wall hugger is perched. Its tentacles cannot reach underneath itself, and slaying it is trivial from this side. It leaves behind a scroll of power within as it fades away.
12. Sniper Nest
The blowdart sniper at the top of the ladder pelts darts at anyone climbing up. A wooden bridge connects to another gap higher up the shaft. The shaft has a stone walkway along the inside. Two infested ghouls guard the ladder down to the Area 11 spillway.
13. Swamp Walkways
A mass of mutated insects prowls this area far beneath Area 12. A cragspider waits at the highest platform 30 feet above the marsh. Two giant mosquitos descend when the cragspider attacks. A set of ladders descend deeper and deeper down to Area 14. A penultimate challenge blocks the way to a place of rest.
14. Insect Swarm
Four more cragspider and three giant mosquitos block the southern path into the swamp. Two more cragspiders join the fray if any character enters the swamp. A corpse on the far eastern platform wears a wanderer’s cloak. The entrance to the swamp holds another corpse carrying a large soul of a proud knight.
15. Blighttown Swamp
The swamps of Blighttown have been fouled and corrupted for as long as nearly anyone can memory. Poison infests the bog, and those that were unable to build above have either been killed or subsumed by it over the years. When a creature starts its turn in the water, it must succeed on a DC 10 Constitution saving throw or become poisoned. Each consecutive turn in the muck raises the DC by 1. While poisoned this way, the creature takes 1d6 poison damage at the end of their turns. A poisoned creature can make another saving throw at the start of their turn, ending the condition on a success. The swamp is difficult terrain for creatures walking through it.
The swamp connects Areas 14 and 20, as well as Quelaag’s Domain and the Great Hollow on opposite sides.
The Great Hollow dominates the far eastern side of the chasm. Fifteen giant leeches swarm around it, attacking creatures looking to move up the roots to Area 18.
Creatures moving from Area 14 to Area 15 provoke the third butcher sister, Maneater Mildred, to invade their world. Mildred seeks to slaughter undead who would seek the bonfire nearby. She whichever creature is closest to reaching it. Mildred, like all invaders, does not respawn once slain, and leaves behind her butcher’s knife.
15A. The Witch's Daughter
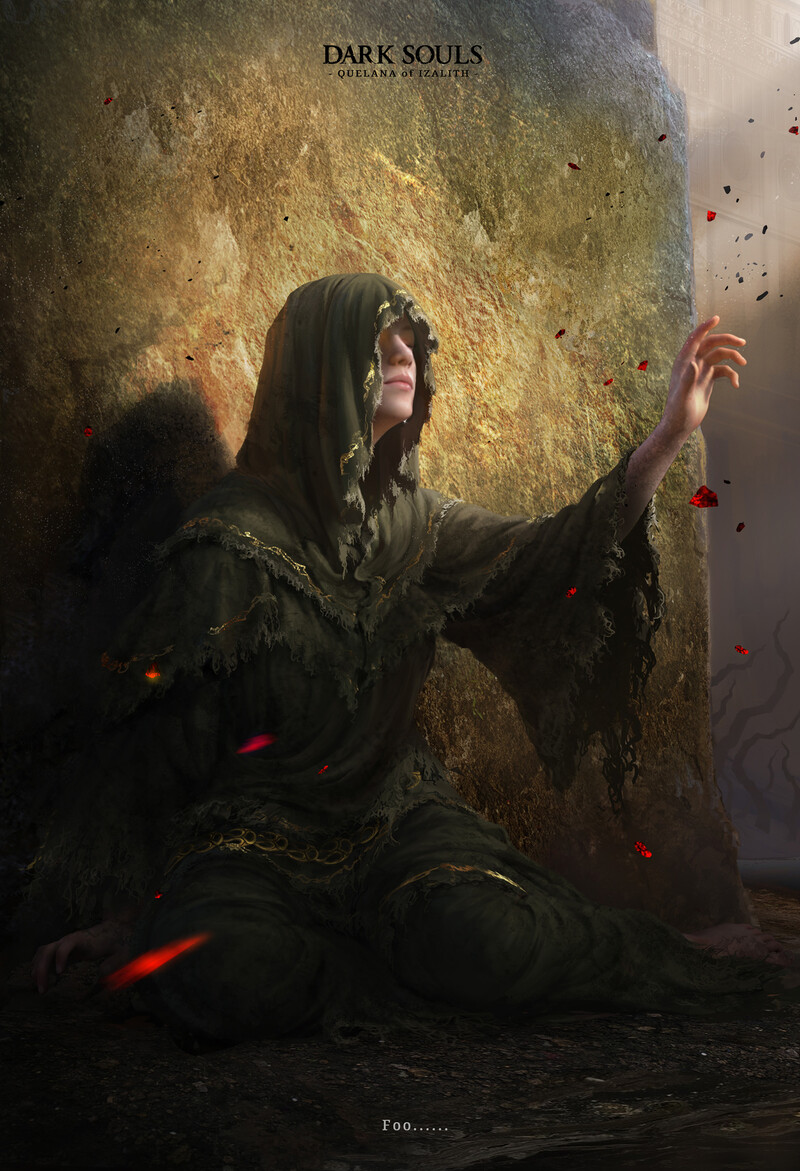
A large green titanite shard sticks out of the swamp near the northern end of this pillar. An invisible Quelana of Izalith waits on a mound of search above the muck just yards away from it. Quelana is only visible to creatures with Sorcerer class levels. Appendix A describes Quelana in more detail. The creatures of Blighttown cannot perceive her either.
16. Empty Alcove
The corrupted swamp has eroded alcoves into the southern wall.
16A. A Wake in Filth
Two infested barbarians stare down at a corpse of another, defending it to the death. The corpse carries a greatclub.
16B. The Knight and the Leech
A giant leech feasts on a corpse carrying a large soul of a proud knight. The corpse's tattered clothing marks them as a pyromancer from the Great Swamp.

16C. Viscera Pile
A mound of bodies has been piled up over decades. Four giant leeches gorge themselves on the bodies. Searching the pile yields only gore and viscera.
17. Spillway Bonfire
A bonfire sits at the mouth of a sewer exit. The architecture is reminiscent of those in the depths. A search north reveals a long-clogged exit to that pipe leading far up to the sewers under the Undead Burg. A ladder leads down into a cistern, where a chest holds a dragon scale.
18. Base of the Great Hollow
15 giant leeches surround the trunk of the Great Hollow. Once dispatched they yield a considerable pile of treasure: a large titanite shard, green titanite shard, and the Server. The Server is a greatsword variant of the Butcher’s Knife.
The Great Hollow rises out of the swamps of Blighttown. A large root leads up to a large hole in the bark that allows access inside. The interior space is a small alcove with a chest against the far wall containing a -1 shield made of old planks.
The wall behind the chest is actually illusory, and it can be detected with a DC 13 Perception check. If a character interacts with the wall, it fades away revealing another small alcove with a corpse clutching a humanity sprite. The next wall behind it is another illusory as well. Passing through it brings the characters into the Great Hollow-proper, a mess of branches and vines that winds its way down hundreds of feet to Ash Lake below.
Siegmeyer of Catarina will be waiting at the base of the tree if the characters spoke to him in Firelink Shrine after obtaining the Lordvessel. He will ask the players for five purple moss clumps to aid in his journey to Lost Izalith, giving them a pierce shield in return.
19. Barbarian's Hill
A steep hill is the last terrain obstacle blocking the way to Quelaag’s Domain. Dozens of thick, root-like stalks have burst from the mound. The entrance to Area 25 is covered in thick spider webbing.
Three infested barbarians wait at the base of the hill, holding massive boulders. The barbarians hurl boulders at anyone within range. They move in close to crush them in melee if required to protect the entrance. The barbarians will not pursue intruders beyond the entrance into the cave.

20. Waterwheel Elevator
A series of platforms rise out of the swamp towards the massive waterwheel rising far up the cliffside. The thick fins of the wheel jut out the side of it. Creatures can leap onto them with careful timing to use as an elevator all the to the top or bottom. Ascending the elevator will deposit the party next to a ladder to Area 21. Descending it will bring them down to the swamp.
If one of the players is in the Forest Hunter Covenant, Shiva of the East will be sitting at the base of the wheel. He sells wares to the hunter in exchange for souls.
21. Waterwheel Landing
A ladder descends from Area 22, and another nearby down to Area 20. A cragspider waits in ambush for anyone that moves about the area. A tight walkway hugging the cliff face leads to a corpse wearing a red robe and a Mask of the Sealer. The corpse is also wielding a scroll of remedy.
22. Spillway Gutter
A series of small platforms and tall ladders ascend ever further up the cliff face to Area 23, and down as well.
A stone spillway is accessible via a wooden walkway to the east. The area is crawling with five blowdart snipers. They focus on keeping as many creatures poisoned as possible. Seven flaming attack dogs prowl the lower area, attacking anyone that descends from above. The first hallway to the left has a corpse with a soul of a proud knight. Thirty feet below is a chest with a fire keeper soul that the denizens of the spillway protect at all costs.
23. Sealer's End
The ladders and platforms zig zag up the cliff until they reach a tunnel through the cliffside north to Area 24. A corpse at the top platform carries a key that can be used to unlock the door to the New Londo Ruins near the tunnel's exit. Three giant mosquitos attack creatures moving about the area.
24. Darkened Passage
A wide tunnel connects the Valley of Drakes to Blighttown. Three infested barbarians serve as a bloodthirsty introduction to travelers from the valley. They are also a final challenge to those that would seek to escape Blighttown.
25. Cobweb Tunnel
The spiderwebs caking the entire tunnel leading into Quelaag’s Domain have long hardened over the years. Two egg carriers lay prone and supplicate themselves in front of the fog door leading to Area 26. They do not attack unless threatened.
26. Quelaag's Domain
Since the birth of demons in the Age of Lords, chaos witch quelaag has guarded both the Bell of Awakening as well as her sister below. She takes the humanity of those that she slays and offers what remains to her sister, emboldening her fragile Fire Keeper Soul. Quelaag is ancient and wise, using her lava breath and fire immunity to take advantage of her terrain. She fights to the death to keep her sister safe.
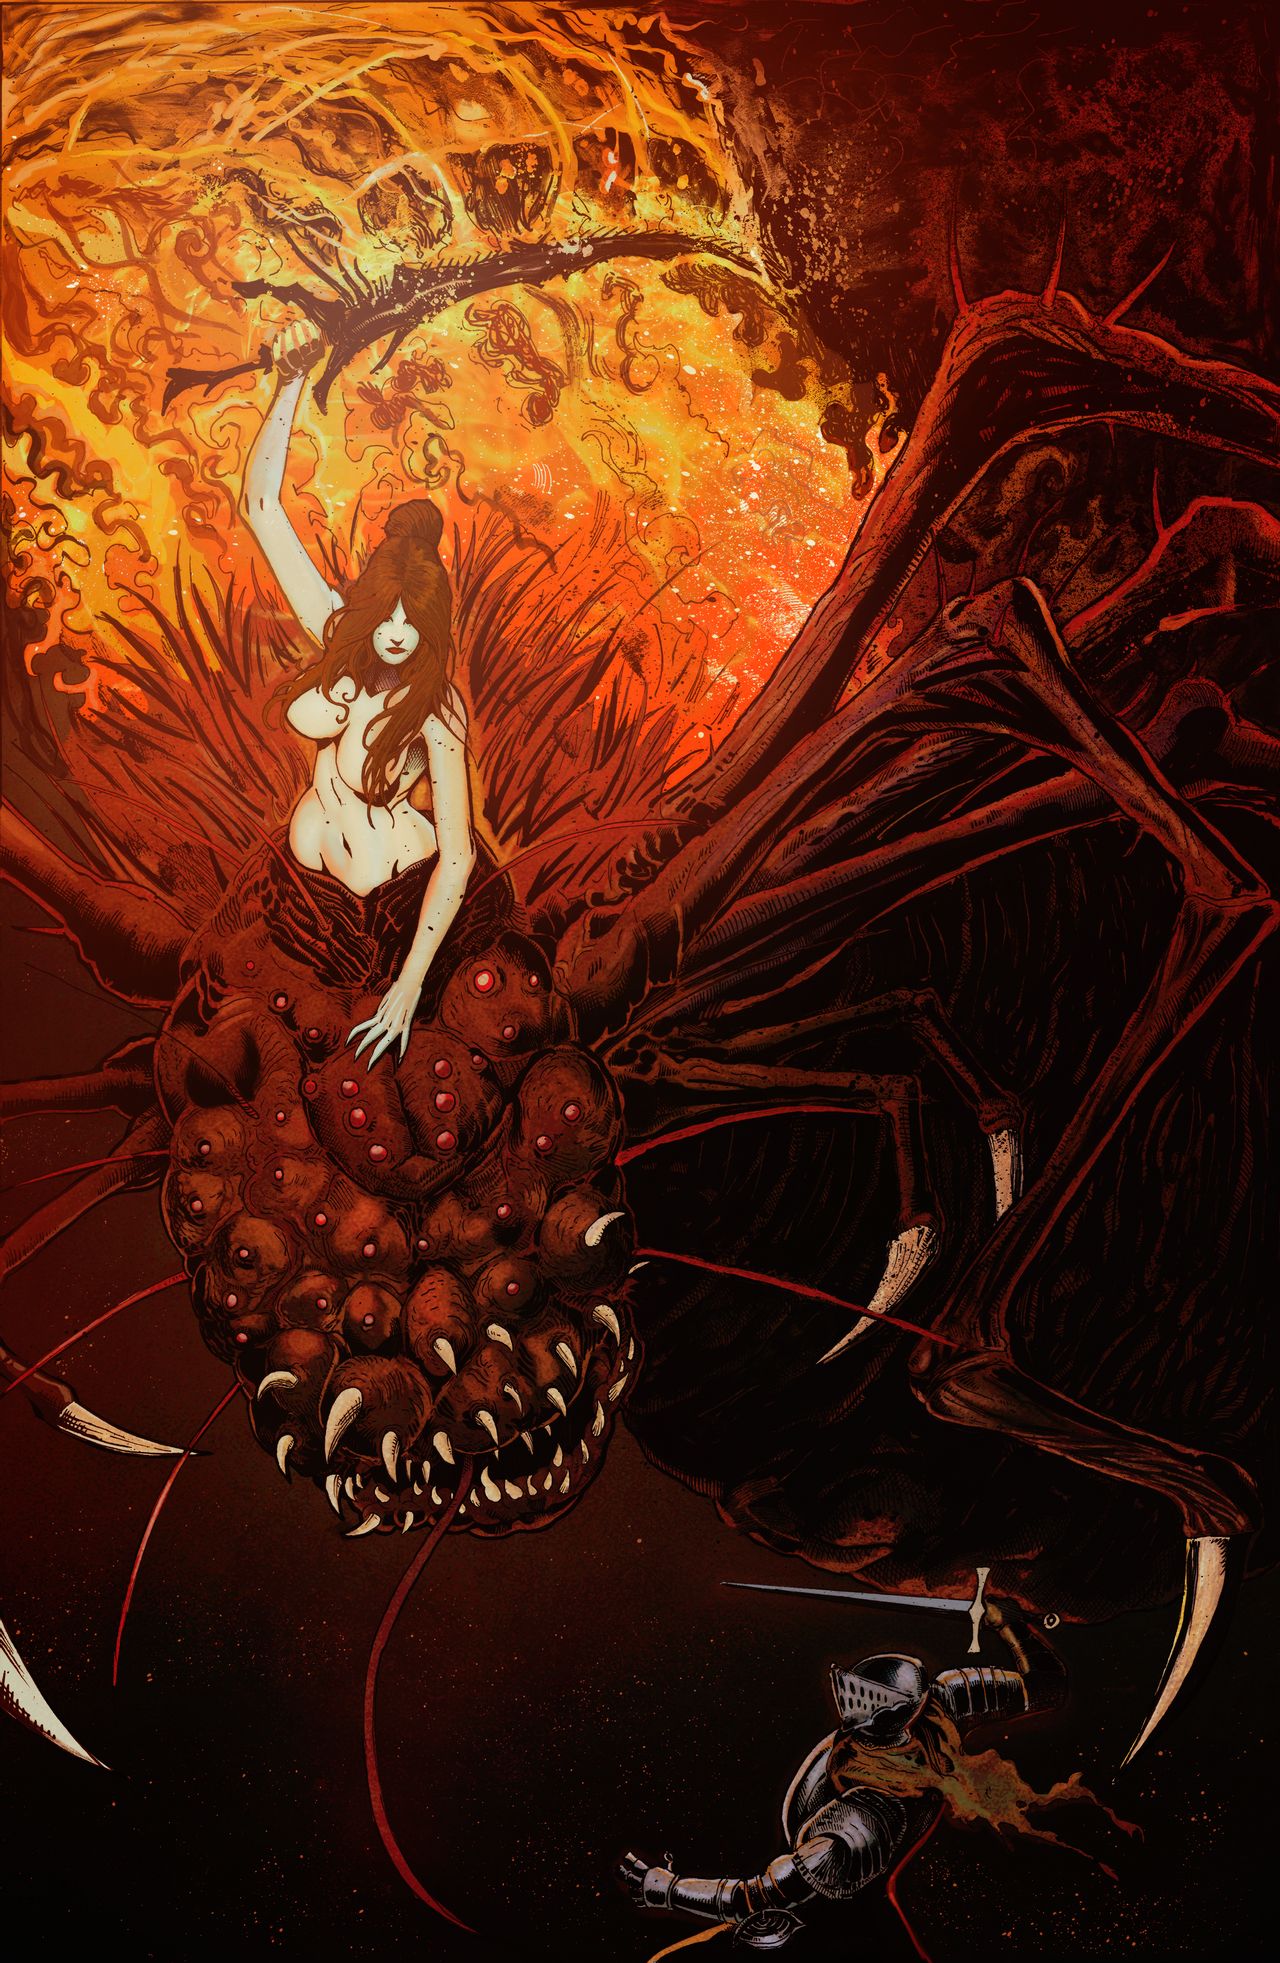
She drops her soul as well as a twin humanity sprite after the characters slay her. A set of stairs lead up to Area 27.
27. Bell of Awakening
Beyond Quelaag’s lair, the second Bell of Awakening can be wrung with the massive lever on the far end of the chamber. The entire chamber rumbles if the characters have rung both bells. The ancient gates of Sens Fortress are raised for the first time in centuries. A stone staircase rings the outside of this stone temple, leading down to Area 28.
28. Lower Temple
The basement of the temple has seen the ravages of time. A tunnel has been bored through the eastern wall leading out to the Demon Ruins. A DC 15 Perception check reveals the presence of an illusory north wall leading to Area 29.
29. Fair Lady's Bonfire
The sister Quelaag was protecting faces the bonfire she has tended since her curse took hold. Eingyi crawls along the floor in a feeble attempt to defend his lady. Appendix A describes both. If the characters passify Eingyi, he allows access to his “Fair Lady” and her bonfire. The Daughter of Chaos is a Fire Keeper. The Bonfire restores an additional estus charge beyond the flask’s maximum whenever the party rests there.

Valley of Drakes
“I do not know whether you are brave, or just foolish, but you do seem to find your share of trouble.” The Valley of Drakes is a long, narrow chasm that hugs the exterior walls of the ruins of New Londo. Most of the valley is simply a sheer drop into the blackness below. A narrow shelf juts out from the mountainside, wide enough for a medium creature to walk along without squeezing. A creature who falls into the chasm perishes. One end of the valley terminates at the entrance to a wide tunnel, connecting to Blighttown. A key found at the end of the tunnel can open the locked door to the small nearby tower.
1. Sleeping Death
A creature walking along the shelf will find an undead dragon clutching the shelf. The dragon is unmoving, and an observer couldn’t be sure it was in fact undead until it awakens. A small hoard of treasure has amassed around the dragon, trophies from careless adventurers. Any creature who approaches the dragon must succeed on a DC 17 Stealth check to avoid provoking. A successful check offers the chance to take a single piece of treasure safely.
Three items of interest are found in front of the dragon: a dragon crest shield, an astora straight sword, and a soul of a proud knight. If the players do not attempt to grab the items, the dragon may be left undisturbed if they hug the western wall.
A two-hundred-foot section of shelf lies between Areas 1 and 2.

2. Drake-swarmed Crossroads
The far western end of the shelf terminates at a crossroads. A large tower rises from the south. The bridge across the valley ends at a massive set of iron doors that contain the floodwaters of New Londo. Creatures walking from Area 1 will encounter two blue drakes on the shelf. The second will refrain from attacking unless a creature moves beyond the shelf into the wider area. Next to the first blue drake’s position on the cliff is a corpse carrying a humanity sprite.
The southern path leads to the top of a large tower, the base of which descends deep into the earth. The center of the room is a sheer drop down hundreds of feet into darkness, a fatal fall. The lever to the side that would call the elevator platform is only accessible if the elevator was already used on the other end in Darkroot Basin.

3. New Londo Gates
Once the seal breaks and the gates open, the flood waters drain into the valley. The ruins are then accessible from this entrance. Four blue drakes guard the door. One stands over the body halfway across the bridge wielding a spider shield.
A small tower sits at the side of the bridge, with a wooden door in front of the interior spiral staircase.

Northern Undead Asylum Revisit
"You again? There's nothing to speak about, really. Oh, actually… Something strange did happen. That crow flew off with somebody in its clutches. I think it was a man curled up in a ball. Stranger things have happened, right? No, maybe not…"
1. Deepest Cell
The cell that the characters once occupied is still empty, with the exception of a misshapen, peculiar doll against the south wall. A creature carrying this doll can enter the Painted World of Ariamis against Anor Londo Cathedral's wall.
2. Cell Block Hallway
All of the hollows that once prowled this hallway are now slain on the ground. Their killer, a longsword-wielding black knight of gwyn guards the door to Area 1.
2A. Well
The water in the previous rooms flows through a small tunnel that leads to the bottom of a well. A small ladder attached to the side of the well leads up to Area 3.
3. Asylum Courtyard
A small archway sits at the top of the well which leads into a wide courtyard. The courtyard is filled with dead grass, shattered bricks, and a faint dusting of snow.
Sitting in the middle of the grass is a bonfire. The doors to Area 4 have long been swung open since the characters initially conquered the Asylum.
4. Great Hall
The oak doors give way to a destroyed great hall. Most of the heavy stone columns that held up the now-collapsed ceiling lie in chunks on the floor.
Since the characters last traveled through the Asylum, the floor has weakened substantially. If a medium-sized creature walks through the center of the room, it collapses from underneath them, dropping them 30 feet down to Area 10.
5. Archer's Corridor
A bonfire sits at the bottom of a short staircase leading from the portcullis. The bonfire is in a cramped, flooded room with an archway that leads up a steady incline up to Area 6. At the far end of the hallway, a pair of shortbow-wielding broken hollows wait at the far end of the hallway and begin shooting at anyone who enters the corridor. Once dispatched, a staircase leads up to Area 6.
6. 2nd Floor Balcony
This area sits over Area 3. A set of iron bars are set into the small stone railing blocking someone from jumping into the courtyard below, except for a ten foot gap in the iron bars in the center.
To the east is a collapsed staircase. The only usable portion is 14 feet from the ground. The remaining portion of the staircase leads to a corpse wearing a rusted iron ring. A locked door leads to Area 8.
To the west is a staircase down to the locked door on Area 3, as well as a staircase up to Area 7. Any character that moves more than halfway up the staircase triggers a 5-foot wide rolling ball to be pushed down the staircase by a broken sword-wielding broken hollow near the door. The ball rolls down the staircase and crashed through the wall at the bottom. Any creature in the boulders path must succeed on a DC 12 Dexterity saving throw or take 3d6 bludgeoning damage.
Soon after passing along the Undead Prophecy and giving the players their precious Estus Flask, Oscar of Astora finally abandoned his quest and went hollow inside the Asylum. Today, his husk still walks this corridor and viciously attacks any who come up either staircase. Oscar leaves behind his crest shield when he is killed, and does not respawn after a long rest.
7. Asylum Battlements
The battlements of the Asylum, Area 7 shows the most natural wear of any area. Straight ahead, the battlements overlook the cliffside that leads to the Raven’s Nest in Area 10. Beyond the battlements is Area 8, while a large Fog Door stands in the archway behind the balcony above Area 4. Four hollows patrol the archway, two wielding broken swords and two wielding shortbows.
A series of sharpened iron spikes have been driven into the railing. Any creature that climbs over them takes 2d6 slashing damage and falls 30 feet to the ground in front of the large door in Area 4.
8. Battlements Antechamber
The small, rectangular side room holds a locked door that leads to Area 6 and two hollow soldiers. The key to this door waits in Firelink Shrine, and unlocking it leads to the broken staircase down to Area 6 and a corpse wearing a rusted iron ring.
9. Cliffside
This small clifface leads to a large cliff, at the edge of which Velka’s Messenger will drop the characters down onto after being taken there from Firelink Shrine. A character can signal the crow again from the cliff to take them back to Firelink.
Four torch hollows now walk along the path down to Area 7, and rush towards anyone deposited on the cliff.
To the right of the path is a small nest, containing an invisible raven named Snuggly. Snuggly makes shrill requests: “ Give me, warm. Give me, soft”. When certain items are dropped in the nest, the next time the characters go to the nest after a long rest, other items will be left behind, gifts from Snuggly. Only one item may be placed in Snuggly’s nest at a time, and she will tell the characters immediately if she dislikes an offering.
10. Stray Demon's Cistern
This cistern beneath Area 4 is only accessible after the ceiling above, the floor of Area 4, has collapsed. The stray demon prowls the cistern, a more powerful magic-wielding sibling the Asylum Demon. The stray demon immediately attacks any characters that drop into its lair.
When defeated, the stray demon’s corpse rots away to reveal a titanite slab and a number of humanity sprites equal to the number of PCs.
A ladder on the northern wall leads to a small walkway. At the end of the walkway is a small trap door that leads to a secret exit to Area 2.

Sen’s Fortress
“Oh-hoh! Ahh, where did you come from? Splendid news, I tell you. First, I hear a great roar. And, voila! The path is open. Just goes to show. Good things come to those who wait! Hah hah hah hah!”
The last barrier to entrance into Anor Londo is an imposing grey castle filled with vicious enemies, deadly traps, and complex overlapping corridors and elevators. To merely survive traversing the labyrinthine passages of the fortress is a test of every skill adventurer’s will have learned through their travels thus far. An imposing artificial guardian has been tasked with preventing passage to the fabled city above, a task it has succeeded in since it was built ages ago.
1. Bell-Barred Gate
A long, narrow bridge connects the gates of Sen’s Fortress to Andre’s tower in the Undead Parish. Before both Bells of Awakening are rung, the gates are shut tight, and there is no way into the fortress without passing through them.
Siegmeyer of Catarina (described in Appendix A), will be sleeping on a ledge outside the gate before the bells are rung, moving inside the fortress (Area 7A) afterwards. Siegemeyer is an affable, if cowardly and lazy, knight who will rely on the players when possible to dispatch threats in his way.
Once the bells are rung, a giant deep within the fortress raises it with a set of massive chains, allowing access into Area 2 and the fortress at large.
2. A Painful Introduction
The first step into the fortress proper is a pressure plate trap that fires a series of large dart-like projectiles from the back of the room down that hall towards the plate. Any creature in the way of the darts must make a DC 15 Dexterity saving throw or take 6d10 piercing damage. Only a single creature will be hit by the darts, whichever creature is closest to the back of the room and fails the saving throw. A DC 13 Perception check reveals the location of the pressure plate before it is triggered.
Two man-serpent soldiers stand at the far back of the room, just out of sight of creatures standing at the southern entrance. They move out from the shadows and attack when a creature triggers the pressure plate or moves beyond it into the room. A soul of a brave warrior is clutched by a corpse in the back of the room.
An archway to the north is the only exit to this room, leading to Area 3.
3. Scythe-Filled Walkway
A long, narrow walkway stretches over this massive room. A creature that drops off of the walkway plummets 30 feet down to Area 31.
A series of swinging scythes hang over this walkway and the one above, marked in blue. At the end of each turn, a creature standing in the space of a scythe is hit by it, taking 3d12 slashing damage and being thrown down into Area 31.
A man-serpent soldier waits at the end of the walkway, engaging the players in a single file line, making it difficult to fight in melee. Once the soldier is engaged in combat, the mage on the walkway above (Area 3A) attacks at range.
After the cage high above in Area 26 is unlocked and ridden down, it will deposit a player at the northern end of the walkway and can be used as an elevator up to the roof of the fortress.

Once the characters pass the soldier, a small corridor will lead them up to Area 3A. The corridor is filled with decaying silver knight armor sets leaning up against the wall and collapsed on the floor.
3A. More Scythes, Even Higher
A dense series of swinging scythes bars the way to Area 4, further blocked by a man-serpent mage in the eastern passageway.
4. Trapped Antechamber
Another pressure plate sits at the entrance to this small room, with the same effect as the trap in Area 2. The darts fire from the eastern wall towards the pressure plate. A passageway on the eastern wall leads to Area 5.
5. The Sleeping Soldier
A raised walkway bridges the gap between Area 4 and 7. If a creature crosses the bridge and moves to Area 7, a man-serpent soldier walks into the archway leading out to the ledge. Before initiative is rolled, a giant, smooth boulder rolls down the ramp and flattens it.
A set of stairs to the north lead down to a flat bridge where a sleeping man-serpent soldier rests against the southern wall. The soldier is only awoken if it takes damage, or if a creature otherwise physically interacts with it. If the boulder mechanism in Area 11 is shifted correctly, a boulder sent down the Area 12 hallway will collide with the wall, killing the man-serpent soldier and destroying the southern wall and allowing access to Area 6.
6. Hanging Prison
This long corridor is flanked by a dozen locked cages hanging from the ceiling. Boulders rolling down the hall from Area 5 drop deep into the forest at a sheer drop at the end of the southern hall, where a portion of the fortress has been reclaimed by nature.
Inside one of the cages is a trapped Big hat Logan, described in Appendix A. His cage, and all of the other cages in the fortress, can be unlocked with a key found in Area 25. Once freed, Logan will express his thanks and make his way to Firelink Shrine.
Another locked cage at the end of the hallway holds a corpse with the soul of a hero.
7. Worn Lane
Decades of boulders rolling down this steep shelf along the outside wall of the fortress have worn a deep grove along its length.
When a character wants to traverse this area, roll initiative before they step into it. At the top of the round, a boulder rolls from Area 11 down the ramp. Any creature in the path of the boulder when it rolls through takes 10d10 bludgeoning damage and be knocked prone. To speed things along, if the players intend to move to another area with twice their movement speed and the man-serpent mage in the doorway to Area 8 is slain, they can do so without rolling initiative.
The south end of the ramp has a small branching path at the bottom to Area 7A. The top of the ramp is the entrance to Area 8, and a hallway westward leads to Area 9.
7A. The Befuddled Knight
Dropping down into this area from the far northern end of the Area 7 will deposit the player next to a chest containing a shotel. Siegmeyer of Catarina is here as well, he explains that the boulders block his path forward as he cannot move fast enough to get up the ramp in time. He will move on to Anor Londo once the boulder mechanism in Area 11 is moved to shoot the boulders safely out of the way.
Near the bottom of the ramp in Area 7, two man-serpent soldiers stand in between the chest and the point where the ramp meets the ground of this area.
8. The Mage's Ring
Once the man-serpent mage in the entrance of this room is dispatched, the room itself can be examined. A series of small pillars support the roof, hiding a chest in the back corner containing a ring of steel protection.
9. Trapped Corridor
A small room along the ramp in Area 8 leads deeper within the fortress. The corridor to Area 9A has a pressure plate trap that functions the same as the one in Area 2. The darts fire from the wall of Area 9A facing the pressure plate.
9A. Chamber Guard
After the pressure plate is triggered, the man-serpent soldier in this room is alerted to intruders nearby. Once it is slain, the hallway to the west is left unguarded.
10. Boulder-worn Stairs
Massive boulders rumble down this series of dense staircases. When the pressure plate is triggered, the mechanism in Area 11 is switched to send boulders into this area. If pressed again, it will switch the path back to Area 7.
Use the same mechanics for the boulder rolling down Area 8 to traverse this area.
A small wooden platform above the middle stairwell can be dropped down halfway up the western stairs. A lone man-serpent mage standing on it guards a corpse with a large soul of a proud knight. The platform is connected to Area 16A and Area 15. At the top of the western staircase is one of the many archways into Area 11. At the bottom of the eastern staircase is an obvious entrance to Area 13, as well as a solid wall blocking the way to Area 14. Once a pit in front of the wall is filled with five boulders, the next one will roll over the pit and destroy the wall leading to Area 14.
11. Boulder Mechanism
Massive gears, pulleys, and battering rams cover the top of this room. A hole in the ceiling is where the boulders rolling down the halls are being deposited by a giant on the roof. The direction of the boulders is controlled by a large mechanism in the center that can be manipulated by a humanoid to change which hallway the boulders are being pushed down. Areas 8 (roof), 10, and 12 can all be chosen as options, as well as northwards out of the fortress entirely. A small hallway to the west above Area 10 leads ever deeper into the fortress.
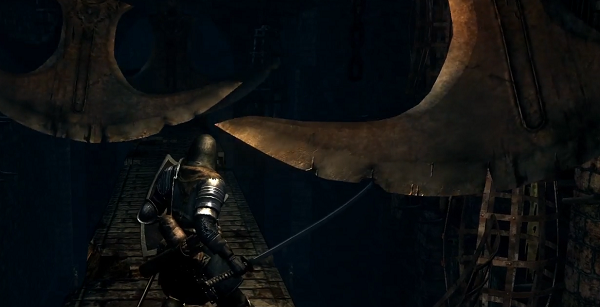
12. Center Worn Hallway
A giant set of stairs lead down to Area 5. Boulders can be rolled down in this direction to destroy the wall blocking access to Area 6. A staircase off into the western wall leads up to Area 16. A ten foot wall blocks creatures from moving from Area 5 up to 12, but they can drop from 12 into 5.
14. Envy
Once the wall of this room has been broken by a boulder, it can be explored and looted. A corpse on a window sill near the hole in the wall still wears a covetous gold serpent ring. The far end of the hall drops fatally into Darkroot Garden far below.
15. Rooftop Walkways
A lone man-serpent soldier patrols these narrow walkways. Creatures can drop down into Area 3 from the far southern path, though any creature that falls into the two pits in the center of this area will plummet 50 feet down to Area 29.

16. Intermediate Bridge
The staircase going up from Area 12 branches in two directions, Area 16A to the west and 16B to the east.
16A. Not Quiet Enough
The door to this room can only be opened from the side facing the stairs connected to Area 10. A corpse of a long dead wizard still wears a set of black Vinheim robes, and still clutches a spell scroll of hush.
16B. Trapped Elevator Platform
The elevator from Area 13 makes a brief stop in this room. If a creature does not immediately step out when the elevator arrives, the platform will raise and crush the player against large spikes embedded in the roof of the shaft. A staircase joins this room to the rest of Area 16.
17. Scythe-filled Walkway
Just before entering this room, a pressure plate sits at the end of the hallway from Area 11. Any creature other than the one who triggered the trap in the Hallway must succeed on a DC 15 Dexterity saving throw or take 6d10 piercing damage. Otherwise, this room is simply a passageway to the bridge across the chasm above Area 3.
More scythes swing over both bridges between areas 17, 18, and 19, and operate the same as the other scythes in the fortress.

18. Uppermost Scythe Gauntlet
A man-serpent soldier on the north end of the room, as well as a man-serpent mage at the top of the stairs guard the entranceway from Area 17. The two engage characters moving from Areas 18 or 19. A second man-serpent soldier hides in the southern passage and guards a large titanite shard. It waits for a creature to move into the far southern hallway to attack.
A pit in the far northern hallway drops into a hidden alcove in Area 15. A set of stairs to the south leads up to a higher walkway leading toward Area 19. A last man-serpent mage standing on the small western outcropping attacks creatures at range.
Once the characters have moved past the last set of swinging scythes to the north, they can move east to Area 20, or west to dispatch the mage that attacked them on the walkway. Two sets of pressure plates in the northern hallway will trigger darts to shoot out of an opening in the western wall towards the plates
19. Fortress Bonfire
The sole bonfire of Sen’s Fortress is nestled on this small outcropping. A small hallway leads south to a ledge that creatures can easily drop down from onto the northeast stairwell of Area 18.
20. Fortress Rooftop
The staircase from Area 18 leads up to the roof of the fortress. Emerging from the staircase, the characters will immediately notice a fortress giant loading boulders into the mechanism in Area 11. He will not engage the party in combat, and can be killed from range with enoughs spells and arrows, though he will still respawn.
20A. Deserted Portion
A staircase to the east leads down to Area 21, and a staircase to the north leads to Area 21A.
A set of iron guardrails prevents access down into Area 22, though the Area 24 walkway will eventually provide an option to do so.
20B. Knight's Prize
Two balder knights wander this small courtyard, guarding a chest with a flame stoneplate ring inside.

21. Bombing Ground
Any creature walking into these areas must roll initiative when they begin walking in the staircase. Far above in Area 28, a fortress giant hurls giant bombs downwards into these open courtyards. Make note of the space the character furthest north at the start of the round is (use the northwestern most character in the event of a tie). The fortress giant throws a giant firebomb into that space at the end of each round. Each creature within ten feet of the resulting explosion must succeed on a DC 16 Dexterity saving throw or take 10d6 fire damage, taking half on a success.
21A. Signs of Explosives
A DC 11 Investigation check reveals that the source of the black soot caking the ground as a recent explosion, or series of explosions. Otherwise this area has nothing of interest other than a stairwell to Area 22A.
21B. Fence Gap
Part of the high iron fencing around the perimeter of the roof has been torn open, allowing access down to the bonfire in Area 19 to the east. A corpse against the far northern edge of the roof holds a large soul of a brave warrior. The staircase to the northwest leads up to Area 22.
22. Firebombed Rooftop
A mangled corpse sits in the middle of a blast center at the top of the stairs from Area 21B. It still clutches a large titanite shard to its chest. The giant continues to firebomb this area, though it will not be able to throw them into the western 35 foot section, nor the narrow walkway to the south leading to Area 24.
In the half-circular area to the far west, a berenike knight blocks the path to Area 23. It will pursue the characters throughout this area, making it possible to take advantage of the firebombing giant to hurt it.
23. Ricard's Rise
This lone tower is connected to the rest of the fortress by a lone bridge to Area 22. Guarding its entrance is Prince Ricard, a long undead knight from Astora. He takes advantage of the cramped space, and uses invader’s allies as cover from ranged attacks on the stairwell. Once he is killed, he leaves behind *Ricard's Rapier" and does not respawn after a long rest. A small room at the top of the tower contains two chests containing a rare ring of sacrifice and a divine blessing.
24. Pillar Walkway
Stretching high above the roof below, this set of narrow walkways is crumbling with age. A ten foot gap in the middle of the eastern portion can be lept over with a DC 15 Athletics check. On a failure, the creature plummets 40 feet into Area 22.
To the west, the path branches north and south. A balder knight guards the southern branch, which contains nothing of interest. The north branch leads up to Area 26.
25. Merchant's Tower
A set of narrow staircases spirals long the inside walls of this tower. At the very bottom is the Crestfallen Merchant described in Appendix A, as well as the Cage Key at the end of a walkway to the south.

26. Cage Elevator Control Room
If the cage key in Area 25 has been retrieved, the cages dangling above the central shaft in this small room can be unlocked and climbed into. Once a cage is entered, the weight of the occupant activates the elevator mechanism controlling the pulleys connected to them. The cage then descends down into Area 3, from which it can be ridden upwards to this room afterwards. The exit to the north leads up to a walkway 80 feet above Area 15, while a sole hollow knight wielding a light crossbow blocks the way to Area 27.
27. Arena Foyer
Dense pillars crowd the entrance to the Fortress Golem's arena, a fog gate blocking the southern path to Area 29. Across a walkway to the west is a small dining room, with a table and four wooden chairs. A spiral staircase north leads to the very top of the fortress, Area 28.

28. Giant's Rise
The firebomb throwing fortress giant can be finally slain once this area is reached. This roof platform is quite small however, and it will be difficult for characters to stay out of melee with the giant, the spiral staircase making ranged engagement difficult as well. The giant drops a titanite chunk when defeated.


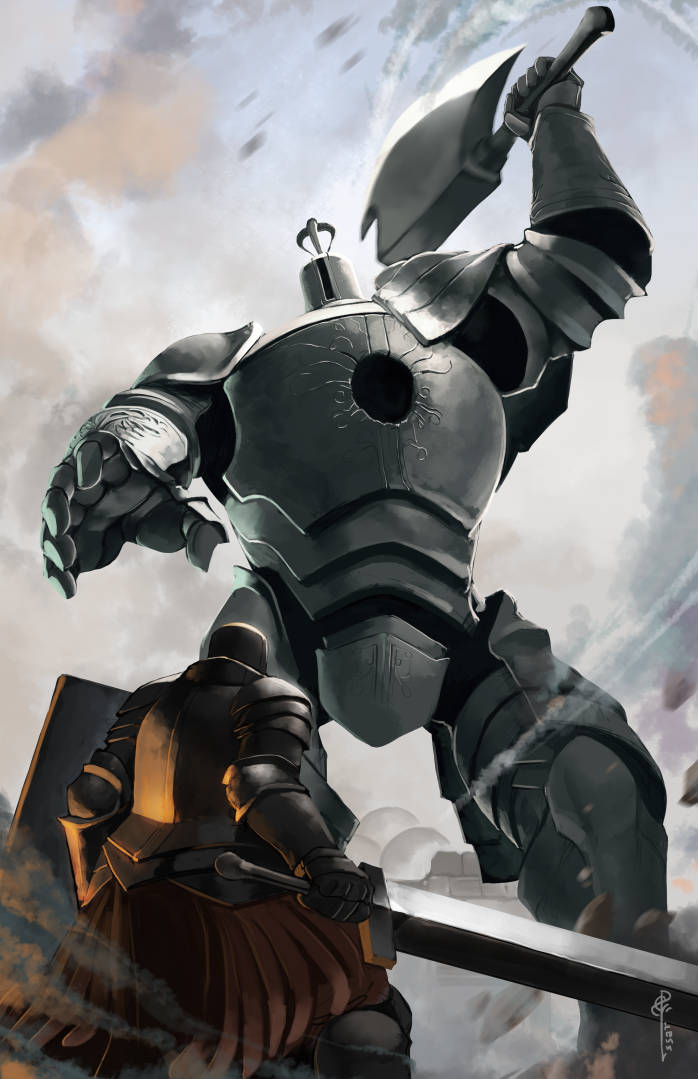

29. Arena of the Fortress Golem
The Fortress Golem has guarded the entrance to Anor Londo since the fortress' creation centuries ago. Creatures who wish to enter the City of the Gods must defeat it first, a feat completed by no undead thus far. The golem itself fights in a brutal, if straightforward, manner. It prefers to engage in melee combat, reserving its ranged attacks only when necessary. A particularly well-armored or hearty individual may be worth the golem using its action to grapple them, and then its next to throw them far into the forest, killing them instantly. Its arena is narrow however, and if it is overwhelmed it may stumble backwards off of it entirely.
If the giant in Area 28 has not been slain while the golem is being fought, it rolls initiative as well and hurls firebombs wherever would hit the most PCs at a time.
Once the golem is defeated, a group of batwing demons quickly descend on the party, seizing their arms and lifting them high above the walls where they get their first glimpse of Anor Londo.
30. Mage-swarmed Ledge
This small shelf north of Area 31 can be dropped 30 feet down from Area 3. Three man-serpent mages immediately attack any creatures who drop into this room, or Area 31 if they are within range. A 20 foot drop from this area leaves a creature in Area 31.
31. Pitch-Filled Basement
A prowling demon stalks this tar-filled basement. All demons in the basement of Sen’s Fortress drop a demon titanite shard when slain. The tar creates difficult terrain for all creatures other than the demons. The demon takes advantage of this to kill intruders before they reach the ladder up to Area 34 in the southwest corner. A small passageway to the east leads to Area 32, and a tunnel under Area 30 leads to Area 33.
32. Basement Antechamber
Two more prowling demons assault intruders in this tar-filled antechamber. Otherwise the room is empty.
33. Demon's Hoard
A final prowling demon guards a pair of corpses in this small, enclosed space. The corpses have a soul of a brave warrior and a greatscythe between them.
34. Gate Operator
A series of ladders provides an exit route from the basement of the fortress. The first ladder leads to a small walkway with a large soul of a proud knight with a drop down to Area 2. Another ladder on that same platform leads up to a large section of roof overlooking Area 1. The fortress giant that lifted the gate when the bells were rung can be found and fought here, dropping a titanite chunk when killed. It fights similarly to the giant in Area 28.
Anor Londo
“Thou hast journey'd far, and overcome much, chosen Undead. Come hither, child...”
The City of the Gods appears as immaculate as it did at its height.
1. Demon's Perch
After the demons take them high above the city walls from Sen’s Fortress, the characters are dropped on this parapet at the top. A series of staircases leading south and east is the only exit from the parapet. It ends at the southern entrance to Area 2. A sentinel giant looms over the entrance. It does not attack unless threatened, allowing the characters to pass if they do not attack it in turn.
2. Ornstein's Hall
Polished black and white tiles line the floor of this large interior space. The room is bereft of furniture or any other clues about what it was once used for. Two sentinel giants flank a statue of a large figure against the eastern wall. They are similarly passive to the one in Area 1. A chest behind the north-eastern giant contains a demon titanite shard. Attempting to open the chest will provoke the giant guarding it if it is still alive.
The statue depicts a heavily-armored warrior wearing a lion helm. He wields a massive, golden spear. A DC 13 Intelligence(History) check reveals the identity of the figure, Dragonslayer Ornstein, and his history as captain of Gwyn's Knights.
3. Gorgeous View Ahead
A wide-open courtyard contains no enemies or items. It does offer a spectacular view of the areas around them. The massive tower to the east descending into Area 6 attracts immediate attention. A small tunnel to the north leads to Area 4. Archways to the east and west lead to the mirrored chambers on Area 2 and Area 5.
The southern tower has a rotating platform that acts as an elevator down to Area 6.
4. Knightess's Bonfire
The bonfire roaring in this room is a welcome friend. A woman of few words waits nearby, the Darkmoon Knightess. Appendix A describes her in more detail. The knightess is a Fire Keeper. She empowers her bonfire in the same manner as others of her kind. She only attacks them if they provoke her or destroy the illusion of Gwynevere. If she dies, her bonfire goes out permanently.
5. Smough's Hall
This room is a mirrored copy of Area 2. Two more sentinel giants flank a statue of Executioner Smough on the west wall. Each sentinel guards a chest. The northeastern one hides a twinkling titanite shard. The southeastern chest is actually a lordran mimic. Slaying it will leave a crystal halberd in its wake. It functions as a halberd ascended with the Crystal Ember once.
Another sentinel giant blocks a pathway further to the east. It will not attack the players if it is not harmed by them, but it will do so if they attempt to move down the eastern path. After it dies, the entrance to the Duke’s Archives is a hundred feet down the path.

6. Elevator Landing
The elevator from Area 3 drops onto a spiral staircase. It further descends down onto the large bridge towards the castle. When this area is first explored, the massive structure of Area 9 is positioned far below. The gap is uncrossable until the characters raise it.
An anor londo gargoyle guards the bridge and viciously attacks anything that crosses it. It operates similarly to the Bell Gargoyles, and its tail is dropped as a gargoyle tail axe.
A small shelf of stone surrounds the northern tower, a five-foot drop down from the northern end of the bridge. Behind the tower on this path is a chest containing a demon titanite shard. The only path forward is to climb along the top of a buttress leading to the top floor of the massive cathedral to the east, Area 7.
7. Cathedral Brace
The buttress drops down onto a balcony against the cathedral’s stained glass windows. One of the windows is already shattered, providing access into the building. The pillars on the ground floor of Area 13 support the second floor outside the window. Across the way is a painting guardian. A railing prevents creatures from falling 90 feet down to Area 13. Once the characters climb through the window, another painting guardian drops down from Area 8 to ambush them.
A ladder nearby the window reaches up to the far northern end of Area 8.
8. Cathedral Struts
Thin metal struts stretch across the top of the cathedral. The struts are wide enough to walk across. But, anyone who takes the dash action while on the beams must succeed on a DC 10 Acrobatics check or fall off. Anyone who falls from the struts plummets fatally down into Area 15 below. A creature hit by a melee attack must make a DC 10 Acrobatics check or fall as well.
Dangling from the ceiling in the center of the area is a massive gold chandelier. Caught on a sharp piece of ornamentation is a corpse clutching a spell scroll in its hand. The scroll is inaccessible from this area. Dealing 10 slashing damage to the chain will sever it, sending the chandelier and the corpse down to Area 15.
Four painting guardians move swiftly across the southern struts. They attack anyone moving south. The guardians have advantage on Acrobatics checks made to stay on the strut. They fight in tight coordination, preferring to knock an intruder below than engage them directly. Once the characters slay the guardians, a ladder to the south leads down to a small walkway. Near the base of this ladder is a small, marble pedestal with a divine blessing atop.
A large lever outside the southeastern exit raises the stone structure of Area 9. The structure's bridge meets the lever's height and the characters can now access the area.
9. Rotating Pillar
This giant stone pillar stretches far down into the city below. It consists of two sets of perpendicular bridges 40 feet above and below each other. A spiral staircase connects the two bridges. Levers across the nearby structures control the mechanism. A large, circular lever on the pillar itself can be used as well. Once the characters use the mechanism for the first time coming from Area 8, an anor londo gargoyle descends from the sky. It slams down onto the top bridge. It viciously guards the entrance to the castle to its death. The pillar has three “settings”.
Setting Connected Areas 1 9 2 6, 13, 14 3 10, 13
10. Darkmoon Bonfire
A bonfire crackles in this small room beneath the cathedral. Next to the bonfire is a ring of the sun’s firstborn.
The enormous statue of Lord Gwyn against the wall is actually an illusion. Interacting with it all causes it to dissolve away. Behind is a staircase down a narrow hallway. A small prayer rug sits in front of the fog gate at the base of the stairs. A creature wearing a darkmoon seance ring can kneel at this rug and commune with dark sun gwyndolin. Appendix A describes Gwyndolin, and Appendix C describes his Blades of the Darkmoon covenant.
The Fog Gate cannot be crossed unless a creature wearing a blades of the darkmoon covenant ring crosses first. The fog wall also becomes passable if the characters dispel the illusion of Gwynevere. Gwyndolin himself waits beyond it.

11. Gwyndolin's Hall
If the characters transgress into this tomb, Dark Sun Gwyndolin will punish them for their transgression. As the characters enter, Gwyndolin throws his arms to the side and transforms the hall. The back of the hall replicate infinitely behind him.
Gwyndolin is a powerful, if somewhat frail, opponent. He detests melee conflict, attacking enemies at range with his bow and magic. Should he believe that he is in any danger, Gwyndolin teleports further into the hallway. Due to his magic, the hallway will forever extend behind him. He has no mercy for interlopers and will target weak or slow creatures first to dispose of them early.
When Gwyndolin falls, his magic fades and the room appears as normal, with only a short walk down to Area 12.
12. Darkmoon Tomb
The Darkmoon Tomb is where Lord Gwyn was supposedly put to rest after using his own soul to kindle the First Flame. That is not so. Unfortunately, the coffin is far too massive to investigate inside. His final confrontation in the kiln will reveal his true state.
Set upon an altar in front of the coffin is a scroll of sunlight blade.
13. Cathedral Floor
The base floor of the Cathedral is swarming with 12 painting guardians performing their eponymous duty. They fight and die to protect the painting hung on the far northern wall. If the chandelier was cut down from the ceiling, it will have fallen into the center of the room. It crushes one of the guardians and leaves the scroll of magic weapon within easy reach. A chest against the northern wall contains a set of black iron plate armor.
The painting to the north is of a rickety wooden bridge leading to a ruined keep covered in snow. It looks to be a cold, forlorn place. If a character interacts with the painting while the peculiar doll is in their possession, every other creature within 20 feet of the painting is drawn into the Painted World of Ariamis. Once a trapped creature frees themselves from the painted world, they emerge in front of it.

14. Footsteps of Giants
Once Area 9 has been raised to meet Area 6, it will bridge the gap to the grand staircase up to the Anor Londo’s great castle. Three sets of stairs have set been into the stone. One in the center has two-foot tall steps. The other two flanking it sized for Medium creatures.
The doors to Area 23, the castle’s Great Hall, are shut tight. The doors cannot open without using the mechanism in Area 23. Even the closed doors are further guarded by two sentinel giants. They will only attack intruders who move beyond the north staircase. The western door leading to Area 26 sits locked, and can only opened from the other side. A gap in the eastern fence leads out to Area 15.
15. Western Courtyard
This small unoccupied courtyard leads down a staircase to a lower one. Three bat wing demons prowl this lower courtyard. They attack anyone they notice moving down either staircase nearby. A buttress like the one connected to the cathedral leads down to Area 16.
16. Castle Gazebo
A small bench offers a step up to another buttress leading south. Unfortunately, two bat wing demons block those who would like to cross upwards. Once dispatched, it will become clear to travelers south that the following pathway to the castle will not be easy.
The archers in Area 17 rain greatarrows onto the entire party. As long as a character is within range and the knights are alive, movement should be done in initiative. The northern buttress has iron fencing along the outside. The fencing provides three-quarters cover to creatures moving up it. The southern buttresses have no such cover.
The buttresses sit high above the city streets, and a fall from them means certain death to any creature.

17. Gough's Pincer
Two silver knights of Gwyn wielding greatbows attack anyone climbing up from Area 16. They attempt to knock creatures walking along the buttresses to their deaths. If a creature attempts to engage them in melee, they will switch weapons to longswords. Once the characters slay the western knight, the walkway along the outside of the castle is unguarded. The path leads south and drops down to a small balcony outside Area 18.
A corpse sitting on the northern end of the eastern buttress clutches a soul of a hero.
18. Anor Londo Keep - 3rd Floor
This will likely be the first interior space of Anor Londo’s Castle that the players will explore. Brown floors and clean, sparkling white walls cover every surface. Beyond the spiral staircase is a silver knight of Gwyn wielding a longsword. It is the area’s sole guardian until the characters explore Area 18B. Taking the staircase upwards leads up to Area 21.
18A. Keep Bonfire
An old friend waits at a warm bonfire. Solaire of Astora sits among the scattered tables and chairs strewn about the room. Appendix A describes Solaire in more detail. He offers words of encouragement to the characters and even attempts to awkwardly flirt. Solaire can be summoned later in the Great Hall (Area 23).
18B. Sitting Room
A sole silver knight of Gwyn guards a sunlight medal in this room, with furniture strewn about the place to Area 1.
18C. Kitchen
Dried wood and bone cover all the available surfaces in this small kitchen. The fireplace to the east is an illusory wall. If the characters interact with it, it will fade away revealing a staircase down to Area 22.
18D. Trophy Room
The door to this area can only be unlocked from the inside. Two silver knights of Gwyn, wielding a longsword and a pike, guard the staircase up to Area 19B. Dozens of slain drake heads decorate with walls of this trophy room. The heads of two blue hellkite drakes have been mounted the highest. A chest at the base of the stairs holds a set of silver knight armor.


19. Anor Londo Keep - 4th Floor
This crossroads is deserted. The spiral staircase to the east leads up to the roof of the castle, Area 20. The path westwards leads to Area 23.
19A. Desecrated Chapel
A finely decorated chapel is currently the home of a prowling demon. It never attempts to leave the room but will protect its lair to the death. It leaves a demon titanite shard when it dies.
19B. Empty Balcony
A small balcony sits above Area 18D, with a staircase that leads down to it to the east.
20. Keep Roof
The roof of the castle is a wide-open area, with a silver knight of Gwyn guarding each entrance. The western stairwell leads down to Area 19. The two eastern stairwells lead down to the corresponding landing in Area 21.
21. Anor Lonod Keep - 2nd Floor
Most of the doors on this floor are locked when first explored. Two chests against the northern and southern walls are actually lordran mimics. They contain a gold coin and silver coin respectively.
The staircase in the center leads down to Area 18.
21A. The Onion Knight's Conundrum
The staircase from Area 20 leads into a small antechamber. A sulking siegmeyer of catarina in the rear plots his next move. Appendix A describes Siegmeyer in more detail. Three silver knights of Gwyn wait in the adjacent bedroom. Siegmeyer does not believe he has any chance of taking them on alone. If the knights are defeated, he offers the players a tiny being’s ring as a token of thanks. The door to this area is locked from the inside.
21B. Master Bedchamber
The door to this room is unlocked on first inspection. A lone silver knight of Gwyn waits in the antechamber of this bedroom near the staircase up to Area 20. The bedroom is otherwise untouched and unguarded.
21C. Knight's Sworn Oath
An unlocked door offers no resistance to those who would explore this room. The far eastern end of this balcony holds a corpse clutching a soul of a hero. A silver knight of Gwyn on the northern end guards it.
21D. Trophy Room Balcony
This balcony sits high above Area 19D. It puts creatures at about eye-level with the hellkite drakes’ mounted heads. Otherwise, there is nothing else of interest on the balcony.
22. Havel's Armaments
Beyond the illusory wall in Area 18C, a staircase descends into the pitch-black empty basement underneath it. A series of chests along the wall hold the pieces of Havel’s Armor, Havel’s Greatshield, and the Dragon Tooth. An occult-imbued greatclub is inside a disguised lordran mimic.
23. Anor Londo Keep - Great Hall
The character's first glimpse of the castle’s Great Hall will likely be from atop the western balcony near Area 19. Rows of massive marble pillars line the entire length of the hall. The entire room is polished and gleaming as it would have been the day after it was finished. Two sets of staircases to the sides of the hall lead up to balconies flanking the fog gate southward. Another two sets of matching staircases lead up to Area 24.
Two royal sentinel giants stand motionless in the hall until they notice intruders. They will hem hunt throughout the area. A silver knight of Gwyn hunts from the eastern balcony, hurling great arrows below.
A mechanism in the northwestern alcove opens the castle gates out to Area 14.
If the players have spoken to Solaire in Area 18A, they can find his summon sign on the balcony the silver knight is standing on.
24. Great Hall Balcony
High above the Great Hall is an open attic-like space that is otherwise unoccupied. A window northwards is shattered, leading out to a staircase-like parapet. Hidden inside is a greatbow and 20 greatbow arrows. From the bottom of the steps is a 30-foot drop down into Area 26.
A staircase to the west leads down to Area 25.
25. Giant Blacksmith's Shop
The familiar sound of hammer blows ringing against steel fills this tower. Their source is quite different from Andre or Vamos though. The Blacksmith Giant is of the same ilk as those in Sen's Fortress. Appendix A describes him in more detail. The giant is surrounded by hundreds of completed weapon and armor pieces. He is friendly to all travelers and offers his services in exchange for souls. Stairs along the inside walls of the tower leading up to Area 24. Open doors to the north lead out to Area 26.

26. Eastern Courtyard
Three bat wing demons crawl around this courtyard, guarding a titanite chunk on the northern side at the base of the stairs. The door to Area 14 in the east can be unlocked and opened from this side.
27. Anor Londo Keep - Sanctuary
Perhaps once this was a throne room. Maybe it was the sanctuary of the largest cathedral ever conceived. I was likely once both. Statues of the entire family of Gwyn are lovingly rendered in stone on the southern wall. Ten-foot thick pillars stretch to the ceilings. Bright light filters through the stained glass depictions of the war against the dragons covering the western wall.
Standing at the front of the room when the players enter through the fog door is Gwyn's royal executioner. executioner smough is an imposing figure made nearly spherical in muscle and fat bound by golden armor. He picks up his greathammer as his partner dragonslayer ornstein peers down from the balcony. Noticing the intruders, Ornstein leaps down and joins Smough. Both begin combat on the far southern end of the room. The two have been tasked with protecting the princess above. They will both lay down their lives to fulfill that duty.
Ornstein and Smough are legendary warriors and competent partners. The two act in practiced concert, taking each other’s strengths and weaknesses into account while fighting. Ornstein is fast and flexible, a capable threat at range and in melee. He prefers to take advantage of prone or otherwise incapacitated foes. Smough is slow but incredibly strong, crushing even the toughest armor. He tries to leave openings for Ornstein to execute brutal critical finishes. The two are noble but not necessarily honorable in their tactics. Both use any opportunities available to annihilate their opponents.
When either is dropped to 0 hit points, the real fight begins. If Smough falls, Ornstein rushes to his side and extends a hand towards him, absorbing his energy and growing in size and strength. If Ornstein is slain, Smough crushes his previous partner, growing as well and taking on Ornstein’s lightning for himself. Either way, the remaining knight becomes the Empowered version of their stat block and gains the benefits of a long rest immediately. These empowered foes are tougher than their previous incarnations. The empowered boss fights with no restraint to the bitter end.
If this empowered foe is defeated, they fade away, leaving behind the Great Soul of Ornstein and the Great Soul of Smough, along with a leo ring. At this point the elevators to the left and right activate, allowing passage up to Area 28.
28. Gwynevere's Bedchamber
A lone bonfire sits at the top of the balcony overlooking Area 27. Looking over it below, one could imagine the view Ornstein had before he first descended earlier. A set of doors to the south lead towards the Princesses’ Chambers, Area 29 Area 29 Gwynevere, Queen of Sunlight (described in Appendix A), sits eternally atop her plush chaise. She greets the characters warmly, welcoming them inside. She entreats them to succeed her father, Lord Gwyn, and link the First Flame in his stead. Regardless of their decision, she gifts them the Lordvessel. Its power allows its possessors to warp between bonfires after finishing a long rest. Guinevere points them towards Kingseeker Frampt in Firelink Shrine, who has more details on the steps necessary to link the fire.
A character who wishes to serve Gwynevere can enter into her covenant, the Princess Guard. Appendix C describes the Princess Guard Covenant.
Guinevere is an illusion, a fiction created by her brother Gwyndolin to encourage undead to link the fire. If the characters harm or interact with the illusion, Guinevere fades away. The sunlight over Anor Londo fades as the illusion dissolves. The changes made to Anor Londo while the illusion is gone are as follows below.
Changes to Anor Londo during the Night All enemy creatures other than silver knights vanish The Darkmoon Knightess becomes hostile. Two more blades of the darkmoon appear in Area 23 to punish sinners. The bonfire in Area 28 goes out and cannot be relit. The Fog Door to dark sun gwyndolin can be passed through (Area 11)

Painted World of Ariamis
“Thou must returneth whence thou came. This land is peaceful, its inhabitants kind, but thou dost not belong. I beg of thee, plunge down from the plank, and hurry home.”
1. Broken Bridge
The bridge behind this entrance to the Painted World has long rotted away. The path forward through the mountain cliff to the north is the character's only option.
At the top of the path is a bonfire near the southern wall of the fort. The Painted World is sealed off from the rest of Lordran. If the players have retrieved the Lordvessel, they find that they cannot warp away until they escape.
Three broken hollows wander the entryway ahead. Beyond them, a locked door blocks the path to the courtyard (Area 9). The door can only be unlocked from the inside. A set of stairs north lead up to Areas 2 and 4.
2. Battlements
Four broken hollows shambling about this narrow passageway. One wields a shortbow and fire down the way at intruders. The corridor stretches to the northwest. When the characters arrive, two engorged zombies leap out and attempt to poison those who would progress further. A bridge connects Area 2, 3B, and 5.
3. Southern Tower
This tall structure makes up one of the southern corners of the painted world.
3A. Crowspawn Sentinels
The roof of this building is only accessible from Area 4. Two crowspawn of velka guard a soul of a proud knight. A ledge outside of Area 3B sits a short drop down from here. A corpse on it clutches a twin humanity sprite.
3B. Hanging Sprite
A single broken hollow blocks the staircase lower to Area C. A twin humanity sprite on a nearby ledge is not quite reachable from this area, though a creature on that ledge can drop down onto the staircase.
3C. Empty Room
This room is unremarkable, save for the staircase leading down to Area 3D
3D. Rats!
Two snow rats gnaw on a corpse clutching a soul of a brave warrior. They fight to the death to protect their prize.
4. Eastern Stairs
Up the eastern staircase from Area 1, three broken hollows descend on this platform. Another staircase hugs the outside wall of Area 3, leading up to its roof (Area 3A).
5. Crumbling Building
This decrepit structure across the Area 2 bridge's original purpose is long forgotten.

5A. Sunken Foyer
Now, a trio of engorged hollows wander senselessly throughout the lower floor, waiting to incinerate and poison any who draw near. A western lede hides three broken hollows who wait in ambush if the engorged hollows are engaged in combat. Another broken hollow drops from the ceiling (Area 5B) to join the fray as well.
Outside the northern exit, a broken hollow guards a large soul of a proud knight. A staircase to the south leads up to the second floor of the structure, Area 5B.
5B. Collapsed Second Floor
Much of this second floor has collapsed over the years. The part at the northern stairs to Area 3A has nothing of interest. A short gap blocks the way to the south and a DC 10 Athletics check is all that is necessary to cross between the two. On a failure, the creature plummets 10 feet to Area 5A.
An engorged hollow and a broken hollow patrol this walkway. They guard an egg vermifuge and a soul of a brave warrior at the north and south ends respectively. A staircase on the western outside wall descends to the basement of this building, Area 6.
6. Rats!
Two snow rats are the wardens of this damp, cold basement. They chew on the corpse of a painting guardian unfortunate enough to have been drawn into the painting.

7. Undead Dragon's Hoard
Characters crossing over from Area 5 will find an empty courtyard here. 30 feet up the north path is the corpse of a long-dead dragon, in reality, an undead dragon. It awakens should anyone try to loot the corpses of the adventurers nearby carrying a bloodshield and a large soul of a proud knight. The dragon guards its treasure fiercely and claws its way down the bridge towards intruders. It stops at the end of the bridge and prefers to engage with its necrotic breath at range.
A staircase down to the south leads to the massive inner stairwell of Area 8.
8. Central Tower
The top of this central tower has long collapsed, leaving only a side spiral staircase up to Area 15. A thin layer of snow coats the bottom floor of the tower. Area 9 is accessible south of the base floor, accessible from the archways to Area 7 and 14.
9. Phalanx Courtyard
This open courtyard is the central access point to many different areas within the Painted World. Down a staircase to the east is the graveyard, Area 10. The annex building to the west has a potential path up to Area 14. A well in the southwest corner has a ladder inside down to the sewers, Area 11. The spiral staircase upwards connects to Areas 7, 14, and 15. Finally, a heavy iron door blocks the way towards the bridge under Area 7, Area 16. It is locked when first examined, and can only open with the Annex Key in Area 11.
13 phalanx creatures surround a statue of Velka, Goddess of Sin, in the center of this courtyard. They attack any intruder they notice and take advantage of their shield wall wherever possible.
At the top of a staircase to the west is a small ledge hugging the wall, where a corpse wears a ring of sacrifice.
9A. Empty Annex
Empty space and worn stone are all that remains of this annex space. A locked door northwards leads to Area 14 must be unlocked from the opposite side.
10. Frozen Cemetary
Hundreds of graves make this entire cemetery difficult terrain to move through. Seven torch hollows prowl about, protecting the souls held by corpses at the far eastern cliff face: two souls of a proud knight and a large soul of a proud knight. On the southern cliff is another corpse reaching out to a fallen scroll of acid surge.
When this area is first explored, Xanthous King Jeremiah will invade the party at the top of the stairs. He prefers to attack from afar, taking advantage of the difficult terrain in the graveyard.
11. Underfort Catacombs
Narrow tunnels cross into each other underneath the rest of the fort. A group of three bonewheel skeletons patrols the tunnel system. The skeletons take advantage of the narrow corridors, slicing through intruders back and forth.
Three walls (dashed on the map) are illusory, and interacting with them causes them to fade away.
A staircase to the east leads up to a small platform where an engorged zombie waits motionlessly. It protects itself if attacked, and when slain drops a scroll of fire surge. Through the western illusory wall, the tunnels open up to the wide cistern of Area 12. A corpse carrying the Annex Key which unlocks the door in Area 9A sits in the far northwestern corridor.
12. Catacombs Mechanism
Six wheel skeletons guard the locking mechanism to the door in Area 8, as well as a soul of a brave warrior and a soul of a proud knight. Pillars placed every ten feet provide half cover against the skeletons. They act in concert to protect the mechanism A ladder on the south wall leads up to the northern section of Area 14.
13. Petrified Blacksmith
Long ago, a blacksmith turned to stone and was left in the Painted World. It cradles the Dark Ember to this day, which Andre can use to create Occult weaponry. Two engorged zombies protect the petrified corpse.
14. Western Battlements
A walkway surrounds the outside walls of the western keep overlooking the graveyard and the courtyard. The stairs north climb higher up onto the roof at the very top. Two crowspawn of velka guard a corpse carrying a scroll of vow of silence. Velka’s Rapier, on the other hand, lies unguarded on the eastern path.

15. Broken Tower Stairs
While the walls around the keep’s central tower have long since fallen, the stairs around the inside stand to this day. Three crowspawn of velka perch at the top of the stairs. They guard a corpse clutching a red sign soapstone at the very top.
16. Underbridge Guard
The mechanism in Area 11 opens the door to this bridge underneath Area 7. Seven broken hollows wander the bridge, waiting for any who would threaten Priscilla. A berenike knight is the final guardian of the bridge before the fog wall at the far north end to Area 17.
17. Priscilla's Chamber
Crossbreed Priscilla is the child of Dragons and Gods. Little is known of her early life, just that both shunned her. The Gods built the Painted World to contain her, as they feared her birthright, the power of Lifehunt. Despite this treatment Priscilla is kind and benevolent.
When the characters cross through the fog wall for the first time, she is not hostile to them. Priscilla knows that escape to the outside world is possible by throwing oneself off the cliffside to the depths below. She shares this information freely, as she recognizes that they are not the same as the forlorn souls the painting was made to contain. Even if they do not listen to her advice, Priscilla will not become hostile unless threatened.


If the characters intend to take her soul, Priscilla uses Lifehunt and her greatscythe to lethal effect. Priscilla is not well armored however. She prefers to fight while invisible wherever possible. She waits until an opening grants advantage on her attack rolls to use Lifehunt, targeting unarmored opponents first.
If Priscilla perishes, she leaves behind her Great Soul of Priscilla.
Regardless of whether Priscilla lives, her advice remains true. Any creature that throws itself from the northern ledge plummets into the endless abyss below. They are then transported back to the entrance to the painting in Anor Londo’s Cathedral.

New Londo Ruins
“I am the Guardian of the Seal. I watch over the Four Kings, the masters of the darkwraiths. The darkwraiths are the enemies of man, and any living thing that has a soul. They were born in New Londo, and that is where they perished; the entire city was sacrificed to contain them. ...For that is how great a threat they were...”
New Londo was flooded centuries ago, killing the inhabitants and trapping the darkwraiths beneath the water. This must be undone to access the Four Kings, and the Lord Soul they possess.
1. Ruined Suburb
An elevator descends from Firelink Shrine to the south into this dark, flooded city. 12 broken hollows wander the courtyard at the bottom of a staircase leading further towards the city. A corpse tucked away behind the staircase clutches a soul of a nameless undead. The hollows do not react to the character's presence, though they will defend themselves if harmed. A tower to the west has a locked door that can be opened with a key found in the very last area of Blighttown.
A broken-down staircase to the north near the elevator ends in a sheer drop into the flooded lake. Rickert of Vinheim sits in a prison cell with no door or exit. Appendix A describes Rickert in more detail. He offers aid to the players and can upgrade their equipment with the necessary materials. He can also act as an early tutor for sorceries.
A corpse at the beginning of the path up to Area 2 clutches a rapier.
2. Overlake Walkway
A series of rickety wooden bridges span the gap between the elevator to Firelink Shrine and the flooded city ahead. Blue flames light the walkway from torches that have burned for centuries.
When the Crestfallen Warrior goes hollow, he can be found guarding the entrance to the ruins. Appendix A describes the Crestfallen Warrior in more detail. He immediately and viciously attacks any who approach the bridges to Area 3. Once killed, he does not respawn after a long rest.
A large urn at the base of the stairs contains a corpse clutching a pair of dismembered hands, two transient curses. Only the cursed can harm the ghosts deeper within the city.
3. Crumbling Courtyard
Archways that once supported the majestic towers of New Londo are now crumbling echoes of their former grandeur. Two new londo ghosts rise from the ground when the characters enter the area, fighting to the death to prevent the characters from moving closer.
The eastern stairs lead up to Area 3A. A walkway just above the floodwaters to the southwest is guarded by five new londo ghosts. Long ago, a fire keeper fled from the rising floodwaters and fled to this small building. Giving up hope completely in the face of the death of thousands, she collapsed and died soon after. Her corpse still clutches her fire keeper soul.
Once the water is drained out of the ruins, the southwest cliff face will now yield a 20-foot jump down to Area 15.

3A. Upper Courtyard
Up the stairs from Area 3, two more New Londo Ghosts block the path to Area 4.
4. Broken Home
The western elevator down to Area 11 must be raised from the bottom before it can be called here. Two new londo ghosts guard the entrance to it, along with three more inside the room ahead. They wait to ambush passersbys going to the spiral staircase down to Area 5.
5. Forgotten Structure - 3rd Floor
A handful of pillars still support a ring of balconies around the second and third floors of this large structure. A corpse on the edge of the northwestern ledge carries a parrying dagger. A new londo ghost hiding in the walls guards it fiercely. The northwestern ledge has another corpse, though a powerful new londo banshee hovers over it. Its piercing wail can bring even the strongest foe to its knees. It fights to the death to prevent adventurers from looting the corpse's two transient curses.
6 Buttress Walkway
Large stone banisters decorate the flooded roofs of former lavish homes. A narrow walkway crosses over to Area 7. At the end of the northern walkway is a large soul of a nameless soldier. Underneath the corpse is a new londo ghost*, alongside another two in the middle part.
Northwards, a staircase leads down to Area 7.
7. Forgotten Temple
Long ago this may have been a luxury home, or a place of worship. Now it is a nest of ghosts and specters. A staircase around the outside of the building has broken down and decayed. A creature must succeed on a DC 15 Athletics check to leap across it.
Four new londo ghosts wait in the basement. They move up to attack anyone in the center room after the new londo banshee inside calls them.
A ladder is inside the staircase at the far northern end of the room leading up to Area 7B. The interior wall around the center walls leads up to Area 7A and out up the ramp to Area 8. A corpse on the far western end of the walkway above clutches a humanity sprite.
7A. Temple 2nd Floor
Two New Londo Ghosts patrol these hallways up to the second floor balcony. A new londo banshee waits on the balcony, hovering over a corpse wearing a cursebite ring. A path outside to Area 8 winds out of the temple from a descending staircase. Along the outside path is corpse clutching a large soul of a nameless soldier. Another corpse in the western homestead carries a green titanite shard
7B. Temple Roof
The roof of the building is barren, except for its sole occupant, Ingward, Guardian of the Seal. He will act as a healer and merchant for the party, but will not part with the Key to the Seal in Area 8 until the characters retrieve the Lordvessel. The key is also left behind if Ingward is killed. Appendix A describes Ingward in more detail. A corpse on the northwest hallway still wears its rare ring of sacrifice.
8. Floodgate Seal
A set of massive doors out to the Valley of Drakes keep New Londo's floodwaters at bay. A massive lever nearby the gate controls the lock mechanism. Ingward’s Key to the Seal unlocks the door protecting it. If the characters use the mechanism, the doors open wide and most of the water flooding New Londo empties out into the valley. This allows access down to Area 9 via the elevator in the center of this room.
A shortbow with 20 arrows sits on a corpse in the eastern alcove in the northern hallway.

9. Drake Valley Corpseyard
Hundreds of long drowned corpses cover this courtyard in the lower ruins. It can only be accessed once the floodwaters drain into the Valley. The open gates lead out into the Valley of Drakes, while two staircases to the north head upwards to Areas 10 and 12.

10. Knights of Dark
A pair of darkwraiths guard this rotting wooden home. Inside the home is a corpse carrying a large soul of a proud knight.
11.Fogotten Structure - Base Floor
Drowned corpses and algae growth cover the basement floor of Area 5’s structure. Three darkwraiths prowl the area alongside a mass of souls. It begins vomiting wisps as soon as it notices the players.
The elevator up to Area 4 can is activated from this level, and a staircase to the northwest leads up to the second floor of the building. A chest on the second floor contains the very large ember. It can be given to Andre the Blacksmith to reinforce weapons to +3. Exits to the east and west lead to Area 10 and 12.
12. Prowling Darkwraiths
This courtyard has been partially flooded, creating an area of difficult terrain in the blue square. A lone darkwraith patrols the southern end, attacking any who come near. An illusory wall to the southwest covers a walkway out to a small building. Inside is a chest containing a titanite chunk guarded by another darkwraith.
Beyond the southern end of the pool, a large soul of a proud knight waits on a smaller alcove next to Area 13.
13. King's Sitting Room
This small antechamber to the entrance to the Abyss has two new londo ghosts and two darkwraiths guarding the way forward to Area 14. Inside a pile of drowned corpses to the south, the previous occupant has hidden their only treasure, a titanite chunk.
14. The Four King's Demesne
In New Londo's prime, this tower stretched high above the city's skyline. When the Four Kings were tempted with Lifedrain, the tower instead descended into the Abyss below. The corpse leaning against the tower's exterior clutches a green titanite shard. A fog wall blocks progress into the tower.
This well descends into pitch darkness, an impenetrable void that appears to have no end. A spiral staircase rings around the inside of the well, eventually collapsing away. If a creature drops into the void, it will plummet for a full minute into the Abyss. An unwarded creature will be consumed by the darkness and perish. A creature wearing the Covenant of Artorias can traverse the Abyss safely and challenge the four Kings of New Londo.
At the beginning of the round after the characters land in the Abyss, a King appears within 60 feet of one of them. At the beginning of every two rounds after this, another King appears until four have arrived in total. Only after all four have been defeated do they permanently die and relinquish their Lord Soul. A bonfire appears in the center of the room afterward.
If Kingseeker Frampt has not yet taken the characters to the Kiln of the First Flame, then Darkstalker Kaathe will appear over the bonfire. Appendix A describes Darkstalker Kaathe in more detail.


The Catacombs
“Be gone with you! ...You'll spoil my focus.”
Firelink Shrine's Cemetery was built to intern the countless fallen dead as the Age of Fire waned. This approach proved shortsighted. Over the centuries, the cemetery overflowed with corpses, necessitating the construction of a the Catacombs underneath Firelink. Nearly every available space of this necropolis is occupied with mausoleums and gravestones. Even then, the corpses continued to pile up, leaving many to carelessly dump them into any available space.
Over the decades and centuries, necromancers have identified the Catacombs as a prime source of cadavers for their profane experiments. Chief among them is Pinwheel, once human, now twisted into a horrifying facsimile of life in his attempts to bring his family back to life. Long ago he stole the Rite of Kindling from Nito, a sin that the entire religion of the Way of White has devoted their undead servants to correct.
If Pinwheel falls, he relinquishes the Rite of Kindling and opens the path to Nito's domain, the Tomb of Giants.
1. Catacombs Threshold
The stairs from the Firelink Shrine cemetery leads deep within the earth. The first steps down lead to a shelf along a deep pit carved out of the stone. The drop off the shelf is fatal. Three catacombs skeletons wandering the shelf, alongside three wisps hovering above the chasm. They pursue anyone seeking to enter the catacombs and progress to Area 2.
2. Corpse Mound
A mound of corpses form a small ramp down to this open chamber. Two catacombs skeletons lead from the pile to ambush anyone moving on to Area 3.
3. Bonfire Chamber
Light drifts in from Area 4, illuminating two catacombs skeletons guarding the entrance to this room. A bonfire and the undead necromancer who animated the skeletons in the areas lurk further in. Once slain, the skeletons do not regenerate after death, only after a long rest. The necromancer does not respawn at all.
A massive lever in the southern room shifts the orientation of bridge A further ahead.
4. Trapped Bridge
Three catacombs skeletons patrol this walkway out to Area 5.
The bridge from this area to Area 5 rotated to face vertically by default. This position exposes large jagged spikes covering the walkway. Traversing the bridge in this position is impossible without being impaled. The mechanism in Area 3 must flip the bridge into place before it can be crossed. Once bridge C rotates via the mechanism in Area 7, a creature can drop 20 feet down to it from bridge A.

5. Crumbling Mausoleum
The southern wall of this open space has broken away, facing the chasm below. Three catacombs skeletons and an undead necromancer wait to attack adventurers inside. The skeletons in Areas 4, 5, and 6 lose their regeneration ability if the necromancer that raised them dies. If slain, the necromancer doesn’t respawn after a long rest. A short staircase to the west leads to Area 6.
6. Undead Patrol
Two catacombs skeletons patrol this corridor. Another in Area 6B fires a bow from an eight-foot ledge nearby. A skeleton in the adjacent room to the north lies still on the ground clutching its halberd. It is in fact an animated corpse lying in ambush, striking out at intruders trying to take its weapon.
6A. Ambush!
Three more catacombs skeletons wait in ambush here.
6B. Archer's Comeuppance
The bow-wielding catacombs skeletons that attacked the characters in Area 6 waits here. A hallway to the south leads out to Area 8. A corpse near the archer clutches a large soul of a nameless soldier.
7. Trapped Bridge
The bridge ahead to Area 8 is flipped to its spiked side by default. It can only be crossed if the characters use the mechanism to the west is. Three wisps and three catacombs skeletons protect the corridor, along with a set of three trapped statues along the northern wall. If a creature moves within five feet of a statue, it shoots out and retracts a dozen razor-sharp spikes at them. The creature must succeed on a DC 14 Dexterity saving throw or take 4d6 piercing damage. A target takes half damage on a successful save.
8. Archway
Two catacombs skeletons wait in front of an archway leading into this area from bridge B.
8A. Crumbling Floor
A weakness in the dashed spot in this area gives way if a creature stands on it, dropping them 13 feet down into a narrow tunnel to Area 7. Two titanite lizards crawl through this tunnel, recognizing characters dropping in immediately. The way forward is blocked by five trapped statues like in Area 7. Another hole at the end of the tunnel drops down near the mechanism in Area 7.
8B. Corpse pile
Innumerable corpses have been thrown into this large room. Three catacombs skeletons patrol the lower area, along with three more that animate in the southern antechamber. The latter trio guard a corpse carrying a soul of a proud knight. Another soul of a proud knight sits in the southeastern alcove along with a trapped statue.

A set of stairs lead down into a large well, Area 9. An exit to the east leads out to Area 10.
9. Coffin-Ledge Well
Dropping straight down the well would lead to a 120-foot drop down in Area 15, Vamos’s chamber. The inside of the well has a series of coffin ledges embedded in it. Creatures can cross it safely with a series of four Strength(Athletics) or Dexterity(Acrobatics) to jump from one to the other. The creature can choose which check to make. (creature’s choice) onto ledges scattered along the inside of the walls. The DC of the first check is ten, and on a failure, the creature drops the full distance to the bottom of the well. Each successful check reduces the distance dropped on a failure by 30 feet, and increases the DC of the check by 2. After the fourth jump, the creature arrives safely at the bottom after the fourth.
10. Trapped Statue
Several corpses are slumped against the walls of this corridor. Two more trapped statues are the only gatekeepers to the western mechanism that operates bridge C.
12. Clifftop Courtyard
A pair of narrow shelves along the outside walls connect to a large courtyard. Three wisps hover in the center gap. Three more catacombs skeletons patrol the courtyard. The walls surrounding the courtyard are covered by statues, four of which conceal traps like in Area 7. The western exit leads to Area 13.
13. Titanite Demon's Mausoleum
This decrepit mausoleum is the resting place of many noble families and individuals. A prowling demon has long ago made the mausoleum its home. An altar at the far eastern end of the mausoleum has three eyes of death resting on it. An exit to the south leads to Area 14, where the characters will find a large soul of a nameless soldier.
A coffin lays somewhat ajar on the southern wall, empty. If a creature enters it, the coffin will close above them and pull itself into the wall. The creature is then transported to Nito’s lair in the Tomb of Giants.
The character transported in this way can approach Nito’s resting place, where he is immune to damage. Here, the player can enter into the Gravelord Servant covenant. Appendix C describes the Gravelord Covenant in more detail. The character can return to Area 13 by climbing back into the coffin they arrived in.
14. Skeletal Crypt
A narrow walkway surrounds this lower crypt. Two catacombs skeletons wander on the lower level. A ladder to the north descends into the crypt. Two areas on the floor have weakened over time, and if a Medium creature other than a skeleton stands on top of them, the give way and drop to a lower level. The archway on the eastern wall leads out to Area 14A.
The holes in the floor of this chamber drop down into a broken-down crypt above Area 17. Two shortbow-wielding catacombs skeletons wait to ambush adventurers. The only exit to this room is a cliffside above 20 feet above Area 17.
15. Mausoleum
This more well put together mausoleum has a ladder leading down to a series of crypts. An exit at the end leads out to the far western end of Area 17. A corpse on the ledge nearby clutches a soul of a proud knight.
16. Vamos's Workshop
Vamos’s workshop can only be accessed by maneuvering down Area 9. When Blacksmith Vamos first sees the players, he takes a large pickaxe and breaks through the walls facing Area 17 down. Appendix A describes Vamos in more detail. He gruffly tells them to leave, but will ultimately work on their equipment if given the proper materials. A bonfire nestled in the corner furthest away from Vamos is a much-needed place of respite among the crypts.
17. Wheel Skeleton's Hunting Grounds
Hundreds of corpses litter this massive courtyard. Two wisps and seven wheel skeletons wander the area. They doggedly pursue trespassers seeking to entering Pinwheel’s lair, Area 18. The skeletons try to injure as many creatures as possible by taking advantage of the long narrow corridors to the west.
A fog wall on the far western end of the corridor blocks the way to Pinwheel’s lair. After traversing it, a 20 foot drop down will bring a creature into the lair.
18. Basement Mausoleum
Another mausoleum sits below Area 11. Three catacombs skeletons wander the coffins in search of living flesh to slaughter.
18A. Fallen Darkmoon Knight
The corpse of a once proud knight sits on an altar at the far end of this crypt. When a creature moves within ten feet of the altar, a giant skeleton drops from the ceiling to ambush them. The knight still wears his darkmoon seance ring, which can be used to commune with Gwyndolin in Anor Londo.
18B. Empty Corridor
This corridor has been long abandoned.
18C. A Less-than Tranquil Walk
Three more catacombs skeletons protect a corpse clutching a scroll of tranquil walk of peace. The ladder in this room leads up to an alcove, with an opening to an easy drop down to Area 5.
19. Pinwheel's Study
Long ago, Pinwheel was a nascent necromancer when his wife and child were killed. He turned to the necromantic arts, but was unsuccessful from reanimating them. In a cruel twist of fate, he turned himself and his family into a twisted husk that stole the Rite of Kindling from Nito himself. To this day he studies necromantic tomes to undo his work.
pinwheel takes advantage of his ability to create illusory duplicates of himself to defeat interlopers. Once killed, the Rite of Kindling is left in his place and a ladder appears on the northwestern wall up to Area 20.
20. Tomb of Giants Threshold
The entrance to the Tomb of Giants is pitch dark, lit only by the dull red glow of Lost Izalith burning in the distance. By following the southern path eastward, a tunnel through the rock leads back to Area 18.
A massive coffin serves as a bridge down to Area 21.
21. What Remains of the Giants
A lone giant skeleton patrols the highest of these small stone platforms connected by massive coffins laying at a steep angle. A creature moving down a coffin must succeed on a DC 10 Acrobatics check or fall prone at the end. A corpse dangling off the southern cliff still clutches a large soul of a proud knight.
22. Patrolling Undead
Two more giant skeletons wander this stone platform in search of living prey.
23. Tomb Bonfire
A ladder down to the first bonfire within the Tomb of Giants is easily missed in the dark. At the base of the giant coffin down from Area 21 is a lone humanity sprite.
Tomb of Giants
“Be gone with you! ...You'll spoil my focus.”
1. Trusty Patches
The bonfire at the far end of the Tomb of Giants sits on a cliff looking over an empty black nothingness. The dull glow of lava from Lost Izalith is the only source of natural light in the area. A ladder leads up to a larger area with several pathways to the south and east. The eastward path leads to Area 3, and the southern one leads out to Area 3 and the southern to Area 9 & 10. A small alcove on the southern path has a ladder leading down to Area 6.
If he still draws breath, Trusty Patches waits at the edge of a small cliff. Appendix A describes Trusty Patches in more detail. If he has not met the characters, he will ask if any are clerics. If one is revealed to him, he points them towards a trove of “treasure” in the pit below (Area 2). If they approach the cliff’s edge, Patches attempts to shove the creature into the pit. Patches makes the check at advantage. Patches will attempt to shove any other characters he can into the pit, and kill anyone he can’t.
2. Treasure Pit
This pit is the eternal resting place of countless victims of Patches. Patches loots the vast majority of treasure taken from his victims, but has left some scraps to entice new marks. Four catacombs skeletons wander the pit entrance, taking advantage of surprised creatures. Two large souls of a proud knight and a skull lantern sit in the pit to entice new marks. One victim of patches managed to retreat behind the southern pillar, but succumbed to his wounds before he could escape. His corpse still clutches a white titanite chunk.
Further to the west, Reah of Thorolund sits in complete despair. Reah and her group were the most recent victims of Patches deception. Her two guards Nico of Thorolund and Vince of Thorolund wander the west half of the pit. Appendix A describes Rhea, Nico, and Vince in more detail. The two have almost certainly slain their former charge countless times by now. Reah entreats the characters to put them out of their misery, giving them a scroll of replenishment if they save her.
Once Vince and Nico are slain, Reah can escape the tomb on her own and relocate to the cathedral in the Undead Parish. A ladder to the south leads back up to Area 1.


3. Beasts in the Dark
A lone skeleton beast lurks in the darkness on the path from Area 1. Another waits in the southeast corner of this ring-shaped platform. A final beast prowls at the opening down to Area 4. A giant skeleton on the northern side fires through the dark at anyone the skeleton beasts engage with.
4. A Human Effigy
The pathway down from Area 4 breaks off into a T intersection. A black knight of gwyn sits vigil halfway up the eastern path, guarding a corpse wielding an effigy shield. The western path finds down to Area 5.
5. Covetous Trap
This tighter alcove holds a giant skeleton and a skeleton beast waiting in ambush. A small path off to the northeast hides a bonfire as well. Near this path downwards and westward is Area 6, ten feet below the southern cliff.
A corpse sits on a platform to the east, wearing a covetous silver serpent ring. Any creature with Strength 12 or higher can jump to it from this area. Anyone who attempts to take it from the corpse will awaken the 5 bone towers using the corpse as a honey trap.
6. Tomb Alcove
At the base of the ramp here is an alcove carved into the wall, where a corpse clutches a white titanite chunk. Creatures too busy looting the corpse are unlikely to notice the three skeleton beasts prowling this lower area in wait for prey.
A ramp further down leads to Area 7.
7. Lone Corpse
This area is barren, except for a corpse in a northeast corner clutching a soul of a brave warrior. The only other landmark is a ladder down to Area 10.
8. Giant's Mausoleum
Someone of powerful and royal descent was once buried in this mausoleum. A petrified blacksmith sitting vigil over their grab holds the Large Divine Ember close. Six giant skeletons prowling about the place guard it. On the far side of the room, a corpse clutches a soul of a brave warrior. A ladder to the northwest leads out and up to Area 1.
9. Lower Mausoleum
Two giant skeletons at the bottom of the ladder up to this mausoleum mirror another two at the top to protect the path out of the tomb and up to the Catacombs.
The eastern ladder leads up to the mausoleum, and the western ladder leads up and out to Area 20 of the mausoleum.
10. Deep Tomb Walkway
The northern half of this pathway is a long, narrow shelf along the outside cliff. Lost Izalith in the distance glows brighter. Halfway down the path, a yellow fog gate bars the path to Nito’s lair if the Lordvessel was not placed at the Kiln. If she has, the gate will be gone, and creatures can into a tunnel deep within the mountain. Immediately behind where the fog gate would be is a titanite lizard. It flees as soon as it notices another creature.
Once the party has moved halfway through the mountain tunnel, four bone towers rise to block the path forward. A giant skeleton wielding a greatbow further down fires at range. It acts as a distraction for another giant skeleton waiting around the corner in ambush. Beyond the two skeletons is the large antechamber before Nito’s lair, Area 11.
11. Pinwheel's Shades
The bottom floor of this room has begun to flood with water. Five pinwheel illusions scattered about the room guard the entrance to Nito’s lair. At the beginning of each round of combat, a skeleton child climbs out of the wet mud below and attacks interlopers until all the illusions are slain.
Just beyond the entrance to this room is a corpse directly to the east carrying a soul of a brave warrior. If the characters explore the northern alcove underneath the fog wall, a half-submerged corpse can be found carrying a white titanite chunk.
A fog gate to the south is the final barrier to Gravelord Nito himself. Bones and viscera have been piled up to block a small alcove next to the fog door. If the debris is cleared, the alcove reveals a corpse clutching a precious white titanite slab


12. Nito's Necropolis
Beyond the fog wall is a balcony 30 feet above Nito’s proper lair. Initiative begins when a creature drops from the balcony and lands in the damp, cold home of Death.
Nito, Lord of the Dead, is joined in battle by four catacombs skeletons, as well as three giant skeletons. His thralls are only provoked into battle if a hostile creature moves within thirty feet of them. If combat is kept only to the northern half of the room, Nito can potentially fight without the giant skeletons' involvement. Nito is aware that the skeletons he commands will reanimate if he kills them. He is not afraid to use his AoE effects even if they would harm his allies.
Nito is slow, but hits hard. He seeks to kill an individual target before moving on to others, and will often pursue whichever target is closest. Nito uses his vast array of attacks and abilities to target his opponent's weaknesses. When Nito is slain, he leaves behind his Lord Soul, and a bonfire appears in the southern end of the room.


Duke’s Archives
“The tomes stored in these Archives are truly magnificent. A great pool of knowledge, the fruits of superior wisdom and an unquenchable desire for the truth. Some would say Seath had an unsound fixation... But his work is a beautiful, invaluable resource. All progress demands sacrifice.”
The Duke's Archives was once Lordran's greatest repository of knowledge and sorcery. Even the greatest scholars of the Vinheim Dragon School go in search of the fabled archives to learn from the Duke himself, Seath the Scaleless. Over time though, the Archive was warped into its current form, closer to a fortress and prison than a place of academia.
Duke Seath was born without the precious scales that granted immortality to his kin. In response to his ostracism, he turned traitor against his kind and revealed the secrets of their longevity to the burgeoning Lords of Anor Londo. In exchange, Gwyn gifted him a fragment of his Lord Soul and his dukedom. Since the war against the dragons, Seath has ceaselessly pursued the secrets of immortality. Only after he found the Primordial Crystal did he create a facsimile of his lost immortality. He also used this power to create crystal sorcery, a much more potent form of magic using the Primordial Crystal as a blueprint.
As the Age of Fire began to wane, the Duke took note of his own fading power. In response, he turned to foul experiments, particularly focusing on creating new abominations from captured maidens. The Archive Prison is one of the still functioning systems within Lordran. The Duke's channelers still prowl the land in search of cleric women for Seath's experiments.
1. Archive Threshold
An unremarkable marble corridor leads into the Duke’s Archives from Anor Londo. Two armored tusk waits at the end of each of the hallways leading in. These tusks do not have the armor gap the one in the Undead Parish does. It is a far more formidable foe when charging down intruders. The hallway leads north beyond them to Area 2.
2. Archive Foyer Bonfire
A bonfire sits in front of a lectern. It faces a large lift on the northern wall that can be called down with a lever to its side. A lever on the lift lifts it up to Area 3.
3. Grand Archive
Four crystal soldiers prowl this open antechamber at the top of Area 2’s lift. A crystal golem sits at the top of the first staircase off to the right. The channeler in the center of the larger room will bolster its allies and fire soul arrows down the hall. Five more crystal soldiers wait on the eastern walkway above. Another on the eastern walkway joins them when combat begins.
A corpse on the eastern walkways clutches a twinkling titanite chunk. A chest at the end of the southwest walkway holds another. At the top of the stairs is a soul of a brave warrior. The chest at the end of the southeast walkway is actually a lordran mimic. It drops a crystal knight shield after it is slain.
Another lift, identical to the one to Area 2, waits at the northern end of the hall. It will ferry creatures up to Area 4. A fog door in the northeast corner blocks progress deeper into the archives until the characters have fought Seath in Area 5.

4. Archive Lift Landing
The top of the lift leads only to a narrow staircase which continues higher in a wide arc. A quarter of the way up, a titanite lizard notices the characters moving up and flees higher up. Halfway up the stairs is the crystal knight, which cuts through enemies viciously to protect his master at the top. Once slain, nothing else bars progress to a fog gate to Area 5.
5. Seath's Study
Seath, the Scaleless is a surprising foe to face this early into the archive. This room is Seath’s study, where he consults endless tomes in his search for immortality. Seath is immortal in this form with the Primordial Crystal safe in his lair far below. The fog gate behind blocks the character’s exit, so this fight will almost certainly lead to their defeat. It is in the best interest of all involved for this fight to be big, climactic, and fast. Feel free to recharge Seath’s breath weapon each round to keep the fight from becoming a slog to inevitable defeat. After Seath slays the characters, they awaken in a cell deep within the archive, Area 6.
This room will be empty if the characters reach it after imprisonment. A chest appears in the center of the room containing the large magic ember. A corpse on the higher walkway holding a soul of a great hero. Once big hat logan goes hollow, he moves to this room naked and wields the tin crystallization catalyst. Appendix A describes Logan in more detail.
6. Archive Prison Bonfire
The bonfire is a lone companion to the characters once they awaken in this jail cell. This bonfire is cut off from the rest, and the characters cannot warp using the power of the Lordvessel from it. The party still has all their weapons and equipment, however. An injured man-serpent soldier leaning against the door of the cell holds the archive tower cell key to their freedom. The soldier has 10 hit points left. Its injuries give it three levels of exhaustion when the characters wake up. If killed or pickpocketed, the key it carries unlocks the door to this cell as well as Area 7, 9, and 10.
7. Barren Cell
A crystal soldier is the only occupant of this otherwise barren cell. The key to the characters' cell unlocks this one as well.
8. Reah's Cell
This cell is empty unless the characters rescued Reah of Thorolund in the Tomb of Giants. Appendix A describes Reah in more detail. A channeler will have abducted her by this point and she finally hollows in this cell. If put out of her misery, she will leave behind her ivory talisman. A corpse in her cell clutches a large soul of a brave warrior. The key in Area 7 opens the door to this cell.

9. Barren Cell
The key to the party's cell unlocks this one as well. Two crystal soldiers wait in the cell, and a ledge to the east drops down to Area 10.
10. Extra Key Cell
A lone crystal soldier paces back and forth in this otherwise empty cell. The soldier carries the archive prison extra key it carries unlocks many other cells in the prison. The archive tower cell key unlocks this room.
11. Archive Prison Staircase
A long, thin staircase spirals around the inside perimeter of the Archive Prison. Once the characters leave their cell, they all must succeed on a DC 14 Stealth check to move unnoticed by the man-serpent soldier in Area 13. If the soldier notices them, it pulls a large lever nearby. A high-pitched trill begins screeching from the megaphone next to it. The sound alerts nine of the pisacas in Area 12A. They all race up the stairs towards the former prisoners.
A corpse hanging on the railing outside the bonfire cell still clutches a soul of a brave warrior.
The top of the staircase ends at a ladder up to Area 15. The bottom of the staircase leads to Area 12.
12. Archive Prison Base Floor
Massive gears and levers dominate the central part of this wide ground floor. A ladder towards the northern end leads up to Area 13. A massive archway below it is the entrance to Area 12A.
12A. Pisaca's Shelter
Seath has created eleven pisacas, abominations crafted from the bodies of maiden clerics. If the alarm bell in Area 13 is silent, they wander within this antechamber. The pisacas do not attack unless provoked. Two in the back stay out of the fight until they are personally harmed. These two special pisacas drop a scroll of bountiful sunlight and a scroll of soothing sunlight respectively.
A locked iron door to the north blocks the way to Area 14. The archive tower giant door key found in Area 21 can unlock it.
13. Alarm Mechanism
A man-serpent soldier guards the alarm horn mechanism. A creature within five feet of the lever can use an action to deactivate it. A chest behind the mechanism contains the archive prison giant door key to unlock the large door at the top of the staircase.
14. Archive Prison Big Cell
big hat logan is imprisoned in this large cell here if he moves on from Firelink Shrine. Once freed, Logan moves to Area 21. A corpse in the far back of the room carries a fire keeper soul.
15. Rickety Scaffold
A half-complete wooden scaffold to the north leads to a cell with the corpse of a female cleric wearing a white seance ring. The key in Area 13’s chest unlocks the door to Area 16.
16. Free At Last
This open area is the character's first taste of freedom after they escape the prison tower. They will be immediately ambushed by a crystal soldier waiting in the southern hallway. During the fight, the soldier in Area 16A as well fires down at them.
16A. Ambush!
One of the crystal soldiers in this room fires a shortbow down the hallway at intruders. Another crystal soldier waits in the corner in yet another ambush. Once killed, the balcony north leads out to Area 17.
17. Archive Library
The Archive proper has four levels. The Area 16 hallway leaves the characters at the second-highest level. A set of staircases span the middle of the hallway, which can be rotated with a mechanism halfway up the stairs. When the staircases are first found, the bridge areas 17B & 18A, as well as 17C & 18D. A creature in the center of either staircase can use an action to turn the mechanism. It rotates the staircase 180 degrees to face the opposite quadrants.
17A. 3rd Floor SW Quadrant
The Area 16 hallway exits out to this quadrant's southwest corner. A channeler waits in the middle of the corridor. It makes liberal use of its teleport ability to move up and down the archive floors to attack from range. A smaller staircase to the northwest has a crystal soldier waiting in ambush. It leads down to Area 19A.
17B. 3rd Floor SE Quadrant
This quadrant is unoccupied. It is inaccesible until the characters rotate the central staircase. A small side room to the south has a crystal soldier. It fires arrows across the narrow gap toward creatures trying to use the ladder to get down to Area 21.
17C. 3rd Floor NW Quadrant
A crystal soldier fires arrows down the corridor towards creatures in this area and 17A. Another waits in ambush on the southeast balcony.
17D. 3rd Floor NE Quadrant
This quadrant is unoccupied, with the exception of a chest in the southern hallway containing a twinkling titanite chunk.
18. Archive 4th Floor
This top floor is only accessible via the rotating staircases down to Area 17.
18A. 4th Floor SW Quadrant
This quadrant has a crystal soldier archer in the southern part. Otherwise it is unoccupied.
18B. 4th Floor SE Quadrant
Another channeler waits by the staircase landing. It only attacks if a creature trys to climb up the staircase, or if they come in through Area 18D. A chest in the southern corner has a scroll of magic shield.
18C. 4th Floor NW Quadrant
A crystal soldier blocks the path to Area 18A, and an archer behind him fires at creatures engaged with it’s ally.
18D. 4th Floor NE Quadrant
Another crystal soldier waits at the top of the stairs, while an archer in the southern corner fires away further down.
19. Archive Library 2nd Floor
This set of balconies is just above the base floor, Area 18. This area is only accesible via the staircase from Area 17A.
19A. 2nd Floor SW Quadrant
A crystal soldier archer sits in the middle of this balcony, firing arrows at anyone coming down the stairs from the upper floor. The path to Area 3 in the north is accessible now that the characters have fought Seath in Area 5. A staircase lower eastward leads over to Area 19B and Area 20.
19B. 2nd Floor SE Quadrant
The only occupant of this balcony is a crystal soldier at the top of the stairs.


20. Archive Library Bonfire
Two tall bookcases flank the base floor of the archive. Two crystal soldiers wait at the bottom of the staircase, blocking progress to the southern bonfire. Another crystal soldier wielding a shortbow waits atop the eastern bookshelf, firing down at intruders. That bookshelf has a chest that is only accessible by leaping off of the rotating staircase in Area 17. The Avelyn crossbow sits in the chest for those brave enough to leap to it.
The bonfire on the southern balcony is not cut off from the rest of the world like the on in Area 6. After reaching it, characters can warp using the Lordvessel as normal. There is otherwise no exit out to the Area 22 courtyard if the bookshelf in Area 21 has not already moved.
22. Archive Courtyard
A wide, grassy courtyard is one of the only hints of natural beauty in the archives. To the east, massive crystals grow from every surface. A blue crystal pathway leads deeper into the Crystal Cavern, Area 23.

Eleven crystal golems wander the area, spread far away from each other. A lone golden crystal golem prowls in the center of the courtyard. Like its counterpart in Darkroot Basin, it has a hostage within itself that is freed after its defeat. sieglinde of catarina was kept within the golem for an indeterminate amount of time. Appendix A describes Sieglinde in more detail. Her first words are those of thanks, quickly followed by an interrogation about the whereabouts of her father, Siegmeyer. If the characters tell her of his last known whereabouts, she thanks the characters again and relocates to Firelink Shrine.
One of the crystal golems guards a blue titanite chunk in the northwest corner. A slain knight to the south still wears his crystalline plate armor.
23. Crystal Cavern
This blue crystal pathway leads over the endless chasm that is the Crystal Cavern. A fall off of the walkways is certainly lethal. A crystal golem waits at the bottom of the eastern pathway, blocking the path down to Area 24.
24. Crystal Pathways
At first glance, the only path forward is another blue crystal walkway to the east. A DC 14 Perception check will draw attention to the crystalline snowflakes falling on to an invisible walkway to the west. The walkway leads around a crystal column to a corpse clutching a humanity sprite.
Resting on a crystal jutting out of the wall is a moonlight butterfly, one of Seath’s creations. It does not react to the players presence unless provoked, at which point it begins to attack at range.
The path deeper into the cave is completely inaccessible at first glance. Another DC 14 Perception check reveals the same invisible walkway down to Area 25A. If the characters move carefully along the straight path, they will pass ten feet over Area 25 and ends at Area 25A.

28. Seath's Lair
As soon as the characters enter his lair, Seath, the Scaleless is immediately notified via the magical wards he has placed in the area. It takes him less than a minute to fly down to the lair, when the characters have walked halfway through. The Primordial Crystal, the source of Seath’s immortality, sits against the far eastern wall. Once destroyed, Seath’s immortality vanishes with it. For the rest of the fight, Seath is no longer immune to damage. The Primordial Crystal has an AC of 15 and 5 hit points. The Crystal regenerates after a long rest if Seath is still alive.
Seath fights viciously, particularly after the crystal is destroyed. He is slow and lumbering however, and cannot avoid damage easily. He is a cunning foe, and takes advantage of creatures grouped close to devastate them with his crystal breath and high level spells.
Once slain, Seath relinquishes his Lord Soul and a bonfire appears where the Primordial Crystal was once placed.

Demon Ruins
“After all this searching, I still cannot find it...”
In the earliest days of the Witch of Izalith's reign, there was a vast civilization deep underneath Lordran proper that flourished under her Lord Soul. When Izalith fell, the first demons were born and they began to climb up from the depths and lay siege to Lordran's subjects. What remains of that invading force now stalk the Demon Ruins underneath Blighttown.
Lava continues to flow and pool over the once dormant lakes that fill the ruins, spewing forth from a garguantuan monstrosity that watches over the corpse of one of the Witch's daughters. Only its death will clear the way to further explore Izalith beneath.
1. Quelaag's Domain Tunnel
The tunnel carved through the side of Quelaag’s temple leads through fifty feet of rock, ending at an open plateau above the Demon Ruins. A dozen egg carriers craw near the bonfire in the center of the plateau. They are passive until provoked. A massive lakebed filled with lava stretches out to the south, blocking progress further into the ruins to Area 5. Two paths diverge to the east, one leading down to the bridge to Area 2, and another that descends into the lava (Area 4)
2. Overlake Bridge
Stretching high above the lava lake below is a long bridge to the ceaseless discharge's cliffside. The bridge connects to the roof of a spire, with a fog wall nearby blocking progress to Area 3.
3. Brother and Sister
Long ago, before the First Flame began to flame, a son was born to the Witch of Izalith. The child was cursed from bith, bleeding lava from painful sores. His sisters crafted a ring that would ease his pain, but he lost it, creating the Centipede Demon in the process.
The Ceaseless Discharge now waits at this massive clifface, watching over the corpse of his sister on an altar in the southern alcove. She still wears her gold-hemmed robe. Lava pours from open wounds on its back and arms, filling the lakebed below. If the corpse or its belongings are touched, the Ceaseless Discharge attacks. Area 4 will remain untraversable until the characters end his suffering. The lava in Area 4 cools and hardens afterwards.
4. Molten Lakebed
Lava pouring from the Ceaseless Discharge in Area 3 covers this lakebed.
Once the characters slay the Ceaseless Discharge, most of the lava cools (the orange areas). The cooled lava is safe to walk on further south. The red areas on the map are still filled with hot lava after this.
After the lava cools, demons enter the lakebed and prowl about the area. A capra demon stalking the entrance blocks the walkway eastward to Area 5. Nearby the demon is a corpse half buried in stone carrying a soul of a proud knight.
4A. Prowling Demons
The southern half of Area 4 is now crawling with seven taurus demons that attack anyone who moves more than halfway down the area.
Hot lava forms a small moat around a corpse to the southwest carries a large soul of a proud knight. A petrified blacksmith sits in the middle of a lava puddle in the south clutches the chaos flame ember.


.png)
5. Temple Walkway
Waiting at the end of the walkway from Area 4 are another five capra demons. From the top floor of this demon temple, a river of lava, the large bridge spanning it, and the larger temple across the way are visible. Another staircase to the east leads down to Area 6.
6. Demon Ruins Bonfire
The entrance into this temple is completely blocked by a centuries-old rockslide. The corridor to the far east ends at a tempting bonfire alongside a corpse carrying a soul of a proud knight. A non-respawning burrowing rockworm waits in ambush at the end of the corridor. It hides in the southern rockwall attacking anyone trying to reach the bonfire.
Hidden beneath this eastern walkway is a corpse clutching two green titanite shards
Near the staircase bridge across the river below is a corpse clutching a soul of a proud knight. Anyone trying to retrieve it will awaken the four demonic statues on the bridge who converge on them.
7. Temple Threshold
Another burrowing rockworm waits concealed in the ground in front of the staircase to Area 6. After it bursts out and attacks creatures moving down the staircase, two taurus demons and a capra demon on the northern cliff up to Area 9 join it.
An orange fog wall blocks the way into the Demon Firesage's lair. The fog wall will only be traversable once the Lordvessel is placed at the Kiln of the First flame. Before the fog wall, the eastern wall has fallen away, revealing a large, petrified vine that can be climbed down into Area 9.
A shelf along the side of the western cliff leads to Area 8.
8. Ember Ambush
At the far end of this long corridor, a petrified blacksmith holds the large flame ember. Barring the path in secret are five burrowing rockworms hiding within the floor and walls. They take advantage of their size to block the corridor and separate the party from each other.
9. Bug Swarm
This massive open space is identical to Area 12. The chamber is completely empty except for three chaos bugs near the west wall.
If a character advances within the Chaos Servant covenant, this wall will be destroyed. This allows passage into Lost Izalith. Four more chaos bugs wait on the other side of the door. The tunnel widens into a bridge to Lost Izalith’s Area 5.
If the door is opened before killing the centipede demon, one of the chaos bugs is a sunlight maggot variant. If it is not slain before killing the centipede demon, solaire of astora will find the sunlight maggot first. This eventually drives Solaire insane. He will remain in the area until found by the characters. Appendix A describes Solaire in more detail. Solaire announces he has become the sun and attempts to strike down the characters in a mad frenzy. Only death will bring him peace.
If the characters save Solaire, he will leave the Demon Ruins to assist in the final fight against Gwyn.
10. Demon Firesage's Temple
The demon firesage was the last master of pyromancy within Lost Izalith before the Bed of Chaos was born. In the chaos that followed, he would become the first Demon. Once the players enter this chamber, the Firesage will erupt into flame and charge them down. The Firesage is a massive opponent who uses its AoE effects to devastate as many opponents as they can at once. Once it is slain, it drops the demon catalyst and the fog walls to the north and south fade away.
Two staircases up and down spiral around each other to areas 11 and 12 respectively.
11. Quelaag's Domain Elevator
Five demonic statues wait along the outside staircase leading higher into the temple. At the top, a more narrow walkway heads south to a crossroads in the center. A platform in the center is activated with the pressure plate at its center and rises up to Quelaag’s domain. A staircase on the far end of the corridor has long ago collapsed, leaving a hole in the floor with a 40-foot drop back into Area 10.
12. Grand Temple Bonfire
A bonfire waits at the bottom of the staircase in Area 10. Beyond it is a long petrified vine that descends down into the lower chamber. The higher eastern walkway has a soul of a brave warrior that can be easily accessed. The lower chamber is completely empty, and a fog wall blocks progress further south into Area 13.

13. Centipede Demon's Lair
Within the centipede demon is the orange charred ring, the magical source of its being. Its primary drive is to kill and consume everything that enters its lair. The demon can safely walk on all the surfaces in this area, including lava. Its detachable limbs can tear apart intruders unless they are destroyed quickly. Once the centipede demon is slain, it drops the orange charred ring into a non-lava space.
On the southeastern platform are two green titanite shards.
With the ring in hand, the characters can move across even hot lava. The eastern exit’s fog wall dissipates after the centipede demon is killed. The tunnel through the cavern walls leads to the first bonfire of Lost Izalith.

Lost Izalith
“The tomes stored in these Archives are truly magnificent. A great pool of knowledge, the fruits of superior wisdom and an unquenchable desire for the truth. Some would say Seath had an unsound fixation... But his work is a beautiful, invaluable resource. All progress demands sacrifice.”
Once the cavern with the city of Izalith was much smaller. Over centuries, the people of Izalith excavated massive chunks of stone and lava to build great edifices. Many who looked upon Izalith in it's prime claimed it rivaled the magnificent architecture of Anor Londo. But once the Witch of Izalith tried to create a new Flame as the First Flame faded, she became the corrupted being known as the Bed of Chaos and spawned the demon race that now prowls Lost Izalith.
The Witch's Lord Soul still exists within her corrupted form, and only be searching through the ruins of Lost Izalith can the party hope to seize it, and possibly save a friend.
1. Cavern Bonfire
This tall cavern is unbearably hot, but the bonfire in the south of the room feels like a soothing balm. The first time the players come across this bonfire, Solaire of Astora will be staring out towards the lava lake northwards. Appendix A describes Solaire in more detail. The cavern is otherwise unoccupied. A long petrified branch is wide enough to support a medium creature walking along. The branch leads out to Area 2.
2. Izalith Vista
The great city of Lost Izalith is surrounded by a 300-foot wide moat of molten lava. The lava stretches out in every direction. A set of massive petrified roots, fifty feet tall, create a penned-in area to the east and west of the area.
Two dozen bounding demons of Izalith wait motionless, scattered throughout the area.
2A. Demon Ruins Shortcut Bridge
A large bridge stretches out from the Demon Ruins fifty feet overhead of the entrance above Area 1. At the end of the root out of that entrance is a corpse carrying a soul of a brave warrior. Before it can be taken, the prowling demon waiting in the center of the bridge must be defeated first. It drops a demon titanite shard when it is slain, and does not respawn after a long rest.
2B. Molten Lake Tower
This tall tower sits in the center of the lake. A soul of a brave warrior sits on a corpse at the far eastern outcropping of the land surrounding the tower. The northern wall of the tower is actually an illusory wall. Interacting with it dispels the illusion, revealing a corpse inside the hollow interior clutching a soul of a great hero. Two demonic statues feign inanimacy in the southwestern and southeastern corners of the space.
2C. Molten Lake Bonfire Tower
Another two demonic statues wait in the corners of this tower. The similarly placed illusory wall to the north hides a bonfire within. Across the lake to the north is a fallen tower. A long petrified vine can be climbed up to Area 3.

3. Izalith Branch Road
At the base of the city, this long stretch of road is overgrown with petrified roots. One loops up and down from the lava lake, Area 2. Dozens of statues litter the ground, eleven of which are demonic statues in hiding. The statues attack anyone who attempts to cross up the stairs to Area 4. Sitting near the staircase up to Area 4 is a corpse clutching a large soul of a brave warrior.
4. The Maw, The Daughter, and the Knight
A bizarre chaos eater waits at the top of the stairs up to this higher layer of the city. This neighborhood surrounds the Bed of Chaos in the center of the city. Two long platforms jut out to the south, the western of which has petrified vines that allow passage over to Areas 5 and 6.
Once the characters move to within 30 feet of the center walkway north, the daughter of chaos invades them. The Daughter of Chaos uses the stats of Quelana of Izalith, She defends the entrance to the Bed of Chaos’s lair. She drops the izalith catalyst and does not respawn after she dies. The northern corridor ends at a fog wall down Area 9.
The southwestern walkway ends with a corpse carrying a scroll of chaos fire whip. Kirk, Knight of Thorns, guards it from afar. He invades when a creature moves within 30 feet of the body. Should he fall here, his corpse can be found in front of the Fair Lady’s bonfire.
5. Spire Balcony
A wide balcony winds around the top of this tower above Area 3. A demonic statue to either end will protect the two corpses on the west and east sides of the balcony. The statues clutch a soul of a hero and a rare ring of sacrifice.
6. Izalith Lower Courtyard
This lower courtyard has eight demonic statues milling about it. The floor in the north center part of the courtyard has weakened with age. It collapses if two or more creatures stand on top of it, causing them to fall twenty feet down into Area 7. A long bridge to the south spans the entire Area 2 lava lake and disappears into the Demon Ruins’ Area 9.
7. Fall of an Onion
The petrified branches of the Bed of Chaos fill this wide chamber. A part of the floor in the center has given way with age, leading to the center pit in Area 7 filled with chaos eaters. Higher floors up a ten-foot wall flank the central chamber of this space. The branch leading back up to Area 4 is only accessible from the back of the central chamber. The characters will need to come up from Area 8’s staircases to return alive.
If siegmeyer of catarina, described in Appendix A, survives, he is found at the edge of the pit dozing off. Siegmeyer feels gratitude and shame for the character's help thus far, and offers to descend into the pit to clear the way on their behalf. If the players accept, he will engage the chaos eaters alone and attempt to take as many down as possible to make traversing Area 7 easier. If he is dropped to 0 hit points in the process, he remains alive long enough to offer the characters with his speckled stoneplate ring. He dies shortly after. If the characters save him, he will instead offer them his titanite slab in exchange. Ashamed of his final inadequacy, he will leave Izalith and move on to Ash Lake.
After ascending from Area 8, the characters will find a red titanite shard
8. Poison-filled Chamber
Thick green poisonous filth fills the floor of this lower chamber. The muck creates difficult terrain in this entire area. At the beginning of each creature’s turn within it, they must succeed on a DC 12 Constitution saving throw or be poisoned. While poisoned this way, the creature takes 1d6 poison damage at the end of their turns. If the creature takes the stairs up to Area 6 it may make another Constitution saving throw at the beginning of its turns to end the condition.
Four chaos eaters wait in the central pit for sacrificial victims. The corpses of their previous victims hold two souls of a brave warrior and two green titanite shards. The southern corridor offshoot has a corpse clutching a red titanite slab.
The staircases to the east and west lead up to Area 7.
9. Bed of Chaos
Long ago, the Witch of Izalith and her daughters sought to prolong the Age of Fire by recreating the First Flame with chaos magic. Instead, they transformed into horrible monstrosities. The Witch herself became the Bed of Chaos, the womb of demons. After stepping through the fog wall, the characters will begin sliding down a long tunnel deep into Izalith’s core. As they slide down, flame erupts in the tunnel behind them. At the end of the tunnel is a short drop down into the southern exit into this area.
Once the Bed of Chaos is slain, the maggot beneath it dissolves away leaving behind the Witch’s Lord Soul. A bonfire appears nearby, allowing access out of Izalith with the power of the Lordvessel.


Great Hollow
“Mm! Oh-hoh! Excuse me. I was absorbed in thought, I just drifted away. You see, I'm actually in a bit of a fix. I've made it this far, but I'm short on antitode moss for the trip back. ...By my knighthood, I am ashamed to ask... But can you spare a few scraps of moss?”
Traversing down the Great Hollow is a difficult task. The Hollow has 8 “areas”, branching pathways that can be climbed and dropped down on.
1. Blighttown Branch Path
Beyond the second fog gate is a ten-foot thick branch that winds down into the Hollow below. At the top of the branch is a bonfire, where several branching pathways split down to Area 2. The root continues down to Area 2A. A DC 13 Perception check will notice another branch ten feet beneath it. The branch can be dropped down on safely, leading to Area 2B. A failed Perception check instead points to another branch that will not support the weight of a Medium-sized creature. It will break immediately if such a creature lands on it, dropping the creature 150 feet down to Area 5.
2. Topmost Branchway
2A. Safest Pathway
The winding path around the central column is safe, if unprofitable. The branch continues further down to Area 3B.
2B. A Treasure and a Leap
A red titanite chunk rests at the base of this wide branch. The branch forks twenty feet down, with one ending back in the central column at Area 3B. A creature must make a DC 10 Acrobatics check to drop down to a small shelf below, Area 3A. On a failure, the creature drops 120 feet below down to Area 5.
3. Descent
3A. Titanite Lizard Scramble
Three titanite lizards crawl on this rocky outcropping below Area 2B. Unfortunately, the nearest walkable branch is a DC 15 Athletics check away, Area 4A. An alternative path is straight down to Area 5, a 90-foot drop.
3B. Ooze Trap
The root path down the central column may seem like a safe option, but a DC 15 Survival check reveals that a slippery sap oozes from the branch’s surface. To walk along it to Area D2 safely, a creature must succeed on a DC 15 Dexterity saving throw or fall 90 feet to Area 5 below.
From this an
On a success, the creature can continue to safely walk down to Area 4B.
4. Inner Hollow
4A. Safe Path
If this branch is reached by jumping down from Area 3A, the characters can safely traverse it down to Area 5.
4B. Hollow Within The Hollow
A corpse wearing a cloranthy ring sits inside the Great Hollow's innermost trunk. A 15-foot drop
5. Branch-woven Platform
Halfway down the Great Hollow, branches have weaved themselves into an 80-foot wide circular platform to the outside walls. Two basilisks prowl the area, cursing any who make their way down, be that climbing or falling. A ladder has been built near the outer rim of the circle down to Area 6A and a hole on the opposite side drops down to Area 6B. A small ledge with a blue titanite chunk resting atop it interrupts the drop-down to Area 6.
6. Basilisk Ambush
Another dense cluster of branches forms a more patchy platform underneath Area 5. Four more basilisks wait here, along with a large soul of a nameless soldier. Three holes in the canopy offer “safe routes" down, ten-foot drops to Area 7A and 7B. Another down to weaker branches will not support the character's weight. A character who steps there breaks through and plummets 90 feet down to Area 9. A DC 12 Nature check will reveal the third option as non-viable.
7. Lower-Hollow Branches
7A. No Way But Down
This narrow landing has a white titanite chunk resting on it, though there are no nearby branches to climb further down from there. The only workable route to the bottom, Area 8, is a seventy-foot drop straight down.
7B. Safe Passage
This long branch leads down to a shelf of large red mushrooms along the inside walls of the Great Hollow, Area 7A.
8. Lowermost Branchway
8A. Playtime
Two pairs of mushroom children wait on opposite sides of the mushroom shelf that winds down to Area 8. The shelf can be safely walked upon the base of the Great Hollow.
8B. A Drop Worth Taking
A white titanite chunk rests on this branch across from Area 6B. It is only a 20-foot drop down to Area 8. There is no other path down.
9. Mushroom Family
The base of the Great Hollow is home to three mushroom parents and five mushroom children, joined by those in area 7A. The parents will protect their children and themselves, but will not bother creatures that stay clear of them. A large part of the outer bark of the Great Hollow has fallen away, leading out to a large root to Ash Lake.
Ash Lake
“My father...all Hollow now...has been subdued. He will cause no more trouble. It's finally over...I will return to Catarina. You assisted us both greatly. I can hardly return the favour, but please accept this. It's of no use to me now.”
When the dragons were killed the Age of Fire first began, all traces of the dragons and the Age of Ancinets was wiped from Lordran. Ash Lake stands as the last bulwark of those ancient eons. Even still, a single survivor of Gwyn's campaign against the old ways still offers a covenant with those that would emulate its power.
1. Hydra's Beachead
A massive root winds down from an opening in the base of the Great Hollow. It windows down into the long narrow beach of Ash Lake. The bottom of the root sits near a bonfire on the southern shore. The beach stretches further eastward.

Beyond the bonfire waits a black hydra 30 feet off the northern shore. Unless the entire party succeeds on a DC 15 Dexterity(Stealth) check, the Hydra notices them crossing the shore and attacks. If the characters move beyond its reach, it can use its movement to jump over the beach and engage them on the other side. If slain, the hydra dissolves away and a single dragon scale floats across the lake to the beach.
2. Fallen Tower
The fallen tower jutting out of the sand conceals a dragon scale within.
A creature walking through this area must succeed on a DC 13 Wisdom(Perception) check to locate the two giant clams buried in the sand. They must be engaged at range or else they will ambush creatures moving towards Area 3.
3. Minor Hollow
Another dragon scale sits behind a sand dune to the north, while a hollow archtree sits on the bank. A pair of thick roots are large enough for a medium-sized creature to climb up into its trunk. Inside, a nest of two basilisks attack and attempt to curse any intruders. Another hole in the trunk leads out to a branch that wraps around the trunk. Another basilisk watches over a lower branch, along with a corpse carrying a scroll of great magic barrier.
4. Clambush!
The beachhead tapers off to Area 5, a dense cluster of archtrees that form a canopy of branches obscuring view into it. The path is empty, except for a hidden giant clam in the center.
5. Everlasting Dragon's Cloiser
The final Everlasting Dragon hides deep within the tangled mass of branches and roots of the nearby arch trees. Appendix A describes the Everlasting Dragon in more detail. The dragon is immune to damage now that Gwyn’s lightning miracles have faded with the First Flame. Nonetheless, it is not hostile to the characters' presence. Interacting with it allows any of the characters to join the Path of the Dragon covenant. Appendix C describes the Path of the Dragon covenant. While the dragon is unkillable, if its tail receives 50 points of damage, it is severed and becomes the dragon greatsword.


Oolacile Sanctuary
“Thou shalt see further on. An abyss was begat of the ancient beast, and threatens to swallow the whole of Oolacile. Knight Artorias came to stop this, but such a hero has nary a murmur of Dark. Without doubt, he will be swallowed by the Abyss, overcome by its utter blackness...Indeed, the Abyss may be unstoppable...Still I have faith, that Princess Dusk may be rescued yet...”
Oolacile was a land of ancient sorcery, a kingdom within Lordran seen by many as a utopia even within the height of the Age of Fire. A curse of abyssal dread has swept over the land, corrupting the lands of the kingdom of sorcery. Some guardians still preside over those areas still untouched, while others have fallen to the Abyss. Even some of the land's great champions have fallen from grace, beyond the reach of their closest allies. What's more, the last true dragon has made its roost in the Royal Wood, hunting would-be adventurers and hoarding their wealth for itself. Perhaps a new group of heroes can purge the wood of its blight, and return honor to one of history's great champions.
1. Sanctuary Threshold
After being grabbed by the massive, shadowy hand of Manus, the characters are transported into the far past. They awaken around a Bonfire inside of a small cavern, where the roots of trees above weave themselves through the falls and ceiling. A path north leads outside to a Fog Door to Area 2.

2. Guardian's Clearing
The oolacile Sanctuary in Area 3 is guarded by a fierce winged lion, the Sanctuary Guardian. The guardian is an amalgamation of several different animals, the body and head of a lion, a scorpions tail, and two sets of massive white wings that allow it to fly gracefully in the air and buffet opponents with wind. It also has the ability to magically project lightning from its maw to stun and paralyze foes. The guardian fights intelligently, making use of its mobility to attack ranged attackers and spellcasters while shooting lightning at foes grouped closely together.
When the guardian is slain for good, the fog doors to Area 1 and 3 fade away, allowing passage to the Sanctuary Proper.
3. Oolacile Sanctuary
The oolacile Sanctuary is the last section of oolacile untouched by the Abyss. After defeating the Sanctuary Guardian, the characters walk into a peaceful glade, with sunlight filtering through the trees onto a bonfire in the center of the sanctuary. In Princess Dusk’s youth, she would play and learn within the sanctuary under Elizabeth’s watchful eye. Elizabeth is a giant mushroom who waits in oolacile Sanctuary for a hero to save her goddaughter. She is willing to sell Dusk’s sorceries and catalysts to assist the characters in their journey.
A bridge north leads to Area 4.
4. Royal Wood
The Royal Wood was once the hunting grounds of oolacile’s aristocracy. Today it is the latest victim of the Abyss’s corruption. Grass has been darkened and laid fallow, while the trees curl into themselves without leaves. The bridge from Area 3 over a deep chasm leads to the southern edge of the wood. The majority of the wood is covered in dense trees and fetid fields, with a sloping pathway to the west leading to Area 5.
The works of magic by oolacile’s sorceries created constructs to tend to the wood and protect it from outsiders. Those artificial guardians have also fallen to Manus’s corruption, viciously attacking any who dare enter the Royal Wood. 8 scarecrows and 4 stone guardians prowl the area, attacking any who tread upon the wood.
In the middle of the wood proper is a shallow pond. Sitting inside is a blue titanite slab.
4A. Arena Shortcut
A small structure to the far north has a deep hole within until the levitating platform in Area 8 is raised to provide a shortcut back.
5. Sunken Valley
A small sunken valley sits on the southwestern edge of the Royal Wood. 8 scarecrows wait in hiding or pretend to be dead. A DC 16 Perception check reveals their presence. If one of them is attacked, or the characters move halfway through the valley without noticing them, the scarecrows leap out from hiding and attack with a single stone guardian.
Against the far western ledge to the chasm below is a set of stone armor.
Another small stone bridge leads to Area 6. When the characters move to cross it for the first time, the heavy beating of wings can be heard just before Black Dragon Kalameet shakes the ground by landing on it. It takes note of the character's presence before flying off unperturbed.
6. Deep Wood
Directly after the bridge, a titanite lizard waits near a ledge. When it notices the creatures and initiative is rolled, the lizard will immediately fling itself off of the ledge into the chasm below, making it impossible to attempt to kill it without completing a rest. A smaller ledge nearby drops down into the broader Royal Wood’s sweeping valley. A large portion of the valley has fallen away into a chasm below, leaving only a ring of traversable land on the outside.
Two scarecrows wait guarding a large soul of a proud knight. Another titanite lizard waits on the southern path ahead, scampering off to lead the characters to an ambush by 3 scarecrows and two stone guardians. Another 5 scarecrows guard a gold coin to the northeast. A plateau stretches above this valley, Area 7 to the east. Accessing the plateau requires climbing a rocky outcropping nearby, guarded by 5 scarecrows. At the top of the outcropping is a soul of a brave warrior.
6A. Deep Wood Elevator
The southeastern cliffside of this area holds a small stone structure with a levitating elevator platform waiting for the characters. If the characters use it, it brings them down to the crossroads area in front of Artorias’s arena, Area 8. If the rear of the structure is explored, they will find a soul of a proud knight.
7. Forest Plateau
3 stone guardians and 3 scarecrows prowl the plateau. A thorough exploration of the area yields a cache of 10 gough’s great arrows, as well as an Elizabeth’s Mushroom near the ledge the characters initially drop down on.
A short drop down to the north brings the characters back to the same ledge where they found the first titanite lizard in Area 6.
8. Arena Crossroads
This wide field serves as a crossroads between many of the locales within Oolacile. A set of two elevators to the west lead up to Area 7, and down to the Chasm of the Abyss only after the elevator is activated first far below. Another elevator up to Area 4A lies to the north. To the north of the coupled elevators, a path hugs a cliffside eastward to Kalameet’s lair, Area 11.Finally, the Arena where Artorias’s corrupted form stalks lies to the west behind a fog wall.

8A. Arena Shortcut Floor
Just before the stone building that houses the elevator platform paired with the one in Area 4A, Marvelous Chester leans against the cliffside. His true demeanor is unseen behind his smiling mask, but he is happy to sell his wares to a fellow adventurer lost in time.
If Chester’s phantom is defeated in the Oolacile, he will still be present here. He will not be happy with his defeat, but will still sell to the characters.
9. Artorias's Arena
In the recent past, Oolacile was convinced by a toothy serpent to violate the grave of Primeval Man. The Abyss was unleashed upon the kingdom soon after, and it’s subjects corrupted into hideous forms. One such resident wanders the arena beyond the fog door from Area 8, taking note of the characters presence. In the blink of an eye, a knight clad in blue armor descends onto the creature, impaling it on an impossibly large greatsword. The knight finishes off its quarry, before turning its head to look in the characters direction.
The legends once spoke of Knight Artorias and his companion the Grey Wolf Sif challenging the Abyss in Oolacile and vanquishing it once and for all. Those stories were lies. Despite the warding of his Covenant, the Abyss corrupted the Abysswalker and transformed him into the monster the characters see before them. Artorias gives a deafening roar in their direction before hurling the corpse towards them and rushing to slay them.
Artorias’s battle prowess has only been enhanced by the Abyssal energy coursing through him. His mobility is unparalleled, and his 5 legendary actions allow to react to each character’s turn. To face the Abysswalker should seem like an unwinnable challenge, and you should feel encouraged to play him in the most ruthless and optimized fashion. In some ways Artorias should feel like the most difficult single fight in the entire adventure.
Once Artorias is finally slain, he leaves behind his soul, and the way to the oolacile Township, Area 10, is opened.
Lord’s Blade Ciaran. After the characters take a long rest, a figure in a white porcelain mask clad to cerulean blue armor will be found in this arena mourning over a makeshift grave. Seeing the characters and recognizing them as those that put Artorias out of his misery, she asks them for Artorias’s soul to help preserve his memory as a hero. If she is given the soul, she exchanges them for her Gold Tracer and Silver Tracer, vowing that she has no need for her weapons any longer. In either case, she feels no need to speak of her own identity, and many characters that come across her may never learn of her position in the Knights of Gwyn.
10. Township Pavilion
This pavilion looks over the ruins of oolacile Township. A bonfire sits in the center of it, while a staircase to the east leads down to the Township proper.

11. Chasm Road
A cliff shelf leads down into a deep chasm, full of the same corrupted plants as in the rest of the Royal Wood. Part way down the shelf is a corpse clutching a soul of a brave warrior. The far western side of the chasm has a small waterfall, hiding another large soul of a brave warrior. Three undead attack dogs prowl along the eastern path in front of a fog wall protecting Kalameet’s Lair, Area 12.
12. Kalameet's Lair
This wide valley is the hunting grounds of Kalameet, Black Dragon, one of the last true dragons still alive. What’s more, the Abyss has corrupted Kalameet to a lesser extent than Artorias, empowering its fiery breath. If the characters climb down into the valley, they will find corpses scattered across the area. Two in the center clutch souls of a brave warrior nearby another with a soul of a hero. Underneath a small waterfall to the northwest is a half-buried titanite slab. High walled cliffs surround most of the valley, while a steep drop down a larger waterfall to the south.


When the characters first explore the valley, Kalameet sweeps down from above, bathing them in black flame until they perish. It is unlikely that the characters will be able to take down Kalameet at this point, presenting an almost certain death to any who traverse the valley. Only after Hawkeye Gough pins the dragon’s wings from afar can the characters be blessed with a fair fight. When the dragon’s wings are maimed, its flying speed is reduced to 30 feet and it cannot end its turn in the air. Even with its wings maimed, Kalameet is one of the most powerful foes the characters will come across. Its breath weapon is among the largest sources of damage in the entire advantage, and its Calamity ability can quickly make even the hardiest of characters drop to death in a single turn.
Kalameet does not drop a soul upon death, similar to other dragons. Only the calamity ring remains once Kalameet is defeated for good.
13. Gough's Tower
A ringed walkway stretches above Artorias’s Arena, accessible only after killing him and walking through the southern archway. A staircase will bring the characters up to the walkway where a great view of the Royal Wood and the township below presents itself. At the far end of the walkway is a locked tower who key waits further in the township.
Once the tower is unlocked, a ladder leads up to a massive blind giant, Hawkeye Gough of the Knights of Gwyn. Gough is an amicable fellow, grateful to the characters for putting down his corrupted ally. Gough is happy to sell his carvings, which make whimsical noises when crushed, as well as greatarrows. After the characters face Kalameet for the first time in Area 12, he remarks on their bravery, and offers to take Kalameet down so they can face it on even terms. If the characters agree, Gough stands for the first time, and despite his blindness, fires his last greatarrow flawlessly through the Royal Wood, impaling Kalameet’s wings and bringing it down into its valley.
If the characters are successful in their quest to slay Kalameet, he will congratulate them if they return to him, and offer them his weapon, Gough’s Greatbow. The weapon will magically scale itself down to fit the characters size.

Oolacile Township
“My home Oolacile was reduced to ashes, long ago, in my time. I have been alone ever since...But to be summon'd thus, and to be of service to thee... It is... most rewarding... Oh, forgive me, such a long-past time is none of thine concern...”
The people of Oolacile were content to live in harmony with nature and develop new art and sorcery until they were tempted by a primordial serpent. Asked to disturb the grave of a primordial man, the Abyss soon engulfed the kingdom, and the once peaceful residents were corrupted into the bizarre abberations that now stalk the kingdom. Far beneath the township is the same excavation site that the explorers of Oolacile unearthed, as is Princess Dusk.
1. Township Pavilion
This pavilion looks over the ruins of oolacile Township. A bonfire sits in the center of it, while a staircase to the east leads down to the Township proper. The first small alcove after the staircase houses an Oolacile resident, a corrupted denizen of this once great civilization. It has lost its mind to the Abyss, and now attacks anything with even a trace of humanity left.
The rooftop to the East has a corpse sitting on its ledge clutching a large soul of a proud knight. The staircase west continues further down to Area 2.
2. Rooftops
In oolacile’s past, this courtyard may have been a public gathering space, or a marketplace. Now it lies in ruin, and is occupied only by four Oolacile residents that attack anyone they see. A deep pit in the center of the square leads far beneath to the lower township, only accessible once the elevator platform below has been activated at least once.
A southwestern staircase leads deeper to Area 3.
3. Rooftop Corridor
Two more Oolacile residents stalk this corridor deeper into the township. A staircase south leads to Area 4.
4. Decrepit Residence
This larger residence is now the home to a host of corrupted humanoids. An Oolacile sorceress commands a group of 3 Oolacile residents on the northern patio outside. A covered area directly to the south houses a soul of a brave warrior and another Oolacile resident waiting in ambush. The way south branches to the west, with one path leading further to Area 6a and one west around the structure to Area 5.
5. Protected Treasure
A walkway circles around the outside of the Area 4 home. The ledge drops off as the rest has crumbled with age, but a short leap to a ledge on a nearby homestead. Following the path south around the first building ends in a similar crumbled section, with an orange soapstone message reading “Let there be light.” If one of the characters presents light from a constant source like the Cast Light spell or a skull lantern, an illusory wall fades away leading inside the building. No one else is present, only a chest containing a silver pendant. At one time, the pendant was given to Knight Artorias to protect him from the Abyss and its magics.
The walkway west leads to Area 5A.
5A. Residence Interior
A lone Oolacile sorceress stalks this upper floor of a living space. A set of staircases lead up to Area 5B, and another leads out to a long ledge with a soul of a brave warrior, and a small jump down to the ledge below Area 4.

5B. Upper Floor
Two more Oolacile sorceresses wait at the top floor of this home, protecting a scroll of dark orb. Two exits to the north and south lead to ledges surrounding the outsides of the building. The one on the south has an Oolacile sorceress on the far western edge.
6. Tower Bridges
A long narrow bridge connects Area 5 and 6. As the characters cross halfway down it, Marvelous Chester invades the bridge as a black phantom. He prefers mid-range combat, able to swap between barrages of crossbow fire and melee weapons.
Sitting at the top of the tower that occupies this area is a lone chest. A DC 17 Perception check reveals the telltale bloodstains surrounding the lordran mimic that masquerades as the treasure chest. Once it is slain, it leaves behind one of Gough’s woodcarvings that exclaims “Very Good.” A staircase spirals around the outside of the tower, where an Oolacile resident waits in ambush. As it engages the characters, the Oolacile sorceress to the west attacks at range while the characters try to close the gap. Once they are both dispatched, the way to the meeting hall, Area 7, is clear.
7. Great Hall
Two more Oolacile residents hide in the ceiling rafters on the top floor of this wide meeting hall facing Area 6. They descend on the characters if they try to move down the eastern staircase. The lower floor of the hall is crawling with aberrations, six Oolacile residents wander the center while two Oolacile sorceresses flank the south and north ends. Another Oolacile sorceress sits on a wooded ledge 15 feet above the ground to the north wall. An outcropping to the west leads out to a crumbled staircase deep into the chasm below, but a corpse has held onto what remains clutching a soul of a hero.
The eastern staircase leads up to Area 8 and the alcove near the northern sorceress leads out to Area 9.
8. Great Hall Rafters
A series of smaller rooms criss-cross throughout the highest floors of the meeting hall. After all of the stairs are climbed to the highest point, an Oolacile resident waits in the antechamber between areas 8 and 8A. A small ledge to the east presents a short jump(DC 10 Acrobatics check) to a small room above the broader meeting hall.
A single chest, similar to the one in Area 6, sits in the corner of the lower room, while another Oolacile resident waits in ambush. The chest is a lordran mimic that protects the crest key that unlocks Gough’s tower.
Another ledge further towards the west drops down to the same shelf where the Oolacile Soreress in Area 7 was attacking from above. The sorceress leaves behind a scroll of dark fog when she is slain, and a twin humanity sprite rests on a corpse on the western end of the ledge.
8A. Decaying Storerooms
One more Oolacile resident stalks this partially collapsed section of floorboards. A DC 12 Acrobatics or Athletics check will allow a creature to jump to the western section and secure the red titanite chunk on the far side. The broken floorboards reveal a ten foot drop down to Area 7 where the characters first entered the hall.
7. Lower Township Courtyard
Leaving the Great Hall, the characters round their way to a thoroughfare up to oolacile’s Penitentiary, Area 10. To the north, a large stone building houses a levitating elevator platform that creates a shortcut back to Area 2 when activated.
A long courtyard up to the penitentiary is guarded by two Oolacile sorceresses at the far southern side as well as four Oolacile residents. If they are defeated, the path is cleared to enter the penitentiary further south.
8. Corrupted Pentitentiary
Oolacile’s penitentiary was once a place of mercy and rehabilitation. Now it is the most abyss-corrupted part of the township, owing to its proximity to the Chasm of the Abyss excavation site. One of the prisoner’s closest to the excavation was exposed directly to the Abyss’s corruption, transforming it into a massive collection of chains and spears. The Chained Prisoner stalks out of the darkness on the far end of the room when the characters first arrive. It takes advantage of its massive reach to target the most weakened members of the group first, finishing them off with massive attacks before moving on to hardier foes.
Once the chained prisoner is defeated, it leaves the way deeper into the prison unobstructed. A series of prison cells are now filled with corpses and imprisoned Corrupted Residents incapable of harming the group. On the far end is a broken wall with a levitating elevator platform leading deeper within the Chasm of the Abyss below, but not before the raised platform brings one more Oolacile resident to ambush a final time on the raising platform.

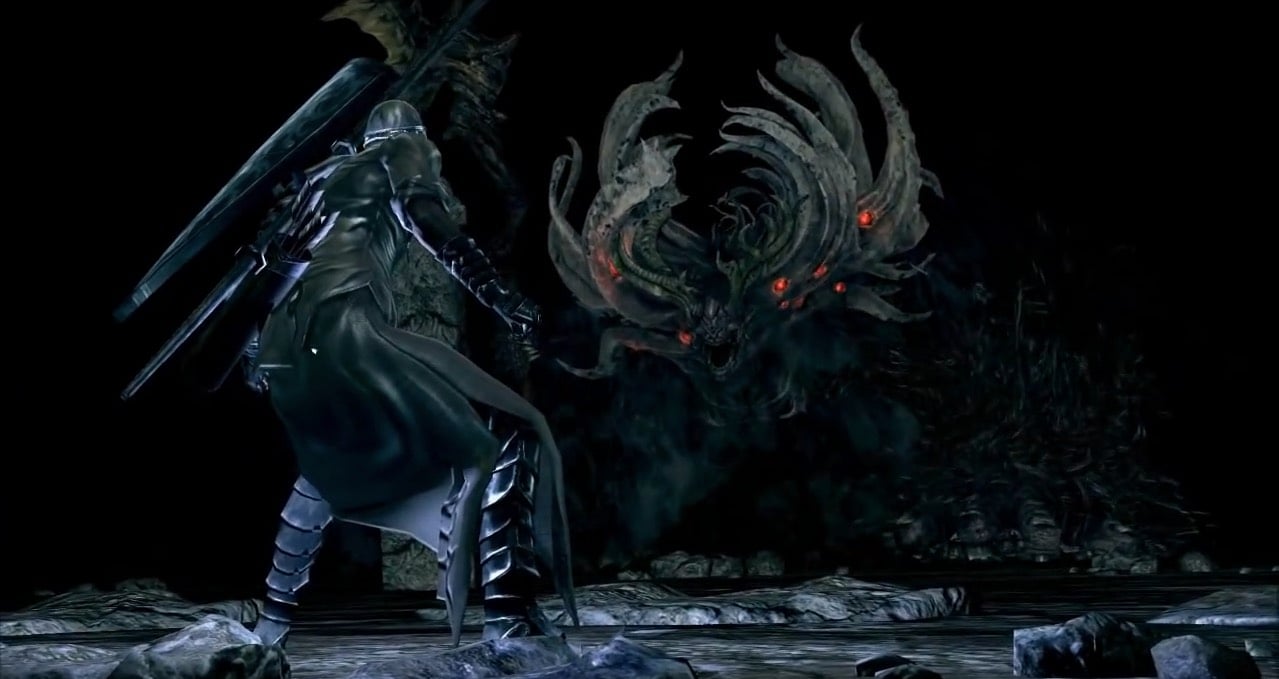
Chasm of the Abyss
“I still think on that creature from the Abyss that preyed on me. My faculties were far from lucid, but I quite clearly sensed certain emotions. A wrenching nostalgia, a lost joy, an object of obsession, and a sincere hope to reclaim it... Could these thoughts belong to the beast from the Abyss? But if that were true, then perhaps it is no beast after all?”
No human understands that which truly makes them human, the dark soul inside of them that represents itself in the form of humanity. What is readily apparent however is that this humanity stems from the Abyss, and that the gods fear nothing more than its spread. Manus is said to be the Father of the Abyss, and while theories abound as to his origins, it is clear that he has no fondness for gods nor humans, and acts out of a bizarre sense of loss. Regardless, he must be defeated to rescue Princess Dusk and prevent others from being dragged into the past by the beast's rage.
1. Penitentiary Elevator
The elevator platform within the penitentiary descends deep within the Earth. At the bottom, an even more Abyss-corrupted section of the prison reveals itself. The bars of nearby cells have been wrenched free and desiccated corpses line the hall. At the far end of the hall, the source of the Abyss finally reveals itself. A bonfire sits at the mouth of the Chasm of the Abyss, with pitch blackness in every direction. The path leads further west, deeper into the chasm.

2. Cavern Threshold
At the end of the narrow path is a** titanite lizard** that scampers off into the western cavern. It drops a twinkling titanite chunk upon its death. Within the cavern are 4 Oolacile residents and an Oolacile sorceress guarding a scroll of dark bead. The path deeper into the chasm leads further north to Area 3.
3. Humanity Spawning Grounds
The cliff shelf curves eastward as it continues on, down into a lower valley where a dozen shifting giant humanity sprites wander aimlessly. The sprites are not outright hostile, and only attack if a creature moves within ten feet of them. A fallen stone column forms a makeshift bridge down to Area 8. However, an Oolacile sorceress waits in hiding on a ledge to the west of Area 6, firing down dark orbs at anyone who tries to cross into Manus’s domain.
A glowing prism stone rests on a northern outcropping. The outcropping is in fact illusory, and when a creature stands on top of it, the floor falls away, sending the creature plummeting 20 feet down to a lower level of the cave system. A path further to the north leads to Area 4 ahead.
Another path to the south has a hidden ledge beneath it, spottable with a DC 15 Perception check. A creature can drop 15 feet down on to the west end of Area 7.
4. Secret Tunnel
Should a character drop down the illusory floor in Area 3, they find themselves in a narrow tunnel underneath the chasm. A ghostly apparition of a giant feline, Alvina, appears at the far end of tunnel, retreating further when the characters approach. The tunnel ends in an apparent dead end, though it is in fact an illusory wall blocking the way to Area 5.
5. Royal Wood Shortcut
A small clearing is devoid of enemies, but presents a helpful shortcut back to the Royal Wood via an elevator platform to the north. When the characters first arrive, Alvina will be present just long enough for the characters to notice before she vanishes in front of an illusory wall to the west. It is noticeable with a DC 15 Perception check, and blocks the way to Area 6.
6. Gray Wolf's Shield
When Artorias fell to the Abyss within this Chasm, he used his last remnants of sanity to protect his dead companion, the Grey Wolf Sif. Artorias’s shield is impaled in the ground, its magic forming a protective circle around the wolf much smaller than the one that protects Artorias’s grave in the future. Sif is surrounded by five giant humanity sprites that must be defeated before the players can retrieve the Cleaning Greatshield and free her. Sif howls in gratitude as she is freed, and disappears into the Chasm. If and when the players face Manus deeper inside, Sif will come to their aid in the fight.
7. Underground Path
If the characters come to this area through Area 3, they land on the far western end near a corpse clutching a scroll of black flame. The path east is blocked with 5 giant humanity sprites that are impossible to cross without killing them. The path leads up to Area 6 in the same manner as the northwards path, Area 4.
8. Abyssal Threshold
The path down from Area 3 is narrow, and just before the deeper cavern is a twin humanity sprite. This deep cavern rests just above Manus’s lair. Seven giant humanity sprites wander the area, surrounding the treasures previous adventurers have tried to collect in their journeys into the Abyss. A precious white titanite slab rests in an alcove next to a corpse clutching a soul of a hero. The fog door blocking the way to Manus’s lair lies just on the southern edge.

9. Primeval Man's Lair
A small rocky outcropping lies above a pitch black pit below. Once all of the characters have made their way through the fog door, a massive hand, the same as the one that drug them to Oolacile in the first place, grabs them and drags them into the darkness below. As they collect themselves, the father of the Abyss stalks out of the dark and bellows at them in turn. Manus, Father of the Abyss, the scion of primeval man, waits over the unconscious form of Dusk before attacking the party.
Manus’s true nature is known only to him, but he is a creature of titanic strength and force of will. For the first half of the fight, the Father of the Abyss attacks with brute strength, sundering the strongest members of the party so as to finish them off with his powerful magics after he is bloodied. This fight is as an endurance match, whittling down Manus’s massive health pool is difficult. He is not as maneuverable as Artorias, but his raw strength will break through even the hardest armor and fastest adventurer.
If Sif was saved in Area 6, then he will arrive to assist the party at the beginning of the second round of combat. Sif uses the statistic of Great Gray Wolf Sif, except that she does not have Legendary Actions nor Legendary Resistances, nor her Relentless Guardian ability. She also has half her maximum hit points.
Once Manus is defeated, he leaves behind fifteen humanity sprites and each character with less than ten Sanity is restored to that amount. Dusk of oolacile regains consciousness, she fades away as the magic Manus used to tether her to this time is broken. Her summoning sign is return to Darkroot Basin where she can speak more of her time with the Primeval Man. A bonfire appears in Manus’s lair, and his power over the lordvessel is broken as well, allowing the characters to transport themselves back to their own time in Lordran.


Kiln of the First Flame
“Once living, now Undead, and a fitting heir to father Gwyn thou art, I beseech thee. Succeed Lord Gwyn, and inheriteth the Fire of our world. Thou shall endeth this eternal twilight, and avert further Undead sacrifices.”
The fire fades, and the power of the gods goes with it. In a vain attempt to usurp the coming Age of Dark, Lord Gwyn linked the flame to both the Dark Soul of Man, and later his own soul to prolong his age. Alas, even this was not enough, the flame needs more kindling still. The Chosen Undead is the next piece of fuel for the Flame, and no matter their choice, their story ends at the Kiln of the First Flame. The last vestiges of Gwyn's army guards his tomb, but even their might should cause little frustration on the party's path to the Kiln. The final confrontation with Gwyn will be a momentous one, and there is still yet one twist of fate that will test the party at the end of their story.
1. Seat of the Lordvessel
Since Gwyn linked the First Flame so long ago, a set of massive stone doors underneath Firelink Shrine sit sealed. In front of the doors is an altar made of long-petrified roots and vines. This is the Lordvessel's proper resting place. After Gwyenevere gives it to the party, it can be placed here. Afterward, the orange fog walls in the Demon Ruins, Duke’s Archives, and the Tomb of Giants vanishes.
The placed Lordvessel acts as an unkindled bonfire. Only Great Souls can kindle this flame. A Lord Soul placed in the vessel increases the number of Estus Flask charges it fills on a long rest, up to a maximum of four.
The doors to the Kiln will open once the Lordvessel is sated with the Lord Souls of Nito, Seath, the Four Kings, and the Bed of Chaos. Once open, the gateway allows access to the staircase down to Area 2. The staircase is stark white and stretches down to the Kiln Road. Dozens of black knight spirits walk from one side to the other as the characters descend into the Kiln proper.
2. Ash Heap
Once upon a time, the path to the Kiln may have been paved in marble or gold. One could imagine a procession of hundreds of knights following their lord to save the world’s fading flame. Now the Kiln lies under a mountain of ash, a barren wasteland devoid of any life. This wide ash mound tapers off to a narrow path to the east.
Most of Gwyn’s knights were burnt to cinder when he linked the flame. The few remaining in corporeal form are scattered about the road to the Kiln. A longsword-wielding Black Knight of Gwyn wanders around the western third of this area. A greatsword-wielding knight waits in the eastern third.
3. Kiln Superstructure
A ringed colosseum-like structure once surrounded the kiln. Today the bulk of the structure has collapsed into the ash heap hundreds of feet below. Only a series of narrow walkways and the central ring remain.
A Black Knight of Gwyn waits at the far end of the western walkway, attacking anyone who walks towards it from Area 2. While the other knights vanish before their corpses can be loot, a corpse on the southern walkway still wears a set of black knight plate armor.

4. Kiln Outer Staircase
The wide staircase that climbed all the way down to the bottom floor of the kiln has mostly collapsed over time as well. The remaining part leads a quarter turn downwards to the fog wall before the Kiln. Two Black Knights of Gwyn wielding a longsword and halberd flank the fog wall, and act as Gwyn’s final guardians.
If Solaire was saved in Lost Izalith, his summoning sign is waiting at the end of the staircase. Appendix A describes Solaire in more detail.
5. Kiln of the First Flame
Gwyn, Lord of Cinder was once a god of light and battle. But the fire has long faded, and the burnt husk watching over the flickering flame. Even in his broken form, Gwyn is still a god and fights with every ounce of his strength to protect the First Flame. Gwyn’s blows are devastating, and he can effortlessly close a gap to an enemy at range.
If Gwyn is defeated, he falls to the ground and leaves behind his Great Soul of Gwyn. If only a single character remains alive, a bonfire will appear in the center of the room. If two or more characters are alive, the bonfire will not appear until only a single character remain and absorbs the souls of the rest.
This campaign ends in one of two ways:
The Chosen Undead chooses to light the bonfire and use their soul to rekindle the First Flame. The bonfire expands into the rest of the kiln, filling it with flame and immolating the Chosen Undead in the process. The Ago of Fire renews, and the Dark is forced back.
The Chosen Undead abandons the flame and steps out of the Kiln as the Lord of an Age of Dark. Dozens of identical Darkstalker Kaathe-like serpents rise out of the ashes surrounding the Kiln and welcome the new Dark Lord.
In either case, the story of Dark Souls ends there.
Thank you very much for reading this.


Items
| Weapon | Damage | Weight | Properties |
| Simple Melee Weapons | |||
| Club | 1d4 bludgeoning | 2 lb. | Light |
| Dagger | 1d4 piercing | 1 lb. | Finesse, light, thrown (range 20/60) |
| Greatclub | 1d8 bludgeoning | 10 lb. | Two-handed |
| Handaxe | 1d6 slashing | 2 lb. | Light, thrown (range 20/60) |
| Javelin | 1d6 piercing | 2 lb. | Thrown (range 30/120) |
| Light Hammer | 1d4 bludgeoning | 2 lb. | Light, thrown (range 20/60) |
| Mace | 1d6 bludgeoning | 4 lb. | - |
| Quarterstaff | 1d6 bludgeoning | 4 lb. | Versatile (1d8) |
| Sickle | 1d4 slashing | 2 lb. | Light |
| Spear | 1d6 piercing | 3 lb. | Thrown (range 20/60), versatile (1d8) |
| Simple Ranged Weapons | |||
| Crossbow, light | 1d8 piercing | 5 lb. | Ammunition (range 80/320), loading, two-handed |
| Shortbow | 1d6 piercing | 2 lb. | Ammunition (range 80/320), two-handed |
| Sling | 1d4 bludgeoning | - | Ammunition (range 30/120) |
| Martial Melee Weapons | |||
| Battleaxe | 1d8 bludgeoning | 4 lb. | Versatile (1d10) |
| Claws | 1d4 slashing | 4 lb. | Light, Versatile (1d8) |
| Caestus | 1d4 bludgeoning | 1 lb | Light, special |
| Flail | 1d8 slashing | 2 lb. | - |
| Glaive | 1d10 slashing | 6 lb. | Heavy, reach, two-handed |
| Greataxe | 1d12 slashing | 7 lb. | Heavy, two-handed |
| Greatsword | 2d6 slashing | 6 lb. | Heavy, two-handed |
| Greathammer | 2d6 bludgeoning | 10 lb | Heavy, two-handed |
| Halberd | 1d10 slashing | 6 lb. | Heavy, reach, two-handed |
| Katana | 1d8 slashing | 2 lb. | Finesse |
| Lance | 1d12 piercing | 6 lb. | Reach, special |
| Longsword | 1d8 slashing | 3 lb. | Versatile (1d10) |
| Maul | 2d6 bludgeoning | 10 lb. | Heavy, two-handed |
| Morningstar | 1d8 piercing | 4 lb. | - |
| Pike | 1d10 piercing | 18 lb. | Heavy, reach, two-handed |
| Rapier | 1d8 piercing | 2 lb. | Finesse |
| Scimitar | 1d6 slashing | 3 lb. | Finesse, light |
| Scythe | 1d8 slashing | 1 lb | Two-handed, finesse |
| Shortsword | 1d6 piercing | 2 lb. | Finesse, light |
| Trident | 1d6 piercing | 4 lb. | Thrown (range 20/60), versatile (1d8) |
| War Pick | 1d8 piercing | 2 lb. | - |
| Warhammer | 1d8 bludgeoning | 2 lb. | Versatile (1d10) |
| Whip | 1d4 slashing | 3 lb. | Finesse, reach |
| Martial Ranged Weapons | |||
| Crossbow, Hand | 1d6 piercing | 3 lb. | Ammunition (range 30/120), light, loading |
| Crossbow, Heavy | 1d10 piercing | 18 lb. | Ammunition (range 100/400), heavy, loading, two-handed |
| Longbow | 1d8 piercing | 2 lb. | Ammunition (range 150/600), heavy, two-handed |
| Greatbow | 1d10 piercing | 15 lb. | Ammunition (range 200/800), heavy, two-handed, special |
Abyss Greatsword
Weapon (Greatsword), Unique (requires attunement by a creature with Strength and Wisdom 15 or greater
“This greatsword belonged to Lord Gwyn's Knight Artorias, who fell to the Abyss. Swallowed by the Dark with its master, this sword is tainted by the Abyss, and now its strength reflects its wielder's humanity. The Abyss Greatsword is crafted from the corrupted soul of Knight Artorias. It demands much from its wielder but offers much in return.
If you are human, you can allow the sword to consume your humanity as a free action. When you do so, you become hollow as if you had died. For one minute afterwards, the Abyss Greatsword deals an additional 3d6 bludgeoning damage on a hit. While empowered this way, your movement speed increases by ten feet and can use your bonus action to Disengage.
Alluring Skull
Wondrous Item, common
"A skull with meekly lingering souls. Throw to shatter and spread souls to attract certain types of enemies. Souls are a concentration of life, and the life-starved Hollows are lured by its power. Not effective for all enemies."
As an action, you may throw an alluring skull at a point you can see within 30 feet. The skull produces the effects of an Aural Decoy spell after it lands.
Avelyn
Weapon (Light Crossbow), very rare
“Repeating crossbow cherished by the weapon craftsman Eidas. Its elaborate design makes it closer to a work of art than a weapon. Intricate mechanism makes heavy damage possible through triple-shot firing of bolts. but in fact each bolt inflicts less damage."
As an action, you can preload three bolts to be shot simultaneously. The next shot from the Avelyn will instead attack three times, all at disadvantage.
Barbed Half-Plate
Armor (half-plate), rare
"Apparel of Kirk, Knight of Thorns and notorious member of the Darkwraiths. A dense patch of thorns grows from its surface. It is a fitting item for the murderous Kirk, for by simply wearing it and rolling, one can damage enemies.”
When you take the disengage action while wearing this armor, you can deal 1d6 bludgeoning damage to an enemy creature within five feet of you.
Barbed Straight Sword
Weapon (Longsword), Rare
"The choice weapon of the infamous Darkwraith Kirk, also known as the Knight of Thorns for the gnarly spikes on his favorite weapon. This frightful sword deals only thrust attacks, and causes heavy bleeding."
This magic weapon deals an additional 1d6 piercing damage on a hit. A creature hit by this weapon twice in a single round must succeed on a DC 13 Constitution saving throw or take an additional 3d6 piercing damage.
Bellowing Dragoncrest ring
Wondrous Item (ring), rare (requires attunement)
"A special ring granted to only the most accomplished sorcerers at Vinheim Dragon School. The ring is engraved with an everlasting dragon, and boosts the strength of sorceries.”
While wearing this ring, you gain a +1 bonus to spell attack rolls and your spell save DC increases by 1.
Black Bow of Pharis
Weapon (Longbow), Rare (requires attunement by a wielder with 15 or higher Dexterity)
“The preferred black bow of the heroic archer Pharis. Has a longer range than standard bows, but is more difficult to use. Without proper abilities, results will be underwhelming."
The base damage of this longbow is 1d10 piercing. This bow does not impose disadvantage while firing at long-range.
Black Firebomb
Adventuring gear (consumable)
"Black bisque urn filled with black powder. Explodes, inflicting fire damage. Powerful ranged weapon, especially in situations called for fire damage. A very precious item at low levels. Black Firebombs are especially destructive"
This sticky, adhesive fluid ignites when exposed to air. As an action, you can throw this urn up to 20 feet, shattering it on impact. Make a ranged Attack against a creature or object, treating the black firebomb as an Improvised Weapon. On a hit, the target and each creature within five feet of it takes 4d6 fire damage.
Black Iron Plate
Armor (plate), very rare
"Armor set of Black Iron Tarkus, a knight known for his great strength. Built of a special black iron and providing strong defense, notably against fire, but so terribly heavy to be unwieldy to all but Tarkus himself.”
You have a +1 bonus to AC while wearing this armor. You also have resistance to fire damage.
Bloodshield
Shield (shield), rare
"The bloodshield spoken of in the lost legends. The red blood is slightly enchanted, and boost various resistances."
This shield grants the wearer resistance against poison damage and the poisoned condition. You also gain advantage on saving throws made to avoid being cursed.
Blooming Purple Moss Clump
Wondrous Item, rare
“Potently medicinal moss clump with a flower. Reduces poison and toxin. Restores status. Toxin is a more vicious form of poison which quickly leads to death. Moss clumps without a flower are useless against toxin, and a lack of these moss clumps could lead to an early demise.”
A creature that consumes this moss clump is cured of the poison condition and grants you advantage on saving throws made to resist the poisoned condition for the next minute.
Blue Tearstone Ring
Wondrous Item (ring), rare (requires attunement)
"The rare gem called tearstone has the uncanny ability to sense imminent death. This blue tearstone from Catarina boosts the defense of its wearer when in danger.”
While wearing this ring, whenever your health drops below 20% of your maximum hit points, you have resistance to all damage.
Bonewheel Shield
Shield (shield), uncommon
"Giant wooden wheel encircled by spikes. Half-melded to a strange skeleton" Can be used as a great shield, only for the great gaps. But at least the spikes turn into weapons with a good spin. Strange indeed!"
This shield has a -1 penalty to its normal AC bonus. As an action, you may make a melee attack roll against a creature within five feet of you. On a hit, the shield deals slashing damage equal to 3d4+your Strength reminder.
Butcher Knife
Weapon (Battleaxe), Uncommon
“Giant butcher knife wielded by the Undead man-eating cook lurking in the Depths. More of a tool for subduing and preparing live catches than an actual weapon. Those who have faced this deadly blade have a deeper sense of how helpless prey must feel."
A nasty, rusted blade that is a favorite of the Butchers in the Depths. When you hit a creature with an attack using this weapon, you regain hit points equal to your proficiency modifier.
Calamity Ring
Wondrous Item (ring), rare (requires attunement)
"A ring enchanted by the orange eye of Kalameet, the bringer of calamity. Doubles damage received by its wearer. A useless ring befitting no finger. Best left unknown, or at least well hidden.”
While you wear this ring, you have vulnerability to all damage.
Channeler’s Trident
Weapon (Trident), rare (requires attunement)
“Trident of the Six-eyed Channelers, sorcerers who serve Seath the Scaleless in collecting human specimens. Thrusted in circular motions in a unique martial arts dance that stirs nearby allies into a bloodthirsty frenzy.”
Trident of the Six-eyed Channelers, sorcerers who serve Seath the Scaleless in collecting human specimens. The wielder of this magic weapon can use their Intelligence instead of their Strength modifiers for attack and damage rolls with this weapon.
While attuned to the trident, you can use an action to bolster your allies. Any allied creatures within 20 feet of you receive a bonus to their weapon damage equal to your Intelligence modifier. You regain use of this ability on a long rest.
Chaos Blade
Weapon (Katana), Unique
“A curved sword born from the soul of Quelaag, daughter of the Witch of Izalith, who was transformed into a chaos demon. This blade inherits only the chaotic nature of Quelaag, and has a unique speckled design. Blade wielder erodes along with opponents.”
While you are human, this weapon deals an additional 2d6 slashing damage on a hit.
Each time you hit with an attack roll with the Chaos Blade, you take force damage equal to your proficiency modifier. This damage cannot be reduced or prevented.
Charcoal Pine Resin
Wondrous Item, rare
“Black charcoal-like pine resin. Temporarily applies fire to right-hand weapon. Used in the Undead Burg to preserve Undead bodies after dissection, and to bury them.”
When you apply this pine resin to a weapon you carry, it ignites in flame for a minute and deals an additional 1d8 fire damage on a hit. The weapon is considered magical for the duration.
Pine resins cannot be applied to magical weapons.
Cleansing Greatshield
Shield (shield), Legendary (requires attunement)
"The steel greatshield used by Knight Artorias, who succumbed to the Abyss. Artorias, deeply scarred by the Abyss, used this to form a barrier to protect his compatriot Sif. Although this drained the shield, its magic defense remains high."
The wielder of this shield has resistance to fire, force, and lightning damage. The wielder also has advantage on saving throws against spells and other magical effects.
Cloranthy Ring
Wondrous Item (ring), uncommon (requires attunement)
"This ancient ring, engraved with a large green flower, is of unknown origin. Hastens the regeneration of stamina.”
While you wear this ring, you have advantage on Constitution checks and saving throws.
Covenant of Artorias
Wondrous Item (ring), uncommon (requires attunement)
"This ring symbolizes Knight Artorias's covenant with the beasts of the Abyss. Its wearer, like Artorias himself can traverse the Abyss.”
This ring protects the wearer from being eaten away by the Abyss. The wearer can traverse the abyss at will. Allied creatures within 30 ft. of you are protected as well.
Covetous Gold Serpent Ring
Wondrous Item (ring), uncommon (requires attunement)
"The serpent is an imperfect dragon and symbol of the Undead. Its habit of devouring prey even larger than itself has led to an association of gluttony. This gold ring, engraved with the serpent, boosts its wearer's item discovery, so that more items can be amassed.”
You gain advantage on Perception checks made to detect illusory walls or hidden objects while wearing this ring.
Covetous Silver Serpent Ring
Wondrous Item (ring), uncommon (requires attunement)
"The serpent is an imperfect dragon and symbol of the Undead. Its habit of devouring prey even larger than itself has led to an association of gluttony. This silver ring, engraved with the serpent, rewards its wearer with additional souls for each kill.”
When you collect souls when an enemy is slain, you receive 10% additional souls (rounded down).
Crystal Ring Shield
Shield (shield), rare (requires attunement)
"Weapon born from the mystical creature of the Darkroot Garden, the Moonlight Butterfly. Imbued with a powerful crystal power, like the butterfly created by Seath the Scaleless. Can emit crystal light rings."
This shield grants the wearer resistance to force damage and advantage on Dexterity saving throws against sorceries.
The shield has 5 charges. As an action, you can expend a charge to hurl a mass of arcane energy at a creature within 30 feet of you. Make a ranged spell attack at the target. On a hit, the mass deals 2d6 force damage.
The shield regains all expended charges at dawn.
Crystal Shield
Shield (shield), rare
"A fully crystallized straight shield. How such a weapon was created is entirely unknown. The crystallization boosts its defense, but makes the shield brittle. The shield cannot be used for long, as it cannot be repaired."
This shield grants a +3 bonus to its AC. The shield is fragile. Each time an attack against you is a critical hit, the shield’s bonus is reduced by 1. If the bonus reaches 0, the shield shatters completely and cannot be repaired.
Crystalline Set
Armor (splint), rare (requires attunement)
"Armor worn by a Hollowed knight, who was partially crystalized. The crystal provides strong defense, but they cannot be used for long because they are easily broken and cannot be repaired."
You have a +3 bonus to AC while wearing this armor. The armor is fragile. Each time an attack against you is a critical hit, the armor’s bonus is reduced by 1. If the bonus reaches 0, the armor shatters completely and cannot be repaired.
Cursebite Ring
Wondrous Item (ring), uncommon (requires attunement)
"One of the infamous bite rings commissioned by Sir Arstor of Carim. Despite the dreadful rumors surrounding its creation, this ring is an unmistakable asset, in its ability to help prevent curses.”
While wearing this ring, you gain advantage on saving throws to avoid being cursed.
Dark Hand
Armor (Shield), rare (requires attunement)
“The Darkwraiths, incited by Kaathe, use the power of the dark soul to absorb humanity, an art shared by this weapon, which also acts as a special shield. The ancients, particularly, could sap the humanity of even a replete saint in the blink of an eye.”
The Dark Hand’s shield can be donned or doffed as a bonus action.
When the shield is doffed, you can cast vampiric touch using your Charisma as your spellcasting ability. The Vampiric Touch attack can only be used with the Dark Hand. You may use this ability a number of times a day equal to your Charisma modifier, regaining uses after finishing a long rest. When you hit a Human creature with this attack, you absorb their humanity, restoring your humanity and leaving the target Hollow.
Dark Set
Armor (half-plate), rare (requires attunement)
"Some say the skeletal mask of an ancient Darkwraith is partially fused with the flesh of its face. Armor of the Darkwraiths, former knights of New Londo who descended into Dark. Their Armor transformed, and remains a symbol of the Dark servants and their diabolical art of Lifedrain."
You channel the power of Lifedrain more effectively while wearing this armor. If you cast vampiric touch while wearing the Dark Hand, you make spell attacks with it at advantage.
Dark Silver Tracer
Weapon (Shortsword), rare (requires attunement)
“A dark silver dagger used by the Lord's Blade Ciaran, of Gwyn's Four Knights. The victim is first distracted by dazzling streaks of the Gold Tracer, then stung by the vicious poison of this dagger.”
You can use an action to cause thick, black poison to coat the blade of this magic weapon. The poison remains for 1 minute or until an attack using this weapon hits a creature. That creature must succeed on a DC 15 Constitution saving throw or take 2d10 poison damage and become Poisoned for 1 minute.
If you are attuned to both the Dark Silver Tracer and the Gold Tracer, the pair only require one attunement slot for both items.
Dark Wood Grain Ring
Wondrous Item (ring), uncommon (requires attunement)
"This special ring crafted in an Eastern land is made of gold, but with a wood grain crest on its surface. Agents of subterfuge in this faraway land are particularly fond of the dark gold wood grain, which greatly alters its wearer's rolling action.”
A creature wearing this ring can Disengage as a bonus action.
Darkmoon Bow
Weapon (shortbow), Unique (requires attunement)
“Bow born from the soul of the Dark Sun Gwyndolin, Darkmoon deity who watches over the abandoned city of the Gods, Anor Londo. This golden bow is imbued with powerful magic and is most impressive with Moonlight Arrows.”
Arrows fired by this weapon become Moonlight Arrows that deal force damage instead of piercing. You may add your Wisdom modifier to force damage dealt by Moonlight Arrows.
If you load no ammunition in the weapon, it produces its own, automatically creating one piece of magic ammunition when you pull back the string. The ammunition created by the bow vanishes the instant after it hits or misses a target.
Darkmoon Seance Ring
Wondrous Item (ring), very rare (requires attunement)
"This ring is granted to adherents of Gwyndolin, Darkmoon deity and last born of Gwyn, Lord of Sunlight. Grants additional magic attunement slots. The Dark Sun Gwyndolin is the only remaining deity in Anor Londo. His followers are few, but their tasks are of vital importance.”
A creature attuned to this ring can prepare add prepare two additional cleric spells per day. If they have wizard levels, they gain two additional 1st level spell slots with which they can prepare additional spells into as well.
Darkmoon Talisman
Weapon (talisman), very rare
“Medium for casting miracles of the Gods. Granted to Darkmoon Blade knights, adherents to the Covenant of the Dark Sun Gwyndolin. This talisman demands dutiful faith from its owner, but has very high miracle adjustment”
A talisman granted to Darkmoon Blade knights, adherents to the Covenant of the Dark Sun Gwyndolin.
You have advantage on concentration checks made to maintain spells cast with this talisman. Spells cast with this talisman deal additional damage equal to your Wisdom modifier.
Darksword
Weapon (Longsword), rare (requires attunement)
“The sword of the knights of the Four Kings of New Londo. Its blade is wide and thick and it is wielded in an unusual manner. When the Four Kings were seduced by evil, their knights became Darkwraiths, servants of the Dark who wielded these darkswords.”
This magic weapon deals an additional 3d6 slashing damage against Human creatures. In addition, you can make one attack with it as a bonus action on each of your turns.
Demon’s Catalyst
Weapon (quarterstaff), very rare (requires attunement by a spellcaster)
“Demon catalyst formed from Izalith molten rock. Can be used as fire weapon. The Demon Firesage was the first demon, and the last master of the original fire arts, before the Witch of Izalith was engulfed by Chaos, creating pyromancy.”
This staff can be wielded as a magic Quarterstaff with the finesse property.
This catalyst has 5 charges. While holding it, you can use an action to expend 1 or more of its charges to cast one of the following spells from it: fire whip (1 charge), fire surge (2 charges), fireball (3 charges), flame weapon (3 charges).
Demon’s Spear
Weapon (spear), uncommon
“Carved from the bones of fellow demons. Wielded by the slim lesser Batwing demons. The weapon of these chaos demons wandering Anor Londo are different from those of other chaos demons, and are imbued with lightning”
This weapon deals an additional 1d6 lightning damage when it hits a creature, and has a reach of 10 ft.
Divine Blessing
Wondrous Item, very rare
“Holy water from Goddess Gwynevere. Fully restore HP and undo irregularities. The Goddess of Sunlight Gwynevere, daughter of the great Lord of Sunlight Gwyn, is cherished by all as the symbol of bounty and fertility.”
When a creature consumes a divine blessing, it is restored to full hit points. The creature is cured of the poisoned condition as well..
Dragon Bone Fist
Weapon (fist), Unique (requires attunement)
“A weapon from the soul of the Iron Golem, guardian of Sen's Fortress who repelled countless heroes who sought Anor Londo. The Gods fused the power of the soul with the great bones of the dragons, forming an appropriate core for the giant golem”
A weapon from the soul of the Iron Golem, guardian of Sen's Fortress who repelled countless heroes who sought Anor Londo. While wielding the Dragon Bone Fist, your unarmed strike’s damage increases to 1d8. When you make an unarmed strike as part of your attack action, you may make an additional unarmed strike as a bonus action.
You have resistance to fire and force damage while wearing the fists. This weapon can be infused or enchanted with pine resins and similar items, like non-magical weapons.
Dragon Crest Shield
Shield (shield), rare
"Shield of a nameless knight, likely a high-ranked knight of Astora. One of the enchanted blue shields. The dragon crest shield greatly reduces fire damage."
This shield grants the wearer resistance against fire damage.
Dragon Greatsword
Weapon (fists), Unique (requires attunement)
“This sword, one of the rare dragon weapons, came from the tail of the stone dragon of Ash Lake, descendant of the ancient dragons. Its great mystical power will be unleashed when wielded with two hands.”
As an action, the blade can shoot a shock wave in a 60-foot line along the ground, and will even travel up walls. Creatures in the line must succeed on a DC17 Dexterity saving throw or take 5d6 bludgeoning damage. You regain use of this ability after finishing a long rest.
You have resistance to fire and force damage while wielding this weapon. This weapon can be infused or enchanted with pine resins and similar items, like non-magical weapons.
Dragon King Greataxe
Weapon (greataxe), Unique (requires attunement)
“This axe, one of the rare dragon weapons, is formed by the tail of the Gaping Dragon, a distant, deformed descendant of the everlasting dragons. The axe is imbued with a mystical power, to be released when held with both hands.”
As an action, you can strike the ground with this magic weapon’s hilt to cast wrath of gods (DC 15). You regain use of this ability on a long rest.
You have resistance to fire and force damage while wielding the blade. This weapon can be infused or enchanted with pine resins and similar items, like non-magical weapons.
Dragon Tooth
Weapon (greatclub), rare
“Created from an everlasting dragon tooth. Legendary great hammer of Havel the Rock. The dragon tooth will never break as it is harder than stone, and it grants its wielder resistance to magic and flame.”
The Dragon Tooth deals an additional 3d6 bludgeoning damage on a hit. This weapon can only attack once when you use an action, Bonus Action, or Reaction to attack with it, regardless of the number of attacks you can normally make.
You have resistance to fire and force damage while wielding the tooth. This weapon can be infused or enchanted with pine resins and similar items, like non-magical weapons.
Dragonslayer Spear
Weapon (pike), Legendary (requires attunement)
“Cross spear born from the soul of Ornstein, a Dragonslayer guarding Anor Londo cathedral. Inflicts lightning damage; effective against dragons. Two-handed thrust relies on cross and buries deep within a dragon's hide, and sends human foes flying.”
This magic weapon deals an additional 1d8 lightning damage on a hit.
When you hit a dragon with this weapon, the dragon takes an extra 3d6 damage of the weapon's type. For the Purpose of this weapon, "dragon" refers to any creature with the dragon type, including Dragon turtles and wyverns.
This spear has 6 charges. As an action, you can expend a charge to cast lightning spear from this weapon at 1st level (attack bonus +7, save DC 15). This weapon regains all charges on a long rest.
Drake Sword
Weapon (longsword), rare
“This sword, one of the rare dragon weapons, is formed by a drake's tail. Drakes are seen as undeveloped imitators of the dragons, but they are likely their distant kin. The sword is imbued with a mystical power, to be released when held with both hands.”
An action, the blade can shoot a shock wave in a 30-foot line along the ground, and will even travel up walls. Creatures in the line must succeed on a DC13 Dexterity saving throw or take 2d6 bludgeoning damage. You regain use of this ability after finishing a long rest.
Dusk Crown Ring
Wondrous Item (ring), very rare (requires attunement)
“This magic crown-shaped ring was granted to princess Dusk of Oolacile upon her birth. The ringstone allows its wearer to cast additional sorceries, but at the cost of one-half of HP.”
While wearing this ring, your maximum hit points are halved. If you can cast spells, you gain an additional 1st, 2nd, 3rd, 4th, and 5th level spell provided that you have at least one of the given slots already.
Eagle Shield
Shield (shield), rare
"Greatshield with an eagle design. Lightest and easiest greatshield to handle. Greatshields are very stable, and deflect attacks. But one cannot parry, and instead bashes with the shield."
You gain a +1 bonus to AC while wearing this shield. You must have a Strength score of 14 or higher to wear this shield.
East Wood Grain Ring
Wondrous Item (ring), uncommon
“This special ring crafted in an Eastern land is made of gold, but with a wood grain crest on its surface. The ring slows the loss of weapon durability and is particularly useful to bearers of delicate swords crafted in the East.”
While wearing this ring, the maximum hit points of your weapons and armor double. You also have advantage on saving throws to avoid effects that would degrade your equipment.
Effigy Shield
Shield (shield), rare
"Frightful occult shield. Defends against divine weapons and lightning. In an ill-fated plot to destroy the very gods, the followers of the occult once attempted to steal the power of Gravelord Nito, the first of the dead."
This shield grants the wearer resistance to lightning and radiant damage.
Egg Vermifuge
Wondrous Item, rare
“Bitter, sour chestnut. Removes parasitic egg from body. The egg-bearers have chosen to serve the Flame of Chaos, and the eggs symbolize this selfless choice. Naturally these chestnuts are forbidden, but are allowed under special circumstances”
When consumed, this vermifuge purges parasites from the user. Most commonly used to remove the Egg Head parasites found in the demon ruins.
Elizabeth’s Mushroom
Wondrous Item, rare
“Large medicinal mushroom of Elizabeth, keeper of the sanctuary. Eating this mushroom invigorates the flesh, and greatly restores HP for a limited duration. Its dramatic effect can make the difference between a warrior's life and death”
When consumed, this mushroom creates a regenerative effect for five rounds. At the end of the creature’s turns, it regains 2d8 hit points.
Estus Flask
Wondrous Item, legendary
“The Undead treasure these dull green flasks. Fill with Estus at Bonfire. Fills HP. The Estus Flasks are linked to the Fire Keepers. The Dark Tales also make reference: An emerald flask, from the Keeper's soul. She lives to protect the flame, and dies to protect it further”
The Estus Flask has 4 charges. While holding it, you can use an Action to expend 1 or more of its charges to drink from it and regain 4d4+4 hit points. Kindred bonfires restore additional charges if they are rested at.
If a Fire Keeper is given a Fire Keeper Soul, they can reinforce the Estus Flask and increase the amount it heals by 2d4+2 for each soul
The flask regains all of its charges after its bearer finishes a long rest.
Fire Keeper Soul
Wondrous Item, Legendary
"Soul of a long-lost Fire Keeper. Each Fire Keeper is a corporeal manifestation of her bonfire, and a draw for the humanity which is offered to her. Her soul is gnawed by infinite humanity, and can boost the power of the precious Estus Flask. Reinforced Estus Flasks capture denser Estus, allowing for increased restoration of HP."
When consumed, a fire keeper soul floods the body with humanity, granting the consumer a point of inspiration. The Fire Keeper Soul can also be granted to another Fire Keeper, who can use it to reinforce an Estus Flask.
Firebomb
Adventuring gear (consumable)
"Bisque urn filled with black powder. Explodes, inflicting fire damage. Relatively powerful ranged weapon, especially in situations called for fire damage. A very precious item at low levels. Many warriors use these to augment their strategic repertoire"
This sticky, flammable fluid ignites when exposed to air. As an action, you can throw this flask up to 20 feet, shattering it on impact. Make a ranged Attack against a creature or object, treating the firebomb as an Improvised Weapon. On a hit, the target and each creature within five feet of it takes 2d6 fire damage.
Gargoyle Tail Axe
Weapon (battleaxe), uncommon
“Sliced tail of the gargoyle guarding the Bell of Awakening in the Undead Church or patrolling in Anor Londo. Can be used as a bronze battle axe. Bends dramatically during large attacks, owing to its nature as a tail.”
You gain resistance to poison damage and you have advantage on savings to resist poison while wielding this magic weapon.
As a bonus action, you can increase the range of this axe to ten feet until the beginning of your next turn.
Ghost Blade
Weapon (dagger), uncommon
“The ghosts of New Londo clutch this wickedly sharp dagger with their bony hands and make mincemeat of the living. One of the cursed weapons which can inflict damage upon ghosts."
This dagger can damage spectral undead without the need for a Transient Curse.
Gold Pine Resin
Wondrous Item, rare
“Rare pine resin which emits golden sparks. Applies lightning to right-hand weapon. Affected weapon inflicts rare lightning damage, making it effective against targets which are resilient to both magic and fire. Very effective against dragon family foes”
When you apply this pine resin to a weapon you carry, it crackles with electricity for a minute and deals an additional 1d8 lightning damage on a hit. The weapon is considered magical for the duration.
Pine resins cannot be applied to magical weapons.
Gold Tracer
Weapon (Shortsword), rare (requires attunement)
“Curved sword used by the Lord's Blade Ciaran, one of Gwyn's Four Knights. Ciaran brandishes her sword in a mesmerizing dance, etching the darkness with dire streaks of gold.”
This weapon deals an additional 2d6 slashing damage when it hits a creature attacked at advantage. This ability has no effect on constructs or undead.
If you are attuned to both the Dark Silver Tracer and the Gold Tracer, the pair only requires one attunement slot for both items.
Gold-Hemmed Black Robe
Wondrous Item, rare (requires attunement)
"Worn by the witch Quelana of Izalith, mother of pyromancy and Daughter of Chaos. She wore this gold-hemmed black set before even the Age of Fire, and it offer strong resistance versus fire, poison, and other perils.”
The wearer of these black robes gains resistance to fire and poison damage.
Golem Axe
Weapon (Battleaxe), rare (requires attunement)
“An axe born from the soul of the Iron Golem, guardian of Sen's Fortress who repelled countless heroes who sought Anor Londo. Its powerful one-handed attack imitates the Golem's blade of wind, but the heavy iron blade makes it quite unwieldy.”
As an action, you can use the Golem Axe to produce an invisible projectile. Make a ranged attack roll against a creature you can see within 30 feet. On a hit, the creature takes thunder damage equal to 1d6 plus your Strength modifier.
Gough’s Greatbow
Weapon (Greatbow), Legendary (requires attunement by a creature with Strength 16 or greater)
“Greatbow used by Hawkeye Gough, of Lord Gwyn's Four Knights, for dragon slaying. This bow is larger than even those used by the famed Dragonslayers. Only their leader, Gough, had the strength to handle it."
When you hit a Dragon with this weapon, the Dragon takes an extra 3d6 damage of the weapon's type. For the purpose of this weapon, "dragon" refers to any creature with the dragon type, including Dragon turtles and wyverns.
If you hit a flying creature with this weapon, it must succeed on a DC 20 Strength saving throw or be knocked prone.
Grant
Weapon (Greataxe), legendary (requires attunement)
“A legendary weapon of the Way of White, granted to an Undead paladin long ago. This mass of iron can only be lifted by those with inhuman strength, but it is blessed, and very effective against agents of Dark.”
A legendary weapon of the Way of White, granted to an Undead paladin long ago.
Grant has 5 charges. As an action, you expend a charge to strike the ground with the Greataxe’s hilt and cast wrath of gods at fifth level. You may use your Strength or Wisdom as spellcasting ability modifiers for spells cast through Grant. Grant regains all expended charges after a long rest.
Grass Crest Shield
Shield (shield), rare
"Old medium metal shield of unknown origin. The grass crest is lightly imbued with magic, which slightly speeds stamina recovery."
While wielding this shield, you can add your proficiency bonus to any Constitution checks or saving throws you make. This bonus does not apply if you’ve already added your proficiency bonus to the check.
Gravelord Sword
Weapon (Greatsword), rare (requires attunement)
“Sword wielded only by servants of Gravelord Nito, the first of the dead. Crafted from the bones of the fallen. The miasma of death exudes from the sword, a veritable toxin to any living being.”
While unsheathed, the sword generates a toxic miasma in a five-foot radius around the wielder. Any creature that starts its turn within the miasma must succeed on a DC 15 Constitution saving throw or take 2d6 poison damage on a failure.
Greatshield of Artorias
Shield (shield), Legendary (requires attunement)
"Shield born from the soul of the great grey wolf Sif, guardian of the grave of the Abysswalker Knight Artorias."
While holding this shield, you have a +1 bonus to AC. This bonus is in addition to the shield's normal bonus to AC. The wielder of this shield automatically succeeds on saving throws triggered by being hit with a weapon attack.
The wielder has advantage on saving throws made to resist being knocked prone or forcibly moved.
Greatsword of Artorias
Weapon (Greatsword), rare (requires attunement)
“Sword born from the soul of the great grey wolf Sif, guardian of the grave of the Abysswalker Knight Artorias. Sir Artorias hunted the Darkwraiths, and his sword strikes harder against dark servants. Sword born from the soul of the great grey wolf Sif, guardian of the grave of the Abysswalker Knight Artorias"
When you hit an undead with this magic weapon, the undead takes an extra 3d6 slashing damage.
Cursed: This greatsword is Cursed, and becoming attuned to it extends the curse to you. As long as you remain Cursed, you are unwilling to part with it, keeping it within reach at all times. You cannot unattune to this weapon while cursed.
Green Blossom
Wondrous Item, uncommon
“Green weed, shaped like a flower. Temporary boost to stamina recovery speed. This uniquely bitter, biting herb is sometimes harvested in large quantities, but normally it is an annual plant found near water.”
A creature that consumes this blossom is flooded with energy, granting them advantage on Constitution checks and saving throws for one minute.
Guardian Tail
Weapon (whip), rare
“Sliced tail of the Sanctuary Guardian. This flexible, spiked and highly poisonous tail would make a rather obnoxious weapon."
Sliced tail of the Sanctuary Guardian. The Guardian Tail deals an additional 1d10 poison damage on a hit.
Gwyndolin’s Moonlight Set
Wondrous Item, rare (requires attunement)
"Garb of the Dark Sun Gwyndolin, protector of the forsaken city of Anor Londo. The crown of the gods demands faith immeasurable of its wearer, but it is imbued with Darkmoon power that enhances all magic. The image of the sun manifests Gwyndolin's deep adoration of the sun. The power of the moon was strong in Gwyndolin, and thus he was raised as a daughter. His magic garb is silk-thin, and hardly provides any physical defense."
When you deal force damage with a spell or ranged attack, you may add additional force damage to one of the effects damage rolls equal to your Intelligence modifier.
Hammer of Vamos
Weapon (Light Hammer), uncommon (requires attunement)
“Metal hammer of Vamos, a skeleton blacksmith deep within the Catacombs who rarely speaks. Can be used as a strike weapon, but better left in the hands of its talented owner.”
Metal hammer of Vamos, a skeleton blacksmith deep within the Catacombs who rarely speaks. Hammer of Vamos deals an additional 1d4 fire damage on a hit.
You have advantage on Smith’s Tools checks made while you are attuned to this hammer.
Havel’s Armor
Armor (plate), legendary
"Apparel worn by Havel the Rock's warriors. Carved from solid rock, its tremendous weight is matched only by the defense it provides. Havel's Warriors never flinched nor retreated from battle. Those unfortunate enough to face them were inevitably beaten to a pulp.”
You have a +3 bonus to AC while wearing this armor. You also have resistance to fire, force, lightning, and poison damage. You cannot be forcibly moved or knocked prone while wearing this armor. Your movement speed is halved while wearing this armor, and you automatically fail Dexterity saving throws.
Havel’s Greatshield
Shield (shield), Legendary (requires attunement by a creature with 17 strength or higher)
"Greatshield of the legendary Havel the Rock. Cut straight from a great slab of stone. This greatshield is imbued with the magic of Havel, proves a strong defense, and is incredibly heavy. A true divine heirloom on par with the Dragon tooth”
While holding this shield, you have a +3 bonus to AC. This bonus is in addition to the shield's normal bonus to AC. You also have resistance to force damage while using the shield. Your movement speed is reduced by 10 feet while wielding this shield (reducing it to a minimum of 5 feet).
Once per day, you may cast the spell stoneskin without requiring a spell slot or material components. You regain use of this ability on a long rest.
Havel’s Ring
Wondrous Item (ring), uncommon
“This ring was named after Havel the Rock, Lord Gwyn's old battlefield compatriot. Havel's men wore the ring to express faith in their leader and to carry a heavier load”
While wearing this ring, your carrying capacity is tripled.
Hawk Ring
Wondrous Item (ring), rare
“One of the special rings granted to the four knights of Gwyn. The Hawk Ring belonged to Hawkeye Gough, who led the Greatarchers. Boosts bow range, so that arrows fly like they were shot by Gough's great bow, which took down high-flying dragons.”
While wearing this ring, you have advantage on Wisdom (Perception) checks made to see distant objects. The standard and maximum range of bows you wield are doubled.
Homeward Bone
Wondrous Item, uncommon
“Bone fragment reduced to white ash. Return to last bonfire used for resting. Bonfires are fueled by bones of the Undead. In rare cases, the strong urge of their previous owner's to seek bonfires enchants their bones with a homeward instinct.”
A creature that prays over this bone for one minute can cast the homeward spell once. The bone shatters after it is used in this way.
Hornet Ring
Wondrous Item (ring), rare
“One of the special rings granted to the four knights of Gwyn. The Hornet Ring. Belonged to the Lord's Blade Ciaran. By boosting critical attacks, its wearer can annihilate foes, as Ciaran's dagger laid waste to Lord Gwyn's enemies.”
While wearing this ring, your finesse weapon attacks score a critical hit on a roll of 19 or 20.
Humanity Sprite
Wondrous Item, Uncommon
“This black sprite is called humanity, but little is known about its true nature. If the soul is the source of all life, then what distinguishes the humanity we hold within ourselves?”
Humanity represents a tiny fragment of the dark soul, with myriad uses. Humanity can be consumed as an action, giving the user a point of Inspiration and healing them for 50 hit points. It can also be offered to a bonfire to restore the users Humanity.
Leo Ring
Wondrous Item (ring), rare
“One of the special rings granted to the four knights of Gwyn. The Leo Ring belonged to Ornstein the Dragonslayer. This ring strengthens counters with pierce weapons. His lugged spear is said to have sliced a boulder in two.”
While wearing this ring, when you roll a critical hit on your attack roll with a weapon that deals piercing damage, the target takes an extra 7 piercing damage.
Lifehunt Scythe
Weapon (scythe), Uncommon
“Scythe born from the soul of Priscilla, the stark white crossbreed trapped inside the painted world of Ariamis. Even the Gods feared Priscilla's lifehunt ability, and in the hands of a mortal, its power will turn upon its wielder."
While unsheathed, the Lifehunt Scythe does 1d6 piercing damage to its wielder at the beginning of their turn.
This weapon deals an additional 3d6 slashing damage when it hits a creature attacked at advantage. This ability has no effect on constructs or undead.
Lingering Dragoncrest Ring
Wondrous Item (ring), rare
“A special ring granted to only the most accomplished sorcerers at Vinheim Dragon School. The ring is engraved with a lingering dragon, and boosts the length of the effects of sorceries.”
While wearing this ring, the duration of spells you cast are affected as if the were under the effect of the Extended Spell metamagic.
Lloyd’s Talisman
Wondrous Item, uncommon
"Talisman utilized by Allfather Lloyd's cleric knights to hunt down the Undead. Blocks Estus recovery within a limited area. In the outside world, the Undead are accursed creatures, and Lloyd's cleric knights are widely praised for their Undead hunts. This blessed talisman blocks Undead recovery, allowing the knights to fight with impunity."
When thrown at an undead, it forces them to make a DC 12 Dexterity saving throw. On a failure, the target cannot regain hit points through the use of an estus flask for one minute. On a success, the creature is unaffected.
Logan’s Catalyst
Wondrous Item (catalyst), legendary (requires attunement by a Wizard with 15 or greater intelligence)
“Catalyst of Big Hat Logan, the great sorcerer and seeker of knowledge. Originally the same catalyst employed by the Vinheim sorcerers, only terribly strengthened over time due to Logan's use. Very powerful when used by one of superior intelligence.”
Logan’s Catalyst increases your spell save DC by 1 while wielding it.
While holding this catalyst, you can use a bonus action to cast a spell you have written in your spellbook, without expending a spell slot or using any verbal or somatic components. Once used, this property of the catalyst can't be used again until the next dawn.
Manus Catalyst
Wondrous Item (catalyst), Legendary (requires attunement)
“A sorcery catalyst born from the soul of Manus, Father of the Abyss. A rough, old wooden catalyst large enough to be used as a strike weapon. Similar to the Tin Crystallization Catalyst, it boosts the strength of sorceries, but limits the number of castings.”
A sorcery catalyst born from the soul of Manus, Father of the Abyss. All abyssal sorceries are cast as if they used a spell slot one level higher. This catalyst has 10 charges. While holding it, you can use an action to expend 1 or more of its charges to cast one of the following spells from it: dark orb (2 charges), dark bead (3 charges), dark fog (4 charges), and pursuers (5 charges).
The catalyst regains all expended charges daily at dawn.
Mask of the Child
Wondrous Item, rare (required attunement)
"One of the three masks of the Pinwheel, the necromancer who stole the power of the Gravelord, and reigns over the Catacombs. This mask, belonging to the naive child, slightly raises stamina recovery speed."
When you fail a Constitution saving throw while wearing this mask, you have advantage on saving throws on subsequent saving throws made to end that specific effect.
Mask of the Father
Wondrous Item, rare (requires attunement)
"One of the three masks of the Pinwheel, the necromancer who stole the power of the Gravelord, and reigns over the Catacombs. This mask, belonging to the valiant father, slightly raises equipment load."
While wearing this mask, your speed is not reduced while wearing heavy armor and your carrying capacity is doubled.
Mask of the Mother
Wondrous Item, rare (required attunement)
"One of the three masks of the Pinwheel, the necromancer who stole the power of the Gravelord, and reigns over the Catacombs. This mask, belonging to the kindly mother, slightly raises HP.
While wearing this mask, your maximum hit points increase by a number equal to your maximum hit dice.
Mask of the Sealer
Wondrous Item, rare
"Mask of the sorcerers who flooded New Londo to seal away the Darkwraiths, and the Four Kings who descended into Dark. It symbolizes their resolve to keep the seal shut forever and their atonement for all who were sacrificed, but two of the three forsook New Londo upon tiring of their duty."
You gain advantage on saving throws made to resist becoming cursed while wearing this mask.
Moonlight Butterfly Horn
Wondrous Item (pike), rare (requires attunement)
“Weapon born from the mystical creature of the Darkroot Garden, the Moonlight Butterfly. The horns of the butterfly, a being created by Seath, are imbued with a pure magic power."
The wielder of this magic weapon can use their Intelligence instead of Strength for attack and damage rolls with this weapon. The Moonlight Butterfly Horn deals force damage instead of piercing.
Moonlight Greatsword
Wondrous Item (greatsword), Legendary (requires attunement)
“This sword, one of the rare dragon weapons, came from the tail of Seath the Scaleless, the pale white dragon who betrayed his own. Seath is the grandfather of sorcery, and this sword is imbued with his magic, which shall be unleashed as a wave of moonlight.”
The wielder of this magic weapon can use their Intelligence instead of Strength for attack and damage rolls with this weapon.
While unsheathed, the wielder has resistance to force damage and advantage on saving throws against magical effects. The Moonlight Greatsword deals force damage instead of slashing.
As an action, you can swing the moonlight greatsword and summon an arc of moonlight from the blade. Make a ranged attack roll against a creature you can see within 30 feet. On a hit, the creature takes force damage equal to 4d6 plus your Intelligence modifier.
Obsidian Greatsword
Weapon (greatsword), Unique (requires attunement)
“This greataxe, one of the rare dragon weapons, is formed by the tail of the one-eyed black dragon Kalameet, the last of the ancient dragons. The mystical power of its obsidian blade will be released when held with both hands.”
This greatsword, one of the rare dragon weapons, is formed by the tail of the one-eyed black dragon Kalameet, the last of the ancient dragons.
An action, you can strike the ground with the greatsword’s blade and generate a blast of black flame. Each creature within ten feet of your must make a Constitution saving throw or take 6d6 bludgeoning damage and be knocked prone. A creature takes half damage on a success and they are not knocked prone. You regain use of this ability on a long rest.
You have resistance to fire and force damage while wielding the blade. This weapon can be infused or enchanted with pine resins and similar items, like non-magical weapons.
Old Witch’s Ring
Wondrous Item (ring), Unique
“Old ring from an old witch. Engraved minutely with indecipherable script, but seemingly useless.”
This ring has no apparent purpose.
oolacile Catalyst
Wondrous Item (catalyst), rare (requires attunement)
“Sorcery catalyst of the lost land of Oolacile. Formed by enchanted whitebark branches. Boosts sorcery adjustment, but lost land sorceries are not offensive, and attacks are not affected by intelligence”
A Sorcery catalyst of the lost land of Oolacile. Formed by enchanted whitebark branches.
This catalyst has 5 charges. While holding it, you can use an action to expend 1 or more of its charges to cast one of the following spells from it: hidden weapon (2 charges), invisibility (2 charges), mending (1 charge), light (1 charge), chameleon (1 charge).
The wand regains all expended charges daily at dawn.
Orange Charred Ring
Wondrous Item (ring), Rare
“An orange ring enchanted by a witch. Reduces lava damage. Since his sores were inflamed by lava from birth, his witch sisters gave him this special ring. But fool that he is, he readily dropped it, and from that spot, a terrible centipede demon was born.”
While wearing this ring, you can stand on and move across lava as if it were solid ground. You also take no damage from being near lava.
Ornstein’s Set
Armor (half-plate), Unique (requires attunement)
"Armor of the dragonslayer Ornstein, who guards the cathedral in the forsaken city of Anor Londo. Ornstein is believed to be the captain of the Four Knights. His golden lion helm is imbued with the power of lightning and should provide good protection against it. "
You gain resistance to lightning damage while wearing this armor. When you roll a critical hit on an attack roll with a weapon that deals piercing damage, you may deal an additional 1d8 lightning damage to the target. This damage is doubled as if it were weapon damage.
Pierce Shield
Shield (shield), rare
"Shield of certain knights of Catarina, used in attacks with a large protrusion in the center. Can be used as a thrust weapon."
When a creature misses you with an attack while you wear this shield, you can make a melee attack with this shield as a reaction. On a hit, you deal 1d6 plus your Strength modifier in piercing damage.
Priscilla’s Dagger
Weapon (dagger), rare (requires attunement)
“This sword, one of the rare dragon weapons, came from the tail of Priscilla, the Dragon Crossbreed in the painted world of Ariamis. Possessing the power of lifehunt, it dances about when wielded, in a fashion reminiscent of the white-robed painting guardians.”
Hit Points lost to this weapon’s damage can be regained only through a long Rest, rather than by regeneration, magic, or any other means.
Once per turn, when you hit a creature with an attack using this magic weapon, you can wound the target. At the start of each of the wounded creature’s turns, it takes 1d4 necrotic damage for each time you’ve wounded it, and it can then make a DC 15 Constitution saving throw, ending the effect of all such wounds on itself on a success. Alternatively, the wounded creature, or a creature within 5 feet of it, can use an action to make a DC 15 Wisdom (Medicine) check, ending the effect of such wounds on it on a success.
Prism Stone
Wondrous Item, common
“Warm pebble emitting a beautiful phasing aura of seven colors, with a very rare eight. The rainbow stone does nothing special, but can serve as a path marker, and can be dropped off a cliff to judge height by the sound of descent. If a loud noise is heard upon its landing, then a fall off the ledge is surely lethal.”
A prism stone dropped on the ground will faintly glow, making them easy to make out in the dark. If dropped off a ledge, it will create a sound proportional in volume to the distance of the fall. If the fall is greater than 100 feet, the stone will make a particularly loud sound in warning.
Purging Stone
Wondrous Item, rare
“Humans are helpless against curses, and can only redirect their influence. The Purging Stone does not dispel curses, but receives them as a surrogate. The stone itself was once a person or some other being.”
A purging stone can be used to cast remove curse once. Once used in this way, it cannot be used again.
Purple Moss Clump
Wondrous Item, uncommon
“Medicinal purple moss clump. Cures poison. Poison builds up in the body, and when it breaks out, it causes gradual damage over a period of time. Poison can be exasperating, so be certain to carry the needed quantity of these moss clumps when destined for an afflicted area.”
A creature that consumes this moss clump is cured of the poison condition.
Quelaag’s Furysword
Weapon (katana), rare
“A curved sword born from the soul of Quelaag, daughter of the Witch of Izalith, who was transformed into a chaos demon. Like Quelaag's body, the sword features shells, spikes, humanity and a coating of chaos fire. Power affected by wielder's humanity.”
A curved sword born from the soul of Quelaag, daughter of the Witch of Izalith, who was transformed into a chaos demon.
While you are human, this weapon deals an additional 2d6 fire damage on a hit.
If you are hosting a fully grown egg parasite, the spell save DC of pyromancies you cast increases by 2.
Rare Ring of Sacrifice
Wondrous Item (ring), Rare
“This mystical ring was created in a sacrificial rite of Velka, the Goddess of Sin. The magenta-shaded ring is especially rare. Its wearer will lose nothing upon death, and will be freed from any curse whatsoever, but the ring itself breaks.”
This ring will absorb the repercussions of death for its wearer, once. When the wearer dies, the ring breaks. Upon resurrection, the creature retains all of their souls and if a bloodstain for the wearer exists already, the bloodstain will remain. The wearer retains their humanity if human, and does not receive a curse. If the wearer is already cursed, the curse is broken as if the remove curse spell is cast on the target.
Red Tearstone Ring
Wondrous Item (ring), rare (requires attunement)
"The rare gem called tearstone has the uncanny ability to sense imminent death. This red tearstone from Carim boosts the attack of its wearer when in danger.”
While wearing this ring, whenever your health drops below 20% of your maximum hit points, increase the damage dealt by half of the damage dice (round up).
Repair Powder
Wondrous Item, common
“Lightly enchanted golden powder. Repairs items. Repair Powder is a precious method of repair on the battlefield, as it obviates the need for a Repairbox.”
When repair powder is sprinkled on an object, it is repaired as if it were under the effects of the mending spell.
Ricard’s Rapier
Weapon (rapier), rare
“A rapier with intricate decorations. Chosen weapon of the famous Undead Prince Ricard. Ricard's exploits are told in a monomyth. He was born into royalty, but wandered the lands in a fateful ill-conceived journey. He became Undead and disappeared up North."
After you make an attack with this weapon, you can use your bonus action to immediately attack again.
Ring of Favor and Protection
Wondrous Item (ring), very rare (requires attunement)
"A ring symbolizing the favor and protection of the goddess Fina, known in legend to possess 'fateful beauty.”
The wearer of this ring’s Strength, Dexterity, and Constitution scores increase by 2. If a creature willingly removes this ring after attuning to it, the ring shatters and becomes non-magical.
Ring of Fog
Wondrous Item (ring), rare (requires attunement)
"Those who befriend Alvina are given this mysterious ring. It resembles a pearl with its robust pure-white fog. The ring camouflages its wearer's presence, helping to prevent detection..”
The wearer of this ring turns slightly transparent, granting them advantage on Stealth checks made to avoid detection.
Ring of Sacrifice
Wondrous Item (ring), Uncommon
“This mystical ring was created in a sacrificial rite of Velka, the Goddess of Sin. Its wearer will lose nothing upon death, but the ring itself breaks.”
This ring will absorb the repercussions of death for its wearer, once. When the wearer dies, the ring breaks. Upon resurrection, the creature retains all of their souls and does not leave behind a bloodstain. The wearer retains their humanity if human.
Ring of Steel Protection
Wondrous Item (ring), Uncommon
“This ring belonged to the Knight King Rendal. It grants its wearer protection by boosting defense against physical attacks. Of the many legends surrounding the Knight King Rendal, one of the more well-known speaks of his standing down a giant drake and slashing it to pieces.”
You gain a +1 bonus to AC while wearing this ring.
Ring of the Evil Eye
Wondrous Item (ring), Rare (requires attunement)
“According to legend, this ring contains the spirit of the evil eye, a dark beast which assaulted Astora. The strength of the evil eye does not waver, and HP is absorbed from fallen enemies.”
When a creature dies within 10 feet of you, you regain hit points equal to your Proficiency Bonus.
Ring of the Sun Princess
Wondrous Item (ring), Rare (requires attunement)
“This ring is granted to those who enter a Covenant with Gwynevere, daughter of Lord Gwyn and the Princess of Sunlight. This slightly warm ring boosts the synergy of miracles. The Princess of Sunlight left Anor Londo along with many other deities, and later became wife to Flame God Flann.”
The wearer of this ring increases the hit points healed by healing miracles she casts by their proficiency bonus.
Ring of the Sun’s Firstborn
Wondrous Item (ring), Rare (requires attunement)
“Lord Gwyn's firstborn, who inherited the sunlight, once wore this ancient ring. Lord Gwyn's firstborn was a god of war, but his foolishness led to a loss of the annals, and rescinding of his deific status. Today, even his name is not known.”
While wearing this ring, the attack bonus and saving throw DCs of miracles you cast increase by 1.
Rotten Pine Resin
Wondrous Item, uncommon
“Pine resin that has rotted and turned poisonous. Likely rotten from the start. Temporarily applies poison to weapon.”
When you apply this pine resin to a weapon you carry, it festers with toxin for a minute and deals an additional 1d8 poison damage on a hit. The weapon is considered magical for the duration.
Pine resins cannot be applied to magical weapons.
Rusted Iron Ring
Wondrous Item (ring), Rare (requires attunement)
“This iron ring was used to shackle the guilty. It is terribly rusted, and faintly stained with blood. Those who find this strange ring to their liking will be pleased to find it easier to gain footing on poor ground such as swamps.”
While wearing this ring, you are unaffected by difficult terrain caused by water and similar natural hazards.
Sanctus
Shield (shield), very rare
"A legendary weapon of the Way of the White, granted to an Undead paladin long ago. Once blessed with the protection of a white flame, but its power has all but faded, so that it provides only slight HP recovery.”
You regain hit points equal to your proficiency modifier at the beginning of your turn if you are wielding this shield.
Shadow Leathers
Armor (leather), rare (requires attunement)
"Black cloth clothing worn by spooks from an Eastern land. Designed so as not to hinder their unique form of martial arts. While they sacrifice defense for the sake of greater mobility, they do offer resistance to bleeding and poison among other things, perhaps due to the nature of espionage.”
You have resistance to poison damage while you wear this armor. While you wear it, you have advantage on Dexterity (Stealth) checks that rely on moving silently.
Shotel
Weapon (Shortsword), uncommon
“Curved sword with sharply curved blade. Created by Arstor, Earl of Carim. Requires great skill to wield, but evades shield defense to sneak in damage.”
A sword with a sharply curved blade. The wielder gains a +2 bonus to attack rolls against creatures wearing shields with this weapon.
Silver Pendant
Wondrous Item, uncommon
"One of the ancient treasures of Anor Londo. Presented to Artorias for facing the Abyss. Effectively deflects the Dark of the Abyss, especially in its magic forms."
A worn silver pendant inscribed with sorcerous runes. As a reaction, the wielder can form a shield of protective magic against dark magic, such as hex spells and Manus's lair actions. The shield lasts until the end of the current turn, and effectively provides immunity to such effects for the wielder for the duration.
Slumbering Dragoncrest Ring
Wondrous Item (ring), Rare (requires attunement)
“This ring was secretly worn by a surreptitious sorcerer at Vinheim Dragon School. The ring is engraved with an everlasting dragon in silent slumber, and masks all sound emitting from its wearer.”
You are constantly under the effects of a hush spell that does not require concentration. Any sounds you make are only audible at a 10 foot radius around you, including verbal components of spells and speech. You have advantage on Dexterity (Stealth) checks made to operate silently.
Smough’s Hammer
Weapon (greathammer), Legendary (requires attunement)
“Great Hammer from the soul of executioner Smough, who guards the cathedral in the forsaken city of Anor Londo. Smough loved his work, and ground the bones of his victims into his own feed, ruining his hopes of being ranked with the Four Knights.”
Twisted great Hammer associated with Smough, the last knight to remain at his post, guarding the ruined cathedral. The base damage of this greathammer is 3d6 bludgeoning damage.
When you hit a creature with this hammer, you regain hit points equal to your proficiency bonus.
While wielding this weapon, you cannot be forcibly moved against your will and you have advantage on saving throws to avoid being knocked prone.
Smough’s Set
Armor (half-plate), Unique (requires attunement)
"Worn by Smough, the Executioner, protector of the cathedral at the forsaken city of Anor Londo. It offers extremely high defense and can be worn by humans, but not without great difficulty."
When you regain hit points while wearing this armor, you can use your reaction to regain additional hit points equal to your proficiency modifier.
Spider Shield
Shield (shield), rare
"Shield of the savage mountain bandits. Uniquely-shaped with a large black spider etched upon it.”
While wielding this shield, you have resistance to poison damage and advantage on saving throws made to avoid being poisoned.
Stone Armor
Armor (plate), very rare
"Moss-covered armor of the Stone Knight, defender of the Darkroot Garden. The Stone Knight is a product of ancient magic, and although this armor is also imbued with magic, it is incredibly heavy”
If the wearer’s Strength score is less than 15, their movement speed is reduced by 10 feet. You have advantage on saving throws against spells and other magical effects while wearing this armor.
Stone Greatweapon
Weapon (greataxe or greatsword), uncommon (requires attunement)
“The Stone Knights who guard the Darkroot Garden wield this moss-covered greatsword. The same magic which created the Stone Knights is imbued in the sword. Unleash this power by wielding the sword with two hands.”
The Stone Knights who guard the Darkroot Garden wield this moss-covered weapon. As an action, you can cast slow (save DC 13) centered on yourself. You regain use of this ability after you’ve finished a long rest.
Sunlight Talisman
Wondrous Item (talisman), rare (requires attunement)
“Medium for casting miracles of the Gods. The talisman of Solaire of Astora, the Knight of Sunlight, is decorated with a holy symbol, illustrated by Solaire himself. This talisman is a projection of Solaire's upstanding, unwavering faith.”
The talisman of Solaire of Astora, the Knight of Sunlight, is decorated with a holy symbol, illustrated by Solaire himself. This talisman has 5 charges. While holding it, you can use an action to expend 1 or more of its charges to cast one of the following spells from it: light (1 charge), augury (2 charges), daylight (3 charges), bountiful sunlight (4 charges), and soothing sunlight (5 charges).
The talisman regains all expended charges daily at dawn.
Thorolund Talisman
Wondrous Item (talisman), uncommon
Medium for casting miracles of the Gods. This talisman is only granted to high-ranking Thorolund clerics. Has high miracle adjustment which, thanks to divine protection, is not dependent upon faith.”
The talisman of Solaire of Astora, the Knight of Sunlight, is decorated with a holy symbol, illustrated by Solaire himself. This talisman has 1 charge. While holding it, you can use an action to expend a charge to cast the cure wounds spell (spellcasting mod +2) from it.
The talisman regains all expended charges daily at dawn.
Tin Banishment Catalyst
Wondrous Item (catalyst), uncommon
“Catalyst of the banishment sorcerers who flooded New Londo to seal away the Darkwraiths and the Kings who fell to Dark. In contrast to other catalysts, the metal catalyst qualifies as a weapon, as it inflicts physical damage, however small.”
This staff can be wielded as a magic Quarterstaff with the finesse property.
Tin Crystallization Catalyst
Wondrous Item (catalyst), legendary (requires attunement)
“Catalyst imbued in terrifying crystal magic. Used by Logan after his fixation on Seath. Makes all sorceries incredibly powerful, but demands extremely high intelligence from its wielder, and halves sorcery usages.”
Your Intelligence score is 25 while you wield this catalyst. They have no effect on you if your Intelligence is already 25 or higher without them.
The wand regains all expended charges daily at dawn.
Cursed: This catalyst is Cursed, and becoming attuned to it extends the curse to you. As long as you remain Cursed, you are unwilling to part with it, keeping it within reach at all times. While cursed, your maximum number of spell slots for each level is halved (round up).
You also have disadvantage on Sanity checks and saving throws.
You cannot unattune to this weapon while cursed.
Tin Darkmoon Catalyst
Wondrous Item (catalyst), very rare (requires attunement)
“Catalyst born from the soul of the Dark Sun Gwyndolin, Darkmoon deity who watches over the abandoned city of the Gods, Anor Londo. Gwyndolin is Gwyn's lastborn and a legitimate god, but he is also a Moon sorcerer, and this wand is boosted by faith, not intelligence.”
This catalyst channels its magic through the users faith instead of their intellect. Spells you cast through the Tin Darkmoon Catalyst use your Wisdom ability score and modifier in place of Intelligence as your spellcasting ability.
Tiny Being’s Ring
Wondrous Item (ring), Uncommon (requires attunement)
“Ring made of an ancient tiny red jewel. Grants small increase to HP. Rings grant powers large and small. Their discovery, and effective use, can make one's journey easier”
Your maximum hit points increase by 1 for each your maximum hit dice.
Titanite Catch Pole
Weapon (halberd), uncommon
“Weapon of the titanite demon, a faceless stone monster born from a titanite slab.
One of the enchanted weapons, perhaps from residual power of the titanite slab.
Known for its leaping attack which comes smashing down on foes from above.”
You gain a bonus to your damage rolls made with this weapon equal to your Intelligence modifier. Your jump distance is doubled while you wield this weapon.
Transient Curse
Wondrous Item, uncommon
“Limb of the victim of a curse. Temporary curse allows engagement with ghosts. The only way to fight back against ghosts, who are cursed beings, is to become cursed oneself. The safest method, however dreadful, is to cut off an arm of the dead.”
A creature under the effect of a transient curse can interact, and harm, spectral undead for 10 minutes after the curse takes effect. This curse does not harm the recipient.
Velka’s Rapier
Weapon (rapier), rare
“A symbolic, powerful thrusting sword used by the Pardoner serving Velka, Goddess of Sin. It is no mere symbol to be sure; the Pardoner is an inhuman swordsman, and wields this enchanted blade with special sword technique.”
When you hit a Celestial with this weapon, the Celestial takes an extra 3d6 piercing damage.
Velka’s Talisman
Weapon (talisman), very rare (requires attunement)
“Medium for casting miracles of the Gods.
This black tuft of hair that serves as a talisman belongs to Velka, Goddess of Sin. It casts miracles not by drawing upon faith, but intelligence.”
This talisman channels its magic through the users intellect instead of their faith. Spells you cast through Velka’s Talisman use your Intelligence ability score and modifier in place of Wisdom as your spellcasting ability.
Wanderer’s Coat
Wondrous Item, uncommon
"Coat of an aimless traveler. Made from sturdy leather and quilting. Battle comes with the territory when one wanders the land, and this coat provides a certain degree of protection."
When you finish a long rest while wearing this cloak, you can select a type of damage from the following list: Poison, Acid, Fire, Cold, Radiant, Necrotic, Lightning, Thunder, Force, Psychic. You gain resistance against that damage type until you take that type of damage for the first time after the rest. The cloak's resistance vanishes afterwards and does not return until you finish another rest.
White Seance Ring
Wondrous Item (ring), Uncommon (requires attunement by a cleric)
“A divine ring entrusted to the head bishop of the Way of White and apostle to Allfather Lloyd, uncle to Lord Gwyn. It grants additional attunement slots. The head bishop of the Way of White is the guardian of law and caste, and one of the great royals of Thorolund.”
This ring increases the number of miracles you can prepare each day by 1.
Witch Set
Wondrous Item, very rare (requires attunement)
"Armor set of the rogue witch Beatrice. Almost all magic users that employ a wand studied at Dragon School, but Beatrice is one of the few exceptions. She braved the Abyss but did not live to tell of her ordeal."
Beatrice’s proficiency with sorcerous catalyst has passed down into her robes. As an action, you can restore all of the charges of a sorcery catalyst you are wielding. You regain use of this ability after you finish a long rest.
Wolf Ring
Wondrous Item (ring), Uncommon (requires attunement by a cleric)
“One of the special rings granted to the four knights of Gwyn. The Wolf Ring belongs to Artorias the Abysswalker. Artorias had an unbendable will of steel, and was unmatched with a greatsword.”
The wearer of this ring has advantage on checks and savings throws made to avoid being knocked prone or forcibly moved.
Blacksmithing
Blacksmiths in Lordran can repair, reinforce, ascend, and modify weapons given to them with souls and the proper materials. Weapon Ascension Blacksmiths given special Embers can ascend reinforced weapons to grant them magical properties. These ascended weapons can deal magical damage and even use different ability scores to make attacks. Most weapon ascensions require a +1 mundane reinforcement as a prerequisite, though some require previous ascensions. In order to further reinforce a ascended weapon, the weapon must already have been ascended to the previous tier (eg. in order to use a White Titanite Chunk to create a 2d6 Divine weapon, a Green Titanite Shard must have already been used to ascend it to 1d6 radiant damage.)
A particular ascension path requires the talents of a specific blacksmith in order to use its associated Ember. Below is a brief overview of the various blacksmiths in Lordran and the ascensions they can imbue:
Andre of Astora: Mundane, Divine, and Occult Rickert of Vinheim: Magic, Enchantment Giant Blacksmith: Lightning, Crystal Vamos: Fire, Chaos
Embers
Large Ember - Found near the butcher’s table in the Depths. Given to Andre to create +2 mundane weapons
Very Large Ember - Found in the New Londo Ruins. Given to Andre to create +3 mundane weapons.
Divine Ember - Found in the tower on the far end of the Moonlight Butterfly’s bridge. Given to Andre to imbue weapons with radiant energy.
Large Divine Ember - Found in the Tomb of Giants. Given to Rickert to create more powerful divine weapons.
Dark Ember - Found in the Painted World of Ariamis. Given to Andre of Astora to create god-slaying weapons.
Large Magic Ember - Found in the Duke’s Archives after destroying Seath the Scaleless. Given to Rickert to create more powerful magic weapons.
Enchanted Ember - Found in Darkroot Garden beyond Alvina’s bridge. Given to Rickert to create true magic weapons that feed off the wielder’s sorcerous ability.
Crystal Ember - Found in the Duke’s Archives. Given to the Giant Blacksmith to create fragile but powerful crystal-imbued weapons.
Large Flame Ember - Found in the Demon Ruins before the Demon Firesage boss. Given to Vamos to create more powerful fire-imbued weapons.
Chaos Flame Ember - Found in a pool of lava in the Demon Ruins. Given to Vamos to create true chaos-imbued weapons that feed off the user’s humanity.
Mundane Reinforcement.
Blacksmiths in Lordran can imbue titanite shards into non-magical weapons to improve them. The materials, embers, and souls needed to upgrade a weapon are shown below. Upgrading a weapon via titanite reinforcement grants a bonus to attack and damage rolls per the Weapon Bonus column, but such weapons are not considered magical.
Some items need special materials for refinement. Dragon weapons, those dropped by Dragons and their kind like the Hellkite Drake and Priscilla, are upgraded with Dragon Scales. Weapons made from Great Souls are upgraded with Demon Titanite. Other magic weapons detailed in the Items chapter not included in the former categories are upgraded with Twinkling Titanite. These special materials are used in place of titanite shards, chunks, and slabs respectively to upgrade magical and unique weapons. Eg. to upgrade a +0 black knight greatsword to +3, 3 twinkling titanite, 13000 souls, and the large and very large embers are required.
Only Andre of Astora can use the Large and Very Large Embers to upgrade a weapon beyond +1.
| Weapon Bonus | Materials | Souls to Upgrade | Ember |
| 1 | Titanite Shard | 500 | - |
| 2 | Titanite Chunk | 2500 | Large Ember |
| 3 | Titanite Slab | 10000 | Very Large Ember |
Divine Ascension
Divine weapons channel the power of the gods of Anor Londo. Andre of Astora can ascend +1 or higher weapons with the use of the Divine or Large Divine Embers. Divine weapons do not add the wielder’s Strength or Dexterity modifiers to their damage rolls. Instead, they deal additional radiant damage shown in the table below.
| Damage Bonus | Materials | Souls to Upgrade | Ember |
| 1d6 Radiant | Green Titanite Shard | 500 | Divine Ember |
| 2d6 Radiant | White Titanite Chunk | 2500 | Large Divine Ember |
| 3d6 Radiant | White Titanite Slab | 10000 | Large Divine Ember |
Occult Ascension
Occult weapons are made to kill Gods. The Dark Ember could not be destroyed by them, so they hid it in the Painted World of Ariamis with their other mistakes. Only divine weapons can be imbued with Occult magic. Occult weapons use their user's Wisdom in place of their Strength or Dexterity modifiers for attack and damage rolls. As an occult weapon is further reinforced, it gains a bonus to attack and damage rolls as shown in the table below. Additionally, occult weapons deal an additional 2d6 radiant damage when they hit a Celestial creature.
| Weapon Bonus | Materials | Souls to Upgrade | Ember |
| 1 | Green Titanite Shard | 500 | Dark Ember |
| 2 | White Titanite Chunk | 2500 | Dark Ember |
| 3 | White Titanite Slab | 10000 | Dark Ember |
Magic Ascension
Magic weapons are fueled by Vinheim sorcery. Rickert of Vinheim can ascend +1 weapons with his own Magic Ember or the Large Magic Ember if given to him. Magic weapons do not add the wielder’s Strength or Dexterity modifiers to their damage rolls, instead they deal additional force damage shown in the table below.
| Damage Bonus | Materials | Souls to Upgrade | Ember |
| 1d6 Force | Green Titanite Shard | 500 | - |
| 2d6 Force | Blue Titanite Chunk | 2500 | Large Magic Ember |
| 3d6 Force | Blue Titanite Slab | 10000 | Large Magic Ember |
Enchantment Ascension
The art of weapon enchantment was lost with the fall of oolacile, except for the last Enchantment Ember safeguarded in Darkroot Garden. Only magic weapons can be imbued with Enchantment magic. Enchanted weapons use their user's Intelligence in place of their Strength or Dexterity modifiers for attack and damage rolls. An enchanted weapon deals force damage instead of its normal damage type. As an enchanted weapon is further reinforced, it gains a bonus to attack and damage rolls as shown in the table below.
| Weapon Bonus | Materials | Souls to Upgrade | Ember |
| 1 | Green Titanite Shard | 500 | Enchantment Ember |
| 2 | Blue Titanite Chunk | 2500 | Enchantment Ember |
| 3 | Blue Titanite Slab | 10000 | Enchantment Ember |
Crystal Ascension
Of all the Blacksmith Embers, the Crystal Ember was the most recent to be created. In Seath the Scaleless' pursuit of immortality, he crafted arcane magics with the Primordial Crystal. One of the results of such experimentation was the art of Crystal Ascension. Any unascended weapon can be made a Crystal weapon with a titanite chunk, increasing its attack bonus and damage bonus by 3. Each time a natural 1 is rolled on an attack roll with the weapon, this bonus is decreased by 1. When this bonus reaches 0, the weapon is destroyed. Crystal weapons cannot be repaired, reinforced, or ascended again.
| Weapon Bonus | Materials | Souls to Upgrade | Ember |
| 3 | Titanite Chunk | 500 | Crystal Ember |
Flame Ascension
Fire weapons are faint echoes of the First Flame, now flickering in Gwyn’s care. Blacksmith Vamos in the Catacombs can ascend +1 weapons with his own Flame Ember or the Large Flame Ember if given to him. Fire weapons do not add the wielder’s Strength or Dexterity modifiers to their damage rolls, instead they deal additional fire damage shown in the table below.
| Damage Bonus | Materials | Souls to Upgrade | Ember |
| 1d6 Fire | Green Titanite Shard | 500 | - |
| 2d6 Fire | Red Titanite Chunk | 2500 | Large Flame Ember |
| 3d6 Fire | Red Titanite Slab | 10000 | Large Flame Ember |
Chaos Ascension
Chaos ascension is an ancient art lost in the wake of the demonic cataclysm in Izalith.To even use the ember to imbue weapons with chaos magic requires a hand skilled in those forgotten practices. Only fire weapons can be imbued with Chaos magic. Chaos weapons use their user's Charisma in place of their Strength or Dexterity modifiers for attack and damage rolls. As a Chaos weapon is further reinforced, it gains a bonus to attack and damage rolls as shown in the table below. Additionally, this weapon deals an additional 1d6 fire damage on a hit when wielded by a Human creature.
| Weapon Bonus | Materials | Souls to Upgrade | Ember |
| 1 | Green Titanite Shard | 500 | Chaos Flame Ember |
| 2 | White Titanite Chunk | 2500 | Chaos Flame Ember |
| 3 | White Titanite Slab | 10000 | Chaos Flame Ember |
Lightning Ascension
Lightning weapons can only be crafted in Anor Londo, the last bastion of power for the original dragonslayers. The Giant Blacksmith can ascend +1 weapons without the use of an ember. Lightning weapons do not add the wielder’s Strength or Dexterity modifiers to their damage rolls. Instead, they deal additional lightning damage shown in the table below.
| Damage Bonus | Materials | Souls to Upgrade | Ember |
| 1d6 Lightning | Green Titanite Shard | 500 | - |
| 2d6 Lightning | White Titanite Chunk | 2500 | - |
| 3d6 Lightning | White Titanite Slab | 10000 | - |
Legendary Weapons
The Great Souls of slain creatures can be imbued into reinforced weapons. To imbue a weapon, it must be reinforced to at least +2 with mundane reinforcement and it must match the specific weapon type required. Only the Giant Blacksmith in Anor Londo remembers the art of soul transposition needed to create legendary weapons. The table below shows the legendary weapons that can be crafted:
| Legendary Weapon | Weapon Needed | Great Soul |
| Moonlight Butterfly Horn | Spear or Pike | Moonlight Butterfly |
| Crystal Ring Shield | Shield* | Moonlight Butterfly |
| Quelaag’s Furysword | Scimitar or Shortsword | Chaos Witch Quelaag |
| Chaos Blade | Katana | Chaos Witch Quelaag |
| Dragon Bone Fist | Claws | Fortress Golem |
| Golem Axe | Battleaxe or Greataxe | Fortress Golem |
| Dragonslayer Spear | Spear or Pike | Dragonslayer Ornstein |
| Smough’s Hammer | Warhammer or Greathammer | Executioner Smough |
| Greatsword of Artorias | Broken Sword | Gray Wolf Sif |
| Cursed Greatsword of Artorias | Greatsword | Gray Wolf Sif |
| Greatshield of Artorias | Shield* | Gray Wolf Sif |
| Darkmoon Bow | Shortbow or Longbow | Dark Sun Gwyndolin |
| Tin Darkmoon Catalyst | Catalyst | Dark Sun Gwyndolin |
| Lifehunt Scythe | Greatscythe or Halberd | Crossbreed Priscilla |
| Great Lord Greatsword | Greatsword | Gwyn, Lord of Cinder |
| Manus Catalyst | Catalyst | Manus, Father of the Abyss |
| Abyss Greatsword | Longsword or Greatsword | Artorias the Abysswalker |
Spells
Wizard Spells:
Cantrips (0 Level):
light (cast light)
soul arrow
1st level
aural decoy
chameleon
fall control (feather fall (self))
heavy soul arrow
hidden weapon
hush
2nd level
dark orb
hidden body (invisibility)
magic shield
magic weapon
remedy (protection from poison)
3rd level
dark bead
homing soulmass
resist curse
soul spear
4th level:
crystal magic weapon
crystal soul spear
homing crystal soulmass
dark fog
5th level
pursuers
white dragon breath
Cleric Spells:
1st level
cure wounds
force
lightning spear
seek guidance
2nd level:
augury (seek guidance)
emit force
homeward
magic barrier
tranquil walk of peace
3rd level:
karmic justice
replenishment
wrath of the gods
4th level:
bountiful sunlight (aura of vitality)
death ward
gravelord sword dance
5th level:
holy weapon (sunlight blade)
soothing sunlight
sunlight spear
sorcerer spells:
1st level:
minor fireball
fire whip
2nd level:
fire orb
fire surge
flash sweat
iron flesh
poison mist
3rd level:
chaos fire whip
fireball (great fireball)
firestorm
lingering flame
power within
4th level:
great chaos fireball
immolate self
toxic mist
undead rapport
acid surge
5th level:
black flame
chaos storm
Acid Surge
sorcery 4
- Casting Time: 1 action
- Range: Self
- Components: S
- Duration: 1 minute
You gather acid in your palm, hurling it in a 15-foot cone spray in front of you. Any creature in the cone must make a Dexterity saving throw. On a failure, the target's weapon takes a permanent and cumulative −1 penalty to damage rolls. If its penalty drops to −5, the weapon is destroyed. Any metal armor or a metal shield the target is wearing or carrying takes a permanent and cumulative −1 penalty to the AC it offers. Armor reduced to an AC of 10 or a shield that drops to a +0 bonus is destroyed. On a success, the creature takes half damage and their equipment doesn’t degrade.
Aural Decoy
sorcery 1
- Casting Time: 1 action
- Range: 30 feet
- Components: S
- Duration: 1 minute
You create a sound emanating from a point within range. The sound can be as quiet as a whisper or as long as a single person yelling. Creatures that can hear the sound may move to investigate the sound.
Black Flame
abyssal pyromancy 5
- Casting Time: 1 bonus action
- Range: Touch
- Components: V, S
- Duration: Instantaneous
An abyss corrupted variant of great combustion, created when a pyromancer wandered into oolacile. Make a melee spell attack against the target. This attack has advantage if the target is wearing a shield. On a hit, the target takes 8d10 fire damage and must make a Constitution saving throw. On a failure, the creature falls prone.
At Higher Levels: When you cast this spell using a spell slot of 6th Level or higher, the damage increases by 1d10 for each slot level above 5th.
Chameleon
sorcery 1
- Casting Time: 1 action
- Range: Self
- Components: V, S
- Duration: 10 minutes, concentration
An ancient sorcery of the lost land of Oolacile. Choose a medium-sized object that you can see. Your appearance is changed to mimic the object. A creature can use its action to inspect a target and make an Intelligence (Investigation) check against your spell save DC. If it succeeds, it becomes aware that the target is disguised. The disguise is dispelled if the caster attacks or casts another spell, or if another creature physically interacts with the illusion.
Chaos Fire Whip
chaos pyromancy 3
- Casting Time: 1 action
- Range: 15 feet
- Components: S, M (a cord of burnt rope)
- Duration: Instantaneous
Make four melee spell attacks that may be split between up to four creatures within range. On a hit, each attack deals 4d4 fire damage.
At Higher Levels: When you cast this spell using a spell slot of 4th level or higher, you may make an additional spell attack for each slot level above 3rd.
Chaos Fire Storm
chaos pyromancy 5
- Casting Time: 1 action
- Range: Self
- Components: V, S
- Duration: Instantaneous
Pillars of chaos flame erupt in a 30-foot area surrounding you. Each creature other than you in the area must make a Dexterity saving throw. On a failure, they take 12d8 fire damage. A creature takes half damage on a success.
At Higher Levels: When you cast this spell using a spell slot of 6th Level or higher, the damage increases by 2d8 for each slot level above 5th.
Crystal Magic Weapon
sorcery 4
- Casting Time: 1 bonus action
- Range: Touch
- Components: V, S, M (a crystal shard)
- Duration: up to 1 hour, concentration
You temporarily enchant a non-magical weapon with the Paledrake’s crystal sorcery. The weapon gains a +3 bonus to attack and damage rolls. It also deals an additional 1d6 cold damage.
Whenever a natural 1 is rolled with the enchanted weapon, the bonus to attack and damage decreases by 1 as the crystal begin to chip off. When the bonus reaches 0, the spell ends.
Crystal Soul Spear
sorcery 4
- Casting Time: 1 action
- Range: Self
- Components: V, S
- Duration: Instantaneous
This spell represents the culminations of Seath’s efforts to improve mortal sorcery with Crystal magic. A spear of magical energy bursts forth in a 120 foot line from your catalyst. Any creature in the area must succeed on a Dexterity saving throw or take 5d6 force damage and 5d6 cold damage. A creature that succeeds takes half damage.
At Higher Levels: When you cast this spell using a spell slot of 5th level or higher, the spell’s damage increases by 1d6 cold damage and 1d6 force damage for every level above 4th.
Dark Bead
abyssal sorcery 3
- Casting Time: 1 action
- Range: Self (30-foot cone)
- Components: V, S, M (X Souls)
- Duration: Instantaneous
An abyss sorcery discovered by an Oolacile sorcerer on the brink of madness. The caster fires a 30 foot cone of abyssal energy from their catalyst. Creatures in the cone must make a Dexterity saving throw or take 9d6 bludgeoning damage on a failure. On a success they take half damage. Creatures take 1d6 less bludgeoning damage for every five feet of distance between them and the caster.
At Higher Levels: When you cast this spell using a spell slot of 4th Level or higher, the damage increases by 1d6 for each slot level above 3rd.
Dark Fog
abyssal sorcery 4
- Casting Time: 1 action
- Range: 60 feet
- Components: V, S
- Duration: 1 minute
You draw upon the abyss to summon a 15 foot sphere of poisonous gas within range. Any creature that ends their turn inside of the cloud must succeed on a Constitution saving throw or become poisoned. While poisoned, the target takes 1d8 poison damage at the end of their turn.
At the end of each of its turns, the target can make another Constitution saving throw. On a success, the spell ends on the target.
Dark Orb
abyssal sorcery 2
- Casting Time: 1 action
- Range: 30 feet
- Components: V, S
- Duration: Instantaneous
You summon a sphere of abyssal energy and hurl it at a nearby foe. Make a ranged spell attack at a target within range. This attack has advantage against a target with intact humanity. On a hit, the target takes 5d6 necrotic damage.
At Higher Levels: When you cast this spell using a spell slot of 2th Level or higher, the damage increases by 1d6 for each slot level above 3rd.
Emit Force
miracle 2
- Casting Time: 1 action
- Range: 30 foot
- Components: V, S
- Duration: Instantaneous
You project a ball of thunderous might and hurl it at a point within range. Every creature within five feet of the point must make a Constitution saving throw. On a failure, the creature takes 2d6 thunder damage and is thrown 10 feet away from the orb. On a success, the creature takes half as much damage and is not moved.
At Higher Levels: When you cast this spell using a spell slot of 3rd level or higher, each attack deals an additional 1d6 thunder damage for each level above 2nd.
Fire Orb
pyromancy 2
- Casting Time: 1 action
- Range: 30 feet
- Components: V, S
- Duration: Instantaneous
You hurl an orb of fire at a point you can see within range. Each creature within ten feet of the chosen point must make a Dexterity saving thrown. On a failure, the creature takes 4d6 fire damage. On a success, they take half as much damage.
At Higher Levels: When you cast this spell using a spell slot of 3rd level or higher, each attack deals an additional 1d6 fire damage for each level above 2nd.
Fire Storm
pyromancy 3
- Casting Time: 1 action
- Range: Self
- Components: V, S
- Duration: Instantaneous
Pillars of flame erupt in a 20-foot area surrounding you. Each creature other than you in the area must make a Dexterity saving throw. On a failure, they take 6d6 fire damage. A creature takes half damage on a success.
At Higher Levels: When you cast this spell using a spell slot of 4th level or higher, each attack deals an additional 1d6 fire damage for each level above 3rd.
Fire Surge
pyromancy 2
- Casting Time: 1 action
- Range:
- Components: V, S
- Duration: 10 minutes, concentration
You manifest a constant stream of flame, fueled by foreign pyromancy. As a bonus action, you can make a melee spell attack against a creature within five feet of you. On a hit, the creature takes 1d6 fire damage. The spell ends if you use your bonus action to do anything else.
Fire Whip
pyromancy 1
- Casting Time: 1 action
- Range: 15 feet
- Components: S, M (a cord of burnt rope)
- Duration: Instantaneous
Make a melee spell attack against two targets within range, or two attacks against one target. On a hit, each attack deals 3d4 fire damage.
At Higher Levels: When you cast this spell using a spell slot of 2nd level or higher, you may make an additional attack for each slot level about 1st.
Flash Sweat
pyromancy 1
- Casting Time: 1 action
- Range: Self
- Components: V, S
- Duration: 10 minutes, concentration
You summon inner fire and start sweating profusely, inuring yourself to outside flame. For the duration you have resistance to fire damage.
Force
miracle 1
- Casting Time: 1 action
- Range: Self
- Components: V, S
- Duration: Instantaneous
A blast of thunderous energy explodes from you, forcing creatures away. Each creature within five feet of you must succeed on a Constitution saving throw or be pushed ten feet away from you. On a success, the creature is not pushed.
Gravelord Sword Dance
miracle 4
- Casting Time: 1 action
- Range: Self
- Components: V, S
- Duration:
A field of orange greatswords burst from the ground in a 30-foot area surrounding you. Each creature other than you in the area must make a Dexterity saving throw. On a failure, they take 12d8 necrotic damage. A creature takes half damage on a success.
At Higher Levels: When you cast this spell using a spell slot of 6th Level or higher, the damage increases by 2d8 for each slot level above 5th.
Great Chaos Fireball
chaos pyromancy 4
- Casting Time: 1 action
- Range: 60 ft.
- Components: V, S
- Duration: 1 minute
You collect a mass of chaotic energy, drawn from the depths of Lost Izalith, and hurl it at a point within range. Each creature within 20 feet of the point must make a Dexterity saving throw or take 10d6 points of fire damage. On a success, the creature takes half as much damage.
The spell creates a 10 foot puddle of lava that lasts for the duration. Any creature that moves into the area or starts their turn there takes 4d6 fire damage.
At Higher Levels: When you cast this spell using a spell slot of 5th level or higher, the initial fireball deals an additional 1d6 fire damage for each level above 4th.
Heavy Soul Arrow
sorcery 1
- Casting Time: 1 action
- Range: 30 feet
- Components: V, S
- Duration: Instantaneous
You take the time to collect more arcane energy and infuse it into a mighty bolt of force. You can only cast this spell if you have not moved since the beginning of your turn. Make a ranged spell attack at a creature within range. On a hit, the dart deals 2d10 force damage to the target. Your movement speed is reduced to 0 until the end of your turn.
At Higher Levels: When you cast this spell using a spell slot of 2nd level or higher, each attack deals an additional 1d10 force damage for each level above 1st.
Homeward
miracle 2
- Casting Time: 1 minute
- Range: 15 feet
- Components: V, S
- Duration: Instantaneous
You transport yourself and any living comrades within range back to the last bonfire you rested at.
Homing Crystal Soulmass
sorcery 4
- Casting Time: 1 action
- Range: 30 feet
- Components: V, S
- Duration: Concentration, up to 1 minute
This spell creates a number of arcane orbs that sit above the caster equal to their spellcasting modifier. As a bonus action, you can hurl one of the orbs at a creature within range. It must succeed at a Dexterity saving throw or take 2d12 force and 2d6 bludgeoning damage.
At Higher Levels: When you cast this spell using a spell slot of 5th level or higher, another orb is created for each slot level above 4th.
Homing Soulmass
sorcery 3
- Casting Time: 1 action
- Range: 30 feet
- Components: V, S
- Duration: Concentration, up to 1 minute
This spell creates a number of arcane orbs that sit above the caster equal to their spellcasting modifier. As a reaction when a creature starts their turn within 15 feet of you or moves within range, you can hurl one of the orbs at the creature. It must succeed at a Dexterity saving throw or take 2d12 force damage.
At Higher Levels: When you cast this spell using a spell slot of 4th level or higher, another orb is created for each slot level above 3rd.
Hush
sorcery 1
- Casting Time: 1 action
- Range: Touch
- Components: S, M (a bit of cotton)
- Duration: 10 minutes, concentration
You muffle the sounds a creature makes. Any sounds the creature makes are only audible at a 10 foot radius around the creature, including verbal components of spells and speech. This grants Advantage on Dexterity (Stealth) checks made to operate silently.
At Higher Levels: When you cast this spell using a spell slot of 2nd level or higher, you may target an additional creature for each level above 1st.
Iron Flesh
pyromancy 1
- Casting Time: 1 action
- Range: Self
- Components: V, S
- Duration: 1 minutes
You draw remnants of iron and titanite from the earth and surround yourself in cumbersome armor. Your AC increases by your proficiency modifier. Your maximum movement speed becomes 5 ft. for the duration of the spell.
Lightning Spear
miracle 1
- Casting Time: 1 action
- Range: 120 feet
- Components: V, S
- Duration: instantaneous
You utter the first miracle, said to have originated with the Lord of the Sun, Gwyn. The caster hurls a bolt of lightning at a creature within range. On a hit, the creature takes 4d6 lightning damage.
At Higher Levels: When you cast this spell using a spell slot of 2nd level or higher, the spear deals an additional 1d6 lightning damage for each slot level above 1st.
Magic Barrier
miracle 2
- Casting Time: 1 action
- Range: Self
- Components: V, S
- Duration: 1 minute, concentration
You shield yourself from foul sorceries. The target gains resistance to force damage for the duration.
Magic Shield
sorcery 3
- Casting Time: 1 action
- Range: Touch
- Components: V, S
- Duration: Concentration, up to 1 hour
You enchant a non-magical shield to offer additional protection. The targeted object gains +1 to its AC bonus for the duration.
At Higher Levels: When you cast this spell using a spell slot of 4th Level or higher, the bonus increases to +2. When you use a spell slot of 6th Level or higher, the bonus increases to +3.
Minor Fireball
pyromancy 1
- Casting Time: 1 action
- Range: 15 feet
- Components: V, S
- Duration: Concentration, up to 1 hour
A small flame streaks through the air and detonates on a point you choose within range. Each creature in a 5-foot radius Sphere centered on that point must make a Dexterity saving throw. A target takes 3d8 fire damage on a failed save, or half as much damage on a successful one.
At Higher Levels: At Higher Levels: When you cast this spell using a spell slot of 2nd level or higher, the explosion deals an additional 1d8 fire damage for each level above 1st.
Poison Mist
pyromancy 2
- Casting Time: 1 action
- Range: 60 feet
- Components: V, S
- Duration:
You summon a noxious cloud of gas in a 15 foot sphere within range. Any creature that starts it’s turn inside of the cloud must succeed on a Constitution saving throw or become poisoned until the end of their turn. While poisoned, the target takes 1d4 poison damage at the end of their turn.
Power Within
pyromancy 3
- Casting Time: 1 action
- Range: self
- Components: V, S
- Duration: 1 minute
The caster ignites their own soul within their flesh, increasing their physical capabilities at the cost of their life force. At the end of the target’s turn, they take damage equal to their spellcasting modifier. In return, the target gains a bonus to Constitution checks and saving throws, as well as their attack and damage rolls with weapons equal to their spellcasting bonus.
Pursuers
abyssal sorcery 5
- Casting Time:
- Range: 15ft.
- Components: V, S
- Duration: 1 minute, concentration
Five dark orbs of abyssal energy appear and orbit the caster. As a reaction when a creature starts their turn within 15 feet of you or moves within range, you can hurl one of the orbs at the creature. It must succeed at a Dexterity saving throw or take 6d6 bludgeoning damage. Humanoid and Undead creatures have disadvantage on this saving throw.
At Higher Levels: When you cast this spell using a spell slot of 6th level or higher, another orb is created for each level above 5th.
Replenishment
miracle 3
- Casting Time: 1 action
- Range: 15ft.
- Components: V, S
- Duration: Concentration, up to 1 minute
You utter a prayer for strength, creating a sustained healing effect on a willing target within range. At the end of the target’s turn, it regains hit points equal to your spellcasting ability modifier.
Resist Curse
abyssal sorcery 2
- Casting Time: 1
- Range: Touch
- Components: V, S
- Duration: 10 minutes
A sorcery of the red-robed remedician Ingward, guardian of the seal in New Londo. This spell shields a willing target from curses. The target has advantage on saving throws made to avoid or resist curses.
Soothing Sunlight
miracle 5
- Casting Time:
- Range: Self (10-foot sphere)
- Components: V, S
- Duration: 1 minute, concentration
A special miracle granted to the maidens of Gwynevere, Princess of the Sun. The spell creates a 10-foot sphere of healing light that surrounds the caster. At the beginning of the caster’s turn, each allied creature within the light regains hit points equal to 1d8 + your spellcasting modifier.
Soul Arrow
sorcery 0
- Casting Time: 1 action
- Range: 30 feet
- Components: V, S
- Duration: Instantaneous
You summon a tiny dart of magical energy. Make a ranged spell attack at a creature within range. On a hit, the dart deals 1d4 force damage to the target.
The spell's damage increases by 1d4 when you reach 5th Level (2d4), 11th level (3d4), and 17th level (4d4).
Soul Spear
sorcery 3
- Casting Time: 1 action
- Range: Self (60-ft line)
- Components: V, S
- Duration: Instantaneous
A spear of magical energy bursts forth in a 60 foot line from your catalyst. Any creature in the area must succeed on a Dexterity saving throw or take 6d6 force damage. A creature that succeeds takes half damage
At Higher Levels: When you cast this spell using a spell slot of 4th level or higher, the spell’s damage increases by 1d6 damage for every level above 3rd.
Sunlight Spear
miracle 5
- Casting Time: 1 action
- Range: 300 feet
- Components: V, S
- Duration: Instantaneous
A bolt of pure sunlight, crafted from the soul of Gwyn himself. Make a ranged attack roll at a creature you can see within range. On a hit, the creature takes 8d10 radiant damage and must succeed on a Constitution saving throw or be stunned until the end of their next turn.
At Higher Levels: When you cast this spell using a spell slot of 5th level or higher, the spell’s damage increases by 1d10 damage for every level above 6th.
Toxic Mist
pyromancy 4
- Casting Time: 1 action
- Range: 60 feet
- Components: V, S
- Duration: 1 minute, concentration
A pyromancy of Eingyi which produces a 15 foot sphere of toxic gas within range. Any creature that starts it’s turn inside of the cloud must succeed on a Constitution saving throw or become toxically poisoned. Toxic poison cannot be cured with effects that normally cure poison, and an afflicted creature takes 2d6 poison damage at the start of their turn.
At the end of each of its turns, the target can make another Constitution saving throw. On a success, the spell ends on the target.
Tranquil Walk of Peace
miracle 2
- Casting Time: 1 action
- Range: Self (20-foot sphere)
- Components: V, S
- Duration: 1 minute, concentration
A sphere of tranquil energy surrounds the caster in a 15-foot radius. When you cast this spell, you can designate any number of creatures you can see to be unaffected by it. An affected creature’s speed is halved in the area.
Undead Rapport
pyromancy 4
- Casting Time: 1 action
- Range: 30 feet
- Components: V, S
- Duration: 1 minute, concentration
An advanced pyromancy taught by a daughter of Quelaag. Target undead within range must succeed on a Wisdom saving throw or become charmed for the duration. An undead with an intelligence of 8 or higher has advantage on the saving throw. While charmed, the undead follows your commands both verbal and telepathic. Enemy creatures immediately view the undead as one of your allies, and even previous allies of the targeted creature.
White Dragon Breath
sorcery 5
- Casting Time: 1 action
- Range: Self (60-foot line)
- Components: V, S
- Duration: Instantaneous
This spell is a still-devastating approximation of Seath’s crystal breath. The caster exhales radiant white gas in a 60-foot line, which immediately crystallizes on the ground. Any creature in the area must succeed on Dexterity saving throw or take 8d6 force damage and be restrained for the duration. A creature that succeeds takes half damage and is not restrained.
A restrained creature can use its action to make an Strength (Athletics) check against your Spell Save DC. On a success, the creature breaks free and is no longer restrained.
At Higher Levels: When you cast this spell using a spell slot of 6th level or higher, the spell’s damage increases by 1d6 force damage for every level above 5th.
Wrath of Gods
sorcery 3
- Casting Time: 1 action
- Range: Self
- Components: V, S
- Duration: Instantaneous
You call upon primal forces to blast your enemies away. Each creature within ten feet of you must succeed on a Constitution saving throw or take 3d6 thunder damage and be pushed ten feet away from you. On a success, the creature takes half as much damage and is not pushed.
At Higher Levels: When you cast this spell using a spell slot of 4th level or higher, the spell’s damage increases by 1d6 thunder damage for every level above 3rd.
Appendix A - NPCs
C - Covenant Leader/Member
M - Merchant
Q - Questline
Alvina of the Darkroot Wood (C)

| Personality Trait | I speak in circular riddles, taking delight in confusing travelers. |
| Ideal | I care not for the troubles of the outside world, only those in my clan are important (Neutral) |
| Bond | The Forest Hunters are my family, the protection of them and the Darkroot Wood is my only priority. |
| Flaw | I am quick to anger, and slow to forgive. Those that provoke my wrath will regret it. |
Alvina uses the stats of a great feline.
Covenant
Alvina is the leader of the Forest Hunter covenant, a group of warriors dedicated to defending the Darkroot Garden. When the characters first meet her, she is impressed with their strength on Forest Hunters. Alvina offers the party membership, initiating them into the Forest Hunters if they agree. She will leave amiably if they decline. In either case, Alvina will turn against the players if any of them harm another forest hunter and vanish.
Anastacia of Astora (Q)
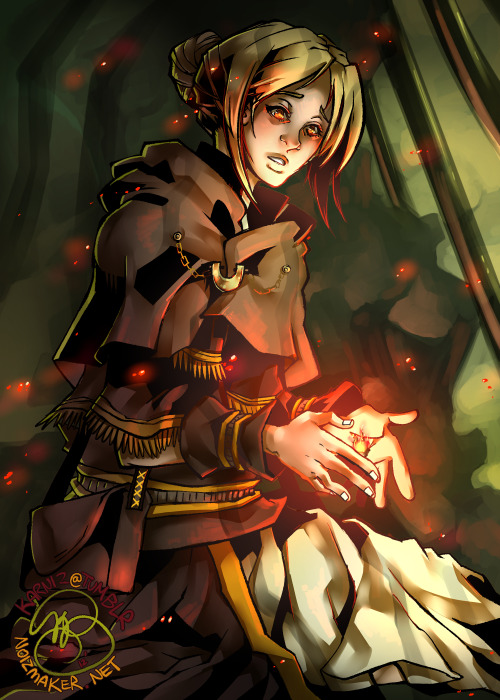
| Personality Trait | My tongue was cut out for a good reason, my speech is impure and should not be heard. |
| Ideal | The First Flame must be relit. I will do everything in my power to ensure it does (Lawful) |
| Bond | The cruelty that has been done to me was justified, I serve only the gods and their grand design. |
| Flaw | I am an impure vessel, not fit to converse with truly free folk. |
Anastacia of Astora is a mute Fire Keeper kept chained in a cell underneath Firelink Shrine. She was maimed as a young girl, and offered as a Fire Keeper. She will never comment as to whether this was her decision.
The Fire Keepers a group of maidens tasked with linking and kindling the bonfires. A bonfire tended by a Fire Keeper restores an additional Estus Flask charge. If the Fire Keeper dies, her bonfire is extinguished with her. A doused bonfire can be warped to with the Lordvessel, but is otherwise unusable. A Fire Keeper can improve the Estus Flask's healing capabilities if given fire keeper souls.
Anastacia uses the stats of a commoner.
Questline.
Anastacia waits eternally her cell underneath the shrine safe from most harm. If Knight Lautrec is still alive after the characters ring the second Bell of Awakening, he kills her and takes her soul with him to Anor Londo. The Black Eye Orb he leaves behind can be used to invade him in Anor Londo’s Great Hall to take the soul back.
If the characters retrieve her soul and return it to her corpse, Anastacia returns to life in turn. Firelink Shrine’s bonfire reignites along with her. Even then, her only words are those of gratitude and pleas to link the First Flame and allow her to die human.
Big Hat Logan (Q, M)
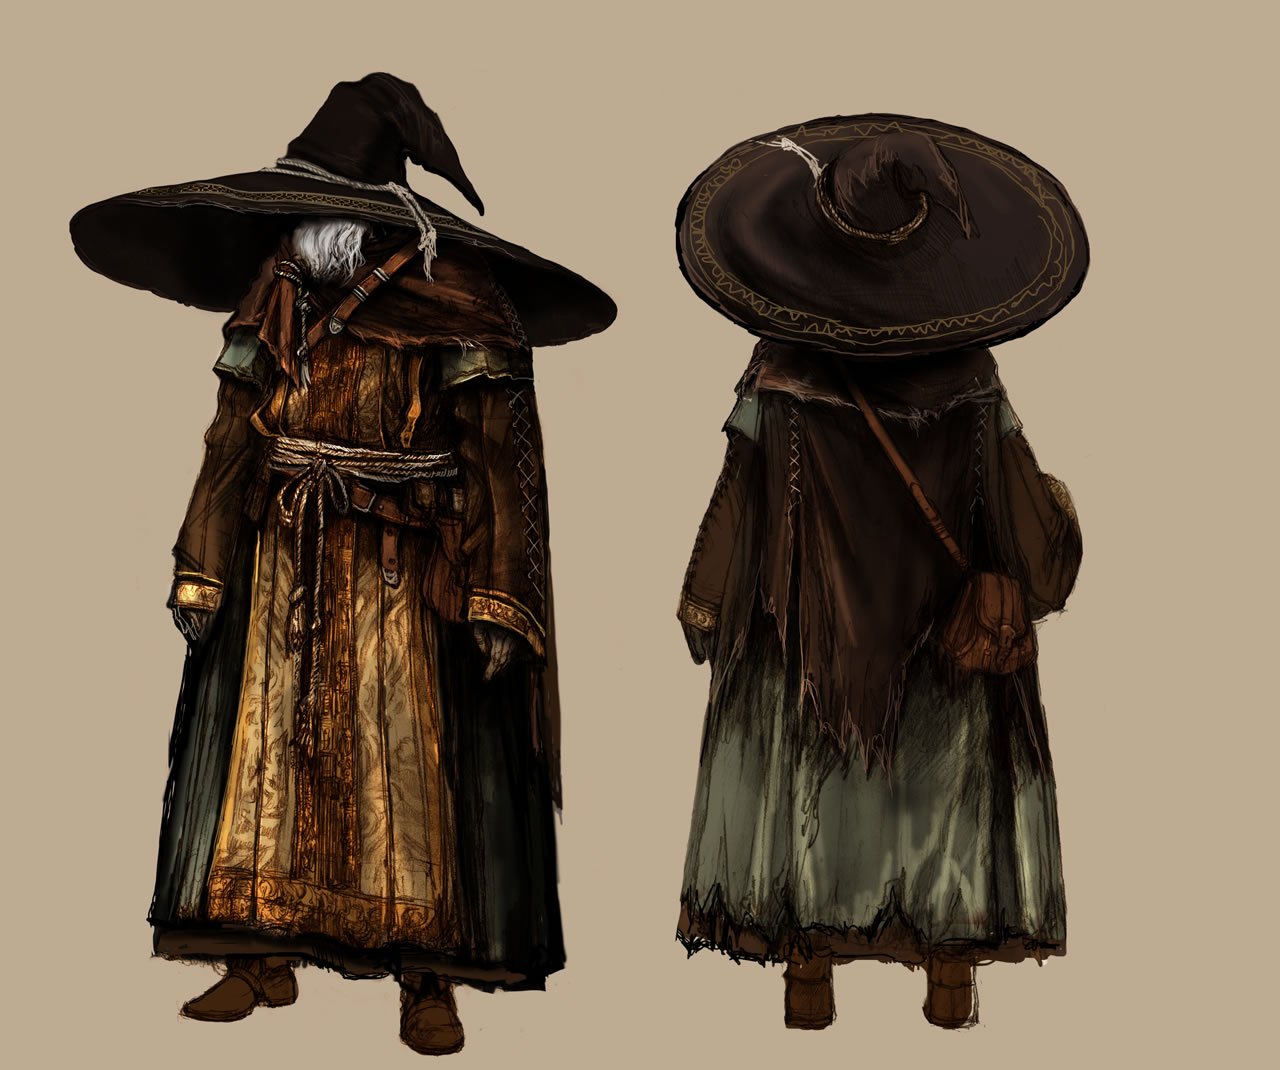
| Personality Trait | My hat ensures that I am left to my devices, though I am willing to teach my sorceries to particularly talented individuals. |
| Ideal | The pursuit of knowledge is a road with no end. Some call me a master, but I am just beginning my journey. (Neutral) |
| Bond | I’ve mastered mortal sorceries, it is time I moved beyond humanity’s comprehension of the universe. |
| Flaw | I detest speaking with strangers, particularly those that lack my keen mind. |
Big Hat Logan was once a preeminent scholar of Vinheim’s Dragon School. He has now journeyed to Lordran in search of new sorcery. His quest will be a fruitful one, but even a genius’s mind has limits. Logan wears the black robes of a high-ranking Vinheim scholar and obscures his features with his signature hat.
Wares
| Item | Souls |
|---|---|
| Sorceries | |
| Soul Arrow | 250 |
| Magic Weapon | 750 |
| Magic Shield | 750 |
| Heavy Soul Arrow | 2000 |
| Homing Soul Mass | 5000 |
| Soul Spear | 10000 |
| Crystal Soul Spear* | 12500 |
| Crystal Magic Weapon* | 5000 |
| Homing Crystal Soulmass* | 7500 |
Questline.
The characters will first find Big Hat Logan trapped in a cage in Sen’s Fortress. Once freed, he thanks his rescuers and relocates himself to Firelink Shrine. He offers his sorceries to any characters with Intelligence scores of 13 or higher. He often sits with his pupil Griggs, offering guidance to the young sorcerer on his own journey. Logan makes no secret of his desire to explore the Grand Archives in Anor Londo, though a yellow fog wall blocks his progress. The fog wall dissipates after the Lordvessel is placed at the Kiln of the First Flame.
Once the fog wall is lifted, Logan at Firelink he will be packing his belongings the next time the characters meet him. He tells them of his plans to journey to the Archives. While Griggs is under the impression that he will be joining his master, Logan slips away during the night leaving him behind.
Logan's journey is a doomed one. He is next found imprisoned again, this time in the Archive Prison, a victim of Seath in the same manner as the party. Once freed, he moves himself into the archive’s libraries. There he begins to explore Seath’s advances in sorcery. The first time the characters speak to him after this, it will be clear that Logan’s sanity is waning. He will forget their names and often just stare into his books.
Once Seath the Scaleless falls, Logan will reach his breaking point. He turns hollow in the chamber where Seath initially defeats the party. He will be found stripped naked except for his hat, and attack the party wielding the tin crystallization catalyst. Once defeated, he leaves behind his hat and the catalyst.
Blacksmith Andre of Astora (M)

| Personality Trait | I might seem gruff on the outside, but I’m quick to make trust. When you need a hand, I’ll help. |
| Ideal | Light the first flame or not, it’s not my fight. But if you want to fight, I can at least lend you my hammer (Good) |
| Bond | I’ve been entrusted with the key to a treasure no man should possess. I’ll only give it to someone I trust can use it for good. |
| Flaw | I’ll help smith for you, but don’t assume that I’ll do anything beyond that. |
Andre of Astora has been hammering away at the base of the Undead Parish tower for untold years. His work is his life, and both are legendary. Every undead pursuing the Chosen Undead prophecy will meet Andre hammering away outside the gates of Sen’s Fortress. While he is not one for pleasantries, he will happily repair and reinforce the party’s weapons and armor.
Long ago, the Forest Hunters sealed the gate to northern Darkroot Garden in an attempt to protect the Covenant of Artorias. Andre was entrusted with the key, the Crest of Artorias. He only gives the crest to an undead that proves their power worthy of challenging the Four Kings. Alternatively, he leaves it behind if he is slain as well.
Wares
| Item | Souls |
|---|---|
| Materials | |
| Titanite Shard | 800 |
| Keys | |
| Crest of Artorias | 20000 |
| Weapons & Armor | |
| Longsword | 500 |
| Shortsword | 500 |
| Battleaxe | 500 |
| Scythe | 400 |
| Pike | 1000 |
| Shield | 500 |
| Ammunition | |
| Arrow | 5 |
| Bolt | 10 |
Blacksmith Rickert of Vinheim (M)

| Personality Trait | I’ve already given up, now I simply wait to run out the clock. Perhaps I can be kept busy with a bit of smithing work. |
| Ideal | Safety and security are all one can wish for in this terrible world. My most fervent wish is to allowed to die with my mind intact (Neutral) |
| Bond | My work is the only thing keeping me sane. |
| Flaw | My cage is my prison and my best friend. I couldn’t imagine going hollow on the outside. |
Wares
| Items | Souls |
|---|---|
| Sorceries | |
| Soul Arrow | 250 |
| Heavy Soul Arrow | 2000 |
| Weapons | |
| Sorcerer’s Catalyst | 250 |
Rickert of Vinheim is the last of a long line of sorcerer blacksmiths, skilled mages who can imbue magic into weaponry. However, he lacks the Smithing Embers necessary to do so. Rickert has chosen self-imprisonment until the end of time as the thought of going Hollow outside terrifies him. Yet he is happy to smith for strangers as he recognizes that only his work keeps him sane.
Rickert uses the stats of a lordran mage.
Blacksmith Vamos (M)
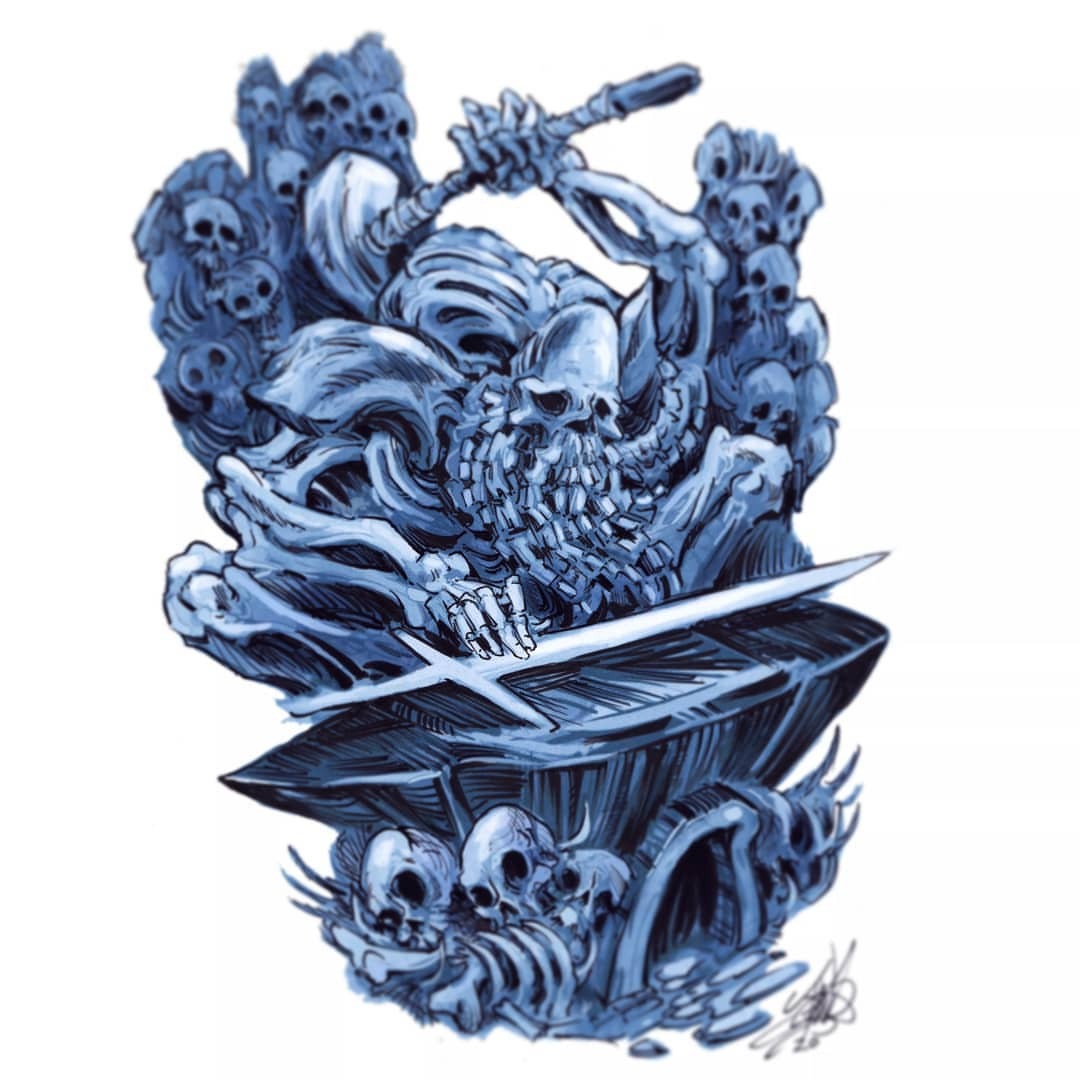
| Personality Trait | Fine, I’ll smith for you. But once I’m done, you’d best leave my home quickly. |
| Ideal | My work is my life, I care not for the troubles of the outside world. Relight the First Flame or not, just leave me alone. (Neutral) |
| Bond | I’ve been smithing with the same sputtering ember for years. I need a new flame to make something new. |
| Flaw | Even customers are interlopers, I’m here to smith not talk. |
Little is known of Vamos, attributable to his age and his own secrecy on the matter. Perhaps he is a long-dead dwarf, or the offspring of the nameless blacksmith deity. In any case, he is now a stocky skeleton with a beard of tentacle-like bones and seems to have no issues with his current state. Vamos will begrudgingly help smith for travelers. If they bring him the smithing embers he needs to make new creations he will warm more to their presence.
Wares
| Items | Souls |
|---|---|
| Items | |
| Homeward Bone | 250 |
| Titanite Shard | 800 |
| Ammunition | |
| Arrow | 5 |
| Bolt | 10 |
Crestfallen Merchant (M)

| Item | Souls |
|---|---|
| Personality Trait | I’ll help you, but know that when the fortress crushes you as it did me, I’ll be waiting to pick your trinkets off your corpse. |
| Ideal | The quest for undead salvation is a pointless one, best to lie down and rot. (Chaotic) |
| Bond | I took on the fortress alone, and have paid the price for it. I’ve learned from my mistake and this tower will be my home and grave. |
| Flaw | I’ve completely given up on my quest for the Great City, nothing will convince me to leave the fortress now. |
The Crestfallen Merchant is a former knight of Berenike. Long ago went beyond the gates of Sen’s Fortress in an effort to reach the fabled city of Anor Londo. However, he was unable to best the Iron Golem, and now waits in an abandoned tower within the fortress. Most days, he wanders the fortress picking the corpses of adventurers clean and selling the refuse off to travelers who find their way to him. He has given up on his quest to fulfill the Undead Prophecy, and has no qualms encouraging other undead to give up as well.
The Crestfallen Merchant uses the stats of a berenike knight.
Wares
| Items | Souls |
|---|---|
| Weapons | |
| Greatsword | 2000 |
| Greataxe | 2000 |
| Shield | 500 |
| Greatshield | 1000 |
| Armor | |
| Plate Armor | 4000 |
| Catarina Plate | 6000 |
| Balder Half Plate | 3500 |
| Items | |
| Black Firebomb | 100 |
| Green Blossom | 50 |
| Ammunition | |
| Arrow | 5 |
| Bolt | 10 |
| Rings | |
| Thunder Stoneplate Ring | 3000 |
| Magic Stoneplate Ring | 3000 |
Crestfallen Warrior (Q)

| Personality Trait | I can find humor in even the darkest circumstances. The more tragic the circumstances, the harder I’ll laugh. |
| Ideal | The quest for undead salvation is a pointless one, best to lie down and rot. (Chaotic) |
| Bond | Firelink Shrine is my home. If the world is to fade into darkness, I can at least wait by the bonfire and offer some advice to the idiots who would fight against it. |
| Flaw | I’ve completely lost hope. You might try to fight against fate, but I’ll just sit by the fire and wait for you to fail. |
The Crestfallen Warrior is the first human the characters meet fter their exodus from the Undead Asylum. Once upon a time, he pursued the Undead Prophecy as well, but found himself not up to the task. Now he sits next to the Firelink Shrine bonfire and offers bits of advice to new arrivals, peppered with characteristic cynicism.
The Crestfallen Warrior has a working knowledge of Lordran’s geography and residents. Where appropriate, he shares the following pieces of information with the party:
- Humanity can be collected from corpses and carrion-eaters. It is consumed to restore sanity and humanity.
- The bell in the Undead Prophecy actually refers to two bells: one in the Undead Parish above and another in Blighttown far below.
- Curses can be cured with purging stones or the services of a Sealer in the ruins of New Londo.
- After the players descend the Undead Parish elevator, he mentions that he saw a man curled up into a ball flying above with the Giant Crow nesting above.
- Titanite shards are used to reinforce weapons, though you’ll need the skills of a blacksmith to do so.
- A sorcerer once made their home in the Shrine, but left to the Undead Burg in search of “Master Logan”.
- A pyromancer he met attempted to descend down into Blighttown and hasn’t been seen since.
He also makes snide comments when a new arrival makes their way to Firelink Shrine, making judgements on their clothing and behavior.
Questline.
It is hard to tell how long the Crestfallen Warrior has been waiting next to the bonfire. However, it is clear that he believes the Undead Prophecy is a fool's errand. Once both Bells of Awakening ring and Frampt awakens, he becomes much more quiet and sullen. The next time the characters return to the Shrine, the Warrior will no longer be resting near the bonfire. Instead, he will have gone hollow at the entrance to the New Londo Ruins, attacking anyone who approaches him.
The Crestfallen Warrior uses the stats of a veteran.
Crossbreed Priscilla

| Personality Trait | I’ve been alone for as long as I can remember. My words are few, and my appearance can hide my good intentions. |
| Ideal | I will be forever trapped in the Painted World, but that is for the best. At least I can provide comfort to the forlorn souls that call it home. (Good) |
| Bond | The people of the Painted World are my family. They are not perfect, but neither am I. I will fight and die to protect them. |
| Flaw | I can only see the good in people, until it is too late. |
In the Age of Lords, a child was born, the offspring of Gods and Dragons. She was feared and mistreated by the Gods from her first moments. This feeling was only heightened as her inherent power, Lifehunt, revealed itself. Even the gods feared her power and commissioned a Painted World to act as her prison.
Despite her mistreatment, Priscilla is a kind soul. The forlorn souls of the Painted World of Ariamis worship her as their protector and goddess. She treats all of them with grace and compassion and will seek to protect them from interlopers.
If the Painted World traps the players and they make their way into Priscilla’s chamber, she offers them a peaceful escape from the painting. She harbors no ill-will toward them and will not harm them unless attacked first. If they choose the path of violence, she responds with the full might of Lifehunt.
Darkmoon Knightess (C)
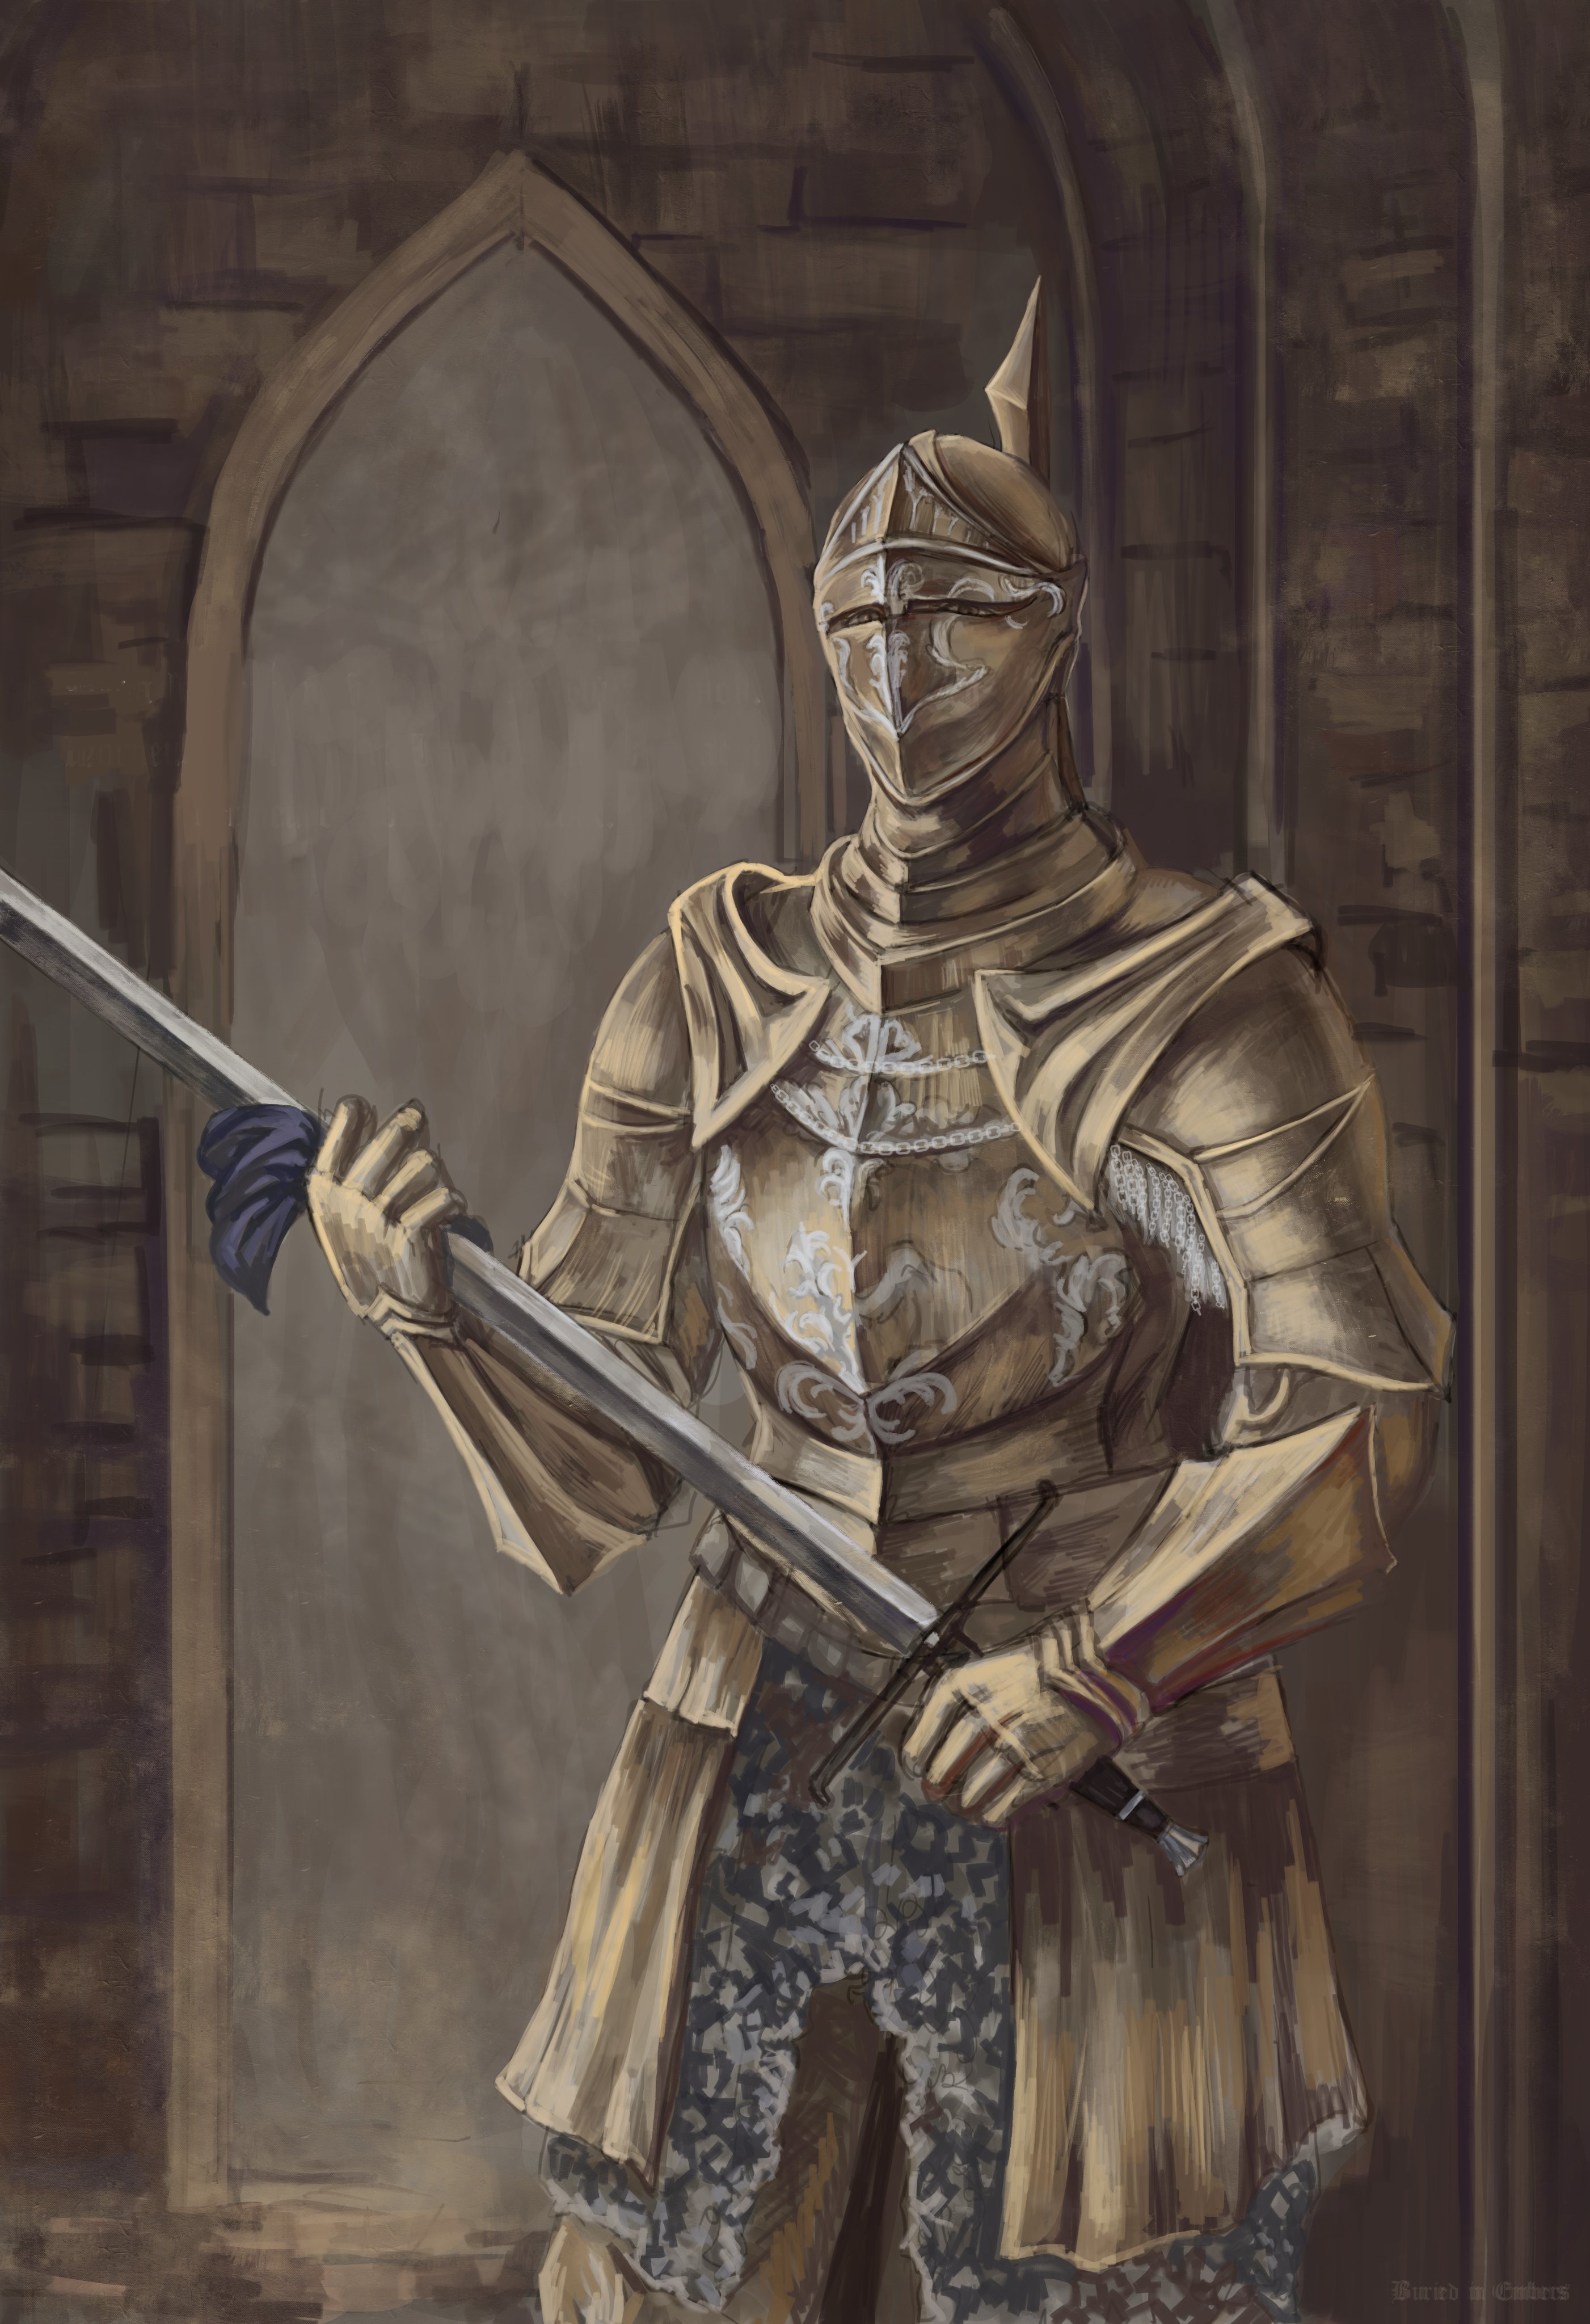
| Personality Trait | I volunteer only the information that serves my master, though I am happy to offer respite to undead traversing Anor Londo. |
| Ideal | I serve as a Blade of the Darkmoon. Whatever Master Gwyndolin commands of me, I shall obey. (Lawful) |
| Bond | My first duty is to Master Gwyndolin, my second is to the bonfire I tend as a Fire Keeper. |
| Flaw | I am inflexible in my thinking. |
A Fire Keeper in brass armor tends the first bonfire in Anor Londo. The Darkmoon Knightess abandoned her name long ago when she entered Gwyndolin’s service. She points the players towards the castle off in the distance, encouraging them to face the challenge ahead and accept Gwyn’s legacy.
If pressed, she reveals the history of the Duke’s Archives nearby, and the sinister experiments the Duke performs inside.
Blades of the Darkmoon immediately recognize each other. If one of the players joins the covenant, she notes their shared duty and looks forward to fighting alongside them. If Anor Londo plunges into darkness, she will turn against the party. The next time they meet the Darkmoon Knightess she will immediately attack them. Her bonfire is unusable even if she lives after this.
The Fire Keepers a group of maidens tasked with linking and kindling the bonfires. A bonfire tended by a Fire Keeper restores an additional Estus Flask charge. If the Fire Keeper dies, her bonfire is extinguished with her. A doused bonfire can be warped to with the Lordvessel, but is otherwise unusable. A Fire Keeper can improve the Estus Flask's healing capabilities if given fire keeper souls.
Darkstalker Kaathe (Q, C)

| Personality Trait | I serve a goal with no clear benefit to myself, a secret I withhold from even the lord I choose. |
| Ideal | The Age of Fire has been sustained long past its natural life. It is time a Dark Lord rises to usher in an Age of Dark (Chaotic) |
| Bond | My motives are my own, I wish only for the Dark Lord to ascend to power. |
| Flaw | I tempt lesser creatures with power and authority, caring not for the consequences to them. |
Darkstalker Kaathe is a Primordial Serpent who lurks deep in the Abyss under New Londo. Only his neck and face are visible. He looks nearly identical to Kingseeker Frampt, except for his deep bloodshot eyes. A row of massive yellow teeth speak unknown truths, and potential falsehoods, to those that would brave the Abyss.
The Primordial Serpents have lived since the Age of Ancients. Relatives of the ancient dragons, the serpents share their kins immortality. They lack their cousin's fierce tactics. Their origins and motives remain unclear, though they share their goals to guide undead towards their own ends.
Darkstalker Kaathe is the leader of the Darkwraith Covenant and seeks to usurp the Age of Fire and usher in an Age of Dark. If he meets the players before they get the Lordvessel, he encourages them to seek the city of Anor Londo and retrieve it. He will allow them to join his Covenant before that though.
After characters place the Lordvessel at the Kiln of the First Flame, Kaathe offers them the “truth of men and the Undead”. Kaathe explains the history of the world dating back to the Age of Ancients:
“The truth I shall share, without sentiment. After the advent of Fire, the ancient Lords found the three souls. But your progenitor found a fourth, unique soul. The Dark Soul. Your ancestor claimed the Dark Soul, and waited for Fire to subside. And soon, the flames did fade, and only Dark remained. Thus began the age of men, the Age of Dark. However... Lord Gwyn trembled at the Dark. Clinging to his Age of Fire, and in dire fear of humans, and the Dark Lord who would one day be born amongst them, Lord Gwyn resisted the course of nature. By sacrificing himself to link the Fire, and commanding his children to shepherd the humans, Gwyn has blurred your past, to prevent the birth of the Dark Lord. I am the primordial serpent. I seek to right the wrongs of the past, to discover our true Lord. But the other serpent, Frampt, lost his sense, and befriended Lord Gwyn. Undead Warrior, we stand at a crossroads. Only I know the truth about your fate. You must destroy the fading Lord Gwyn, who has coddled Fire and resisted nature, and become the Fourth Lord, so that you may usher in an Age of Dark.”
If they refuse, he laments that none of them could take the Dark Lord's mantle and retreats into the Abyss to await another. If the players agree to do so, he transports them to the Kiln of the First Flame where they can place the Lordvessel. He will then act as a guide and advisor to the party in their quest to retrieve the other Lord Souls.
Dozens of identical copies of Darkstalker Kaathe rise to meet the Dark Lord if they fell Gwyn and end the Age of Fire.
Daughter of Chaos (C)

| Personality Trait | The corruption of this domain has left me frail and broken. Still, I persevere with my sister’s aid. |
| Ideal | The wretched inhabitants of Blighttown do not deserve their fate. If consuming their infections will provide them any relief, I will do so. (Good) |
| Bond | I’ve been tasked with keeping the fire lit, even at the cost of my own soul. |
| Flaw | I will sacrifice all I have for any comfort I can give to others. |
The Daughter of Chaos is one of the few remaining survivors of the Chaos Flame’s creation in Izalith. She has submitted herself to the First Flame as a Fire Keeper, tending a bonfire underneath Quelaag’s Domain. The maggot-infested denizens of Quelaag’s Domain worship her as their savior. Long ago she sucked the Blightpus from their infected bodies, sundering herself in the process. This rendered her immobile and fragile. The Daughter needs a steady stream of humanity to keep her flickering flame alight.
The Daughter’s name has been lost to time, and she speaks only the ancient language of Izalith. The only method the characters have to communicate with her is the old witch’s ring. If worn, the Daughter of Chaos will speak to the players as if they were her sister Quelaag. She is blind and weak, unable to understand her sister’s death even if it is explained to her. Quelaag and her sister entered into a covenant long ago, and more recently Kirk, Knight of Thorns, was bonded to her as well. A player who enters into a covenant with her can give her excess humanity to advance within her covenant. The higher the character’s ranks within the covenant, the more she seems to recover herself.
The Fire Keepers a group of maidens tasked with linking and kindling the bonfires. A bonfire tended by a Fire Keeper restores an additional Estus Flask charge. If the Fire Keeper dies, her bonfire is extinguished with her. A doused bonfire can be warped to with the Lordvessel, but is otherwise unusable. A Fire Keeper can improve the Estus Flask's healing capabilities if given fire keeper souls.
The Daughter uses the stats of Chaos Witch Quelaag, however she is blind and incapacitated and has 5 hit points. If slain, her bonfire goes out and her follower Eingyi will become hostile to the players.
Domhnall of Zena (Q, M)

| Personality Trait | Every interaction is actually a transaction, and I am quite a talented negotiator. |
| Ideal | Not every trade was meant to be. There'll be more in store for us, someday. (Neutral) |
| Bond | My collection is all I care about. Barter and trade is my way to grow it. |
| Flaw | I don’t run a charity, if you want my knowledge you’ll have to buy it first. |
Domhnall of Zena is an elusive character, dressed in lavish gold and green. His characteristic horned helmet completely obscures his face. He claims it grants him wisdom. Little is known of Zena, Domhnall’s homeland. Domnhall himself is a mystery, offering little information on his background or motives beyond free trade.
Wares
| Items | Souls |
|---|---|
| Armor | |
| Ornstein’s Armor | 5000 |
| Smough’s Armor | 5000 |
| Merchant’s Armor | 5000 |
| Golem’s Armor | 5000 |
| Moonlight Armor | 5000 |
| Artorias’s Armor | 5000 |
| Crystal Shield | 2000 |
| Weapons | |
| Crystal Shortsword | 2000 |
| Crystal Greatsword | 2500 |
| Bonfire Items | |
| Bottomless Box | 1000 |
| Consumables | |
| Gold Pine Resin | 500 |
| Keys | |
| Master Key | 1500 |
Questline. The characters will first meet Domhnall in the Depths. He sells gold pine resin and powerful crystal weapons to those challenging the Gaping Dragon. If the Gaping Dragon falls, he lets the characters know his intentions to move to Firelink Shrine. The next they meet him, he will have moved his wares underneath the aqueduct leading to the Undead Parish. Here he will sell human sized versions of the armor the character’s foes once wore. He makes no mention of how he acquired them, and charges a premium.
Dusk of Oolacile

| Personality Trait | My upbringing instilled in me nobility and grace, traits I maintain in even the darkest circumstances. |
| Ideal | Kindness and gratitude are lights in a dark world (Good) |
| Bond | My home may be gone, but I may still pass on our magics to someone worthy of them. |
| Flaw | I always seem to be a damsel in distress. I hope to one day save at least myself, if not others. |
oolacile was once a land of ancient sorceries until it was taken by the Abyss. Princess Dusk is the sole survivor of her homeland, trapped inside a Golden Crystal Golem soon after oolacile’s fall. When rescued, she is grateful to the party, and offers to teach them the sorceries of her people. She is from a different time and uses a summoning sign in Darkroot Basin to converse with the players.
Wares
| Items | Souls |
|---|---|
| Sorceries | |
| Hidden Body | 2000 |
| Light | 1000 |
| Repair | 1750 |
| Chameleon | 1500 |
| Hidden Weapon | 1250 |
| Weapons | |
| Oolacile Ivory Catalyst | 2000 |
Questline.
Dusk is initially trapped inside a Crystal Golem in Darkroot Basin, beyond the lake Hydra. Once freed, she will exchange souls for scrolls of oolacile’s unique sorceries. The next time the characters return to her, she and her summoning sign will have vanished. Manus, Father of the Abyss has taken her back into the past. In her place, there is a swirling translucent vortex hovering in the air. It does not react unless the party has the broken pendant, found inside the crystal golem at the entrance to the Duke’s Archives. If they do, Manus’s hand burst from the vortex, dragging them to the Sanctuary Garden outside Oolacile.
Dusk will not be seen again until the characters face Manus in the Abyss under Oolacile Township. Outside the oolacile Sanctuary, Dusk’s godmother, Elizabeth, entreats the players to slay the Father of the Abyss and rescue her. If Manus falls, Dusk is freed and her summon sign returns to Darkroot Basin. She will not remember much from her time in captivity except. Only that you and her “savior” Artorias share an uncanny resemblance despite the gulf of time between your lives. She also recalls emotions of loss and nostalgia in her captor, Manus, and thinks on him often. Otherwise, Dusk operates as she did when initially rescued.
Eingyi (M)

| Personality Trait | I take immense pride in my service to the Fair Lady, a fact I bring up in all interactions. |
| Ideal | Service is the most noble pursuit one of my station may pursue (Neutral) |
| Bond | I live to serve the Fair Lady. |
| Flaw | I secretly loathe myself for being unable to comfort the Fair Lady or speak her tongue. |
Eingyi is, or at believes he is, the most devoted follower of the Daughter of Chaos, or the “Fair Lady” as he calls her. He spends most of his day at the entrance to her room, barring the path further inside. A dozen tumorous growths sprout from this decrepit man, and he crawls along the ground in supplication at all times.
When Eingyi first meets the players, he asks them if they are new servants of the Fair Lady. If they say no, he will attempt to block them from entering the Daughter’s room, fighting to the death if necessary. If they say yes, he will begrudgingly allow them an audience with the Daughter of Chaos, but warns that any harm that befalls her will provoke his wrath.
If the characters are “blessed” with a vile maggot infestation, he will recognize the character's apparent devotion. He offers them an egg vermifuge to cure the infestation once. He also offers his wares and pyromancies to members of the Chaos Servant covenant. If a nascent pyromancer does not have a pyromancy flame, Eingyi offers one to them.
Eingyi uses the stats of an egg carrier.
Wares
| Items | Souls |
|---|---|
| Consumables | |
| Egg Vermifuge* | 750 |
| Pyromancies | |
| Poison Mist | 1600 |
| Toxic Mist | 2200 |
| Weapons | |
| Pyromancy Flame | 750 |
Elizabeth (M)

| Personality Trait | A polite and curteous greeting is the best way to begin a new relationship. |
| Ideal | oolacile may have fallen, but Dusk can still be saved. (Good) |
| Bond | I am Princess Dusk's godmother and protector, her safety is paramount. |
| Flaw | Corrupted Artorias is a peerless foe, those I send to rescue Dusk cannot know the danger they must soon face. |
Elizabeth is a sentient giant mushroom, and the godmother to Princess Dusk of oolacile. Her home is the oolacile Sanctuary outside the Sanctuary Guardian's den. Despite the gap in time, she recognizes the players as the saviours of Dusk from the Crystal Golem she was trapped within. After the players prove themselves by slaying it, she entreats them to rescue Princess Dusk from her captor, "the primeval human." She is also willing to share the story of Artorias's fall to the Abyss, as well as the current state of oolacile.
She is a warm, motherly presence in the otherwise corrupted land of oolacile. She is happy to convert souls into sorceries and fungal reagants such as repair powders.
If the characters return to Elizabeth after they rescue Dusk, she expresses profound gratitude to them and offers each an Elizabeth's Mushroom. Since they come from a time long ahead, she tells them that she will keep their story to herself, offering Artorias as Dusk's true savior to history.
Wares
| Items | Souls |
|---|---|
| Catalysts | |
| oolacile Ivory Catalyst | 2000 |
| Sorceries | |
| Hidden Body | 2000 |
| Light | 1000 |
| Repair | 1750 |
| Chameleon | 1500 |
| Hidden Weapon | 1250 |
| Consumables | |
| Repair Powder | 300 |
| Gold Pine Resin | 500 |
Giant Blacksmith (M)

| Personality Trait | Strong I am |
| Ideal | Forge weapons, make shiny. More happy. (Good) |
| Bond | Forge I can |
| Flaw | Talk, 'tis no good. No-one home. Everyone gone. |
The Giant Blacksmith resembles the same imprisoned giants in Sen’s Fortress. Unlike his brethren however, he appears able to leave at any time. He has served in Anor Londo’s keep since before the flame faded and the gods fled. In the Age of Lords, he was even friends with Hawkeye Gough. He is simple-minded but kind and helpful. The Giant Blacksmith has the unique ability to transmute Great Souls into magical armaments of great power. He can also imbue weapons with Lightning, and later Crystal once he is given the Crystal Ember.
It is doubtful that even he remembers much of his past, but both Gough and Andre remember his prowess and good-will.
Wares
| Items | Souls |
|---|---|
| Weapons | |
| Giant’s Halberd | 1750 |
| Armor | |
| Giant Shield | 2000 |
| Giant Armor | 2500 |
| Ammunition | |
| Arrow | 5 |
| Bolt | 10 |
| Lightning Bolt | 200 |
| Moonlight Arrow | 200 |
| Dragonslayer Arrow | 200 |
Griggs of Vinheim (Q, M)
| Personality Trait | I have a knack for getting into trouble, and I’m eager to help those who help me in turn. |
| Ideal | Knowledge is meant to not only be learned, but shared. (Neutral) |
| Bond | Master Logan searches for new magic, and I intend to follow in his footsteps. |
| Flaw | I truly look up to my Master, but I fear I will never step out from behind his shadow. |
Griggs is a former student of the Dragon School of Vinheim. After being branded with the Darksign, he journeyed to Lordran to learn from the great masters. Grigg's journey is a fraught one though, doomed to failure. The young apprentice has some magical skill, and knowledge he is happy to share with friends.
Questline.
The party will first meet Griggs after opening a locked house in the Lower Undead Burg. Once he is rescued, Griggs will relocate to Firelink Shrine. He will offer his skills in sorcery, along with a few personal possessions from his time in the academy. Griggs is in search of a master of the arcane arts, Big Hat Logan. He doesn't know where the master is, and will remain in Firelink until Logan is rescued from Sen's Fortress.
Afterwards he is thrilled that he can resume his studies under one of the greatest magical practitioners of this age. Unfortunately for him, Logan has little interest in taking on a pupil and pays little attention to Griggs. This apathy continues past Logan's departure from Firelink in search of the Duke's Archives, departing without informing Griggs.
Griggs does not take this dismissal well, and leaves Firelink after selling all of his wares to the party, following after his master. His journey is doomed however. The lethal halls of Sen's Fortress prove too much for the young sorcerer, and he hollows deep inside if the characters follow in his footsteps. Having thoroughly gone insane, he attacks the characters if he spots them and fights to the death.
Wares
| Items | Souls |
|---|---|
| Sorceries | |
| Soul Arrow | 250 |
| Magic Weapon | 750 |
| Magic Shield | 750 |
| Heavy Soul Arrow | 2000 |
| Homing Soul Mass | 5000 |
| Soul Spear | 10000 |
| Crystal Soul Spear* | 12500 |
| Crystal Magic Weapon* | 5000 |
| Homing Crystal Soulmass* | 7500 |
| Weapons | |
| Sorcerer’s Catalyst | 250 |
| Rings | |
| Bellowing Dragoncrest Ring | 5000 |
| Lingering Dragoncrest Ring | 5000 |
Hawkeye Gough

| Personality Trait | Though I sit blinded, I can still find purpose in my carvings. |
| Ideal | The good to all is foremost (Good) |
| Bond | There is no tighter bond than those between brothers and sisters in arms. |
| Flaw | My dragon hunting days are behind me. |
Gough is an amicable fellow, grateful to the characters for putting down his corrupted ally. Gough is happy to sell his carvings, which make whimsical noises when crushed, as well as greatarrows.
Questline
After the characters face Kalameet for the first time in Area 12, he remarks on their bravery, and offers to take Kalameet down so they can face it on even terms. If the characters agree, Gough stands for the first time, and despite his blindness, fires his last greatarrow flawlessly through the Royal Wood, impaling Kalameet’s wings and bringing it down into its valley.
If the characters are successful in their quest to slay Kalameet, he will congratulate them if they return to him, and offer them his weapon, Gough’s Greatbow. The weapon will magically scale itself down to fit the characters size.
Ingward (Q, M)
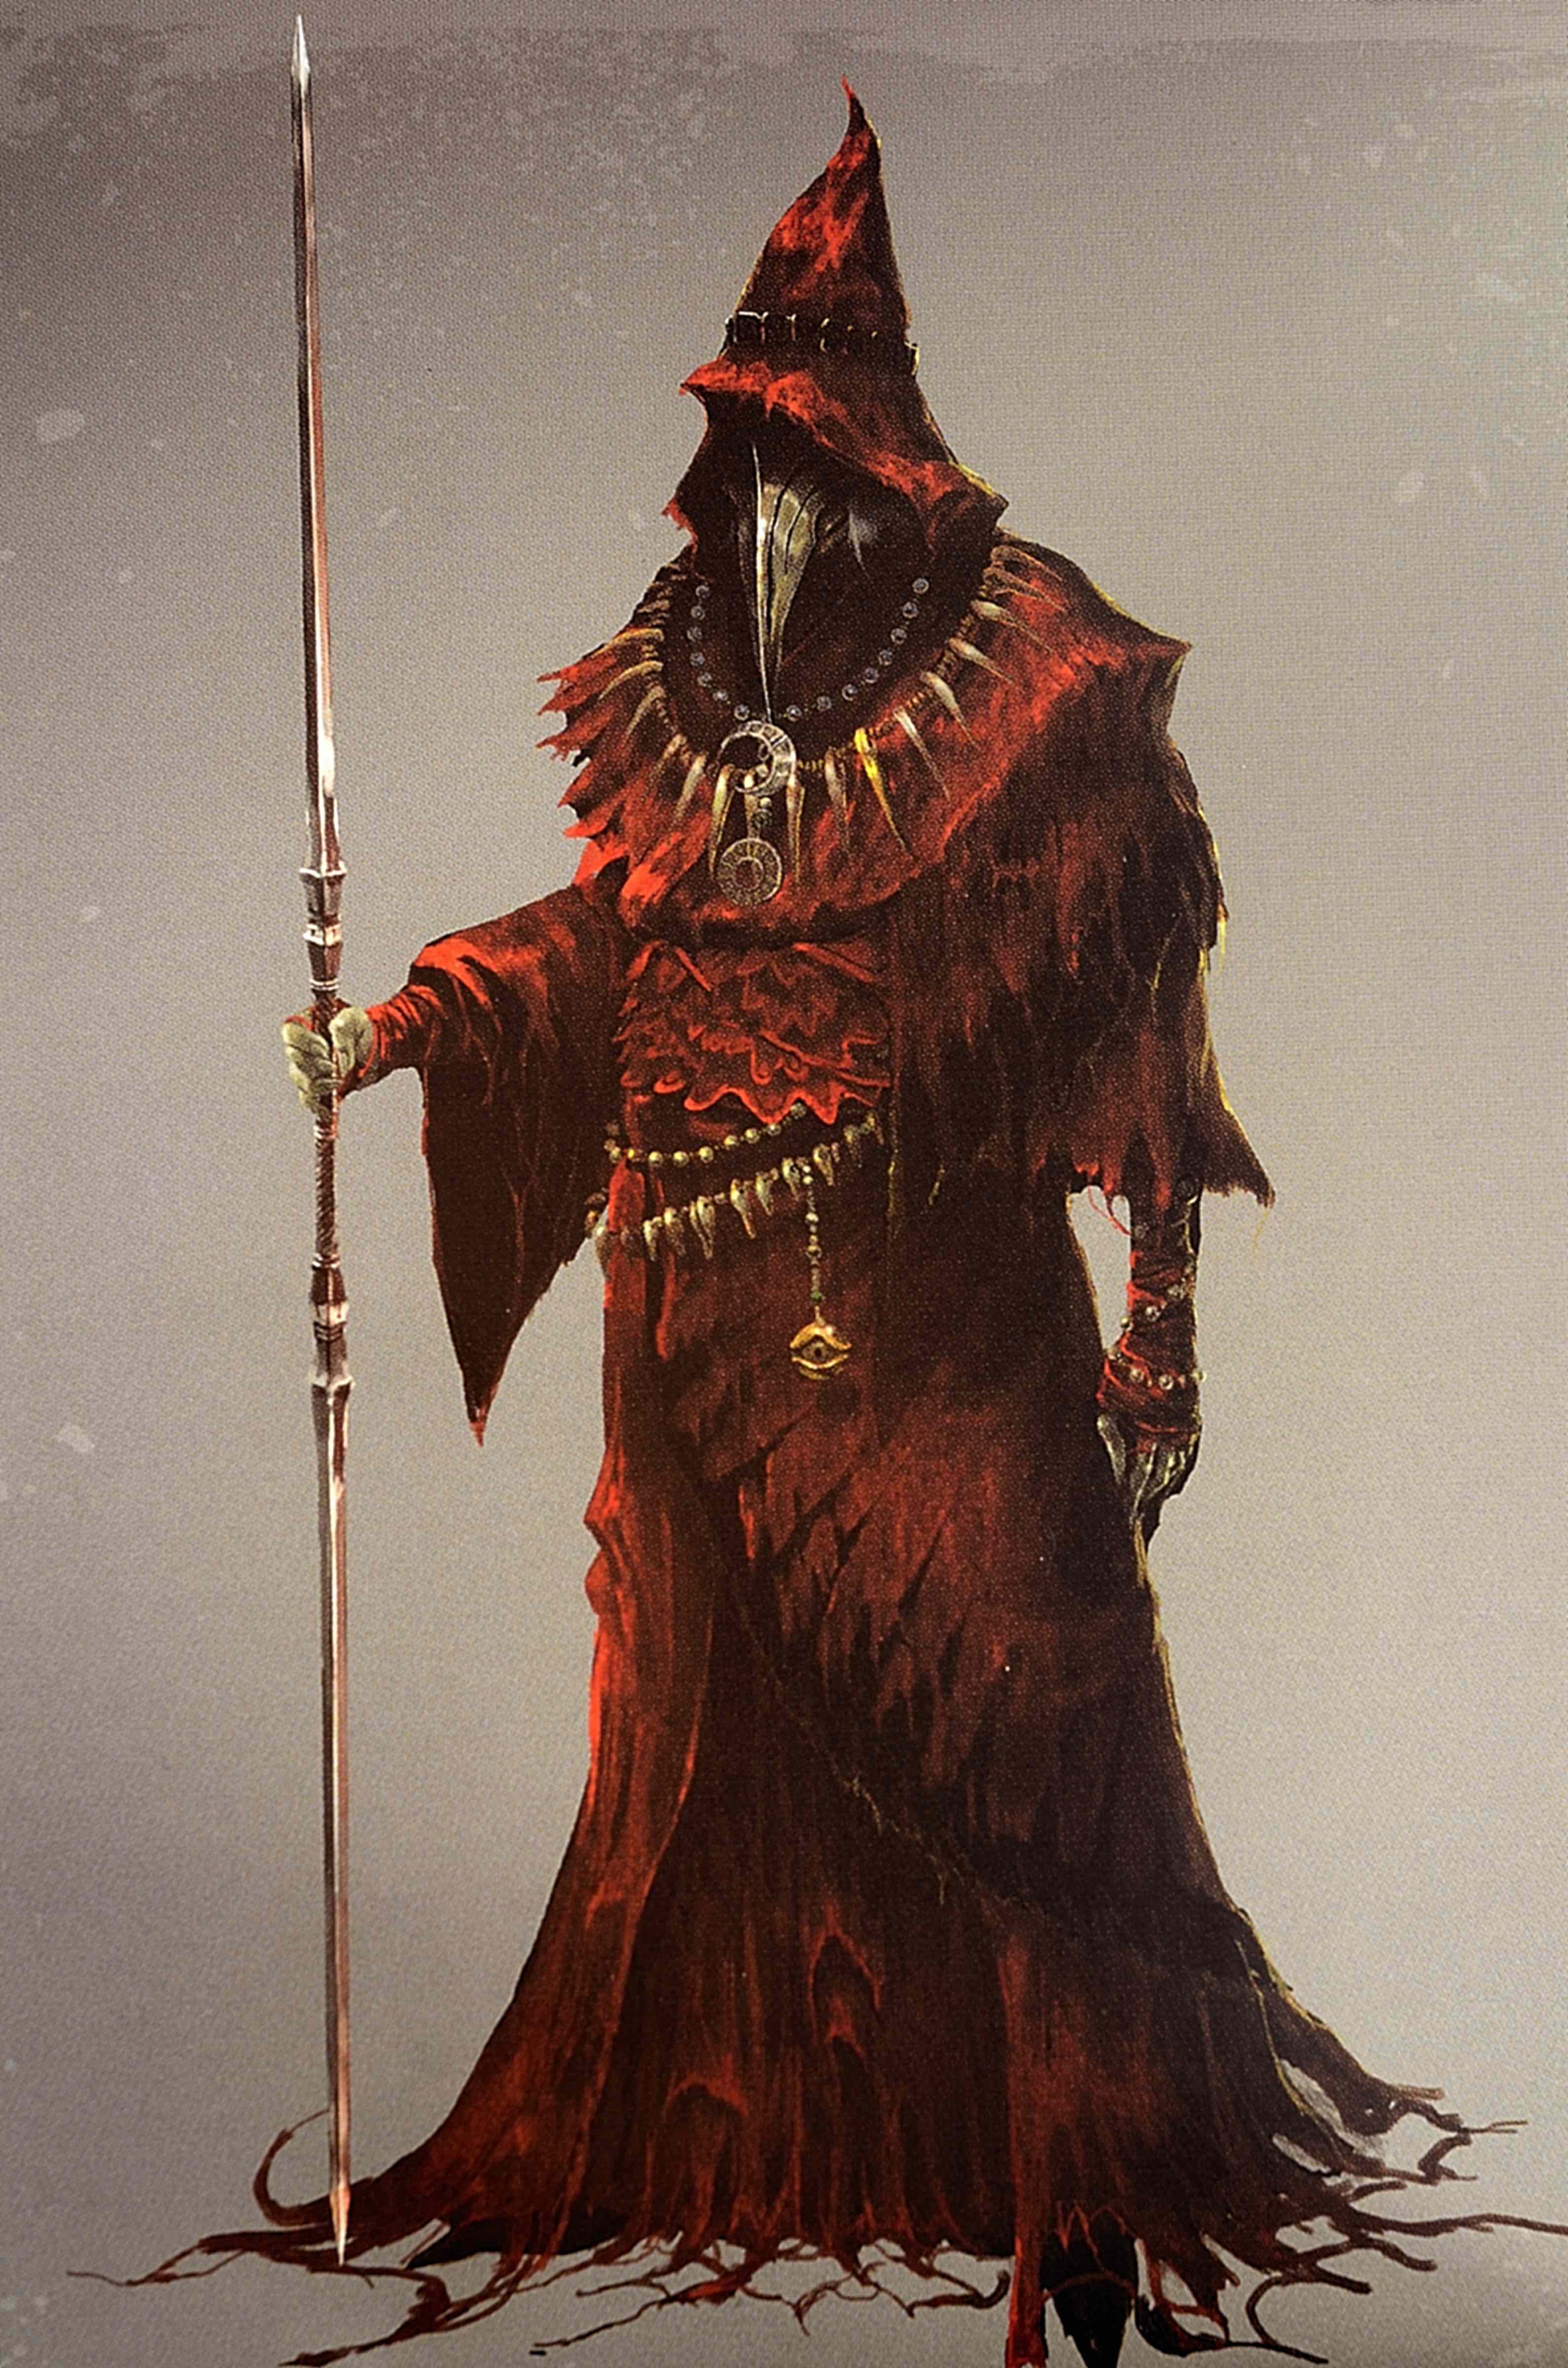
| Personality Trait | I am oathbound to stay in the ruins of New Londo, but that doesn’t mean I don’t enjoy a nice chat with a stranger. |
| Ideal | I will sacrifice my own future to protect the world from the Darkwraiths. (Good) |
| Bond | I am the last of three sealers tasked with containing the spread of the darkwraiths. I will never abandon my post as my brethren have. |
| Flaw | New Londo needed to be flooded. Still, the devastation I caused haunts me to this day. |
After the Four Kings were tempted with the power of Lifedrain, the Darkwraiths began to grow in number within New Londo. Three sealers were sent to seal the kings in the Abyss and flood the city. Ingward is the last to remain at his post watching over the city. One of his fellows met his end in Blighttown, while another works with Knight Lautrec to malevolent ends.
Ingward has made his home on the roof of a large building in the center of the ruins. The specters and banshees that now wander the ruins pay him no mind. In exchange for humanity, he can use ancient magic to purge a curse from a creature. He also can sell transient curses and sorcery to help ward curses from creatures.
Wares
| Items | Souls |
|---|---|
| Transient Curse | 750 |
| Sorceries | |
| Resist Curse | 2000 |
Questline.
Since the city flooded, he has guarded the key to the seal that can drain the floodwaters. If he is not killed for it, he will only willingly give it to an undead who has braved Anor Londo and received the Lordvessel.
Once the Four Kings have been defeated, Ingward’s mission is complete. He relocates to Firelink Shrine where he continues to peddle his wares.
Kingseeker Frampt (Q)

| Personality Trait | My immortal status means I don’t need food or sleep, though they are two activities I indulge in whenever possible. |
| Ideal | The legacy of my old friend Lord Gwyn cannot be doused. (Lawful) |
| Bond | The Age of Fire must be perpetuated. |
| Flaw | Any time I’m not talking is a good time to sleep. |
Kingseeker Frampt is a Primordial Serpent who slumbers underneath Firelink Shrine’s church. Only his neck and face can are visible. He looks nearly identical to Darkstalker Kaathe, though his eyes are a deep amber color. He has a voracious appetite, and will exchange souls for various items if he can eat them. Often the players encounter him in Firelink Shrine when he is asleep with his head against the floor of the church.
The Primordial Serpents have lived since the Age of Ancients. Relatives of the ancient dragons, the serpents share their kins immortality. They lack their cousin's fierce tactics. Their origins and motives remain unclear, though they share their goals to guide undead towards their own ends.
Questline.
Once the characters ring both Bells of Awakening, Frampt awakens from his slumber and bursts through the floor underneath the church. He greets the players warmly and introduces himself as a friend and advisor to Lord Gwyn. He explains the fate of the Chosen Undead:
“Chosen Undead, who has rung the Bell of Awakening. I wish to elucidate your fate, and the very reason your kind have appeared. Chosen Undead, your fate... is to succeed the Great Lord Gwyn. So that you may link the Fire, cast away the Dark, and undo the curse of the Undead. Now, let us take that vessel on a journey. I assume you are ready. Now, be still!”
Whether they agree to their fate or not, he directs them to the city of Anor Londo and acquire the Lordvessel. After they do so and return to him,
After the Lordvessel has been placed at the Kiln, Frampt finishes his story and explains the quest the Chosen Undead must finish:
“Very well. As Kingseeker, I shall now instruct you, the Lord's successor, in your next task. To achieve your fate, fill the vessel with powerful souls, commensurate to the great soul of Gwyn. Scarce few possess such brilliant souls. Gravelord Nito, the Witch of Izalith, the Four Kings of New Londo, who inherited the shards of Gwyn's soul... and Lord Gwyn's former confidant, Seath the Scaleless. All of their souls are required to satiate the Lordvessel.”
Once the Lordvessel is sated, Frampt expresses his approval and fondness for humanity. He says his final farewell to the party before their final confrontation with Gwyn.
Knight Lautrec (Q)

| Personality Trait | Information can, and often is, more powerful than any blade. |
| Ideal | The weak ask, the strong take. (Evil) |
| Bond | I have forsaken everything in exchange for the love of my goddess Fina. |
| Flaw | I take what I want, when I want. |
Knight Lautrec's homeland is a secret known only to him. He forsook it long ago to completely devote himself to his Goddess Fina. Lautrec is a cunning manipulator and seeks to hoard humanity to offer to Fina as proof of his loyalty. His Favor Plate covers his entire body, and two arms are hammered into the breastplate wrapped around the wearer’s torso. The armor gleams with constant luster no matter how much dirt and wear cover it.
If the characters kill Lautrec, he drops his ring of favor and protection as well as Anastacia’s fire keeper soul. His favor plate lies on the balcony overlooking the Great Hall after his death.
Questline.
Lautrec is first found trapped in a cell in the Undead Parish cathedral. A key on a corpse in the Parish unlocks his cell. Whether or not he is freed by the players, he escapes his cell and relocates to Firelink Shrine after the characters ring the Parish bell. If freed by the players, he offers a sunlight medal to them in payment.
If Lautrec is still at Firelink when Petrus returns from the catacombs without Reah, he offers the party the truth of the encounter for 5000 souls. If bribed, he tells them that Reah is trapped with her now-hollow companions. He mentions that he stumbled across the information from a “fleeing old man”, and that Reah is sure to be replete with humanity.
If Lautrec is still alive after the characters ring thesecond Bell of Awakening, he kills Anastacia and takes her Fire Keeper soul with him to Anor Londo. He leaves behind the Black Eye Orb. If the characters bring it to the Great Hall inside Anor Londo’s keep, it quivers in response to Lautrec’s presence. It can then be used to invade his world in turn. If the characters defeat Lautrec and his group, they can return Anastacia’s fire keeper soul to her.
Laurentius of the Great Swamp (Q,M)

| Personality Trait | My manners aren’t quite as refined as others, action matters more than words anyway. |
| Ideal | Change. Life is like the seasons, in constant change, and we must change with it (Chaotic) |
| Bond | I’ve travelled from the Great Swamp to learn of this land’s pyromancies. I’ve had no luck finding a teacher so far. |
| Flaw | I am too quick to trust, and even quicker to accept defeat. |
The denizens of the Great Swamp are famed for their practice of ancient pyromancy. Any true pyromancer seeks the chaos magic of Izalith to perfect their craft. Laurentius is one such pyromancer in search of Blighttown and Izalith beyond it. Laurentius wears the tattered burlap garb of a swamp-dweller. He is a capable pyromancer in his own right. Despite his rough manners, Laurentius is a fast friend, happy to teach his pyromancy skills to those with the capacity to learn.
Wares
| Items | Souls |
|---|---|
| Pyromancies | |
| Fire Orb | 500 |
| Combustion | 750 |
| Iron Flesh | 1000 |
| Flash Sweat | 1250 |
| Minor Fireball | 750 |
Questline.
Laurentius doesn’t reach Blighttown in his first attempt unfortunately. The characters first meet him imprisoned inside the Depths, a captive of the cannibalistic Butchers. If freed, he thanks his rescuers and relocates to Firelink Shrine. There, he offers to teach the characters pyromancy, offering them a piece of his soul in the form of a pyromancy flame if they do not have one already.
Chaos still lurks in the corner of his mind, even if he is not actively pursuing it. If one of the characters approaches him in possession of a chaos pyromancy spell, or a flame upgraded with Quelana’s magic, he will ask after its origins. If they tell him of the Daughter of Chaos or Quelana in Blighttown, it consumes him until he braves the Depths and emerges into Blighttown. Unfortunately, he is not powerful enough to see Quelana or cross the swamp, and goes Hollow. He is next found in the swamp, stripped naked and attacking any who come near.
Lord's Blade Ciaran

| Personality Trait | The age of dragons has fallen, as has my will to intervene further. |
| Ideal | The dead should be paid proper respect. (Lawful) |
| Bond | My comrade Artorias fell to the Abyss long ago, I will not see his memory further besmirched. |
| Flaw | My comrades are the only true friends I have. |
Ciaran is one of the four Knights of Gwyn alongside Gough, Artorias, and Ornstein. She was an assassin within the Lord's Blades and served as the dextrous infiltrator of Gwyn's Knights.
Questline Once the characters slay Knight Artorias and take a long rest, Ciaran recognizing them as those that put Artorias out of his misery, she asks them for Artorias’s soul to help preserve his memory as a hero. If she is given the soul, she exchanges them for her Gold Tracer and Silver Tracer, vowing that she has no need for her weapons any longer. In either case, she feels no need to speak of her own identity, and many characters that come across her may never learn of her position in the Knights of Gwyn.
Marvelous Chester (M)

| Personality Trait | Folks where I come have a bit of a bloodier sense of humor, and certainly justice. |
| Ideal | Being cordial to someone doesn't mean you owe them anything tomorrow (Evil) |
| Bond | I may not have arrived in this time of my own volition, but I have no interest in returning home. |
| Flaw | Corpses make great merchandise sources, even if you have to make a few of them yourself. |
Marvelous Chester was pulled into this time in the far past in the same manner as the characters will be. Enigmatic to the core, Chester is just as happy to sell someone his wares as he is to put a dagger in their back. He refrains from saying much about his homeland, preferring to chuckle about the sorry state the kingdom around him is in.
If Chester’s phantom is defeated in the Oolacile, he will still be present here. He will not be happy with his defeat, but will still sell to the characters.
Wares
| Items | Souls |
|---|---|
| Consumables | |
| Purple Moss Clump | 100 |
| Red Moss Clump | 50 |
| Blooming Purple Moss Clump | 250 |
| Poison Throwing Knife | 50 |
| Firebomb | 100 |
| Alluring Skull | 750 |
| Lloyd’s Talisman 150 | |
| Homeward Bone | 250 |
| Prism Stone | 10 |
| Humanity | 1000 |
| Ammunition | |
| Fire Arrow | 75 |
| Poison Arrow | 75 |
| Arrow | 5 |
| Bolt | 10 |
Nico of Thorolund (Q)

| Personality Trait | I can talk, I just choose not to |
| Ideal | Piety. The Way of White and its many saints serve as role models for everything I do (Lawful) |
| Bond | I am oathbound to protect Reah of Thorolund, the same as my brother Vince. |
| Flaw | The thought of our doomed quest eats at the edge of my mind, slowly consuming my sanity. I could never let Reah know. |
Nico of Thorolund is one of the three guards of Lady Reah of Thorolund, along with his brother Vince and the traitorous Petrus. Her duty is his as well, to journey into the Catacombs underneath Firelink Shrine to retrieve the Rite of Kindling. Nico is silent by choice. He rushes to the defense of Reah if she is threatened.
Questline. Nico’s quest is doomed. Petrus will abandon the trio almost immediately, and they will eventually lost themselves deep in the Tomb of Giants. A betrayal by Trusty Patches will finally break both Vince and Nico’s will and they will go hollow in Patch’s pit.
Oswald of Carim (M)

| Personality Trait | It is vital to imbue every sentence with proper gravitas and import. |
| Ideal | Faith. I trust that my deity will guide my Actions. I have faith that if I work hard, things will go well. (Lawful) |
| Bond | I provide confession and penance to any sinner who requests it. For a fee of course. |
| Flaw | Every man deserves salvation from his sins, but I have no intention of doing so for free. |
Pardoner Oswald is one of the few public followers of Velka, wandering the land absolving sinners and freeing those bound to covenants. All sin is his domain, and he can free any man from the weight of his sins if asked. Oswald speaks little of himself, preferring to focus on the sins he sees in every person. But far from judging them, he speaks of sin as inevitable, a human act if ever there was one.
Oswald exchanges various holy relics of Velka for souls. He can also exchange humanity to absolve the sins of a creature. The first time a character takes Oswald up on this offer, he lets slip that the character and Petrus of Thorolund have much in common. They are both undead drenched in sin.
Wares
| Items | Souls |
|---|---|
| Consumables | |
| Purging Stone | 1300 |
| Miracles | |
| Karmic Justice | 5000 |
| Talismans | |
| Velka’s Talisman | 2400 |
| Rings | |
| Bloodbite Ring | 2000 |
| Poisonbite Ring | 2000 |
| Ring of Sacrifice | 1000 |
Trusty Patches (Q, M)

| Personality Trait | I love meeting new people. You’ll never find a more amiable fellow, at first at least. |
| Ideal | Independence. You can never trust another person. If you get tricked or trapped, that's on you. (Evil) |
| Bond | It’s every man for himself in this world. |
| Flaw | I have a weakness when it comes to Clerics. I just can’t help myself. |
No one knows anything about Trusty Patches. Many in Lordran obscure their pasts, keep secrets, or invent completely new lives for themselves. But not a soul can tell you anything about Patches, only that he cannot be trusted under any circumstances. On the surface, he appears to be an amicable adventurer wielding a greatshield and spear. His completely shaved head is his most remarkable feature, as well as his saccharine tone of voice. Patches himself is in no rush to change this.
Wares
| Items | Souls |
|---|---|
| Consumables | |
| Eye of Death (3) | 500 |
| Divine Blessing (1) | 5000 |
| Prism Stone | 10 |
| Humanity Sprite (3) | 2500 |
| Twin Humanity Sprites | 2000 |
| Miracles | |
| Heal | 1250 |
| Great Heal Excerpt | 500 |
| Weapons | |
| Battleaxe | 500 |
| Mace | 750 |
| Talismans | |
| Canvas Talisman | 500 |
| Thorolund Talisman | 500 |
| Armor | |
| Half Plate Armor | 3250 |
| Mask of the Father | 4000 |
| Mask of the Mother | 4000 |
| Mask of the Child | 4000 |
Questline.
The party will first encounter Patches in the Catacombs, where he will attempt to kill them by flipping the first spiked bridge as they cross it. If he’s found afterwards, he’ll insist that it was an accident and offer the party a humanity sprite in recompense.
If he is not killed after this, he will meet the party in the Tomb of Giants ahead after having pushed Reah’s group into the pit. He will attempt to do the same to this party, and if successful will taunt the players at the bottom. If the characters survive, he will beg the party for forgiveness. If they agree, he will offer them a twin humanity sprite and cease to be aggressive towards them. If he is attacked, he fights to the death and drops a cleric's crescent battleaxe and a humanity sprite.
Patches relocates to Firelink Shrine if he is alive when Gravelord Nito is killed. He sets up shop on the second floor of the church, near the nesting crow. From this point forward, he will not attempt to harm the party, and will sell trinkets to them at what he assures is a “discount rate”.
Petrus of Thorolund (C, Q, M)

| Personality Trait | I try to be left alone, lest someone discover the darkness within my heart. |
| Ideal | Retribution. The rich need to be shown what life and death are like in the gutters. (Evil) |
| Bond | I wait to escort Reah of Thorolund, but the success of her mission means little to me. |
| Flaw | I harbor intense resentment towards Reah. For her birth, her position, and most of all, her insufferable purity. |
Petrus of Thorolund is a priest of the Way of White. He is an older blonde undead waiting for the rest of his band to meet him at Firelink Shrine before they leave on a mission into the catacombs. Petrus is a man of few words and little confidence, and at his heart he is a coward. He prefers to keep the characters at a distance, offering each of them a copper coin as a token of goodwill.
If the characters continue to press him, he will offer them entrance into his religion, The Way of White. Should they accept, he will teach them Miracles in exchange for souls. While Reah and her bodyguards are resting in Firelink, he will teach even non-covenant members miracles.
Wares
| Items | Souls |
|---|---|
| Miracles | |
| Cure Wounds | 1250 |
| Seek Guidance | 500 |
| Force | 1000 |
| Homeward | 750 |
| Talismans | |
| Talisman | 200 |
| Thorolund Talisman | 500 |
Questline.
Petrus will reveal to his pupils that he is waiting for Reah of Thorolund. He is one of her guards accompanying her to the catacombs in search of a secret undead mission. When Reah arrives, he tells the players they will be departing soon. He reveals Reah is the youngest daughter of the good house of Thorolund. The two knights traveling with her are her old schoolmates. If the players show their “faith” to him for a donation of souls equal to 100 times their level, he reveals:
“Undead clerics are given a mission to seek Kindling. Kindling is the art of feeding bonfires with humanity. Through Kindling, we shall one day be granted magnificent powers.
The group departs shortly after. The next time the characters visit the cathedral Petrus will be waiting alone again. He claims to have been separated from his group and that he is deeply worried about Reah’s safety. He speculates that she is in the Tomb of Giants, but is unwilling to back down to rescue her. If the players inquire after her and they have gained his trust, Petrus’s darker nature shines through. He suggests that she is probably completely alone, at the mercy of anyone who stumbles across her.
If the characters rescue her instead, he remarks that it will amount to nothing, and that she is not worth her noble blood. A DC 15 Wisdom(Insight) check reveals Petrus’s foul intentions towards Reah. If the characters do not kill Petrus before they leave Firelink, he murders Reah in the Undead Parish the next time they arrive. He will deny it, but a DC 17 Perception check will reveal he possesses Reah’s ivory talisman. It is also left behind if he is killed afterwards.
Quelana of Izalith (Q, M)

| Personality Trait | I prefer solitude and silence, appearing only to those of sufficient pyromantic talent. |
| Ideal | Sincerity. There’s no good in pretending to be something I’m not. (Neutral) |
| Bond | My mother, and my sisters, were forever corrupted by her foolish experiment. I hope to one day put them out of their misery. |
| Flaw | I've given up my quest to absolve my family, others will have to pick up the weight I should carry. |
Questline.
Quelana sits on the banks of Blighttowns fetid swamp, invisible to the named eye. Quelana can only be be seen and interacted with by a sorcerer of 5th level or higher. She expresses shock the someone can see her and offers to pass on the pyromancy of her family to them.
Quelana has wandered Blighttown since it was initially corrupted, trying to build her strength to end her family’s suffering. Unfortunately, as the First Flame has faded, so too has her mother’s Lord Soul, the source of Quelana’s power. Once Quelaag is slain, Quelana will entreat the characters to brave the Demon Ruins and end her families suffering in Izalith. If they agree to do so, Quelana will give the players a shard of her own pyromancy flame to improve one of theirs. An enhanced pyromancy flame ignores resistance and immunity to fire damage for spells that are cast through it.
If the characters return to her after having slain the Bed of Chaos, she thanks them and offers them a scroll of fire tempest for their service. Quelana vanishes after this. Her gold-hemmed robes lie in front of the illusory wall to the Daughter of Chaos’s bonfire.
Wares
| Items | Souls |
|---|---|
| Pyromancies | |
| Fireball | 1500 |
| Fire Orb | 500 |
| Great Fireball | 2500 |
| Firestorm | 1750 |
| Fire Tempest | 2500 |
| Combustion | 750 |
| Fire Whip | 1500 |
| Undead Rapport | 2250 |
Reah of Thorolund (Q)
| Personality Trait | My actions cast a shadow on not only my family, but the Church as a whole. Everything I do must be immaculate. |
| Ideal | Piety. The Way of White and its many saints serve as role models for everything I do (Lawful) |
| Bond | If I can retrieve the Rite of Kindling from the Catacombs, I will finally be allowed to return home. |
| Flaw | I am ashamed of my own weakness |
Reah is the youngest of several siblings belonging to a noble house of Thorolund. She was poised to take a position within the church’s leadership before her Darksign appeared. As such, her dreams of a comfortable life in service to the gods were dashed against the rocks.
Like all undead clerics, Reah was tasked with descending into Lordran’s Catacombs to retrieve the Rite of Kindling. Kindling is a sacred ritual passed down by clerics through time. All undead can naturally mimic it to a small extent. Pinwheel stole the Rite from Nito long ago, and the church sends undead clerics to their certain death in the catacombs to retrieve it.
Questline.
As a noble of Thorolund,three guards accompany her on her quest into the Catacombs: Nico, Vince, and Petrus. Petrus is waiting in Firelink Shrine before the other three arrive. After the Capra Demon is defeated, the other three arrive in Firelink’s church antechamber. Reah is happy to explain her quest to the characters as she prays at the altar. The next time the characters visit Firelink, the four clerics will have departed for the Catacombs.
The next time the party meets Reah and her company, they are festering a pit in the Tomb of Giants. Vince and Nico have hollowed and Petrus abandoned them. Reah is defenseless and trapped. Reah entreats the party to put her fellows out of their misery. If the party slays her hollow companions, she thanks them with a scroll of replenishment. She then relocates to the Undead Parish Cathedral.
Reah blames herself after this trauma for both her companions death and her abandonment by Petrus. She prays for forgiveness at the cathedral altar, where a corpse of a Fire Keeper lies. At this point, her path likely ends in tragedy. If Petrus is not stopped after rescuing Reah, he will kill her in jealousy and take her belongings. Even if the characters save her, she will be targetted by a channeler sent by Seath. It abducts her and takes her to the Archive Priso. When the characters enter the Duke's Archives if she is in the parish and Seath had not been slain yet. Reah hollows in a cell along the outer ring of the prison.
Shiva of the East (M)

| Personality Trait | I am a foreigner in this land, so I must choose my words and actions carefully. |
| Ideal | Fight and hunt as you like. Whoever's fastest gets the prey. That's the way we do it. |
| Bond | I am a sworn Forest Hunter. My search for the Chaos Blade may test those loyalties however. |
| Flaw | The Chaos Blade haunts my dreams, I would do anything to wield it. Anything. |
Shiva is a traveler from the Far East and is the captain of the Forest Hunters covenant. He joined the clan long ago alongside his mute bodyguard.
Shiva appears near Alvina if any of the characters join the Forest Hunters. He acts as a mentor for the new hunter and answers any of their questions about the clan and it’s practices. He takes immense pride in the greater clan, though he and Alvina seem to treat each other with a suspicious eye.
After the players speak with Shiva in Darkroot Garden, he relocates to the base of Blighttowns water wheel, and acts as a merchant. Shiva only sells his wares in Blighttown.
Wares
| Items | Souls |
|---|---|
| Weapons | |
| Flamberge | 1500 |
| Stone Greatsword | 3500 |
| Demon Great Machete | 4000 |
| Shotel | 1250 |
| Uchigata | 2000 |
| Washing pole | 2000 |
| Demon’s Greataxe | 7500 |
| Claws | 400 |
| Demon’s Spear | 4000 |
| Rings | |
| East Wood Grain Ring | 1250 |
Sieglinde of Catarina (Q)

| Personality Trait | I’d love to chat, but I have matters of more importance to take care of. |
| Ideal | Family. Blood runs thicker than water. (Any) |
| Bond | I must tell father my mother’s last words while he is still sane enough to understand them. |
| Flaw | I owe much to the kindness of others. Unfortunately my quest means I cannot return those favors often. |
Sieglinde is a novice knight of Catarina, following the trail of her father to relay her mothers dying words. Like her father, she wears the characteristic onion shaped armor of a Catarina knight. She is the more level-headed of the pair by far.
Questline.
Sieglinde is first met when she is freed from a Golden Crystal Golem outside of the Dukes Archives. She expresses her gratitude to the party, and enquires about her father Siegmeyers whereabouts. If Siegmeyer is still alive, and the party has met him in Firelink Shrine after helping him in Anor Londo, the players can direct her to the Shrine. She will thank them and leave to Firelink. If Siegmeyer is not alive or the party does not direct her to Firelink, she will abandon her quest and return home.
The next time the players return to Firelink, Sieglinde will be waiting near the bonfire. Unfortuntately for her, Siegmeyer will have already continued onwards. She asks after her father again, and will remain in Firelink Shrine until the characters find Siegmeyer in Blighttown. If they report back to her, she descends into the swamp to pursue him.
Sieglinde’s quest ends in Ash Lake if her father survives Lost Izalith. If the party intervenes to help him, he loses hope in his own abilities and goes hollow near Ash Lake’s first bonfire. Sieglinde lets the characters know that he was able to maintain his sanity long enough to hear his wife’s dying words before she put him down. She thanks the characters a final time, and passes on Siegmeyer’s greatest treasure to them, a titanite slab, before returning home.
Siegmeyer of Catarina (Q)

| Personality Trait | I tend to nod off when I sit down. A good nap is a great way to brainstorm solutions. |
| Ideal | Honor. I am a proud knight of Catarina. We do not back down or surrender. |
| Bond | My wife and daughter wait at home for me, I must find a cure for the undead curse before I return to them. |
| Flaw | Cowardice and fear lurks in my heart at all times, no matter how much I wish to ignore them. |
Siegmeyer is a proud knight of Catarina. He is easily spotted wearing the signature onion-shaped armor of Catarina’s guard. Siegemeyer is an affable, if cowardly and lazy, knight who will rely on the players when possible to dispatch threats in his way.
Questline.
Siegmeyer is one of the first NPCs in the adventure, found sleeping outside the gates of Sen’s Fortress. Rather than adventure to ring the Bells of Awakening, Siegmeyer has waited outside the gates hoping another will come to open them.
Once both bells are rung, Siegmeyer will move deeper into the fortress. Unfortunately, rolling boulders along the eastern walkway block his path again. He’ll be asleep on a ledge nearby, ruminating on his options to move forward. If the players move the boulder mechanism, he will make his way up the fortress. He eventually follows behind the players up to Anor Londo.
The next time the party meets Siegmeyer, he made it to Anor Londo’s palace, trapped in a small room by three Silver Knights. He once again waits for the characters to solve his predicament. If they can kill the knights alone, he gives them a tiny being’s ring in thanks. Siegmeyer moves to Firelink Shrine after this, and gives the characters a scroll of emit force when they meet him there.
If the characters speak to Siegmeyer of Catarina in Firelink Shrine after meeting Gwynevere, they next find him at the base of the Great Hollow. He will ask the players for five purple moss clumps to aid in his journey to Lost Izalith, giving them his pierce shield in return. With his purple moss clumps in hand, he can cross the swamp and enter Izalith. If not, he remains in Blighttown and waits for someone else to come by and help him.
When the players enter Lost Izalith, he will be found next at the edge of a pit dozing off. Siegmeyer feels gratitude and shame for the character's help thus far, and offers to descend into the pit to clear the way on their behalf. If the players accept, he will engage the chaos eaters alone, attempting to slay as many as possible on his own. If he drops to 0 hit points in the process, he will remain concious long enough to thank the characters for their help, and offers them his speckled stoneplate ring before dying. If the characters save him, he will instead offer them his titanite slab in exchange. Ashamed of his final inadequacy, he will leave Izalith and move on to Ash Lake.
Sieglinde’s quest ends in Ash Lake if her father survives Lost Izalith. If the party intervenes to help him, he loses hope in his own abilities and goes hollow near Ash Lake’s first bonfire. Sieglinde lets the characters know that he was able to maintain his sanity long enough to hear his wife’s dying words before she put him down. She thanks the characters a final time, and passes on Siegmeyer’s greatest treasure to them, a titanite slab, before returning home.
Solaire of Astora (Q, C)
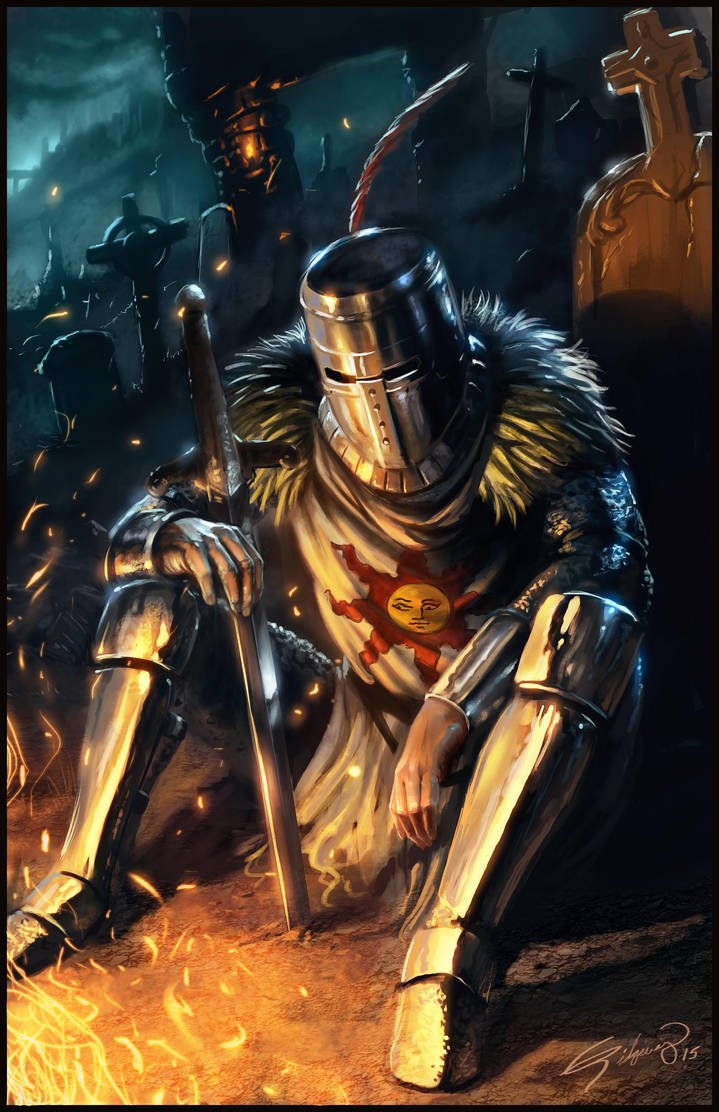
| Personality Trait | A quick joke or even a flirtatious comment is a great way to ingratiate yourself to a stranger. |
| Ideal | Friendship. A friend is the best ally, and we need as many allies as we can get in this world. (Good) |
| Bond | I seek my own sun, even if it takes me to every corner of Lordran. |
| Flaw | I’ll never give up on my quest for my own sun, even if it drives me completely insane. |
Solaire of Astora is a knight from a faraway land who took on the Darksign willingly to pursue “my own sun.” He is a man of boundless optimism and good spirits. If the characters treat him with respect, he may end up being one of the party’s most trusted companions. He is a devotee of the Warriors of Sunlight, and can help instruct characters in the covenant’s practices and rituals.
Questline.
After the characters slay the Taurus Demon, they will meet Solaire by the Hellkite Drake’s bridge. Solaire greets the players warmly, noticing their unhollowed state, and offers to aid them in their quest. He asks nothing in return, only that the players engage in “jolly cooperation” with other undead. If they agree, he passes along a white sign soapstone and he can be summoned to assist with various fights for the rest of the adventure.
The next time the characters meet Solaire he is standing aside the broken statue in the Gatehouse nearby after the characters slay the Bell Gargoyles. The statue serves as the covenant marker for the Warriors of Sunlight.
If the characters do not return to the parish, they will next meet Solaire by the first bonfire in Anor Londo’s castle. He greets them again, and engages in some lighthearted banter.
Once the characters slay the Centipede Demon, Solaire will be waiting at the next bonfire at the start of Lost Izalith. When they come across him, Solaire will be staring out towards the lava lake northward mumbling about the futility of his quest.
If the door is opened before killing the Centipede Demon, one of the chaos bugs is a sunlight maggot variant. If it is not slain before killing the Centipede Demon, Solaire of Astora will find the sunlight maggot first. It will crawl onto his head, filling him and his surroundings with light. This eventually drives Solaire insane. He will remain in the area until found by the characters. Solaire announces he has become the sun, and attempts to strike down the characters in a mad frenzy. Only death will bring him peace at this point.
If the characters save Solaire, he will leave the Demon Ruins to assist in the final fight against Gwyn.
Undead Male Merchant (M)

| Personality Trait | I’ll happily sell you my stolen wares, just know that when you kick the bucket it’s your corpse I’ll be pilfering. |
| Ideal | Greed. If the world is going to end, you might as well go out with a pile of souls. (Neutral) |
| Bond | Yulia is my eternal companion, she protects my wares from would-be thieves. |
| Flaw | I'm never satisfied with what I have – I always want more. |
This undead merchant has made his home in the Undead Burg just after the curse of undeath took hold in Lordran. He still holds onto his sanity, despite his fading humanity, and is not seen as an enemy by the other hollows in the Burg. He spends most of his days wandering the Burg picking corpses clean of their belongings and selling them to new adventurers.
The merchant is eager to do business, but is wary of new adventurers. He and his katana, Yulia, are fearsome foes to weak travelers. He will be permanently aggressive towards those who attack him long after he kills them.
Wares
| Items | Souls |
|---|---|
| Items | |
| Firebomb | 100 |
| Lloyd’s Talisman | 150 |
| Orange Guidance Soapstone | 100 |
| Residence Key | 500 |
| Bottomless Box | 1000 |
| Weapons & Armor | |
| Dagger | 250 |
| Shortsword | 500 |
| Scimitar | 750 |
| Rapier | 1000 |
| Handaxe | 300 |
| Club | 250 |
| Spear | 500 |
| Short Bow | 750 |
| Shield | 500 |
| Chain Mail | 1000 |
| Ammunition | |
| Arrow | 5 |
| Bolt | 10 |
Undead Female Merchant (M)
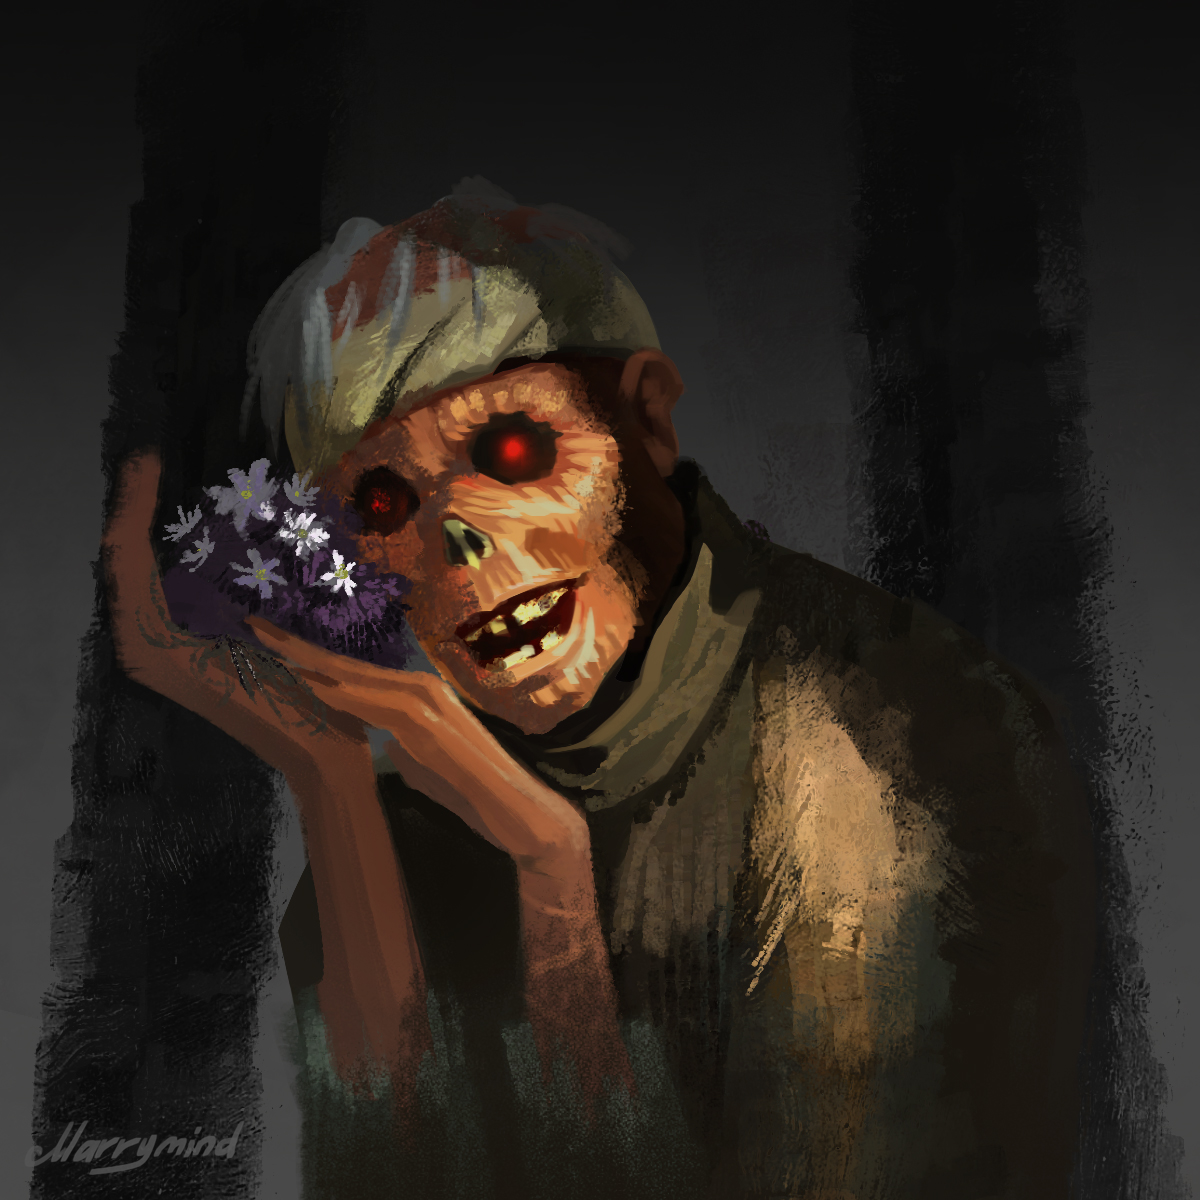
| Personality Trait | Cursing is an art form, and I am a prodigy. |
| Ideal | Greed. I'm only in it for the money (Neutral) |
| Bond | Some may call my home a dank sewer. They’re correct. But it’s my sewer, so fuck off. |
| Flaw | I'm quick to assume that someone is trying to cheat me. |
On the far end of the the Undead Burg aqueduct furthest away from Firelink Shrine, an undead merchant waits on the other side of a sturdy iron grate. She offers no personal information, and prefers to leap straight to business. She has stood for years in this tunnel, the rushing watert eating away the flesh at her ankles to the bone, though she seems to not acknowledge this at all.
If the merchant is harmed but not killed, she retreats sixty feet back into the tunnel and hurls curses and insults at the party from afar.
Wares
| Items | Souls |
|---|---|
| Consumables | |
| Purple Moss Clump | 100 |
| Blooming Purple Moss Clump | 250 |
| Poison Throwing Knife | 50 |
| Dung Pie | 250 |
| Alluring Skull | 750 |
| Charcoal Pine Resin | 500 |
| Transient Curse | 750 |
| Rotten Pine Resin | 500 |
| Homeward Bone | 250 |
| Prism Stone | 10 |
| Humanity | 1000 |
| Ammunition | |
| Fire Arrow | 75 |
| Poison Arrow | 75 |
| Arrow | 5 |
| Bolt | 10 |
Vince of Thorolund (Q)

| Personality Trait | The undead are pitiable, but not our true enemy. |
| Ideal | Piety. The Way of White and its many saints serve as role models for everything I do (Lawful) |
| Bond | I am oathbound to protect Reah of Thorolund, the same as my brother Nico. |
| Flaw | The thought of our doomed quest eats at the edge of my mind, slowly consuming my sanity. I could never let Reah know. |
Vince is a robust knight of Thorolund bonded to Reah of Thorolund’s service. Her duty is his as well, to journey into the Catacombs underneath Firelink Shrine to retrieve the Rite of Kindling. Vince is fiercely protective of Reah, and will vet anyone who wishes an audience with his lady. He rushes to her defense of Reah if he thinks she is in danger.
Questline.
Vince’s quest is doomed. Petrus will abandon the trio almost immediately, and they will eventually lose themselves deep in the Tomb of Giants. A betrayal by Trusty Patches will finally break both Vince and Nico’s will and they will go hollow in Patch’s pit.
Optional Rules - Summoning & Invasions
The flow of time in Lordran is convoluted. Many covenants and items can bridge Chosen Undead to other worlds to aid or hunt other undead. Recurring NPCs in the adventure will aid or hinder the players, like Solaire and Kirk. To either summon or invade other characters, the players must use covenant items such as the white sign soapstone or red eye orb.
The intention of this Summoning & Invasions systems is to serve as a set of optional rules for the original game’s multiplayer elements. With regards to invasions in particular, this game system works best as a 1 on 1 session between a player and the DM. Feel free to use or ignore these rules as you wish.
Several “NPC” character sheets are included at the end of this section. You can use them for the enemies and allies the characters meet.
Co-Op Items
Orange Guidance Soapstone
The Orange Guidance Soapstone is used exclusively to leave messages for other undead. There are no benefits to the players using this, short of leaving messages for themselves or future players in your campaigns.
White Sign Soapstone
When a creature uses a White Sign Soapstone, a summoning sign is sent to an NPCs world. If the user is within 2 class levels of the recommended level for the area the sign is placed in, they are summoned to assist a host as a summoned phantom. There is a 50% chance that the host will summon another NPC within one total class level of theirs as well. If the character is still alive when the boss of the area is slain, the summoned character returns to their world with a humanity sprite and a sunlight medal. If the phantom dies before the boss is slain, the character dies, and their bloodstain is left in the invader's world.
Cracked Red Eye Orb
A cracked red eye orb acts as the Red Eye Orb, except that it is consumed after use.
Red Eye Orb
When a creature uses a Red Eye Orb, they invade the world of an NPC one level higher than they are. The NPC will be found exploring the area the user activated the Red Eye Orb in. If the invader defeats their quarry, they are returned back to their world with a humanity sprite and souls equal to those of a creature of CR equal to the NPC’s level. If the host is victorious, the invader is slain, and their bloodstain is left in the invader's world.
Dragon Eye
The Dragon Eye functions as the Red Eye Orb, with the exception that the user receives a dragon scale after killing their host instead of a humanity sprite.
Eye of Death
The Dragon Eye functions as the Red Eye Orb, with the exception that the user receives two eyes of death after killing their host instead of a humanity sprite.
Co-Op NPCs
2nd - Fighter (Deormod)
3rd - Rogue (Heagyth)
4th - Wizard (Aginela)
5th - Sorcerer (Wulmar)
6th - Cleric (Herelufu)
7th - Rogue (Hybald)
8th - Cleric (Ordic)
9th - Wizard (Eadwine)
10th - Sorcerer (Aldreda)
11th - Fighter (Orfa)
Deormod, Ancient Consul of Iron
Medium humanoid, neutral
- Armor Class 18 (Chain Mail, Shield)
- Hit Points 20
- Speed 30 ft.
STR DEX CON INT WIS CHA 17 (+3) 14 (+0) 15 (+2) 8 (-1) 12 (+1) 10 (+0)
- Skills Athletics +5, Acrobatics +4
- Saving Throws Strength +5, Constitution +4
- Senses passive Perception 12
- Languages Common
- Challenge 2 (50 souls)
Duelist. Deormod deals an additional 2 slashing damage with his longsword when wielding it with one hand.
Heavily Armored. Any bludgeoning, piercing, and slashing damage that Deormod takes from non magical attacks is reduced by 3.
Action Surge. Once per long rest, Deormod can take one additional action on his turn.
Actions
Multiattack. Deormod makes two Longsword attacks
Longsword Melee Weapon Attack: +5 to hit, reach 5 ft., one target. Hit: (1d8+5 slashing)
Bonus Actions
Second Wind (Recharges After a Long Rest) Deormod regains 1d10+2 hit points.
Heagyth, Paragon of Pride
Medium humanoid, chaotic neutral
- Armor Class 16 (studded leather armor, dual-wielder)
- Hit Points 18
- Speed 30 ft.
STR DEX CON INT WIS CHA 10 (+0) 18 (+4) 14 (+2) 8 (-1) 12 (+1) 10 (+0)
- Skills Stealth +7, Acrobatics +7, Perception +4, Investigation +1, Survival +4, Sleight of Hand +5
- Saving Throws Dexterity +5, Intelligence +1
- Senses passive Perception 12
- Languages Common
- Challenge 3 (50 souls)
Sneak Attack. Heagyth deals an extra 7 (2d6) damage when she hits a target with a weapon attack and has advantage on the attack roll, or when the target is within 5 ft. of an ally of her that isn't Incapacitated and Heagyth doesn't have disadvantage on the Attack roll.
Assassinate. Heagyth has advantage on attack rolls against any creature that hasn't taken a turn in the combat yet. In addition, any hit you score against a creature that is surprised is a critical hit.
Actions
Rapier Melee Weapon Attack: +5 to hit, reach 5 ft., one target. Hit: (1d8+3 slashing)
Bonus Actions
Cunning Action. Heagyth takes the Dash, Disengage, or Hide action.
Rapier (Off-Hand) Melee Weapon Attack: +5 to hit, reach 5 ft., one target. Hit: (1d8 slashing)
Aginela, Overlady of the Blind
Medium humanoid, neutral goodl
- Armor Class 14 (mage armor)
- Hit Points 26
- Speed 30 ft.
STR DEX CON INT WIS CHA 9 (-1) 13 (+1) 12 (+1) 18 (+4) 14 (+2) 10 (+0)
- Skills Arcana +6, Investigation +6
- Saving Throws Intelligence +6, Wisdom +4
- Senses passive Perception 12
- Languages Common
- Challenge 4
Spellcasting: Aginella is a 4th-level Spellcaster. Its Spellcasting ability is Intelligence (spell save DC 14, +6 to hit with spell attacks). Aginella has the following Wizard Spells prepared:
Cantrips: soul arrow
1st Level (4 slots): heavy soul arrow, hush
2nd Level (2 slots): invisibility, magic shield
Actions
Dagger. Melee Weapon Attack: +4 to hit, reach 120 ft., one target. Hit: (1d4+1 slashing)
Corrupt Prince Wulmar
Medium humanoid, chaotic evil
- Armor Class 12
- Hit Points 32
- Speed 30 ft.
STR DEX CON INT WIS CHA 20 (0) 16 (+3) 15 (+2) 9 (-1) 8 (-1) 18 (+4)
- Skills Intimidation +6, Persuasion +6
- Saving Throws Constitution +4, Charisma +6
- Senses passive Perception 12
- Languages Common
- Challenge 5
Spellcasting. Wulmar is a 5th-level spellcaster. His spellcasting ability is Charisma (spell save **DC 18, +10 to hit with spell attacks). Wulmar has the following sorcerer spells prepared:
1st level (4 slots): burning hands, combustion, minor fireball, fire whip
2nd level (3 slots): fire orb, fire surge, iron flesh
3rd level (3 slots): fireball, firestorm
Actions
Dagger. Melee Weapon Attack: +5 to hit, reach 120 ft., one target. Hit: (1d4+3 slashing)
Herelufu, Apostle of the Flock
Medium humanoid, neutral
- Armor Class 17 (Splint)
- Hit Points 63
- Speed 30 ft.
STR DEX CON INT WIS CHA 13 (+1) 8 (-1) 16 (+3) 8 (-1) 16 (+3) 10 (+0)
- Skills Perception +6, Persuasion +6
- Saving Throws Constitution +4, Charisma +6
- Senses passive Perception 12
- Languages Common
- Challenge 6
Tough. Herelufu has an additional two hit points for each of their hit dice (already included in their maximum hit points).
Spellcasting: Hereflu is a 6th-level Spellcaster. Their Spellcasting ability is Wisdom (spell save DC 14, +6 to hit with spell attacks). Herelufu has the following Cleric Spells prepared:
1st Level (4 slots): lightning spear, shield of faith, cure wounds
2nd Level (2 slots): emit force, magic barrier
3rd Level (2 Slots): karmic justice
Actions
Morningstar Melee Weapon Attack: +5 to hit, reach 5 ft., one target. Hit: (1d8+5 slashing)
Putrid Minister Hybald
Medium humanoid, neutral evil
- Armor Class 18 (chain mail, shield)
- Hit Points 71
- Speed 30 ft.
STR DEX CON INT WIS CHA 9 (-1) 18 (+4) 14 (+2) 14 (+2) 12 (+1) 10 (+0)
- Skills Perception +6, Persuasion +6
- Saving Throws Constitution +4, Charisma +6
- Senses passive Perception 12
- Languages Common
- Challenge 7
Tough. Herelufu has an additional two hit points for each of their hit dice (already included in their maximum hit points).
Spellcasting: Hereflu is a 6th-level Spellcaster. Their Spellcasting ability is Wisdom (spell save DC 14, +6 to hit with spell attacks). Herelufu has the following Cleric Spells prepared:
1st Level (4 slots): lightning spear, shield of faith, cure wounds
2nd Level (2 slots): emit force, magic barrier
3rd Level (2 Slots): karmic justice
Evasion. If Hybald is subjected to an effect that allows it to make a Dexterity saving throw to take only half damage, Hybald instead takes no damage if it succeeds on the saving throw, and only half damage if it fails.
Sneak Attack. Hybald deals an extra 14 (4d6) damage when he hits a target with a weapon attack and has advantage on the attack roll, or when the target is within 5 ft. of an ally of her that isn't Incapacitated and Heagyth doesn't have disadvantage on the Attack roll.
Actions
Dagger Melee Weapon Attack: +7 to hit, reach 5 ft., one target. Hit: (1d4+4 piercing)
Bonus Actions
Cunning Action. Hybald takes the Dash, Disengage, or Hide action.
Dagger (Off-Hand) Melee Weapon Attack: +7 to hit, reach 5 ft., one target. Hit: (1d4 piercing)
Reactions
Uncanny Dodge. When an attacker that Hybald can see hits him with an attack, he can use his reaction to halve the attack’s damage against him.
Ordic, Overlord of Mirrors
Medium humanoid, chaotic neutral
- Armor Class 18 (chain mail, shield)
- Hit Points 89
- Speed 30 ft.
STR DEX CON INT WIS CHA 16 (+3) 12 (+1) 12 (+1) 8 (-1) 18 (+4) 10 (+0)
- Skills Perception +8, Survival +8
- Saving Throws Dexterity +7, Intelligence +5
- Senses passive Perception 18
- Languages Common
- Challenge 8
Tough. Ordic has an additional two hit points for each of their hit dice (already included in their maximum hit points).
Spellcasting: Ordic is a 8th-level Spellcaster. Their spellcasting ability is Wisdom (spell save DC 15, +7 to hit with spell attacks). Ordic has the following Cleric Spells prepared:
1st Level (4 slots): force, shield of faith, cure wounds
2nd Level (3 slots): emit force, silence
3rd Level (2 slots): wrath of the gods, replenishment
4th Level (2 slots): bountiful sunlight
Evasion. If Ordic is subjected to an effect that allows it to make a Dexterity saving throw to take only half damage, Ordic instead takes no damage if it succeeds on the saving throw, and only half damage if it fails.
Sneak Attack. Ordic deals an extra 14 (4d6) damage when he hits a target with a weapon attack and has advantage on the attack roll, or when the target is within 5 ft. of an ally of her that isn't Incapacitated and Ordic doesn't have disadvantage on the Attack roll.
Actions
Divine Halberd Melee Weapon Attack: +6 to hit, reach 10 ft., one target. Hit: (1d10+ 3 slashing + 3d6 radiant damage)
Eadwine, Magi of Solitude
Medium humanoid, neutral
- Armor Class 15 (mage armor)
- Hit Points 130
- Speed 30 ft.
STR DEX CON INT WIS CHA 10 (+0) 14 (+2) 14 (+2) 25 (+7) 15 (+2) 14 (+2)
- Skills Arcana +11, History +11, Nature +11, Religion +11
- Saving Throws Wisdom +6, Intelligence +11
- Senses passive Perception 12
- Languages Common
- Challenge 9
Spellcasting: Eadwine is a 9th-level Spellcaster. Its Spellcasting ability is Intelligence (spell save DC 19, +11 to hit with spell attacks). Eadwine has the following Wizard Spells prepared:
Cantrips: soul arrow
1st Level (4 slots): mage armor, heavy soul arrow, hush
2nd Level (2 slots): magic weapon, magic shield, see invisibility,
3rd Level (2 slots): dispel magic, soul spear, soul mass
4th Level (2 slots): crystal magic weapon, crystal soul spear, homing crystal soulmass
5th Level (1 slots): white dragon breath
Tin Crystallization Catalyst. Eadwine’s catalyst sets her Intelligence to 25. Eadwine also has disadvantage on Sanity checks and saving throws.
Actions
Enchanted Dagger. Melee Weapon Attack: +11 to hit, reach 120 ft., one target. Hit: (1d4+7 slashing)
Aldreda, Elder of Lies
Medium humanoid, neutral
- Armor Class 15 (studded leather armor)
- Hit Points 125
- Speed 30 ft.
STR DEX CON INT WIS CHA 8 (-1) 16 (+3) 16 (+3) 10 (+0) 15 (+2) 20 (+5)
- Damage Resistances fire, poison
- Skills Persuasion +9, Intimidation +9
- Saving Throws Constitution +4, Charisma +9
- Senses passive Perception 12
- Languages Common
- Challenge 10
Gold-Hemmed Robes. Aldredla’s black robes grant her resistance to fire and poison damage.
Rusted Iron Ring. Alrelda is not slowed by difficult terrain caused by water and similar natural hazards.
Improved Pyromancy Flame. Pyromancy spells cast by Aldrelda ignore resistance or immunity to fire damage.
Spellcasting. Aldrelda is a 10th-level spellcaster. Her spellcasting ability is Charisma (spell save DC 17, +9 to hit with spell attacks). Aldrelda has the following sorcerer spells prepared:
1st level (4 slots): burning hands, combustion, minor fireball, fire whip
2nd level (3 slots): fire orb, fire surge, iron flesh
3rd level (3 slots): fireball, firestorm
4th level (2 slot): great chaos fireball, immolate self
5th level (1 slot): chaos storm
Actions
Dagger Melee Weapon Attack: +5 to hit, reach 5 ft., one target. Hit: (1d4+2 piercing)
Orfa Ylno, Father of Giants
Medium humanoid, chaotic evil
- Armor Class 18 (plate)
- Hit Points 151
- Speed 30 ft.
STR DEX CON INT WIS CHA 15 (+2) 12 (+1) 16 (+3) 10 (+0) 15 (+2) 20 (+5)
- Skills Athletics +6, Acrobatics +6
- Saving Throws Strength +6, Constitution +7
- Senses passive Perception 12
- Languages Common
- Challenge 11
Ring of Favor and Protection. Orfa’s Strength, Dexterity, and Constitution scores increase by 2. These increases are already included in his stat block.
Havel’s Ring. Orfa’s carrying capacity is tripled.
Mask of the Father. Orfa’s speed is not reduced while wearing heavy armor and his carrying capacity is doubled.
Great Weapon Master. On his turn, when Orfa scores a critical hit with a melee weapon or reduces a creature to 0 hit points with one, he can make one melee weapon attack as a bonus action. Before he makes a Chaos Greatsword attack, he can choose to take a -5 penalty to the attack roll. If the attack hits, he adds +10 to the attack’s damage.
Action Surge. Once per long rest, Orfa can take one additional action on his turn.
Indomitable (Recharges After a Long Rest). Orfa can reroll a saving throw that he fails. He must use the new roll.
Actions
Multiattack. Orfa makes three Chaos Greatsword attacks.
Chaos Greatsword Melee Weapon Attack: +12 to hit, reach 5 ft., one target. Hit: (2d6+8 slashing plus 1d6 fire)
Bonus Actions
Second Wind (Recharges After a Long Rest). Orfa Ylno regains 1d10+11 hit points.
Appendix B - Bestiary
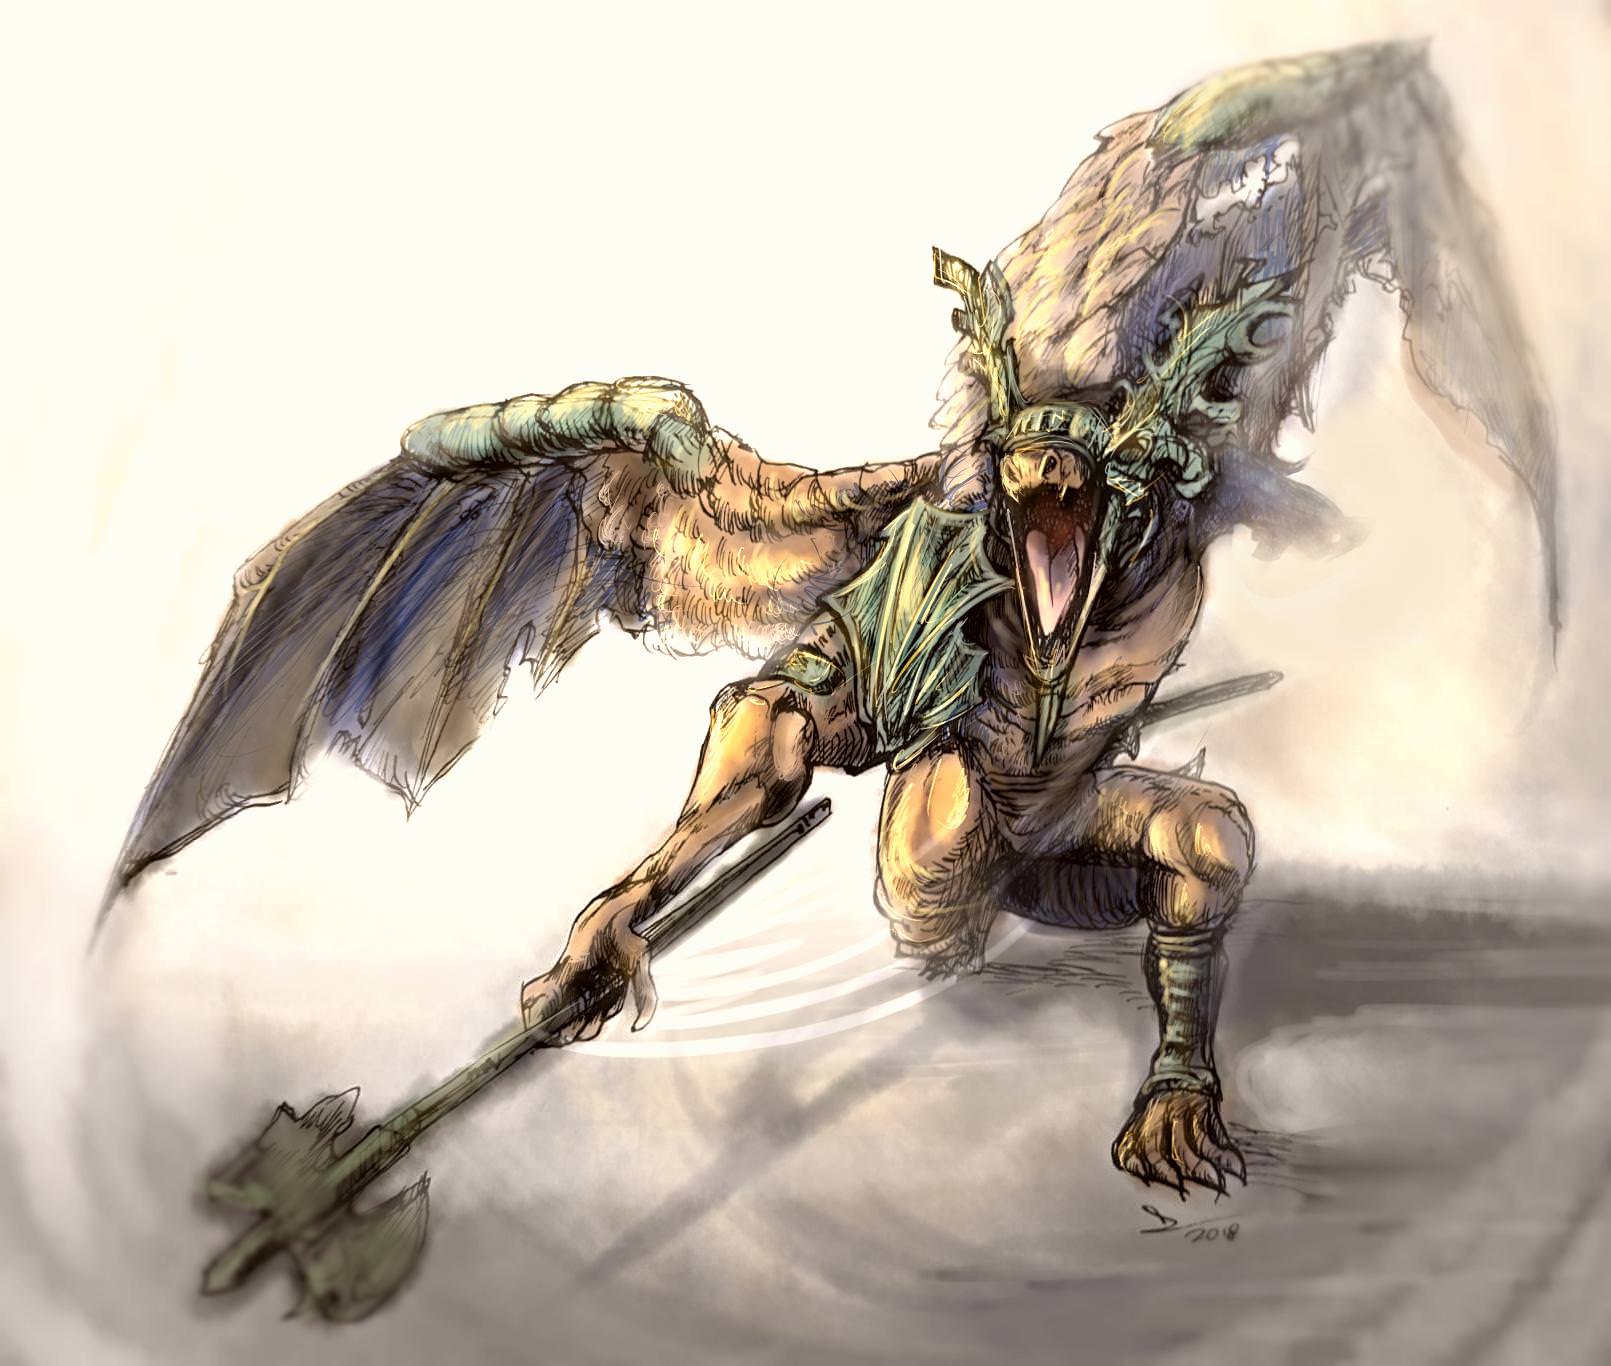
Anor Londo Gargoyle
Large monstrosity, unaligned
- Armor Class 15 (natural armor)
- Hit Points 168 (16d10+80)
- Speed 30 ft., fly 40 ft.
STR DEX CON INT WIS CHA 21 (+5) 11 (+0) 20 (+5) 3 (-4) 14 (+2) 1 (-5)
- Senses Passive Perception 12
- Languages -
- Challenge 7 (2,900 souls)
False Appearance. While the gargoyle remains motionless, it is indistinguishable from a normal statue.
Actions
Multiattack. The gargoyle makes three attacks: two with its halberd, and one with its tail.
Halberd. Melee Weapon Attack: +8, reach 10 ft., one target. Hit: 16 (2d10 + 5) slashing damage.
Tail. Melee Weapon Attack: +8, reach 5 ft., one target. Hit: 19 (4d6 + 5) slashing damage.
Lightning Breath (Recharge 5–6). The gargoyle exhales lightning in a 30-foot line. Each creature in that area must make a DC 16 Dexterity saving throw, taking 45 (10d8) lightning damage on a failed save, or half as much damage on a successful one.
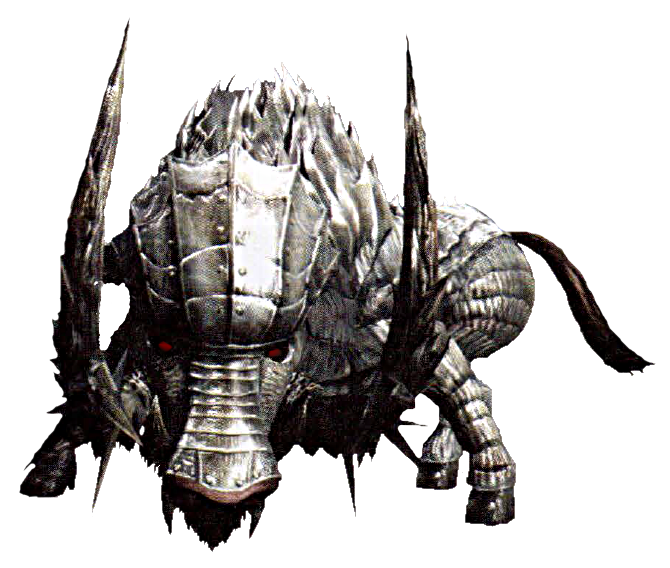
Armored Tusk
Large monstrosity, unaligned
- Armor Class 18 (natural armor)
- Hit Points 104 (11d10+44)
- Speed 40 ft.
STR DEX CON INT WIS CHA 20 (+5) 8 (-1) 18 (+4) 3 (-4) 13 (+1) 6 (-2)
- Damage Resistances fire, force, lightning, and Bludgeoning, Piercing, and Slashing from Nonmagical Attacks
- Senses Passive Perception 11
- Languages -
- Challenge 4 (1,100 souls)
Trampling Charge. If the armored tusk moves at least 20 feet straight toward a creature and then hits it with an armored tusk attack on the same turn, that target must succeed on a DC 16 Strength saving throw or be knocked prone. If the target is prone, the armored tusk can make one attack with its hooves against it as a bonus action.
Armor Gap. The armored tusk has a weakness in its armor on its rear. A creature can take advantage of this to bypass its defenses. Any attack roll made with Advantage against it is an automatic critical hit if it meets or exceeds its AC.
Actions
Gore. Melee Weapon Attack: +7, reach 5 ft., one target. Hit: 18 (2d12 + 5) slashing
Hooves. Melee Weapon Attack: +7, reach 5 ft., one target. Hit: 16 (2d10 + 5) bludgeoning
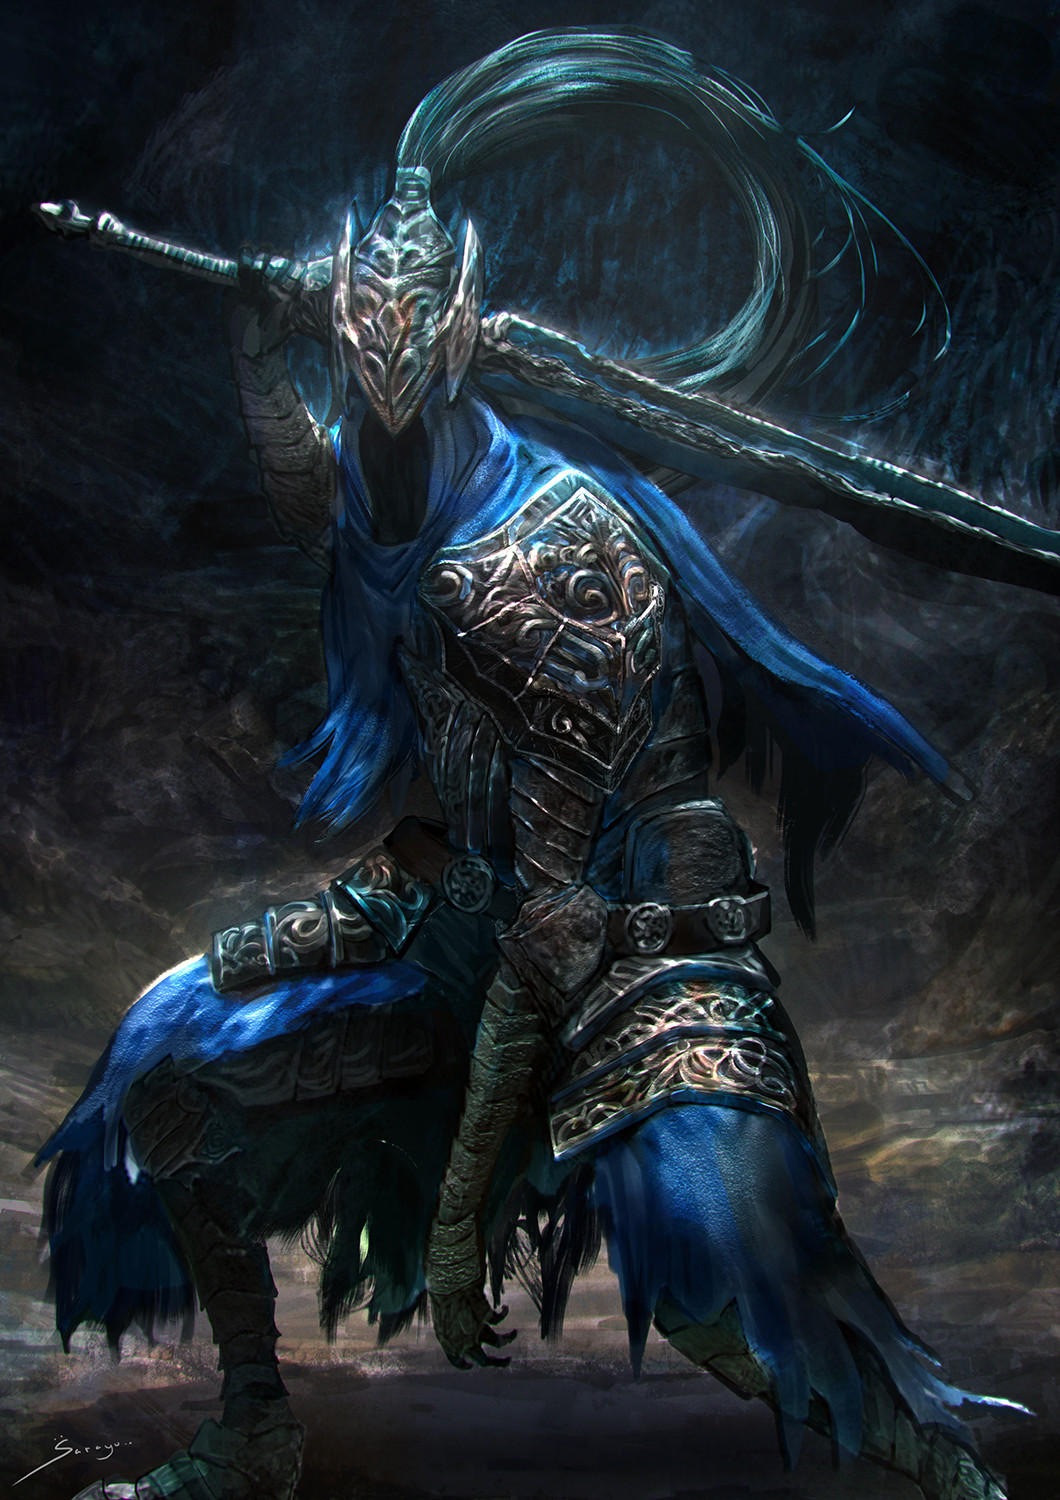
Artorias, the Abysswalker
Large Celestial Aberration, Chaotic Neutral
- Armor Class 20
- Hit Points 325 (26d10+182)
- Speed 30 ft.
STR DEX CON INT WIS CHA 25 (+7) 22 (+6) 24 (+7) 14 (+2) 19 (+4) 17 (+3)
- Damage Immunities Bludgeoning, Piercing, and Slashing damage from non-magical attacks
- Condition Immunities Charmed, Frightened, Stunned, Paralyzed
- Saving Throws Strength +13, Dexterity +12, Wisdom +10
- Skills Athletics +13, Acrobatics +12, Perception +10
- Senses Darkvision 120 Ft., passive Perception 11
- Languages Celestial, Common
- Challenge 19 (22,000 souls)
Legendary Resistance (3/Day). If Artorias fails a saving throw, he can choose to succeed instead.
Heavy Armor Master. Bludgeoning, Piercing, and Slashing damage that Artorias takes is reduced by 3.
Abysswalker Artorias wears the Covenant of Artorias, allowing him to traverse Abyssal regions without dying.
Crippled Artorias's left arm is shattered. While he can wield his Greatsword in one hand, the other cannot be used to wield other weapons or shields, or grapple opponents.
Actions
Multiattack. Artorias makes three Greatsword attacks and may use his Abyssal Rage.
Greatsword. Melee Weapon Attack: +13 to hit, reach 10 ft., one target. Hit: 28 (6d6 + 7) slashing damage plus an additional 11 (3d6) slashing damage to Undead targets.
Cyclone Swing Artorias makes a Greatsword attack at each creature within ten feet of him and can move up to half his movement speed without provoking attacks of opportunity.
Abyssal Rage Artorias's corruption continually seeps from him, seeking to empower him against his foes. When he takes this action, that energy begins to build around him. Artorias's movement speed is reduced to 0 until the beginning of his next turn, and must concentrate on this ability as if it were a spell. If his concentration is unbroked at the end of his turn, his Strength and Dexterity scores increase to 30 until the beginning of his next turn after.
Reactions
Hurl Sludge When a creature moves within 5 feet of Artorias, he can fling abyssal sludge towards them. The creature must succeed on a DC 15 Dexterity saving throw or take 11 (3d6) bludgeoning damage and be knocked prone.
Legendary Actions
Artorias can take 5 legendary actions, choosing from the options below. Only one legendary action option can be used at a time and only at the end of another creature’s turn. The dragon regains spent legendary actions at the start of its turn.
Quick Stab Artorias makes a Greatsword attack at disadvantage
Move. Artorias moves up to his movement speed without provoking attacks of opportunity.
Greatsword (Costs 2 Actions). Artorias makes a Greatsword attack
Leaping Pounce (Costs 3 Actions). Artorias crouches before flinging himself into the air, moving up to twice his movement speed without provoking attacks of opportunity. If he lands within five feet of another creature, he can make a Greatsword attack at that creature with advantage.
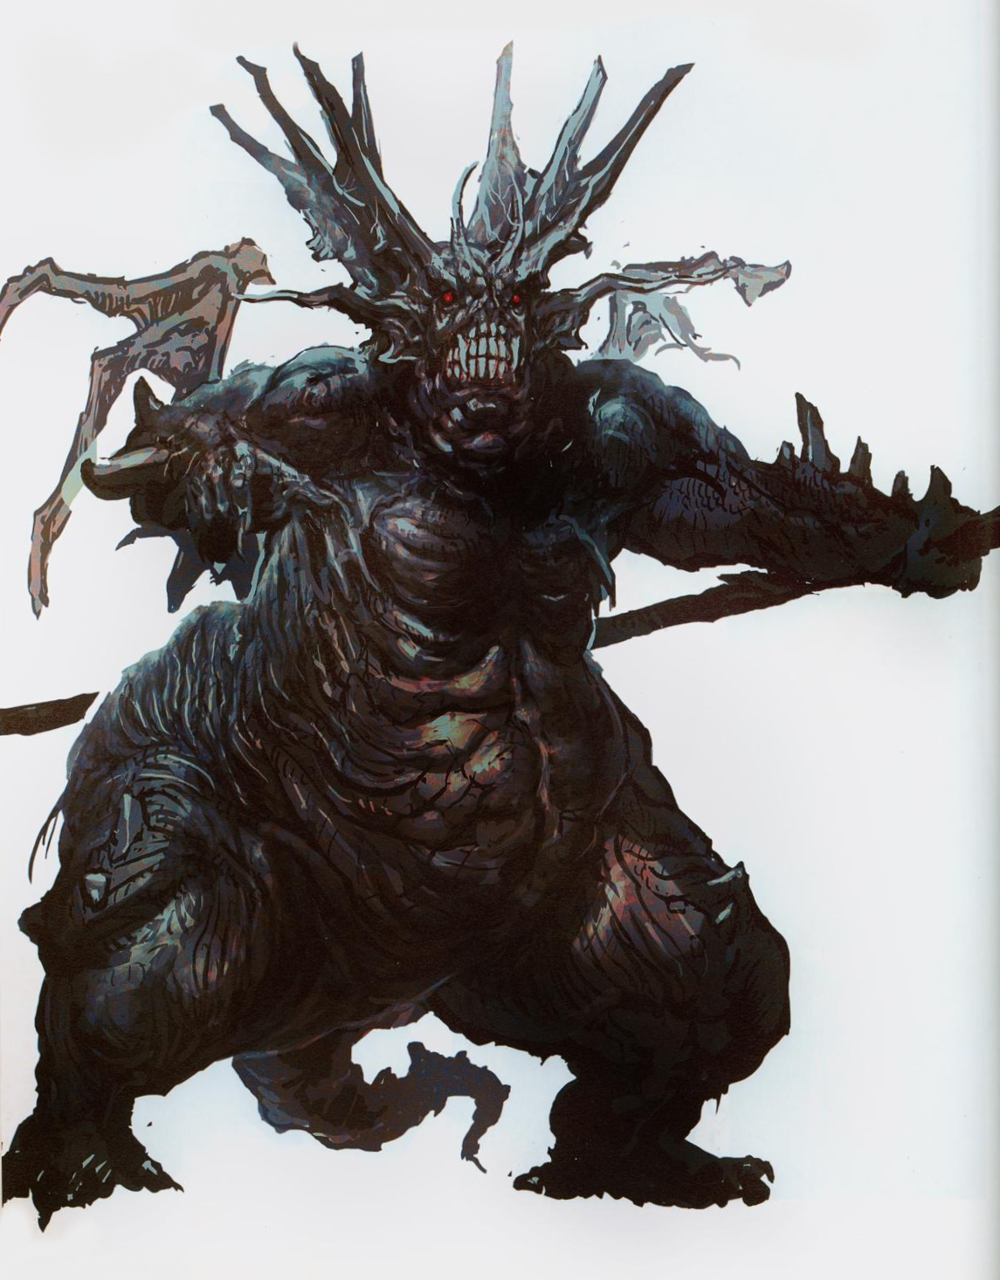
Asylum Demon
Huge fiend(demon), chaotic evil
- Armor Class 9
- Hit Points 149 (13d12+65)
- Speed 30 ft.
STR DEX CON INT WIS CHA 18 (+4) 8 (-1) 20 (+5) 9 (-1) 12 (+1) 10 (+0)
- Senses Passive Perception 11
- Languages -
- Challenge 4 (1,100 souls)
Brute. A melee weapon this creature wields deals one extra die of damage when the demon hits with it.
Siege Monster. The demon deals double damage to objects and structures.
Actions
Demon’s Greathammer. Melee Weapon Attack: +7, reach 10 ft., one target. Hit: 26 (4d10 + 4) slashing
Ground Slam (Recharge 5-6). The demon leaps into the air and comes crashing down, sending out a shockwave around it. Each creature within five feet of the demon must succeed at a DC 13 Dexterity saving throw or take 14 (4d6) bludgeoning damage. A creature takes half damage on a success.

Balder Knight
Medium undead, lawful neutral
- Armor Class 16 (breastplate)
- Hit Points 78 (12d8+24)
- Speed 30 ft.
STR DEX CON INT WIS CHA 15 (+2) 16 (+3) 14 (+2) 10 (+0) 12 (+1) 8 (-1)
- Senses Passive Perception 11
- Languages -
- Challenge 3 (700 souls)
Actions
Multiattack. The Balder Knight makes two rapier attacks.
Rapier. Melee Weapon Attack: +4, reach 5 ft., one target. Hit: 7 (1d8+2) slashing
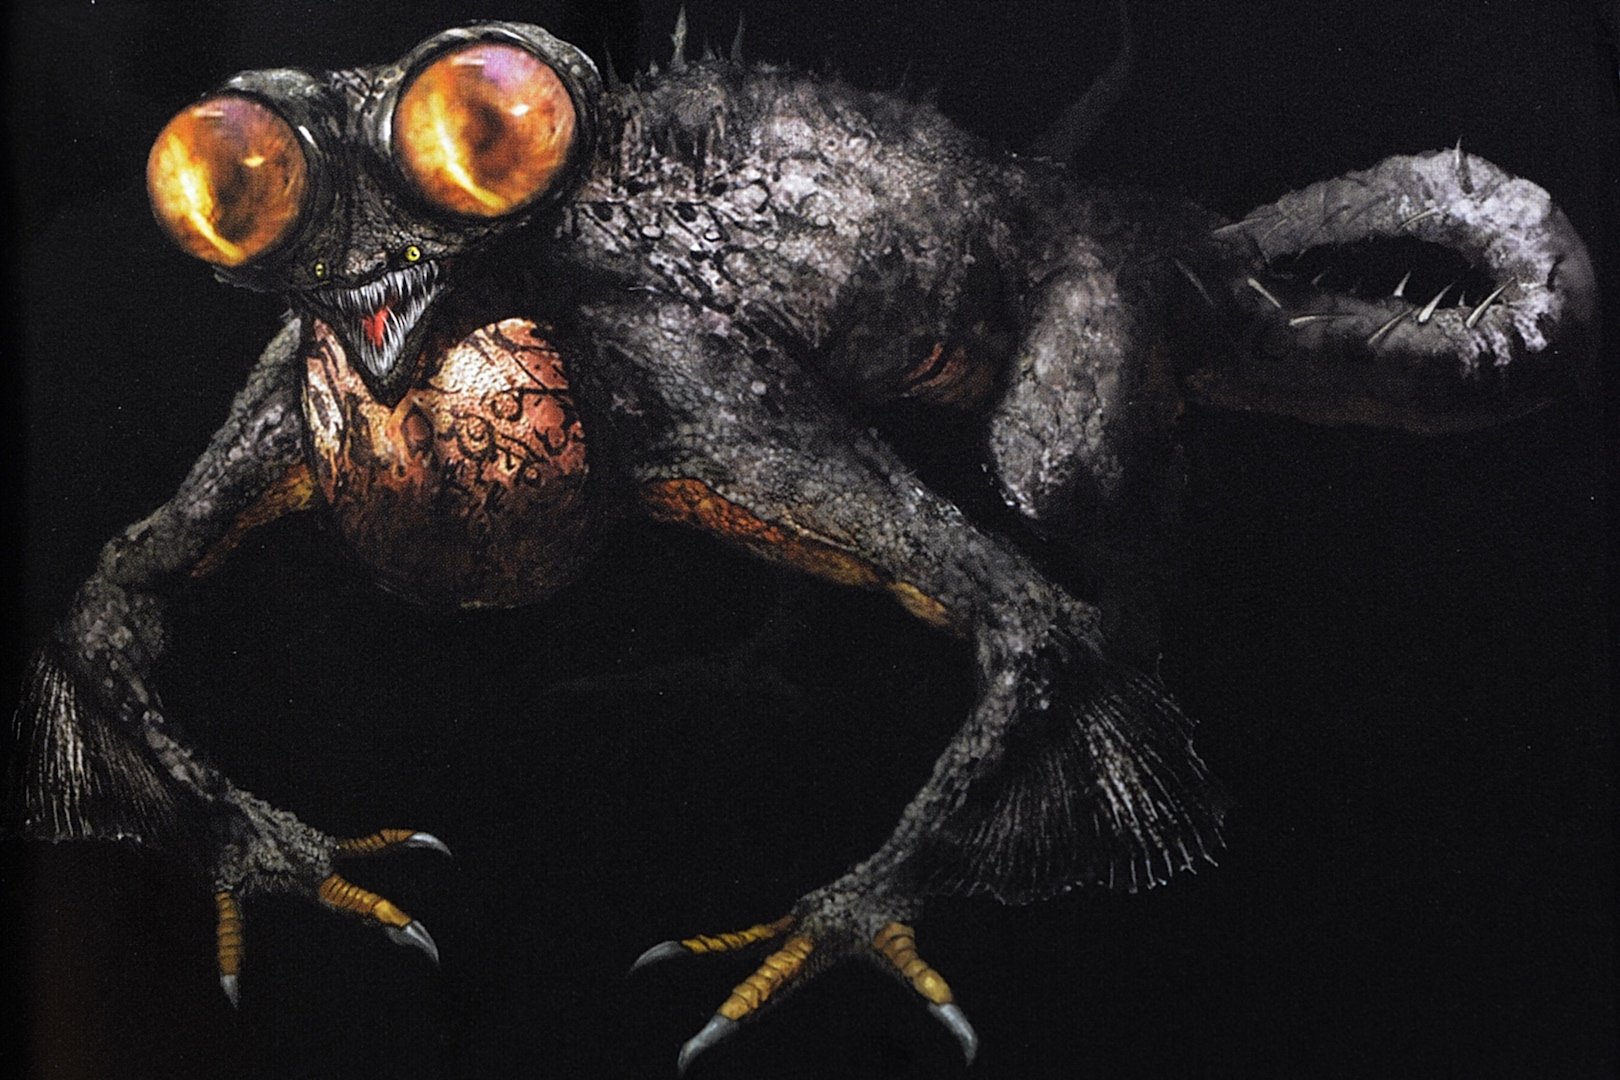
Basilisk
Medium monstrosity, unaligned
- Armor Class 15
- Hit Points 45 (7d8+14)
- Speed 30 ft.
STR DEX CON INT WIS CHA 14 (+2) 12 (+1) 15 (+2) 2 (-4) 16 (+3) 7 (-2)
- Senses Darkvision 60 Ft., passive Perception 15
- Languages -
- Challenge 3 (700 souls)
Actions
Tail. Melee Weapon Attack: +4, reach 10 ft., one target. Hit: 5 (1d4 + 2) piercing damage.
Curse Breath (Recharge 6). The Basilisk exhales a cloud of curse-inducing spores in a 20 ft. cone. Each creature in the cone must make a DC 12 Constitution saving throw. On a failed save, the creature magically begins to turn to stone and is restrained. It must repeat the saving throw at the end of its next turn. On a success, the effect ends. On a failure, the creature is petrified until freed by the greater restoration spell or other magic. After the creature is resurrected at a bonfire, it is cursed. While cursed, the creature’s maximum hit points are halved. This curse can be lifted with a purging stone or the services of Ingward in New Londo.
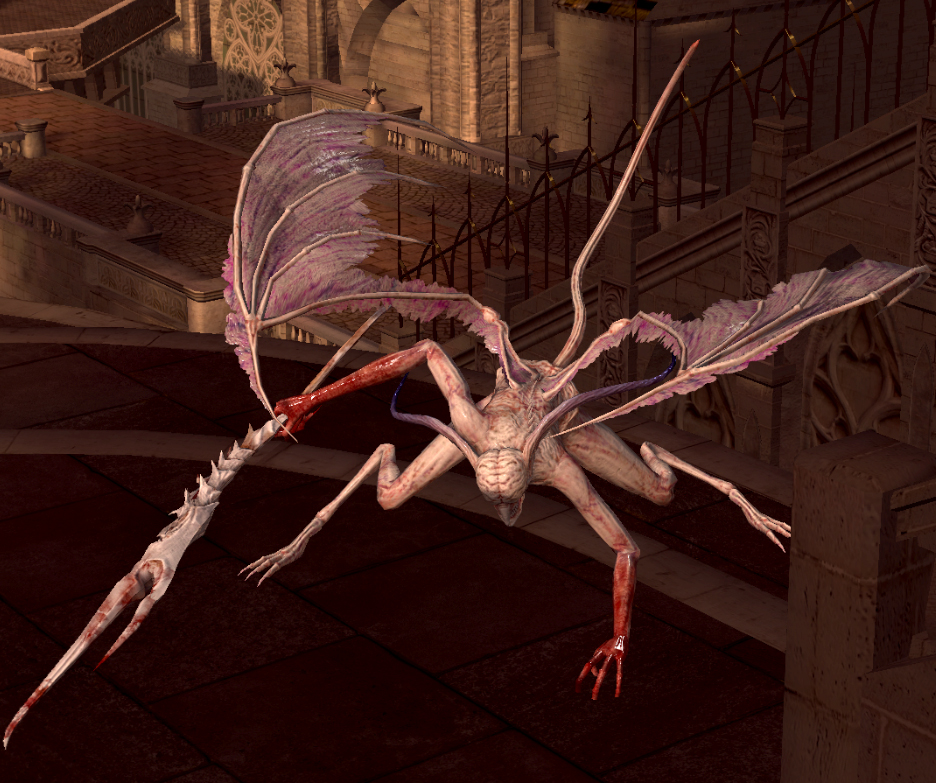
Bat Wing Demon
Medium fiend(demon), neutral
- Armor Class 14
- Hit Points 135 (18d8+24)
- Speed 30 ft., fly 60 ft.
STR DEX CON INT WIS CHA 18 (+4) 15 (+2) 16 (+3) 10 (+0) 16 (+3) 14 (+2)
- Senses Passive Perception 13
- Languages -
- Challenge 5 (1,800 souls)
Actions
Multiattack. The demon makes three lightning spear attacks
Lightning Spear. Melee Weapon Attack: +7, reach 10 ft., one target. Hit: 9 (1d8 + 4) piercing plus 5 (1d8) lightning damage
Bed of Chaos
The Bed of Chaos as a whole is immune to damage, and its true source, the malformed Witch of Izalith, is buried deep under its roots. In order to reach and slay her, the Bed of Chaos must be awoken.
Two large roots in the northeast and northwest corners of the room are surrounded by glowing magical fields in a ten foot radius around them. These fields block all ranged attacks and area of effect spells from the outside, though they do not block creatures from passing through them. The roots themselves glow red, and have AC 10 and 25 hit points. Each root destroyed causes the Bed of Chaos to gradually awaken, pulling a writing mass of scythe-like limbs made of chaotic energy from its petrified torso.
The Bed of Chaos fight operates in three phases. Destroying each root advances phases until both are destroyed.
Phase 1:
The Bed of Chaos can take up to three Legendary Actions per round. The Bed of Chaos can only use the Branch Sweep action.
Phase 2:
The Bed of Chaos can take up to four Legendary Actions per round. It gains the use of its Scythe Arc and Floor Collapse legendary actions.
Phase 3:
The Bed of Chaos can take up to five Legendary Actions per round. It gains the use of its Firestorm legendary action and a 20 foot square portion of the floor in the center collapses. A DC 12 Acrobatics or Athletics check by a creature to the south of this center hole can jump down onto a root ten feet below. On a failure, the creature falls fatally into the depths below.
The root leads up to a 40 feet long path underneath the Bed of Chaos. Every five feet, tiny petrified branches lace the pathway like cobwebs. Each five-foot square of branches has AC 10 and five hit points. A creature can also use an action to make a DC 10 Athletics check to break an adjacent square of branches. A failed attack roll or skill check does 4d4 slashing damage to the creature.
At the end of the pathway is a misbegotten maggot-like demon, what remains of the Witch of Izalith. The creature has AC 8 and 10 hit points. Once it is slain, the Bed of Chaos writhes momentarily before collapsing in on itself and dying. It and the maggot dissolve away.
Legendary Actions
The Bed of Chaos can take legendary actions, choosing from the options below. Only one legendary action option can be used at a time and only at the end of another creature’s turn. The Bed of Chaos regains spent legendary actions at the start of its turn.
-
Branch Sweep. The Bed of Chaos sweeps one of its arms in a 50-foot cone emanating from its center. Each creature in the area must succeed on a DC 20 Strength saving throw or take 10d10 bludgeoning damage and is pushed ten feet in any direction of the Bed of Chaos’ choosing. On a success the creature takes half damage and is not pushed.
-
Scythe Arc. (Phase 2 & 3 Only). One of the Bed of Chaos’ energy scythes swings across the eastern or western half of the arena. A creature in the area must succeed on a DC 20 Constitution saving throw or take 10d10 force damage. On a success the creature takes half damage.
-
Floor Collapse (Phase 2 & 3 Only). Four adjacent and unoccupied five-foot squares of floor drop into the depths below.
-
Firestorm (Costs 2 Actions, Phase 3 Only). Pillars of flame erupt from the ground at random points all around the arena. Each creature in the arena must roll a d20. On an 11 or above, the must succeed on a DC 20 Dexterity saving throw or take 10d10 fire damage on a failed save. On a success the creature takes half damage.
Bell Gargoyle
Large monstrosity, unaligned
- Armor Class 14 (natural armor)
- Hit Points 119 (1410+42)
- Speed 30 ft., fly 50 ft.
STR DEX CON INT WIS CHA 19 (+4) 11 (+0) 19 (+4) 3 (-4) 14 (+2) 1 (-5)
- Senses Passive Perception 12
- Languages -
- Challenge 5 (1,800 souls)
False Appearance. While the gargoyle remains motionless, it is indistinguishable from a normal statue.
Actions
Multiattack. The gargoyle makes two attacks: one with its halberd, and one with its tail.
Halberd. Melee Weapon Attack: +7, reach 5 ft., one target. Hit: 10 (1d10 + 4) bludgeoning damage.
Tail. Melee Weapon Attack: +7, reach 5 ft., one target. Hit: 11 (2d6 + 4) slashing damage.
Fire Breath (Recharge 5–6). The gargoyle exhales fire in a 15--foot cone. Each creature in that area must make a DC 15 Dexterity saving throw, taking 25 (6d8) fire damage on a failed save, or half as much damage on a successful one.
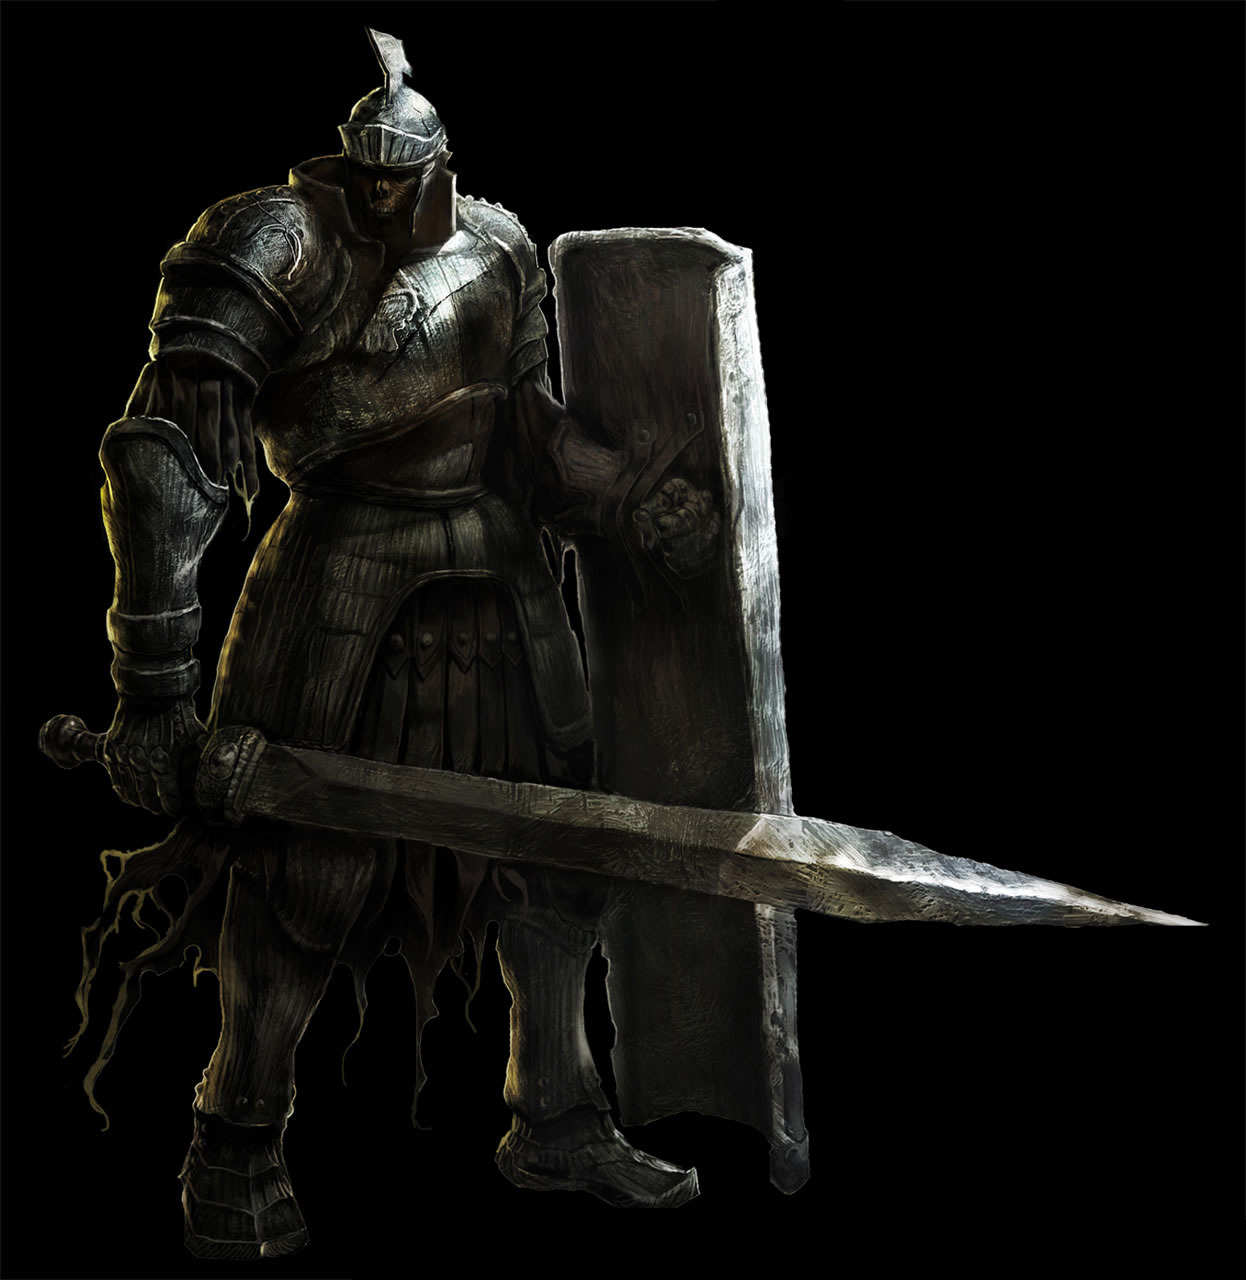
Berenike Knight
Large undead, lawful neutral
- Armor Class 20 (plate, shield)
- Hit Points 102 (12d10+36)
- Speed 30 ft.
STR DEX CON INT WIS CHA 18 (+4) 10 (+0) 16 (+3) 12 (+1) 13 (+1) 8 (-1)
- Senses Passive Perception 11
- Languages -
- Challenge 5 (1,800 souls)
Magic Resistance. The berenike knight has advantage on saving throws against spells and other magical effects.
Actions
Multiattack. The Berenike Knight makes three morningstar attacks.
Morningstar. Melee Weapon Attack: +7, reach 5 ft., one target. Hit: 13 (2d8+4) slashing
Big Hat Logan
Medium humanoid, neutral
- Armor Class 15 (mage armor)
- Hit Points 123 (19d8+38)
- Speed 30 ft.
STR DEX CON INT WIS CHA 10 (+0) 14 (+2) 14 (+2) 20 (+5) 15 (+2) 14 (+2)
- Skills Arcana +13, History +13, Religion +13
- Senses Passive Perception 12
- Languages Common
- Challenge 9 (5,000 souls)
Spellcasting. Logan is a 10th-level Spellcaster. Its Spellcasting ability is Intelligence (spell save DC 18, +9 to hit with spell attacks). Logan has the following Wizard Spells prepared:
Cantrips: soul arrow
1st Level (4 slots): mage armor, heavy soul arrow, hush
2nd Level (3 slots): magic weapon, magic shield, see invisibility;
3rd Level (2 slots): dispel magic, soul spear, soul mass
4th Level (3 slots): crystal magic weapon, crystal soul spear*, homing crystal soulmass*
5th Level (2 slots): white dragon breath*
*Logan prepares these spells only after he is found in the Duke’s Archives
Logan’s Catalyst. Logan’s Catalyst increases his spell save DC by 1 while wielding it.
Actions
Dagger. Melee Weapon Attack: +4, reach 120 ft., one target. Hit: 4 (1d4+1) slashing
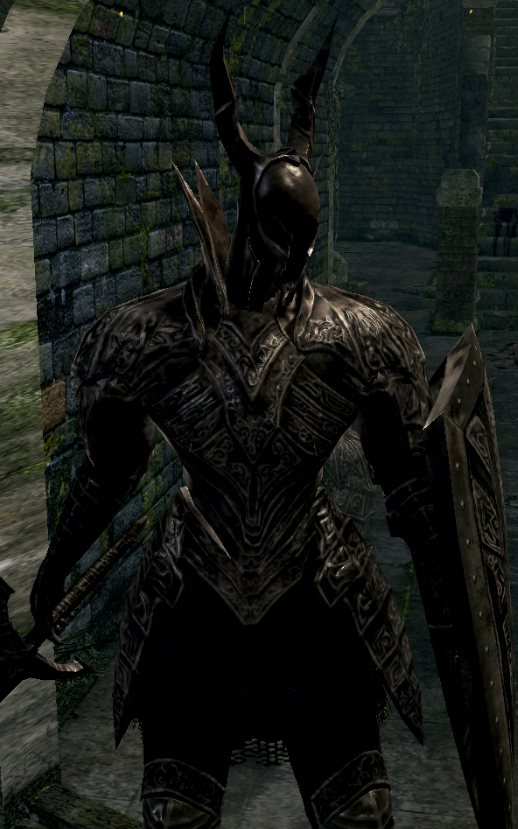
Black Knight of Gwyn
Large celestial, lawful neutral
- Armor Class 19 (plate)
- Hit Points 180 (19d10+36)
- Speed 30 ft.
STR DEX CON INT WIS CHA 20 (+5) 14 (+2) 18 (+4) 14 (+2) 16 (+3) 16 (+3)
- Damage Resistances Fire
- Saving Throws Strength +9, Constitution +8, Wisdom +7
- Skills Athletics +9, Perception +7
- Senses Passive Perception 17
- Languages Celestial
- Challenge 9 (5,000 souls)
Magical Equipment. The plate armor of the black knight grants it resistance to fire damage and a +1 bonus to AC. The weapons of the Black Knights have been reinforced with Twinkling Titanite, making them +1 magic weapons.
Legendary Resistance (1/Day). If the knight fails a saving throw, it can choose to succeed instead.
Actions
Multiattack. The Black Knight makes three attacks with its weapon.
Black Longsword. Melee Weapon Attack: +10, reach 5 ft., one target. Hit: 14 (2d8+5) slashing
Black Glaive. Melee Weapon Attack: +10, reach 10 ft., one target. Hit: 16 (2d10+5) slashing
Black Greataxe. Melee Weapon Attack: +10, reach 5 ft., one target. Hit: 18 (2d12+5) slashing
Black Greatsword. Melee Weapon Attack: +10, reach 5 ft., one target. Hit: 19 (4d6+5) slashing
Reactions
Parry. The knight adds 5 to its AC against one melee Attack that would hit it. To do so, the knight must be able to see its attacker.
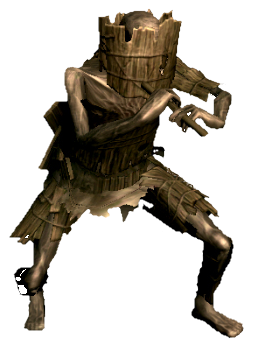
Blowdart Sniper
Small undead, chaotic evil
- Armor Class 15 (armor scraps)
- Hit Points 45 (10d6+10)
- Speed 30 ft.
STR DEX CON INT WIS CHA 10 (+0) 16 (+3) 12 (+1) 10 (+0) 14 (+2) 8 (-1)
- Senses Passive Perception 12
- Languages understands Common
- Challenge 4 (1,100 souls)
Actions
Toxic Dart. Ranged Weapon Attack: +5, range 25/100 ft., one target. Hit: 4 piercing damage and the creature must make a DC 15 Constitution saving throw or become poisoned for one minute. While poisoned this way, the creature takes 5 (1d8) poison damage at the start of their turns. At the end of each of its turns, the target can make another Constitution saving throw. On a success, they are no longer poisoned.
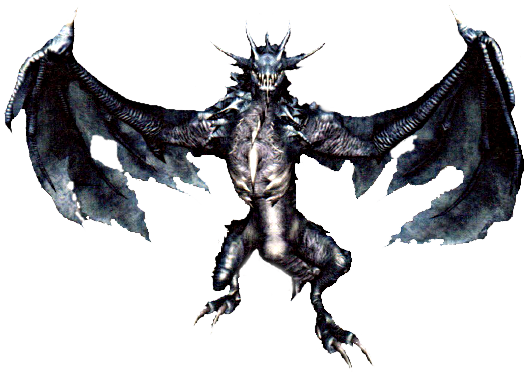
Blue Drake
Large dragon, unaligned
- Armor Class 16
- Hit Points 133 (14d10+56)
- Speed 30 ft., fly 50 ft.
STR DEX CON INT WIS CHA 21 (+5) 10 (+0) 19 (+4) 5 (-3) 13 (+1) 17 (+3)
- Damage Resistances Lightning
- Saving Throws DEX +4, CON +8
- Senses Passive Perception 11
- Languages -
- Challenge 6 (2,300 souls)
Actions
Multiattack. The drake makes two attacks, one with its bite and one with its claws.
Claw. Melee Weapon Attack: +10, reach 5 ft., one target. Hit: 12 (2d6+5) piercing plus 4 (1d6) poison damage.
Bite. Melee Weapon Attack: +10, reach 10 ft., one target. Hit: 23 (3d10+5) piercing plus 4 (1d6) poison damage.
Lightning Breath (Recharge 5–6). The drake exhales lightning in a 30-foot line that is 5 feet wide. Each creature in that line must make a DC 16 Dexterity saving throw, taking 39 (7d10) lightning damage on a failed save, or half as much damage on a successful one.
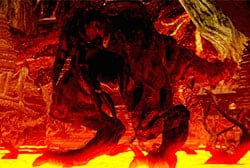
Bounding Demon of Izalith
Huge fiend(demon), chaotic neutral
- Armor Class 18
- Hit Points 216 (16d12+84)
- Speed 30 ft.
STR DEX CON INT WIS CHA 26 (+8) 15 (+2) 24 (+7) 2 (-4) 12 (+1) 5 (-3)
- Senses Passive Perception 11
- Languages -
- Challenge 11 (7,200 souls)
Actions
Multiattack. The demon makes three slam attacks.
Slam. Melee Weapon Attack: +12, reach 15 ft., one target. Hit: 25 (3d10 + 8) bludgeoning damage.
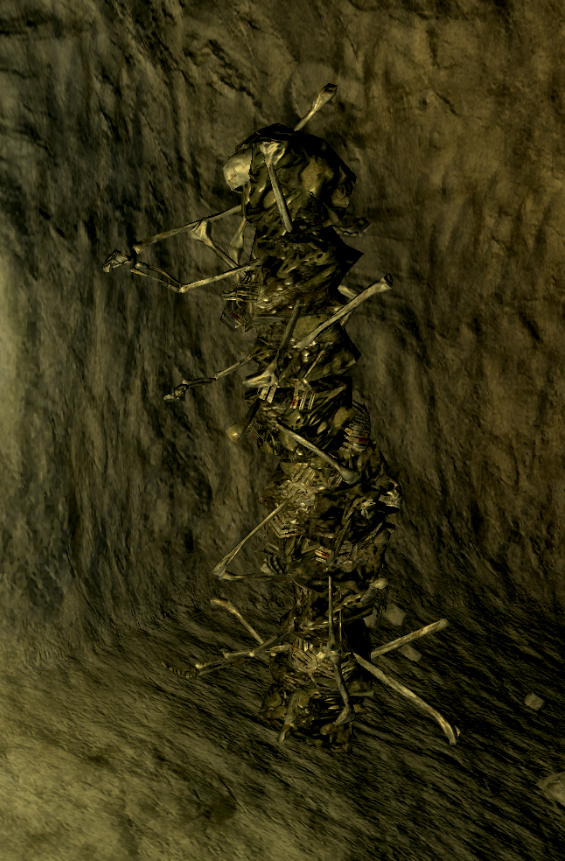
Bone Tower
Medium undead, chaotic evil
- Armor Class 13
- Hit Points 71 (11d8+22)
- Speed 0 ft., 5 ft. burrow
STR DEX CON INT WIS CHA 18 (+4) 8 (-1) 15 (+2) 6 (-2) 12 (+1) 4 (-3)
- Senses Passive Perception 11
- Languages -
- Challenge 3 (700 souls)
Actions
Multiattack. The tower makes two Bone Slam attacks
Bone Slam. Melee Weapon Attack. +6 to hit, reach 10 ft., one target. Hit: (2d10+4) bludgeoning
Bone Flail. Skeletal arms burst from the Bone Tower, lashing out at every creature within five feet of it. Each creature in that area must make a DC 13 Dexterity saving throw, taking 5d6 bludgeoning damage on a failed save, or half as much damage on a successful one.
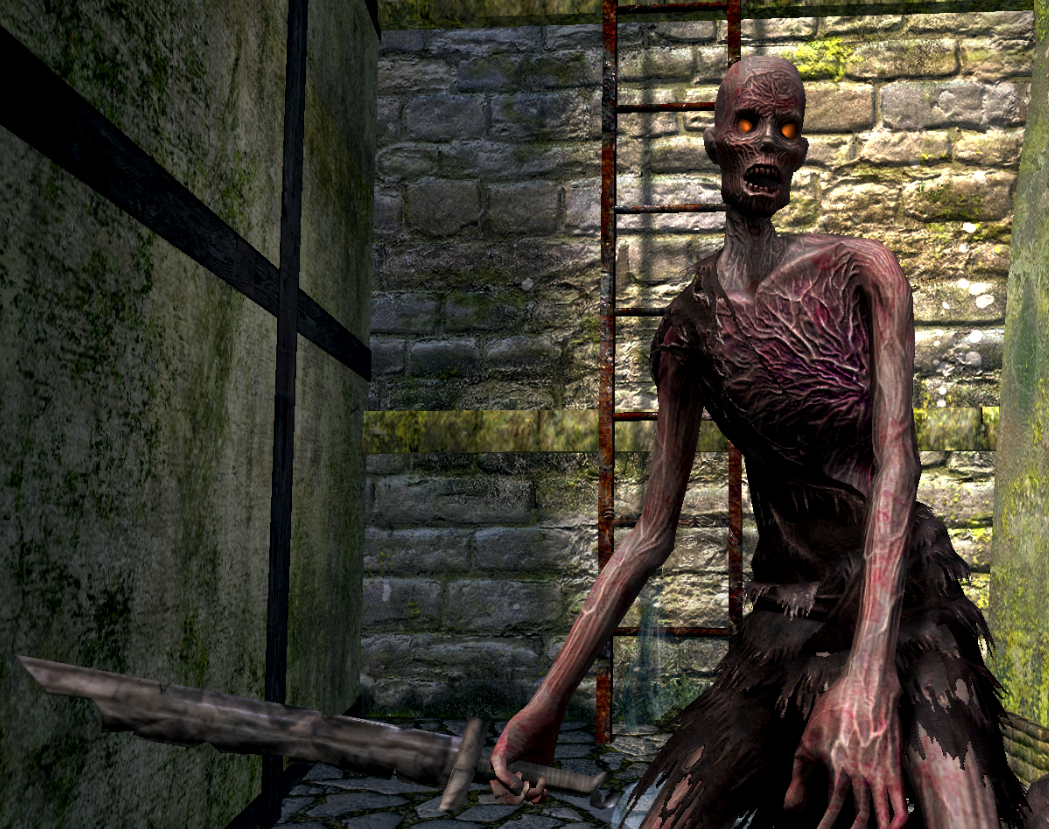
Broken Hollow
Medium undead, chaotic evil
- Armor Class 10
- Hit Points 18 (4d8)
- Speed 30 ft.
STR DEX CON INT WIS CHA 13 (+1) 10 (+0) 10 (+0) 3 (-4) 6 (-2) 5 (-3)
- Senses Passive Perception 8
- Languages -
- Challenge ⅛ (25 souls)
Actions
Broken Sword. Melee Weapon Attack: +3, reach 5 ft., one target. Hit: 4 (1d4+1) slashing
Shortbow. Melee Weapon Attack: +2, reach 5 ft., one target. Hit: 4 (1d6) piercing
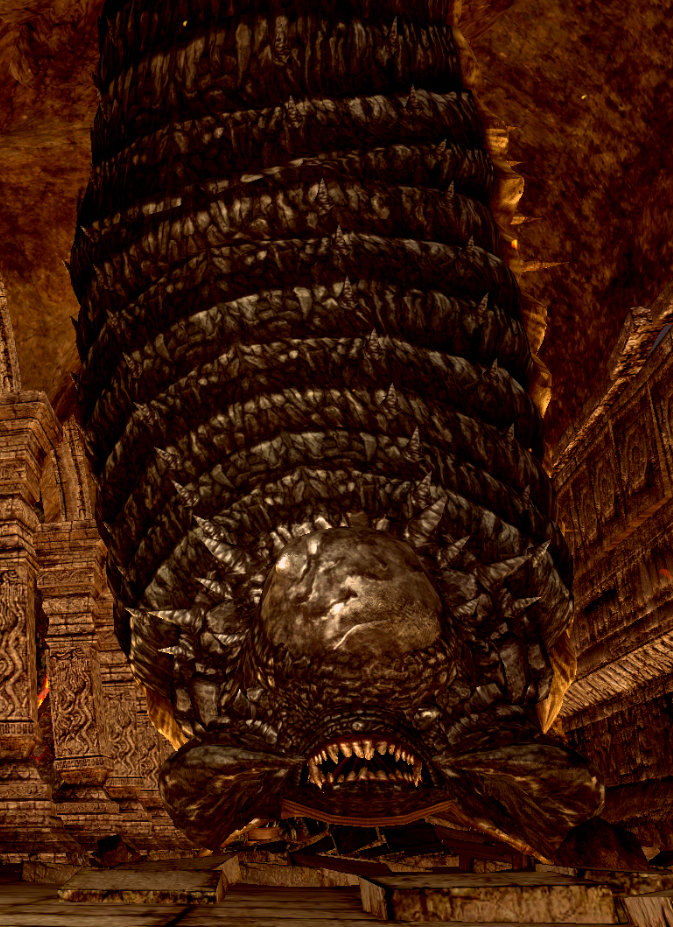
Burrowing Rockworm
Large monstrosity, chaotic neutral
- Armor Class 17
- Hit Points 136 (16d10+48)
- Speed 0 ft, 30 ft. burrow
STR DEX CON INT WIS CHA 20 (+5) 6 (-2) 17 (+3) 1 (-5) 6 (-2) 2 (-4)
- Damage Vulnerabilties Poison
- Senses Passive Perception 8
- Languages -
- Challenge 6 (2,300 souls)
Actions
Bite. Melee Weapon Attack: +8, reach 15 ft., one target. Hit: 26 (6d6+5) piercing and the target is grappled.
Spew Acid. The rockworm spews acid at a creature within 30 feet of it. Each creature in the area must make a DC 16 Dexterity saving throw. On a failure, the creature takes 21 (6d6) acid damage and if the target is wearing nonmagical metal armor, its armor is partly corroded and takes a permanent and cumulative −1 penalty to the AC it offers. The armor is destroyed if the penalty reduces its AC to 10. On a success, the creature takes half damage and its armor is not affected.
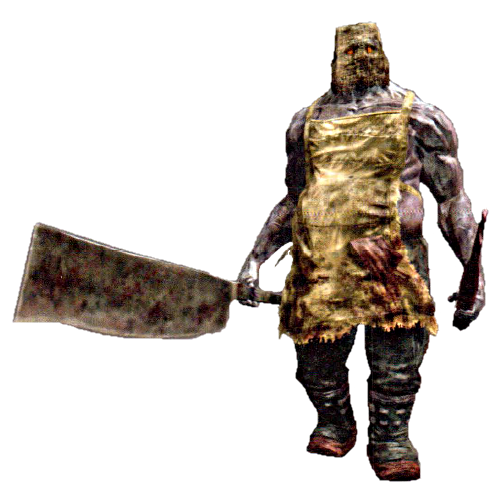
Butcher
Medium undead, chaotic good
- Armor Class 15 (natural armor)
- Hit Points 149 (23d8+46)
- Speed 30 ft.
STR DEX CON INT WIS CHA 18 (+4) 14 (+2) 15 (+2) 8 (-1) 13 (+1) 7 (-2)
- Senses Passive Perception 11
- Languages Common
- Challenge 5 (1,800 souls)
Actions
Multiattack. The Butcher makes two Butcher Knife attacks
Butcher. Knife Melee Weapon Attack: +7, reach 5 ft., one target. Hit: 13 (2d8+4) slashing and the Butcher regains 3 hit points.
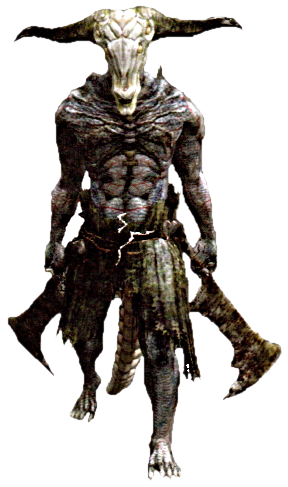
Capra Demon
Large fiend(demon), chaotic neutral
- Armor Class 15 (natural armor)
- Hit Points 152 (16d10+64)
- Speed 30 ft.
STR DEX CON INT WIS CHA 17 (+3) 14 (+2) 18 (+4) 10 (+0) 15 (+2) 12 (+1)
- Senses Passive Perception 12
- Languages -
- Challenge 6 (2,300 souls)
Pack Tactics. The Capra Demon has advantage on an Attack roll against a creature if at least one of the demons's allies is within 5 ft. of the creature and the ally isn't Incapacitated.
Actions
Multiattack. The Capra Demon makes two Demon Great Machete attacks.
Demon Great Machete. Melee Weapon Attack: +6, reach 5 ft., one target. Hit: 10 (2d6+3) slashing

Catacombs Skeleton
Medium(undead), chaotic evil
- Damage Resistances Piercing
- Damage Vulnerabilities Bludgeoning
- Armor Class 14 (armor scraps)
- Hit Points 13 (2d8+4)
- Speed 30 ft.
STR DEX CON INT WIS CHA 11 (+0) 15 (+2) 14 (+2) 6 (-2) 8 (-1) 5 (-3)
- Senses Passive Perception 9
- Languages -
- Challenge ¼ (50 souls)
Regeneration. After being slain, the skeleton returns to life with full hit points at the end of its next turn. This effect is suppressed for 24 hours if the skeleton is slain by radiant damage.
Actions
Scimitar. Melee Weapon Attack: +4, reach 5 ft., one target. Hit: 6 (1d6+2) slashing
Ceaseless Discharge
Gargantuan fiend, chaotic neutral
- Armor Class 12
- Hit Points 333 (18d20+144)
- Speed 15 ft.
STR DEX CON INT WIS CHA 28 (+9) 5 (-3) 26 (+8) 10 (+0) 15 (+2) 3 (-4)
- Damage Immunities Fire
- Damage Vulnerabilties Special
- Senses passive Perception 12
- Senses Passive Perception 10
- Languages Common
- Challenge 14 (11,500 souls)
Cursed Existence. The Ceaseless Discharge is in constant pain due to his birth and upbringing. The Ceaseless Discharge is vulnerable to all damage types other than fire. While his sister’s magic has granted him immunity to the flames of Izalith, the fire magic writhing inside of him exposes his vulnerable flesh to the world.
Actions
Multiattack. The Ceaseless Discharge makes two flame slam attacks.
Flame Slam. The Ceaseless Discharge slams one of its massive arms down onto the plateau in a 50 foot line originating from himself. Each creature in the area must succeed on a DC 15 Dexterity saving throw or take 35 (10d6) fire damage.
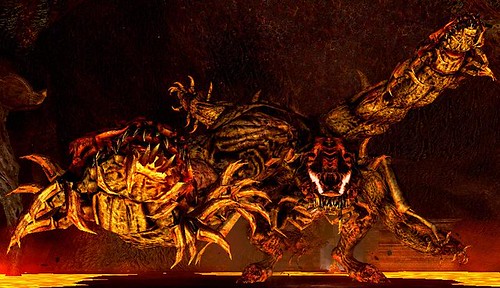
Centipede Demon
Huge fiend(demon), chaotic evil
- Armor Class 15
- Hit Points 275 (22d12+132)
- Speed 40 ft., 40 ft. climb
STR DEX CON INT WIS CHA 24 (+7) 14 (+2) 22 (+6) 10 (+0) 15 (+2) 17 (+3)
- Damage Immunities Fire
- Senses Passive Perception 12
- Languages Common
- Challenge 12 (8,400 souls)
Loathsome Limbs. Whenever the demon takes at least 20 bludgeoning or slashing damage at one time, roll a d20 to determine what else happens to it:
1-5: Nothing occurs
6-10: The demon’s right arm is severed
11-15: The demon’s tail is severed
16-20: One of the demon’s claws is severed
If the demon is reduced to 0 hit points, all parts of it die. Until then, a severed part acts on the demon’s initiative and has its own action and movement. A severed part has AC 15 and 50 hit points.; The severed tail can make one tail attack per turn and has a speed of 15 feet and can make a tail attack on its turn. The demon loses its tail attack when its tail is severed.; The severed arm has a speed of 10 feet and can make a slam claw attack on its turn.; The demon loses its tail attack when its tail is severed.; The severed claw has a speed of 10 feet and can make a claw attack on its turn at disadvantage.
Actions
Multiattack. The Centipede Demon makes four attacks; a bite, claw, tail and slam attack
Bite. Melee Weapon Attack: +11, reach 15 ft., one target. Hit: 23 (3d10+6) bludgeoning plus 1d8 fire.
Claw. Melee Weapon Attack: +11, reach 15 ft., one target. Hit: 17 (3d6+6) bludgeoning plus 3d6 fire.
Slam. Melee Weapon Attack: +11, reach 15 ft., one target. Hit: 20 (3d8+6) bludgeoning plus 3d6 fire.
Tail. Melee Weapon Attack: +11, reach 15 ft., one target. Hit: 26 (3d12+6) bludgeoning plus 3d6 fire.
Chained Prisoner
Medium aberration, chaotic evil
- Armor Class 18 (natural armor)
- Hit Points 190 (20d8+100)
- Speed 30 ft.
STR DEX CON INT WIS CHA 18 (+4) 10 (+0) 20 (+5) 4 (-3) 12 (+1) 7 (-3)
- Senses Passive Perception 11
- Languages -
- Challenge 9 (1,800 souls)
Actions
Multiattack. The Chained Prisoner makes two attacks, a Ball & Chain attack and an Embedded Spear
Ball & Chain. Melee Weapon Attack: +8, reach 20 ft., one target. Hit: 25 (6d6+4) bludgeoning damage
Embedded Spear Melee Weapon Attack: +8, reach 10 ft., one target. Hit: 32 (8d6+4) piercing damage
Chain Whirl The Chained Prisoner makes a Ball & Chain attack at disadvantage against each creature within 20 feet of it.
Spear Charge The Chained Prisoner charges up to its movement speed directly towards a creature at least 10 feet away from it without provoking attacks of opportunity and makes an Embedded Spear attack at it at advantage.

Channeler
Medium aberration, neutral evil
- Armor Class 14 (mage armor)
- Hit Points 130 (20d8+40)
- Speed 30 ft.
STR DEX CON INT WIS CHA 13 (+1) 12 (+1) 15 (+2) 18 (+4) 16 (+3) 11 (+0)
- Senses Passive Perception 13
- Languages -
- Challenge 5 (1,800 souls)
Spellcasting: The Channeler is a 4th-level Spellcaster. Its Spellcasting ability is Intelligence (spell save DC 15, +7 to hit with spell attacks). The Channeler has the following Wizard Spells prepared:
Cantrips: soul arrow
1st Level (4 slots): mage armor, heavy soul arrow, aural decoy
2nd Level (3 slots): magic weapon, see invisibility
Actions
Channeler’s Trident. Melee Weapon Attack: +7, reach 5 ft., one target. Hit: 9 (1d6+4) piercing
Bolster Allies (Recharge After a Long Rest). Each ally of the channeler is empowered for the next minute. Each creature bolstered this way receives a +4 bonus to their weapon damage rolls.
Teleport. The channeler magically teleports, along with any equipment it is wearing or carrying, up to 60 feet to an unoccupied space it can see.

Chaos Bug
Tiny fiend(demon), chaotic neutral
- Armor Class 10
- Hit Points 4 (1d4)
- Speed 20 ft.
STR DEX CON INT WIS CHA 5 (-3) 11 (+0) 10 (+0) 2 (-4) 13 (+1) 1 (-5)
- Senses Passive Perception 11
- Languages -
- Challenge 0 (0 souls)
Sunlight Maggot (Variant). The Sunlight Maggot sheds bright light in a 20-foot radius and dim light for an additional 20 feet.
Actions
Bite. Melee Weapon Attack: -1, reach 5 ft., one target. Hit: 1 piercing

Chaos Eater
Large fiend(demon), chaotic neutral
- Armor Class 15 (natural armor)
- Hit Points 170 (20d10+60)
- Speed 30 ft.
STR DEX CON INT WIS CHA 19 (+4) 12 (+1) 16 (+3) 10 (+0) 15 (+2) 13 (+1)
- Senses Passive Perception 12
- Languages -
- Challenge 7 (2,900 souls)
Corrosive Form. A creature that touches the chaos eater or hits it with a melee Attack while within 5 feet of it takes 4 (1d8) acid damage. Any nonmagical weapon made of metal or wood that hits the chaos eater corrodes. After dealing damage, the weapon takes a permanent and cumulative -1 penalty to Damage Rolls. If its penalty drops to -5, the weapon is destroyed. Nonmagical Ammunition made of metal or wood that hits the chaos eater is destroyed after dealing damage. The chaos eater can eat through 2-inch-thick, nonmagical wood or metal in 1 round.
Actions
Multiattack. The demon makes two attacks, one with its slam and one with its bite..
Slam. Melee Weapon Attack: +7, reach 10 ft., one target. Hit: 13 (2d8 + 4) bludgeoning damage.
Bite. Melee Weapon Attack: +7, reach 5 ft., one target. Hit: 15 (2d10 + 4) bludgeoning damage and the target is grappled.
Swallow. The chaos eater makes one bite attack against a Medium or smaller creature it is grappling. If the attack hits, the target takes the bite’s damage, the target is swallowed, and the grapple ends. While swallowed, the creature is blinded and restrained, it has total cover against attacks and other effects outside the chaos eater, and it takes 28 (8d6) acid damage at the start of each of the chaos eater’s turns.

Cragspider
Medium monstrosity, unaligned
- Armor Class 13
- Hit Points 97 (15d8+30)
- Speed 30 ft., fly(hover) 10 ft.
STR DEX CON INT WIS CHA 15 (+2) 12 (+1) 14 (+2) 4 (-3) 12 (+1) 6 (-2)
- Senses Passive Perception 11
- Languages -
- Challenge 3 (700 souls)
Actions
Claw. Melee Weapon Attack: +4, reach 5 ft., one target. Hit: 7 (1d8+2) slashing
Fire Breath (Recharge 6). The cragspider exhales fire in a 20-foot cone. Each creature in that area must make a DC 12 Dexterity saving throw, taking 11 (3d6) fire damage on a failed save, or half as much damage on a successful one.

Chaos Witch Quelaag
Large humanoid fiend, chaotic neutral
- Armor Class 15
- Hit Points 237 (25d10+100)
- Speed 30 ft.
STR DEX CON INT WIS CHA 20 (+5) 15 (+2) 18 (+4) 13 (+1) 15 (+2) 17 (+3)
- Damage Resistances Fire
- Senses Passive Perception 12
- Languages Common, Primordial
- Challenge 9 (5,000 souls)
Magical Weapon. Quelaag's weapon attacks are magical.
Actions
Multiattack. Quelaag makes two furysword attacks and a hurl lava attack.
Furysword. Melee Weapon Attack: +9 to hit, reach 10 ft., one target. Hit: 14 (2d8+5) piercing plus 5 (1d8) fire damage.
Hurl Lava. Ranged Weapon Attack: +9 to hit, range 20 ft., one target. Hit: 11 (3d6) fire damage. Even if the attack misses, the lava remains on the ground under the target for a minute. Any creature who enters the lava or ends their turn in it takes 11 (3d6) fire damage.
Lava Spray (Recharge 5-6). Quelaag’s spider mouth belches lava in a 15 foot cone. Each creature in that area must make a DC 16 Dexterity saving throw, taking 28 (8d6) fire damage on a failed save, or half as much damage on a successful one. The lava remains on the ground for a minute. Any creature who enters the lava or ends their turn in it takes 11 (3d6) fire damage.
Chaos Detonation. Quelaag’s legs rear back and slam down, creating a magical explosion in a 15 foot radius circle. Each creature in that area must make a DC 16 Constitution saving throw, taking 35 (10d6) force damage on a failed save, or half as much damage on a successful one.
Legendary Actions
Quelaag can take 3 legendary actions, choosing from the options below. Only one legendary action option can be used at a time and only at the end of another creature’s turn. Quelaag regains spent legendary actions at the start of its turn.
Attack. Quelaag makes a Furysword attack
Move. Quelaag moves up to her speed. This movement does not provoke attacks of opportunity.
Hurl Lava (Costs 2 Actions). Quelaag makes a Hurl Lava action.

Crossbreed Priscilla
Large celestial dragon, neutral good
- Armor Class 16
- Hit Points 228 (24d10+96)
- Speed 30 ft.
STR DEX CON INT WIS CHA 22 (+6) 16 (+3) 19 (+4) 14 (+2) 18 (+4) 16 (+3)
- Skills Stealth +7, Perception +8
- Senses passive Perception 18
- Languages Common, Celestial, Draconic
- Challenge 12 (8,400 souls)
Legendary Resistance (3/Day). If Priscilla fails a saving throw, it can choose to succeed instead.
Magical Tail. If Priscilla takes more than 60 damage in a single turn, her tail is severed and it dissolves away leaving Priscilla’s Dagger in its wake.
Innate Spellcasting. Priscilla’s innate spellcasting ability is Wisdom (spell save DC 16, +8 to hit with spell attacks). Priscilla can innately cast the following spells, requiring no material components:
At will: greater invisibility, scrying
Actions
Multiattack. Priscilla makes two greatscythe attacks.
Greatscythe. Melee Weapon Attack: +10 to hit, reach 10 ft., one target. Hit: 24 (3d10+7) piercing
Lifehunt (Recharge 6). Priscilla makes a Greatscythe attack against a creature within range. On a hit, the creature must succeed on a DC 14 Constitution saving throw or be reduced to 0 hit points immediately. If the target is Human, the creature is instead reduced to 1 hit point and becomes hollow.
Legendary Actions
Priscilla can take 3 legendary actions, choosing from the options below. Only one legendary action option can be used at a time and only at the end of another creature's turn. Priscilla regains spent legendary actions at the start of its turn.
Hide. Priscilla makes a Hide check as long as she is invisible
Slash. Priscilla makes a greatscythe attack.
Spell. Priscilla casts a spell with a casting time of one action.

Crowspawn of Velka
Medium monstrosity, chaotic neutral
- Armor Class 15
- Hit Points 110 (13d8+52)
- Speed 10 ft.
STR DEX CON INT WIS CHA 17 (+3) 15 (+2) 18 (+4) 8 (-1) 13 (+1) 8 (-1)
- Damage Immunities Poison
- Condition Immunities Poisoned
- Senses Passive Perception 11
- Languages -
- Challenge 5 (1,800 souls)
Magic Resistance. The crowspawn has advantage on saving throws against spells and other magical effects.
Actions
Multiattack. The crowspawn makes two attacks: one with its beak and one with its talons.
Beak. Melee Weapon Attack: +6, reach 5 ft., one target. Hit: 10 (2d6 + 3) piercing damage.
Talons. Melee Weapon Attack: +6, reach 5 ft., one target. Hit: 14 (2d10 + 3) slashing damage.
Stunning Screech (1/Day). The crowspawn emits a horrific screech. Each creature within 20 feet of it that can hear it and that isn't a demon must succeed on a DC 14 Constitution saving throw or be stunned until the end of the crowspawn's next turn.
Crystal Golem
Large construct, unaligned
- Armor Class 17
- Hit Points 126 (12d10+60)
- Speed 30 ft.
STR DEX CON INT WIS CHA 20 (+5) 10 (+0) 20 (+5) 5 (-3) 10 (+0) 5 (-3)
- Damage Immunities Slashing, Poison
- Damage Vulnerabilities Bludgeoning
- Condition Immunities Poisoned
- Senses Passive Perception 10
- Languages -
- Challenge 5 (1,800 souls)
Magic Resistance. The golem has advantage on saving throws against spells and other magical effects.
Actions
Multiattack. The Golem makes two slam attacks
Slam. Melee Weapon Attack: +8, reach 10 ft., one target. Hit: 14 (2d8+5 slashing)
Crystal Explosion (Recharge 6). The golem slams it’s fist into the ground and summons a burst of crystals in a 10 foot circle around it. Each other creature that within 10 feet of the golem must make a Dexterity saving throw. The creature takes 18 (4d8) bludgeoning damage on a failure and half as much on a success.
Crystal Knight
Medium(undead), chaotic evil
- Armor Class 19 (crystal half plate, shield)
- Hit Points 130 (20d8+40)
- Speed 30 ft.
STR DEX CON INT WIS CHA 19 (+4) 12 (+1) 15 (+2) 10 (+0) 14 (+2) 8 (-1)
- Damage Resistances Force
- Senses Passive Perception 12
- Languages -
- Challenge 6 (2,300 souls)
Crystal Weapons. The knight wields a crystal longsword, giving it a +3 bonus to damage rolls with the (included in its attack already). If the Crystal Knight rolls a 1 on an attack roll, this bonus is decreased by 1. If the bonus is decreased to 0, the knight’s weapon breaks and becomes unusable.
Actions
Multiattack. The knight makes three crystal longsword attacks.
Crystal Longsword. Melee Weapon Attack: +10, reach 5 ft., one target. Hit: 12 (1d8+7 slashing)
Crystal Soldier
Medium(undead), chaotic evil
- Armor Class 16 (broken chain mail, shield)
- Hit Points 39 (6d8+12)
- Speed 30 ft.
STR DEX CON INT WIS CHA 16 (+3) 12 (+1) 15 (+2) 3 (-4) 9 (-1) 1 (-5)
- Senses Passive Perception 9
- Languages -
- Challenge 3 (700 souls)
Crystal Weapons. The knight wields a crystal longsword, giving it a +3 bonus to damage rolls with the (included in its attack already). If the Crystal Knight rolls a 1 on an attack roll, this bonus is decreased by 1. If the bonus is decreased to 0, the knight’s weapon breaks and becomes unusable.
Actions
Multiattack. The soldier makes two crystal longsword attacks.
Crystal Longsword. Melee Weapon Attack: +8, reach 5 ft., one target. Hit: 11 (1d8+6 slashing)
Darkroot Hydra
Huge monstrosity, unaligned
- Armor Class 15 (natural armor)
- Hit Points 172 (15d12+75)
- Speed 30 ft., swim 30 ft.
STR DEX CON INT WIS CHA 20 (+5) 12 (+1) 20 (+5) 2 (-4) 10 (0) 7 (-2)
- Skills Perception +6, Perception +6
- Senses Darkvision 60 ft., Passive Perception 16
- Languages -
- Challenge 9 (5000 souls)
Hold Breath. The hydra can hold its breath for 1 hour.
Multiple Heads. The hydra has five heads. While it has more than one head, the hydra has advantage on saving throws against being blinded, charmed, deafened, frightened, stunned, and knocked unconscious. Whenever the hydra takes 25 or more damage in a single turn, one of its heads dies. If all its heads die, the hydra dies. At the end of its turn, it grows two heads for each of its heads that died since its last turn, unless it has taken fire damage since its last turn. The hydra regains 10 hit points for each head regrown in this way.
Reactive Heads. For each head the hydra has beyond one, it gets an extra reaction that can be used only for opportunity attacks.
Wakeful. While the hydra sleeps, at least one of its heads is awake.
Actions
Multiattack. The hydra makes as many bite attacks as it has heads. It can also use Water Jet attacks in place of any number of bite attacks.
Bite. Melee Weapon Attack: +8 to hit, reach 10 ft., one target. Hit: (1d10 + 5) piercing damage.
Water Jet. Ranged Weapon Attack: +8 to hit, range 60/200 ft., one target. Hit: (2d10+1) bludgeoning damage
Black Hydra
Huge monstrosity, unaligned
- Armor Class 18 (natural armor)
- Hit Points 253 (22d12+110)
- Speed 30 ft., swim 30 ft.
STR DEX CON INT WIS CHA 22 (+6) 12 (+1) 20 (+5) 2 (-4) 10 (0) 7 (-2)
- Skills Perception +6, Perception +6
- Senses Darkvision 60 ft., Passive Perception 16
- Languages -
- Challenge 12 (5000 souls)
Hold Breath. The hydra can hold its breath for 1 hour.
Multiple Heads. The hydra has five heads. While it has more than one head, the hydra has advantage on saving throws against being blinded, charmed, deafened, frightened, stunned, and knocked unconscious. Whenever the hydra takes 25 or more damage in a single turn, one of its heads dies. If all its heads die, the hydra dies. At the end of its turn, it grows two heads for each of its heads that died since its last turn, unless it has taken fire damage since its last turn. The hydra regains 10 hit points for each head regrown in this way.
Reactive Heads. For each head the hydra has beyond one, it gets an extra reaction that can be used only for opportunity attacks.
Wakeful. While the hydra sleeps, at least one of its heads is awake.
Actions
Multiattack. The hydra makes as many bite attacks as it has heads. It can also use Water Jet attacks in place of any number of bite attacks.
Bite. Melee Weapon Attack: +9 to hit, reach 10 ft., one target. Hit: 17 (2d10 + 6) piercing damage.
Water Jet. Ranged Weapon Attack: +8 to hit, range 60/200 ft., one target. Hit: 12 (2d10+1) bludgeoning
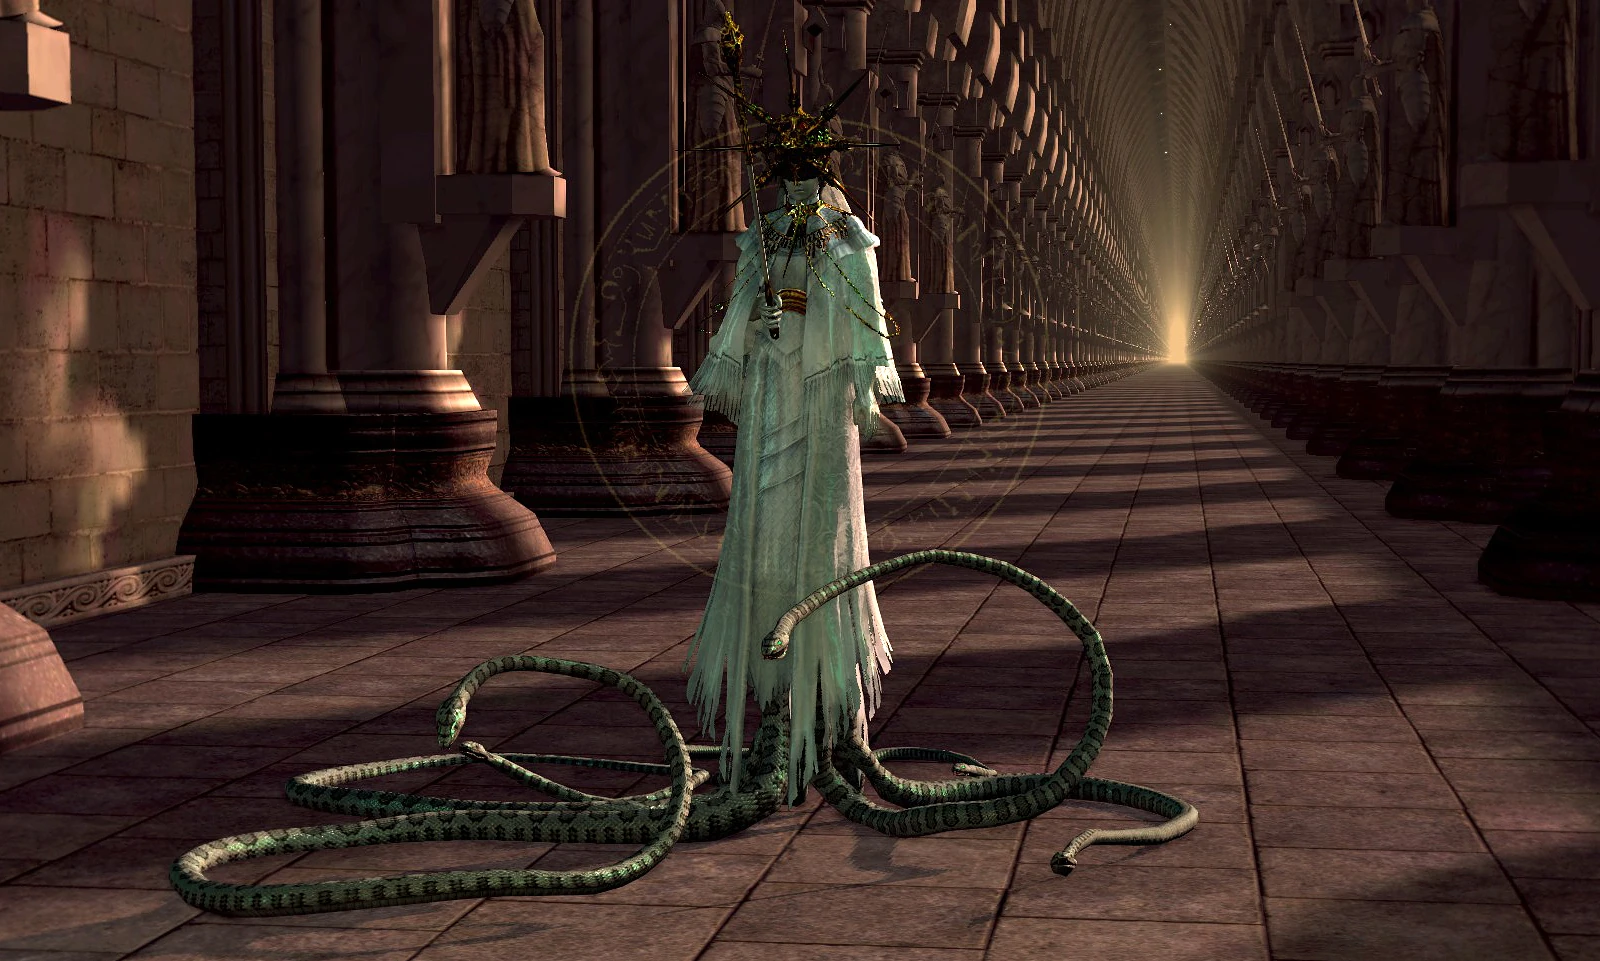
Dark Sun Gwyndolin
Medium Celestial, lawful neutral
- Armor Class 15
- Hit Points 187 (22d8+88)
- Speed 20 ft.
STR DEX CON INT WIS CHA 8 (-1) 20 (+5) 19 (+4) 21 (+5) 22 (+6) 18 (+4)
- Skills Arcana +9, Religion +15, Perception +16
- Saving Throws Dexterity +10, Wisdom +10, Constitution +8
- Resistances Force and Bludgeoning, Piercing, and Slashing damage from non-magical attacks.
- Senses passive Perception 26
- Languages Celestial
- Challenge 13 (10,0000 souls)
Legendary Resistance (3/Day). If Gwyndolin fails a saving throw, it can choose to succeed instead.
Magic Weapons. Gwydolin’s Darkmoon Bow grants him a +3 bonus to attack and damage rolls, and deals force damage instead of Piercing. Gwyndolin adds his Intelligence bonus to damage rolls with his bow.
Innate Spellcasting. Gwyndolin’s innate spellcasting ability is Charisma (spell save DC 19, +11 to hit with spell attacks). Gwyndolin can innately cast the following spells, requiring no material components;
At will*: homing soulmass, soul spear, heavy soul arrow
*Gwyndolin casts all of his spells at 5th level
Actions
Multiattack. Gwyndolin makes three Darkmoon Bow attacks.
Darkmoon Bow. Ranged Weapon Attack: +13 to hit, range 80/320 ft., one target. Hit: 14 (1d6+10) force
Legendary Actions
Gwyndolin can take 3 legendary actions, choosing from the options below. Only one legendary action option can be used at a time and only at the end of another creature's turn. Gwyndolin regains spent legendary actions at the start of its turn.
Moonlight Strike. Gwyndolin makes a Darkmoon Bow attack
Spell (Costs 2 Actions). Gwyndolin casts a spell
Teleport. Gwyndolin teleports up to 60 feet to a point he can see within range.

Darkwraith
Medium humanoid, chaotic evil
- Armor Class 16 (18, shield)
- Hit Points 172 (23d8+69)
- Speed 30 ft.
STR DEX CON INT WIS CHA 19 (+4) 14 (+2) 16 (+3) 13 (+1) 11 (+0) 18 (+4)
- Senses Passive Perception 10
- Languages -
- Challenge 7 (2,900 souls)
Dark Hand. The Dark Hand’s shield can be donned or doffed as a bonus action. The Darkwraith gains a +2 bonus to Attack and Damage Rolls made with its Darksword attack (included in the attack). This bonus increases to +3 against Human enemies.
Actions
Multiattack. The Darkwraith makes three Darksword attacks.
Darksword (One-Handed). Melee Weapon Attack: +9, reach 5 ft., one target. Hit: 11 (1d8+6) slashing
Darksword (Two-Handed). Melee Weapon Attack: +9 to hit, reach 5 ft., one target. Hit: 12 (1d10+6) slashing
Lifedrain (Recharge 6). Melee Weapon Attack: +10, reach 5 ft., one target. Hit: 36 (8d8) necrotic damage and the darkwraith regains hit points equal to half the damage dealt. If the target is human, the target becomes Hollow and the darkwraith instead regains hit points equal to the full amount of damage dealt.
Demon Firesage
Huge fiend(demon), chaotic neutral
- Armor Class 14
- Hit Points 283 (21d12+147)
- Speed 30 ft.
STR DEX CON INT WIS CHA 23 (+6) 8 (-1) 25 (+7) 10 (+0) 12 (+1) 16 (+3)
- Senses Passive Perception 11
- Languages Common
- Challenge 12 (8,400 souls)
Brute. A melee weapon this creature wields deals one extra die of damage when the demon hits with it.
Siege Monster. The demon deals double damage to objects and structures.
Heated Body. A creature that touches the Demon Firesage or hits it with a melee Attack while within 5 feet of it takes 10 (3d6) fire damage.
Actions
Multiattack. The Demon Firesage makes three Izalith Catalyst attacks.
Izalith Catalyst. Melee Weapon Attack: +11, reach 15 ft., one target. Hit: 24 (4d8+6 bludgeoning) plus 3d6 fire.
Demonic Explosion (Recharge 6). The demon summons a great magical explosion from his catalyst in a 30 foot cube that he can touch. Each creature in that area must make a DC 17 Dexterity saving throw, taking 53 (15d6) force damage on a failed save, or half as much damage on a successful one.
Demonic Statue
Medium fiend(demon) construct, chaotic evil
- Armor Class 17
- Hit Points 90 (12d8+36)
- Speed 20 ft.
STR DEX CON INT WIS CHA 14 (+2) 14 (+2) 17 (+3) 10 (+0) 15 (+2) 7 (-2)
- Senses Passive Perception 12
- Languages Common
- Challenge 4 (1,100 souls)
Actions
Fire Breath. The statue exhales fire in a 15-foot cone. Each creature in that area must make a DC 15 Dexterity saving throw, taking 21 (6d6) fire damage on a failed save, or half as much damage on a successful one.
Egg Carrier
Medium undead, chaotic neutral
- Armor Class 9
- Hit Points 39 (6d8+12)
- Speed 40 ft.
STR DEX CON INT WIS CHA 13 (+1) 9 (-1) 14 (+2) 10 (+0) 12 (+1) 9 (-1)
- Senses Passive Perception 11
- Languages Common
- Challenge 2 (450 souls)
Actions
Grub Bite. Melee Weapon Attack: +3, reach 5 ft., one target. Hit: 4 (1d4+1) piercing damage. A creature damaged by the swarm must succeed on a DC 12 Constitution saving throw or contract a disease, Egg Infestation. When the diseased creature next finishes a long rest, or is revived after death, the eggs in the creature’s head burst outwards. Characters cannot wear helmets or other headwear until the disease ends. Any souls gained by the diseased creature after this point are halved, the other half being absorbed by the eggs. Once the eggs have absorbed 100,000 souls, the eggs hatch, and new maggots quickly scurry away. The disease ends once the eggs have hatched. Egg Infestation can be cured with an egg vermifuge.

Dire Rat
Medium beast, unaligned
- Armor Class 13
- Hit Points 40 (9d8)
- Speed 40 ft.
STR DEX CON INT WIS CHA 14 (+2) 17 (+3) 11 (+0) 3 (-4) 12 (+1) 7 (-2)
- Senses Passive Perception 11
- Languages -
- Challenge 1 (200 souls)
Keen Smell. The rat has admntage on Wisdom (Perception) checks that rely on smell.
Pack Tactics. The rat has advantage on an attack roll against a creature if at least one of the rat's allies is within 5 feet of the creature and the ally isn't incapacitated.
Actions
Bite. Melee Weapon Attack: +4, reach 5 ft., one target. Hit: 7 (2d4 + 2) piercing damage and the target must succeed on a DC 11 Constitution saving throw or become poisoned until the end of its next turn. At the end of each of its turns, the target can make another Constitution saving throw. On a success, they are no longer poisoned.

Dragonslayer Ornstein
Large Celestial, lawful neutral
- Armor Class 17
- Hit Points 210 (20d10+100)
- Speed 40 ft.
STR DEX CON INT WIS CHA 20 (+5) 18 (+4) 21 (+5) 15 (+2) 16 (+3) 19 (+4)
- Damage Resistances Lightning
- Saving Throws Constitution +9, Dexterity, +8, Wisdom +7
- Senses Passive Perception 13
- Languages Celestial
- Challenge 10 (5,900 souls)
Magic Weapons. Ornstein’s Dragonslayer Spear grants him a +2 bonus to attack and damage rolls, and deals an additional 5 (1d8) lightning damage on a hit (included in the attack). Ornstein deals an additional 3d6 piercing damage when he hits a dragon with a melee attack.
Improved Critical. Ornstein’s weapon attacks score a critical hit on a roll of 19 or 20.
Leo Ring. When Ornstein rolls a critical hit on your attack roll with a Dragonslayer Spear attack, the target takes an extra 7 piercing damage.
Actions
Multiattack. Ornstein makes two Dragonslayer Spear attacks. He can make a Hurl Lightning attack in place of a Dragonslayer Spear attack.
Dragonslayer Spear. Melee Weapon Attack: +11, reach 15 ft., one target. Hit: 18 (2d10+7) bludgeoning and 1d8 lightning damage
Hurl Lightning. Ornstein fires a bolt of lightning from his speartip at a target he can see within 60 feet of him. The target must succeed on a DC 16 Dexterity Saving throw or take 6d6 lightning damage.
Broad Swipe. Melee Weapon Attack: +11, reach 15 ft., one target. Hit: 24 (3d10+7) slashing plus 5 (1d8) lightning damage. Whether the attack hits or not, Ornstein can move up to 10 feet in any direction without provoking attacks of opportunity.

Empowered Dragonslayer Ornstein
Large Celestial, lawful neutral
- Armor Class 18
- Hit Points 250 (20d12+120)
- Speed 40 ft.
STR DEX CON INT WIS CHA 22 (+6) 20 (+5) 22 (+6) 15 (+2) 16 (+3) 19 (+4)
- Skills Acrobatics +8, Perception +7
- Saving Throws Constitution +10, Dexterity +9, Wisdom +7
- Damage Resistances Lightning
- Senses passive Perception 17
- Languages Celestial
- Challenge 12 (8,400 souls)
Legendary Resistance (3/Day). If Smough fails a saving throw, it can choose to succeed instead.
Magic Weapons. Ornstein’s Dragonslayer Spear grants him a +2 bonus to attack and damage rolls, and deals an additional 2d8 lightning damage on a hit (included in the attack). Ornstein deals an additional 3d6 piercing damage when he hits a dragon with a melee attack.
Improved Critical. Ornstein’s weapon attacks score a critical hit on a roll of 19 or 20.
Leo Ring. When Ornstein rolls a critical hit on your attack roll with a Dragonslayer Spear attack, the target takes an extra 7 piercing damage.
Actions
Multiattack. Ornstein makes three Dragonslayer Spear attacks. He can make a Hurl Lightning attack in place of a Dragonslayer Spear attack.
Dragonslayer Spear. Melee Weapon Attack: +12, reach 20 ft., one target. Hit: 25 (3d10+8) bludgeoning and 9 (2d8) lightning damage
Hurl Lightning. Ornstein fires a bolt of lightning from his speartip at a target he can see within 60 feet of him. The target must succeed on a DC 16 Dexterity Saving throw or take 21 (6d6) lightning damage.
Broad Swipe. Melee Weapon Attack: +12, reach 15 ft., one target. Hit: 30 (4d10+8) slashing plus 9 (2d8) lightning damage. Whether the attack hits or not
Legendary Actions
Ornstein can take 3 legendary actions, choosing from the options below. Only one legendary action option can be used at a time and only at the end of another creature's turn. Ornstein regains spent legendary actions at the start of its turn.
Swipe. Ornstein makes a Broad Swipe attack
Lightning Slam (Costs 2 Actions). Ornstein gathers lightning energy around himself and leaps into the air, crashing downwards and releasing the energy in a ten-foot radius around him. Any creature caught in the blast must succeed on a DC 16 Dexterity saving throw or take 28 (8d6) lightning damage.
Move. Ornstein moves up to its speed without provoking opportunity attacks.
Empowered Executioner Smough
Large Celestial, neutral evil
- Armor Class 15
- Hit Points 275 (19d12+152)
- Speed 30 ft.
STR DEX CON INT WIS CHA 24 (+7) 8 (-1) 26 (+8) 11 (+0) 17 (+3) 10 (+0)
- Skills Athletics +11
- Saving Throws Constitution +12, Dexterity, +3, Strength +11
- Resistances Lightning
- Senses passive Perception 13
- Languages Celestial
- Challenge 12 (8,400 souls)
Legendary Resistance (3/Day). If Smough fails a saving throw, it can choose to succeed instead.
Magic Weapons. Smough’s Greathammer grants him a +2 bonus to attack and damage rolls, and deals 32 (9d6) bludgeoning damage on a hit. He deals an additional 5 (1d8) lightning damage on a hit.
Consumption. When Smough hits a humanoid creature with a melee attack, he regains 4 hit points.
Steadfast. Smough cannot be moved against his will and has advantage on saving throws made to avoid being knocked prone.
Trampling Charge. If the Smough moves at least 20 ft. straight toward a creature and then hits it with a greathammer attack on the same turn, that target must succeed on a DC 17 Strength saving throw or be knocked prone. If the target is prone, the elephant can make one greathammer attack against it as a bonus action.
Actions
Multiattack. Smough makes three greathammer attacks
Greathammer. Melee Weapon Attack: +11, reach 15 ft., one target. Hit: 41 (9d6+9) bludgeoning damage plus 5 (1d8) lightning damage.
Legendary Actions
Smough can take 3 legendary actions, choosing from the options below. Only one legendary action option can be used at a time and only at the end of another creature's turn. Smough regains spent legendary actions at the start of its turn.
Smash. Smough makes a greathammer attack.
Lightning Slam (Costs 2 Actions). Smough gathers lightning energy around himself and leaps into the air, crashing downwards and releasing the energy in a ten-foot radius around him. Any creature caught in the blast must succeed on a DC 16 Dexterity saving throw or take 28 (8d6) lightning damage.
Devour Corpse (Costs 3 Actions). Smough consumes a corpse within five feet of him, regaining hit points equal to the number of the creature’s maximum hit dice. The bloodstains of those devoured disappear.
Engorged Zombie
Medium undead, chaotic evil
- Armor Class 9
- Hit Points 52 (7d8+21)
- Speed 30 ft.
STR DEX CON INT WIS CHA 14 (+2) 9 (-1) 16 (+3) 3 (-4) 9 (-1) 1 (-4)
- Damage Vulnerabilities Fire
- Senses passive Perception 9
- Languages -
- Challenge 3 (700 souls)
Toxic Demise. When the Engorged Zombie is killed, it explodes into a cloud of toxic gas. Each creature within ten feet of the Zombie must succeed on a DC 15 Constitution saving throw or become poisoned until the end of its next turn. At the end of each of its turns, the target takes 3d6 poison damage and can make another Constitution saving throw. On a success, they are no longer poisoned.
Actions
Multiattack. The Engorged Zombie makes two Torch attacks.
Torch. Melee Weapon Attack: +4 to hit, reach 5 ft., one target. Hit: 7 (1d8+2 fire)

Executioner Smough
Large Celestial, neutral evil
- Armor Class 15
- Hit Points 225 (18d10+126)
- Speed 30 ft.
STR DEX CON INT WIS CHA 22 (+6) 8 (-1) 24 (+7) 11 (+0) 17 (+3) 10 (+0)
- Skills Athletics +10
- Saving Throws Constitution +11, Dexterity, +3, Strength +10
- Senses passive Perception 13
- Languages Celestial
- Challenge 10 (5,900 souls)
Magic Weapons. Smough’s Greathammer grants him a +2 bonus to attack and damage rolls, and deals 21 (6d6) bludgeoning damage on a hit.
Consumption. When Smough hits a humanoid creature with a melee attack, he regains 4 hit points.
Steadfast. Smough cannot be moved against his will and has advantage on saving throws made to avoid being knocked prone.
Trampling Charge. If the Smough moves at least 20 ft. straight toward a creature and then hits it with a greathammer attack on the same turn, that target must succeed on a DC 15 Strength saving throw or be knocked prone. If the target is prone, the elephant can make one greathammer attack against it as a bonus action.
Actions
Multiattack. Smough makes two Greathammer attacks.
Greathammer. Melee Weapon Attack: +10, reach 15 ft., one target. Hit: 29 (6d6+8) bludgeoning damage.
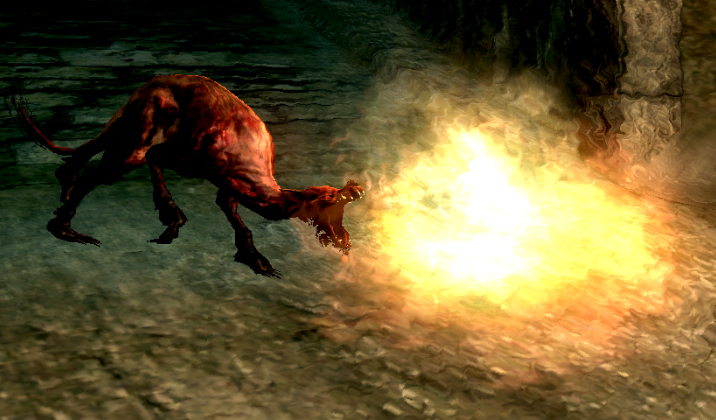
Flaming Attack Dog
Large beast, unaligned
- Armor Class 13 (natural armor)
- Hit Points 11 (2d8+2)
- Speed 40 ft.
STR DEX CON INT WIS CHA 12 (+1) 15 (+2) 12 (+1) 3 (-4) 11 (+1) 6 (-2)
- Damage Resistances Fire
- Skills Perception +3, Stealth +4
- Senses passive Perception 13
- Languages -
- Challenge 1/2 (100 souls)
Keen Hearing and Smell. The dog has advantage on Wisdom (Perception) checks that rely on hearing or smell.
Pack Tactics. The dog has advantage on an attack roll against a creature if at least one of the dog’s allies is within 5 ft. of the creature and the ally isn't incapacitated.
Actions
Bite. Melee Weapon Attack: +4 to hit, reach 5 ft., one target. Hit: 7 (2d4 + 2) piercing damage plus 3 (1d4) fire damage. If the target is a creature, it must succeed on a DC 11 Strength saving throw or be knocked prone
Fire Breath (Recharge 6): The dog exhales fire in a 60-foot cone. Each creature in that area must make a DC 12 Dexterity saving throw, taking 11 (3d6) fire damage on a failed save, or half as much damage on a successful one.

Fortress Giant
Huge giant, lawful neutral
- Armor Class 17 (natural armor, shield)
- Hit Points 162 (13d12+78)
- Speed 30 ft.
STR DEX CON INT WIS CHA 23 (+6) 15 (+2) 22 (+6) 8 (-1) 12 (+1) 9 (-1)
- Senses Passive Perception 11
- Languages -
- Challenge 7 (2,900 souls)
Actions
Multiattack. The giant makes two slam attacks.
Slam. Melee Weapon Attack: +9, reach 15 ft., one target. Hit: 19 (3d8 + 6) bludgeoning damage.
Rock. Ranged Weapon Attack: +9, range 60/240 ft., one target. Hit: 28 (4d10 + 6) bludgeoning damage. If the target is a creature, it must succeed on a DC 17 Strength saving throw or be knocked prone.
Fortress Golem
Huge construct, lawful neutral
- Armor Class 19
- Hit Points 261 (18d12+144)
- Speed 30 ft.
STR DEX CON INT WIS CHA 25 (+7) 10 (+0) 24 (+7) 10 (+0) 15 (+2) 1 (-5)
- Damage Resistances Bludgeoning, Piercing, and Slashing from Nonmagical Sources
- Senses Passive Perception 12
- Languages -
- Challenge 10 (5,900 souls)
Magic Resistance. The golem has advantage on saving throws against spells and other magical effects.
Immutable Form. The golem is immune to any spell or Effect that would alter its form.
Magic Weapons. The golem's weapon attacks are magical.
Siege Monster. The golem deals double damage to objects and structures.
Clumsy. The golem is massive and lumbering, making it susceptible to being knocked over. If the golem takes 50 or more damage in a single round, it must succeed on a DC 15 Dexterity saving throw or stumble backwards 10 feet and be knocked prone.
Actions
Multiattack. The giant makes three greataxe attacks.
Greataxe. Melee Weapon Attack: +9, reach 15 ft., one target. Hit: 28 (3d12 + 8) slashing damage.
Blast Wave (Recharge 6). Each creature within ten feet of the golem must succeed at a DC 16 Dexterity saving throw or take 33 (6d10) bludgeoning damage and be knocked prone. A creature takes half damage on a success.

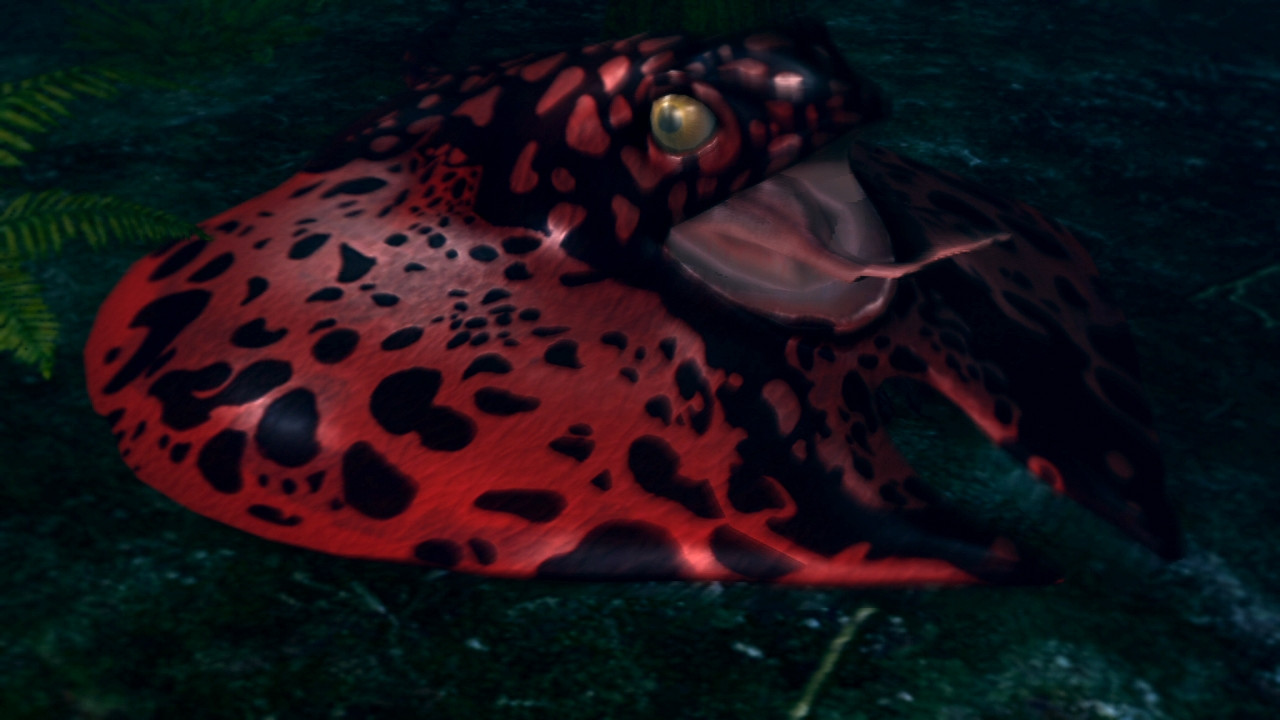
Frog-Ray
Medium monstrosity, unaligned
- Armor Class 12 (natural armor)
- Hit Points 44 (8d8+8)
- Speed 30 ft.
STR DEX CON INT WIS CHA 12 (+1) 14 (+2) 12 (+1) 3 (-4) 11 (+0) 7 (-2)
- Senses Passive Perception 10
- Languages -
- Challenge ½ (100 souls)
Standing Leap. The frog-ray’s long jump is up to 25 feet and its high jump is up to 15 feet, with or without a running start.
Actions
Tongue-Whip. Melee Weapon Attack: +4, reach 10 ft., one target. Hit: 5 (1d4+2) slashing

Giant Clam
Large monstrosity, unaligned
- Armor Class 17 (Natural Armor)
- Hit Points 84 (8d10+40)
- Speed 40 ft.
STR DEX CON INT WIS CHA 18 (+4) 10 (+0) 21 (+5) 3 (-4) 13 (+1) 6 (-2)
- Damage Resistances Bludgeoning, Piercing, and Slashing from Nonmagical Attacks
- Senses Passive Perception 11
- Languages -
- Challenge 4 (1,100 souls)
Titanite Pearl. When slain, the Giant Clam has a 20% chance of dropping a twinkling titanite chunk.
Actions
Multiattack. The clam makes a Bite attack and then a Devour attack if able.
Bite. Melee Weapon Attack: +6, reach 5 ft., one target. Hit: 10 (2d6+3) slashing and the target is grappled.
Devour. The clam makes a bite attack against a target it is grappling. On a hit, the creature must make a DC 13 Strength saving throw. On a failure, the clam may make another devour attack as a bonus action.

Giant Humanity Sprite
Large aberration, chaotic neutral
- Armor Class 8
- Hit Points 101 (7d10+70)
- Speed 20 ft.
STR DEX CON INT WIS CHA 10 (+0) 6 (-2) 30 (+10) (-3) 15 (+2) 1 (-5)
- Senses Passive Perception 12
- Languages -
- Challenge 3 (700 souls)
Font of Humanity. The Sprite has advantage on attack rolls against Human creatures. When a Giant Humanity Sprite dies, there is a 20% chance it leaves behind a humanity sprite.
Incorporeal: The sprite can move through other creatures and objects as if they were difficult terrain. A creature takes 11 (2d10) force damage the first time the sprite passes through its space each turn.
Giant Leech
Medium beast, unaligned
- Armor Class 10
- Hit Points 26 (4d8+8)
- Speed 20 ft.
STR DEX CON INT WIS CHA 14 (+2) 10 (+0) 14 (+2) 4 (-3) 12 (+1) 6 (-2)
- Senses Passive Perception 11
- Languages -
- Challenge 1/4 (50 souls)
Leaper. The Giant Leech can jump up to fifteen feet horizontally without a running start.
Actions
Slam. Melee Weapon Attack: +4, reach 5 ft., one target. Hit: 7 (1d8+2) bludgeoning damage
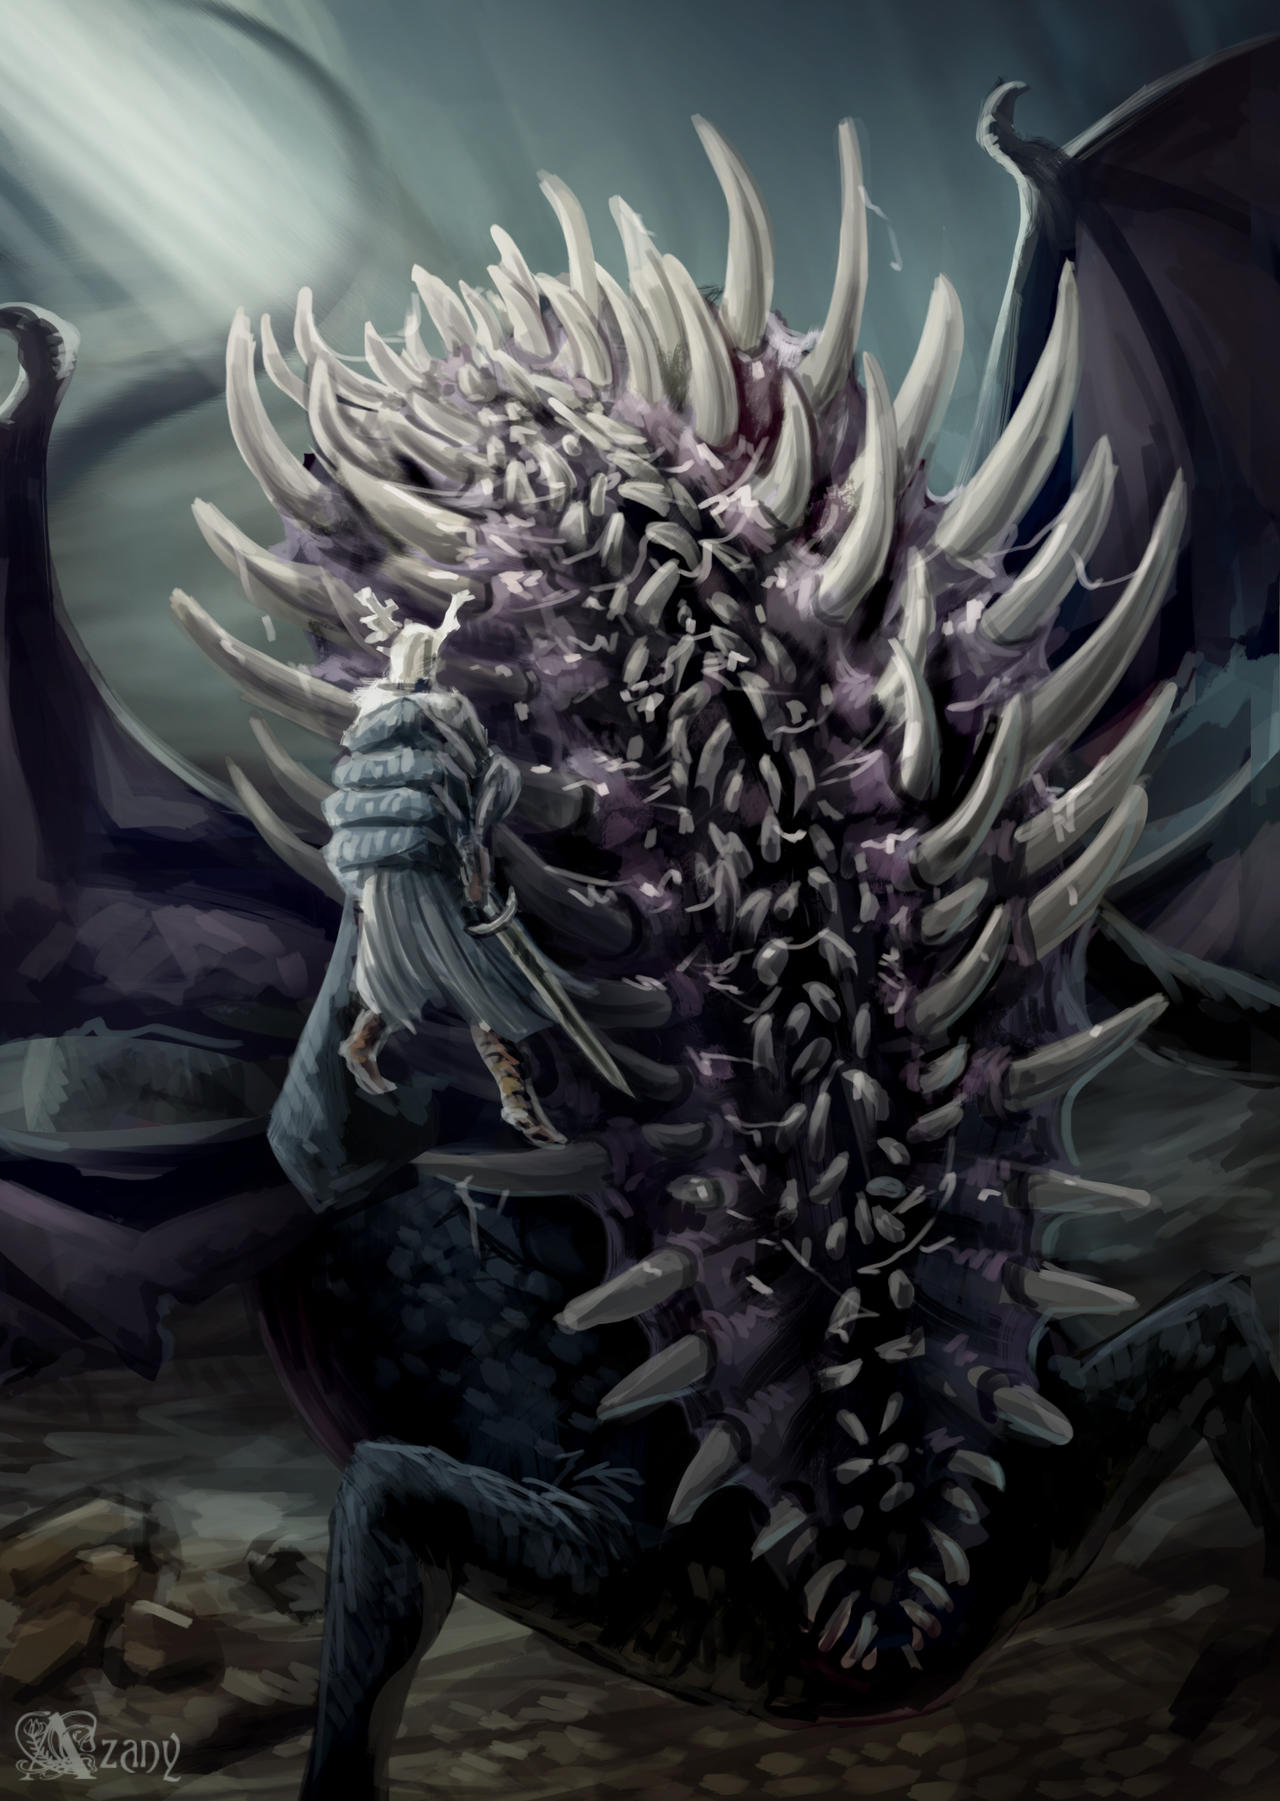
Gaping Dragon
Huge dragon, unaligned
- Armor Class 17
- Hit Points 256 (27d12+81)
- Speed 40 ft.
STR DEX CON INT WIS CHA 22 (+6) 12 (+1) 17 (+3) 10 (+0) 13 (+1) 9 (-1)
- Damage Vulnerabilities Lightning
- Senses Darkvision 60 Ft., passive Perception 11
- Senses Passive Perception 10
- Languages -
- Challenge 7 (2,900 souls)
Legendary Resistance (3/Day). If the Gaping Dragon fails a saving throw, it can choose to succeed instead.
Magical Tail. If the dragon takes more than 40 damage in a single turn, it’s tail is severed and it can no longer make tail attacks. When the tail is severed, it dissolves away leaving the dragon king greataxe in its wake.
Frightful Presence. Each creature of the dragon's choice that is within 60 feet of the dragon and aware of it must succeed on a DC 15 Wisdom saving throw or become frightened for 1 minute. A creature can repeat the saving throw at the end of each of its turns, ending the effect on itself on a success. If a creature's saving throw is successful or the effect ends for it, the creature is immune to the dragon's Frightful Presence for the next 24 hours.
Actions
Multiattack. The dragon makes a claw, tail and bite attack. It can make a Swallow Attack instead of a bite attack.
Bite. Melee Weapon Attack: +8 to hit, reach 10 ft., one target. Hit: 23 (3d10 + 6) piercing damage. If the target is a creature, it is grappled (escape DC 20). Until this grapple ends, the target is restrained, and the dragon can’t bite another target.
Tail. Melee Weapon Attack: +8 to hit, reach 10 ft., one target. Hit: 20 (3d8 + 6) bludgeoning damage.
Claw. Melee Weapon Attack: +8 to hit, reach 5 ft., one target. Hit: 17 (3d6 + 6) slashing damage.
Spew Acid (Recharge 6). The Gaping Dragon vomits a 30 foot radius circle of acid emanating from itself. Each creature in that line must make a DC 15 Constitution saving throw, taking 41 (9d8) acid damage on a failed save and their weapon takes a permanent and cumulative −1 penalty to damage rolls. If its penalty drops to −5, the weapon is destroyed. Any metal armor or a metal shield being worn or carried, it takes a permanent and cumulative −1 penalty to the AC it offers. Armor reduced to an AC of 10 or a shield that drops to a +0 bonus is destroyed. On a success, the creature takes half damage and their equipment doesn’t degrade.
Swallow. The dragon makes one bite attack against a Large or smaller creature it is grappling. If the attack hits, the target takes the bite’s damage, the target is swallowed, and the grapple ends. While swallowed, the creature is blinded and restrained, it has total cover against attacks and other effects outside the dragon, and it takes 18 (5d6) acid damage at the start of each of the dragon’s turns. If the dragon takes 40 damage or more on a single turn from a creature inside it, the dragon must succeed on a DC 18 Constitution saving throw at the end of that turn or regurgitate all swallowed creatures, which fall prone in a space within 10 feet of the dragon. If the dragon dies, a swallowed creature is no longer restrained by it and can escape from the corpse by using 30 feet of movement, exiting prone.
Legendary Actions
The dragon can take 3 legendary actions, choosing from the options below. Only one legendary action option can be used at a time and only at the end of another creature’s turn. The dragon regains spent legendary actions at the start of its turn.
Attack. The dragon makes one claw attack or tail attack.
Move. The dragon moves up to half its speed.
Chomp (Costs 2 Actions). The dragon makes one bite attack or uses its Swallow.
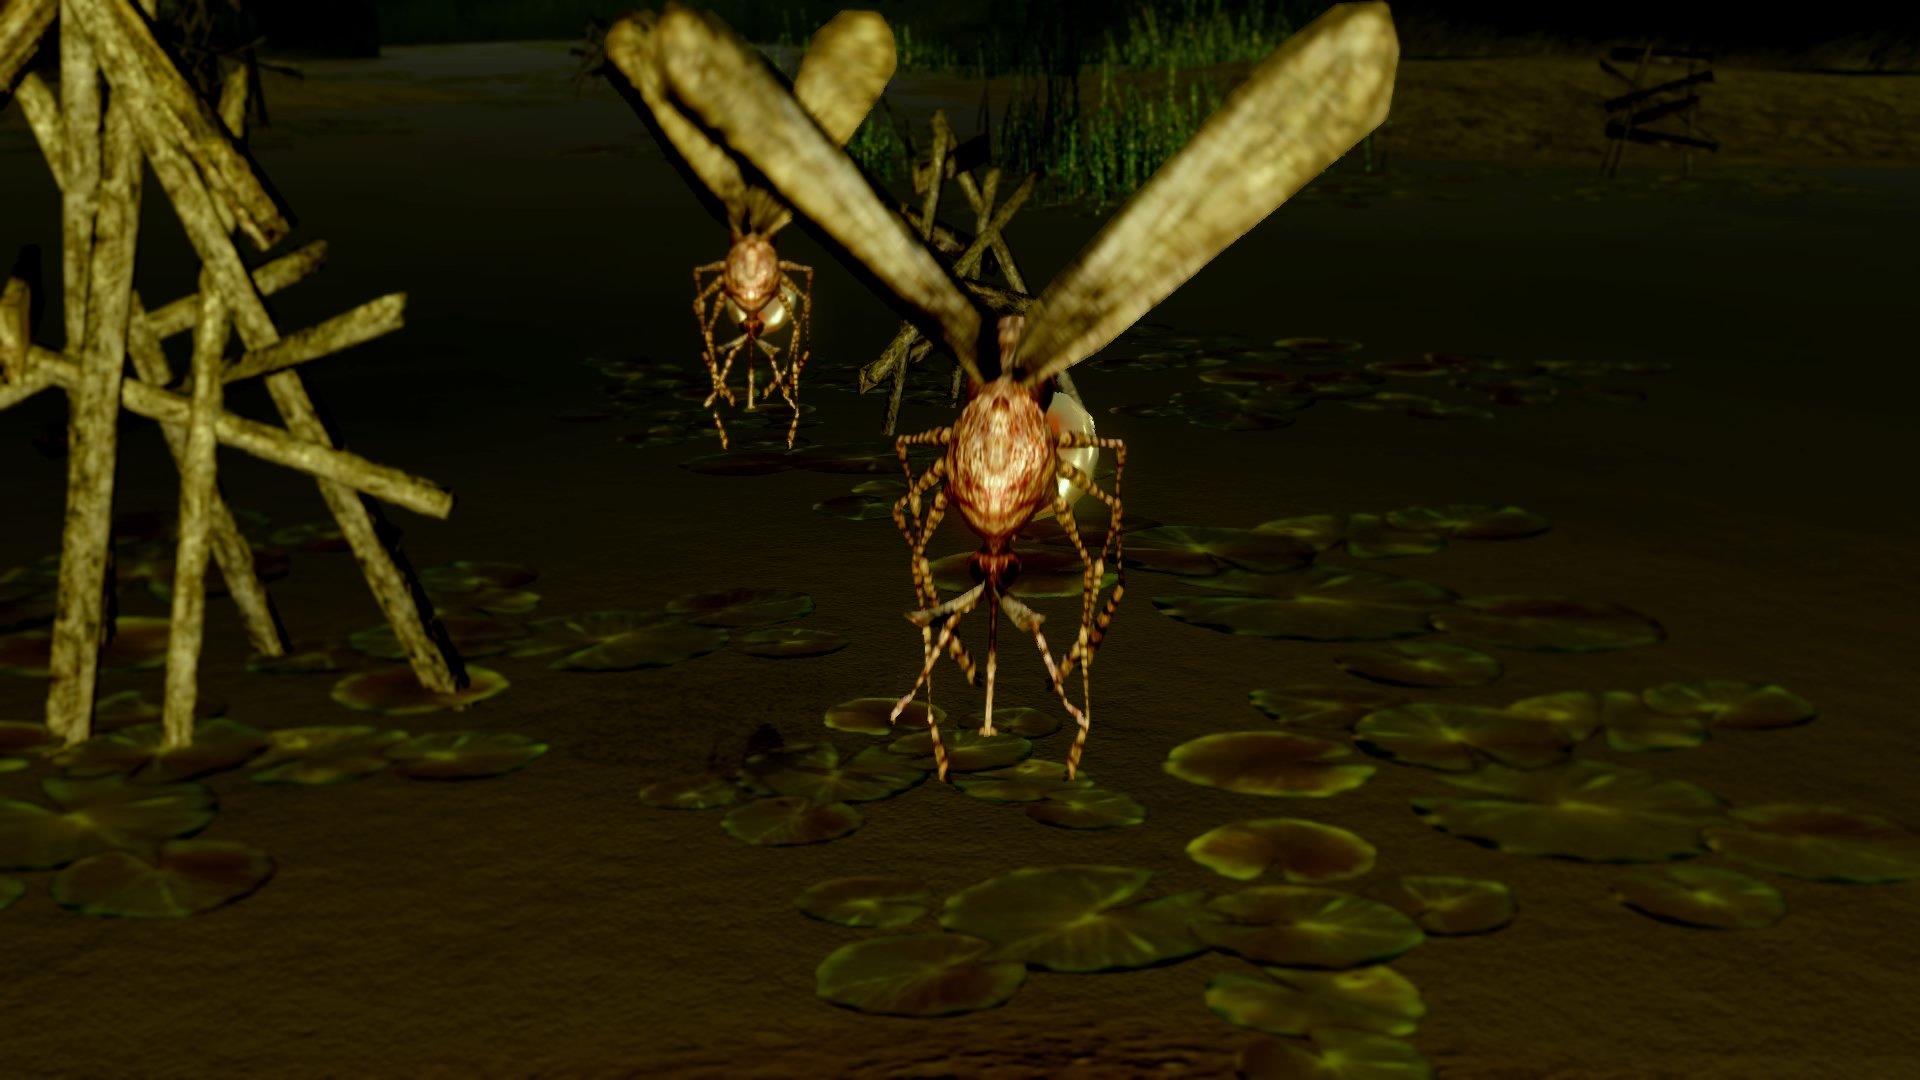
Giant Mosquito
Small beast, unaligned
- Armor Class 12 (natural armor)
- Hit Points 5 (2d6-2)
- Speed 5 ft., fly 30 ft.
STR DEX CON INT WIS CHA 2 (-4) 15 (+2) 8 (-1) 2 (-4) 11 (+0) 5 (-3)
- Senses Passive Perception 10
- Languages -
- Challenge 1/8 (25 souls)
Actions
Sting. Melee Weapon Attack: +4, reach 5 ft., one target. Hit: 5 (1d4+2) piercing damage
Poison Fling. The mosquito hurls poisonous liquid at a target within 10 feet of it. The target must succeed on a DC 12 Constitution saving throw or become poisoned for one minute. At the end of each of its turns, the target can make another Constitution saving throw. On a success, they are no longer poisoned.

Giant Skeleton
Large(undead), chaotic evil
- Armor Class 15 (natural armor)
- Hit Points 76 (9d10+27)
- Speed 30 ft.
STR DEX CON INT WIS CHA 18 (+4) 12 (+1) 16 (+3) 6 (-2) 8 (-1) 5 (-3)
- Senses Passive Perception 9
- Languages -
- Challenge 4 (1,100 souls)
Regeneration. After being slain, the skeleton returns to life with full hit points at the end of its next turn. This effect is suppressed for 24 hours if the skeleton is slain by radiant damage.
Actions
Multiattack. The Giant Skeletons attack twice.
Scimitar. Melee Weapon Attack: +6, reach 5 ft., one target. Hit: 11 (2d6+4 slashing)
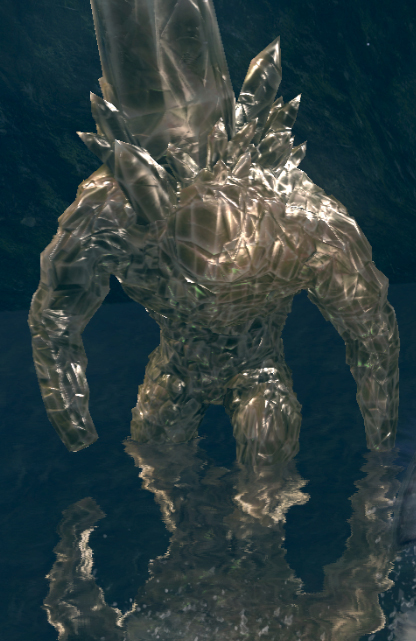
Golden Crystal Golem
Large construct, unaligned
- Armor Class 17
- Hit Points 195 (17d10+102)
- Speed 30 ft.
STR DEX CON INT WIS CHA 22 (+6) 10 (+0) 22 (+6) 5 (-3) 10 (+0) 5 (-3)
- Damage Vulnerabilities Bludgeoning
- Damage Immunities Poison, Slashing
- Senses Passive Perception 10
- Languages -
- Challenge 7 (2,900 souls)
Magic Resistance. The golem has advantage on saving throws against spells and other magical effects.
Actions
Multiattack. The Golem makes two slam attacks
Slam. Melee Weapon Attack: +9, reach 10 ft., one target. Hit: 17 (2d10+6) slashing
Crystal Explosion (Recharge 6). The golem slams it’s fist into the ground and summons a burst of crystals in a 10 foot circle around it. Each other creature that within 10 feet of the golem must make a Dexterity saving throw. The creature takes 23 (5d8) bludgeoning damage on a failure and half as much on a success.
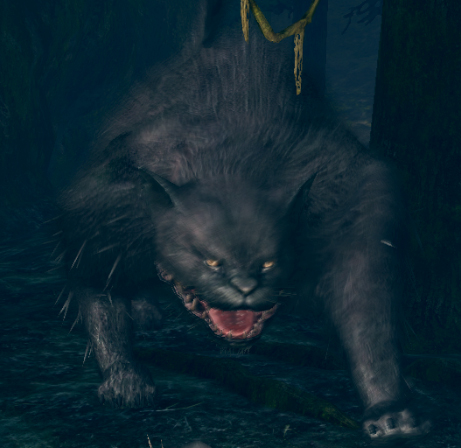
Great Feline
Large monstrosity, unaligned
- Armor Class 15 (natural armor)
- Hit Points 135 (18d10+36)
- Speed 20 ft.
STR DEX CON INT WIS CHA 17 (+3) 18 (+4) 15 (+2) 13 (+1) 16 (+3) 9 (-1)
- Senses Passive Perception 13
- Languages Common, Sylvan
- Challenge 5 (1,800 souls)
Actions
Bite. Melee Weapon Attack: +6, reach 5 ft., one target. Hit: 14 (2d10+3) piercing damage and the target is Grappled (escape DC 15). Until this grapple ends
Claws. Melee Weapon Attack: +6, reach 5 ft., one target. Hit: 12 (2d8+3) bludgeoning damage
Ground Roll (Recharge 6). The cat curls into a ball and quickly rolls in a 30 foot line. Any creature caught in the line must succeed on a Dexterity saving throw or take 21 (6d6) bludgeoning damage. A creature takes half damage on a failure.
Gwyn, Lord of Cinder
Medium undead celestial, lawful neutral
- Armor Class 18
- Hit Points 273 (26d8+156)
- Speed 20 ft.
STR DEX CON INT WIS CHA 27 (+8) 20 (+5) 22 (+6) 17 (+3) 30 (+10) 10 (+0)
- Saving Throws STR +13, DEX +10, CON +11, WIS +15
- Skills Athletics +14, Perception +15
- Damage Immunities Fire, Bludgeoning, Piercing, and Slashing from Nonmagical Attacks
- Senses passive Perception 25
- Senses Passive Perception 10
- Languages All
- Challenge 16 (15,000 souls)
Legendary Resistances (3/day). If Gwyn fails a saving throw, he can choose to succeed instead.
Kindled Weapons. Gwyn’s weapon attacks are magical. When Gwyn hits with any weapon, the weapon deals an extra 6d6 fire damage (included in the attack).
Soul of Cinder (Mythic Trait; Recharges after a Long Rest). If Gwyn is reduced to 0 hit points, he doesn’t die or fall unconscious. Instead, he regains 200 hit points. In addition, flame surrounds Gwyn as his soul is rekindled. Any creature that touches him or hits him with a melee attack takes 4d6 fire damage.
Actions
Multiattack. Gwyn makes three Great Lord’s Greatsword attacks.
Great Lord’s Greatsword. Melee Weapon Attack +13 to hit, 10 ft., one target. Hit: 22 (4d6+8) slashing plus 21 (6d6) fire damage.
Soul Ignition (Recharge 5-6). Gwyn reignites one of the last vestiges of his soul, detonating in a 20-foot radius sphere around him. Each creature in that area must make a 21 Dexterity saving throw, taking 63 (18d6) fire damage on a failed save, or half as much damage on a successful one.
Reactions
Unyielding. When Gwyn is subjected to an effect that would move him, knock him prone, or both, he can use his reaction to be neither moved nor knocked prone.
Legendary Actions
Gwyn can take 3 legendary actions, choosing from the options below. Only one legendary action option can be used at a time and only at the end of another creature’s turn. Gwyn regains spent legendary actions at the start of its turn.
Greatsword. Gwyn makes a Great Lord’s Greatsword attack
Move. Gwyn moves up to his movement speed without provoking attacks of opportunity
Mythic Actions
If the Gwyn’s Soul of Cinder trait has activated in the last hour, it can use the options below as legendary actions.
Recollection. For a moment, Gwyn’s insanity is forcibly suppressed, recalling the halcyon days of the Age of Fire. Gwyn ends one condition or spell affecting him.
Explosive Grasp (Costs 2 Actions). Gwyn reaches out towards a creature within 5 feet of him. The creature must succeed on a DC 20 Dexterity saving throw or be hoisted into the air as an intense rush of flame engulfs them. The creature then takes 70 (20d6) fire damage and is thrown 15 from in any direction of Gwyn’s choice.
Lair Actions
On initiative count 20 (losing initiative ties), Gwyn can take a lair action to cause one of the following magical effects; Gwyn can’t use the same effect two rounds in a row:
- Searing heat spreads out in a 15-foot-radius sphere centered on a point Gwyn can see within 120 feet of it. Any creature that enters the affected area or starts its turn there must make a DC 15 Constitution saving throw, taking 10 (3d6) fire damage on a failed save, or half as much damage on a successful one. The heat lasts until initiative count 20 on the next round.
- The First Flame draws energy into itself to sustain its flickering embers. Fire resistance and fire immunity of creatures in the lair other than Gwyn is suppressed until initiative count 20 on the next round.
- Gwyn draws the First Flame into himself, bolstering his strikes. His reach increases by five feet and he can make an additional Great Lord’s Greatsword attack during his Multiattack action. This power lasts until initiative count 20 on the next round.
Havel the Rock
Medium(undead), neutral
- Armor Class 26 (Havel's Armor & Shield)
- Hit Points 110 (13d8+52)
- Speed 10 ft.
STR DEX CON INT WIS CHA 23 (+6) 20 (+5) 20 (+5) 10 (+0) 12 (+1) 9 (-1)
- Damage Resistances Fire, Force, Lightning, Poison
- Senses Passive Perception 9
- Languages -
- Challenge 10 (5000 souls)
Havel’s Armor. Havel cannot be forcibly moved or knocked prone
Actions
Dragon Tooth. Melee Weapon Attack: +9 to hit, reach 5 ft., one target. Hit: 19 (4d6+5) slashing damage and the target must succeed on a DC 16 Strength saving throw or be knocked prone. The target is also stunned until the end of their next turn on a failure.
Stoneskin (1/Long Rest). Havel slams his shield on the ground, casting stoneskin on himself.
Hawkeye Gough
Huge Giant, Lawful Good
- Armor Class 18
- Hit Points 231 (22d12+48)
- Speed 30 ft.
STR DEX CON INT WIS CHA 23 (+5) 7 (-2) 19 (+4) 3 (-4) 9 (-1) 1 (-4)
- Saving Throws CON +9, WIS +4
- Skills Athletics Perception +9
- Senses Darkvision 60 ft., Passive Perception 19
- Languages Giant, Common
- Challenge 10 (5000 souls)
Hawk’s Ring. Gough has advantage on Wisdom (Perception) checks made to see distant objects. The standard and maximum range of bows he wields is doubled (included already in his attack).
Actions
Multiattack Gough makes two Slam attacks.
Slam. Melee Weapon Attack: +9 to hit, reach 5 ft., one target. Hit: 26 (6d6+5) slashing damage and the target must succeed on a DC 16 Strength saving throw or be knocked prone. The target is also stunned until the end of their next turn on a failure.
Greatbow. Melee Weapon Attack: +9 to hit, reach 5 ft., one target. Hit: 21 (3d10+5) piercing damage. If the target is a dragon, it takes an extra 3d6 piercing damage. For the purpose of this weapon, "dragon" refers to any creature with the dragon type, including Dragon turtles and wyverns. A flying creature hit must succeed on a DC 20 Strength saving throw or be knocked prone.
Hollow Knight
Medium(undead), chaotic evil
- Armor Class 16 (broken chain mail, shield)
- Hit Points 32 (5d8+10)
- Speed 30 ft.
STR DEX CON INT WIS CHA 16 (+3) 12 (+1) 15 (+2) 3 (-4) 6 (-2) 5 (-3)
- Senses Passive Perception 8
- Languages -
- Challenge ½ (100 souls)
Actions
Longsword. Melee Weapon Attack: +5 to hit, reach 5 ft., one target. Hit: 8 (1d8+3) slashing
Spear. Melee Weapon Attack: +5 to hit, reach 5 ft., one target. Hit: 7 (1d6+3) piercing
Light Crossbow. Ranged Weapon Attack: +3 to hit, range 80/320, one target. Hit: 6 (1d8+1) slashing
Hollow Soldier
Medium(undead), chaotic evil
- Armor Class 13 (broken chain shirt, shield)
- Hit Points 26 (4d8+8)
- Speed 30 ft.
STR DEX CON INT WIS CHA 15 (+2) 12 (+1) 14 (+2) 3 (-4) 6 (-2) 5 (-3)
- Senses Passive Perception 8
- Languages -
- Challenge ¼ (50 souls)
Actions
Longsword. Melee Weapon Attack. +4 to hit, reach 5 ft., one target. Hit: 7 (1d8+2) slashing
Firebomb. Ranged Weapon Attack. +3 to hit, 20 ft., one target. Hit: 5 (1d6+1) fire
Illusory Pinwheel
Medium undead, chaotic evil
- Armor Class 13
- Hit Points 76 (9d8+36)
- Speed 20 ft., fly 20 ft.(hover)
STR DEX CON INT WIS CHA 13 (+1) 16 (+3) 18 (+4) 17 (+3) 15 (+2) 19 (+4)
- Senses Passive Perception 13
- Languages Common
- Challenge 3 (700 souls)
Actions
Multiattack. The illusion makes two Hurl Flame attacks
Hurl Flame Ranged Weapon Attack +8 to hit, 60 ft., one target. Hit: (2d8+4 fire)
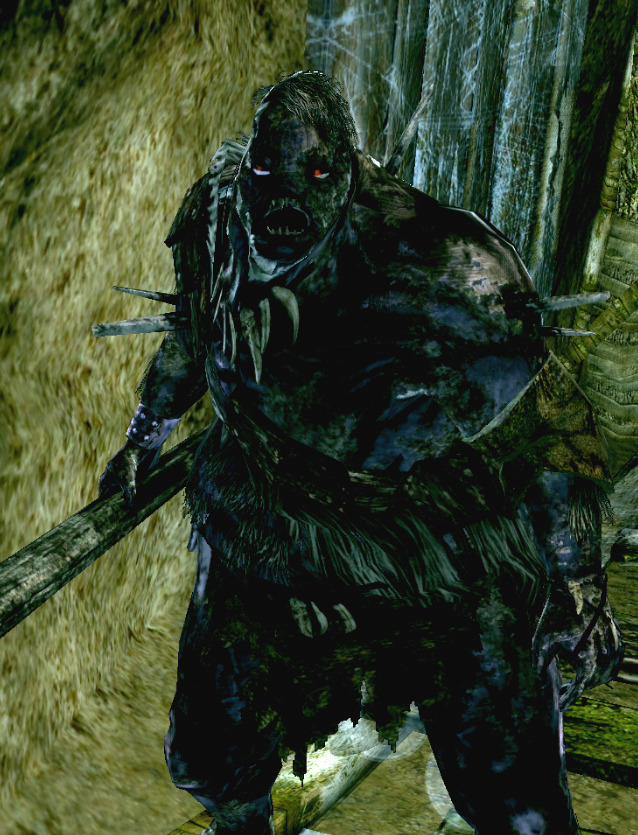
Infested Barbarian
Large undead, chaotic evil
- Armor Class 12 (natural armor)
- Hit Points 85 (10d10+30)
- Speed 30 ft.
STR DEX CON INT WIS CHA 21 (+5) 8 (-1) 17 (+3) 6 (-2) 10 (+0) 8 (-1)
- Damage Immunities Poison
- Condition Immunities Poisoned
- Saving Throws Strength +7, Constitution +6
- Senses Passive Perception 10
- Languages understands Common
- Challenge 4 (1,100 souls)
Actions
Multiattack. The infested barbarian makes two greatclub attacks
Greatclub. Melee Weapon Attack: +6, reach 10 ft., one target. Hit: 14 (2d8+5) slashing
Rock. Ranged Weapon Attack: +6, range 30/120 ft., one target. Hit: 16 (2d10 + 5) bludgeoning damage.

Infested Ghoul
Medium undead, chaotic evil
- Armor Class 13
- Hit Points 49 (9d8+9)
- Speed 40 ft.
STR DEX CON INT WIS CHA 16 (+3) 17 (+3) 12 (+1) 11 (+0) 10 (+0) 8 (-1)
- Damage Immunities Poison
- Condition Immunities Poisoned
- Saving Throws Strength +7, Constitution +6
- Senses Passive Perception 10
- Languages understands Common
- Challenge 2 (450 souls)
Actions
Wretched Claw. Melee Weapon Attack: +5, reach 5 ft., one target. Hit: 8 (1d8+3 slashing) and the target is grappled.
Bite. Melee Weapon Attack: +5, reach 5 ft., one target. Hit: 7 (1d6+3 slashing) and the target is grappled.
Devour. The ghoul makes a bite attack against a target it is grappling. On a hit, the creature must make a DC 11 Strength saving throw. On a failure, the ghoul may make another devour attack as a free action.

King of New Londo
Huge aberration, chaotic evil
- Armor Class 15
- Hit Points 207 (18d12+90)
- Speed 40 ft.
STR DEX CON INT WIS CHA 22 (+6) 16 (+3) 21 (+5) 16 (+3) 13 (+1) 22 (+6)
- Damage Resistances Force, Necrotic
- Senses Passive Perception 11
- Languages -
- Challenge 10 (5,900 souls)
Actions
Multiattack. The King makes two Greatsword attacks. It can make a single Soul Mass attack in place of a Greatsword attack.
Greatsword. Melee Weapon Attack: +10, reach 5 ft., one target. Hit: 27 (6d6+6 slashing) damage
Soul Mass. Ranged Weapon Attack: +10, reach 60 ft., one target. Hit: 28 (8d6) force damage
Soul Detonation. The King collects magical energy within itself and releases it in an 20 foot radius circle around it. Each other creature that within 20 feet of the King must make a Constitution saving throw. The creature takes 36 (8d8) force damage on a failure and half as much on a success.
Lifedrain (Recharge 6). Melee Weapon Attack: +10, reach 5 ft., one target. Hit: 36 (8d8) necrotic damage and the King regains hit points equal to half the damage dealt. If the target is Human, the target becomes Hollow and the King instead regains hit points equal to the full amount of damage dealt.

Kalameet, Black Dragon
Gargantuan Dragon, Neutral Evil
- Armor Class 22
- Hit Points 367 (21d20 + 147)
- Speed 40 ft., fly 80 ft
STR DEX CON INT WIS CHA 27 (+8) 14 (+2) 25 (+7) 16 (+3) 15 (+2) 19 (+4)
- Saving Throws DEX +9, CON +14, WIS +9, CHA +11
- Skills Perception +16, Stealth +9
- Damage Immunities Acid
- Senses Blindsight 60 ft., Darkvision 120 ft., Passive Perception 26
- Languages Common, Draconic
- Challenge 21 (33,000 XP)
Multiattack. Kalameet can use its Frightful Presence. It then makes three attacks: one with its bite and two with its claws.
Bite. Melee Weapon Attack: +15 to hit, reach 15 ft., one target. Hit: 19 (2d10 + 8) piercing damage plus 9 (2d8) acid damage.
Claw. Melee Weapon Attack: +15 to hit, reach 10 ft., one target. Hit: 15 (2d6 + 8) slashing damage.
Tail. Melee Weapon Attack: +15 to hit, reach 20 ft., one target. Hit: 17 (2d8 + 8) bludgeoning damage.
Frightful Presence. Each creature of the Kalameet's choice that is within 120 feet of Kalameet and aware of it must succeed on a DC 19 Wisdom saving throw or become frightened for 1 minute. A creature can repeat the saving throw at the end of each of its turns, ending the effect on itself on a success. If a creature's saving throw is successful or the effect ends for it, the creature is immune to Kalameet's Frightful Presence for the next 24 hours.
Fire Breath (Recharge 5–6). Kalameet exhales fire in a 60-foot cone. Each creature in that line must make a DC 22 Dexterity saving throw, taking 67 (15d8) fire damage on a failed save, or half as much damage on a successful one.
Bonus Actions
Calamity The red gem in Kalameet's forehead glows bright and it targets a creature within 15 feet of him. The target must succeed on a DC 15 Dexterity saving throw. On a failure, the creature is foisted into the air telekinetically and must succeed on a DC 20 Wisdom saving throw or be cursed. While cursed, the creature has vulnerability to all damage. The creature can make an additional Wisdom saving throw at the end of their turns, ending the curse on a success.
Legendary Actions
Kalameet can take 3 legendary actions, choosing from the options below. Only one legendary action option can be used at a time and only at the end of another creature's turn. Kalameet regains spent legendary actions at the start of its turn.
Detect. Kalameet makes a Wisdom (Perception) check.
Tail Attack. Kalameet makes a tail attack.
Wing Attack (Costs 2 Actions). Kalameet beats its wings. Each creature within 15 feet of Kalameet must succeed on a DC 23 Dexterity saving throw or take 15 (2d6 + 8) bludgeoning damage and be knocked prone.
Knight Kirk
Medium humanoid, chaotic evil
- Armor Class 19 (shield)
- Hit Points 91 (14d8+28)
- Speed 30 ft.
STR DEX CON INT WIS CHA 18 (+4) 14 (+2) 14 (+2) 10 (+0) 15 (+2) 17 (+3)
- Senses Passive Perception 12
- Languages Common
- Challenge 7 (2,900 souls)
Barbed Armor. When Kirk takes the dodge or disengage action, he deals 4 (1d6) bludgeoning damage to an enemy creature within five feet of you.
Actions
Multiattack. Kirk makes two Barbed Longsword attacks.
Barbed Longsword. Melee Weapon Attack: +8, reach 5 ft., one target. Hit: 10 (1d8+5) slashing plus 4 (1d6) piercing. A creature hit by this weapon twice in a single round must succeed on a Constitution saving throw or take an additional 3d6 piercing damage.
Bonus Actions
Disengage Kirk takes the Disengage action
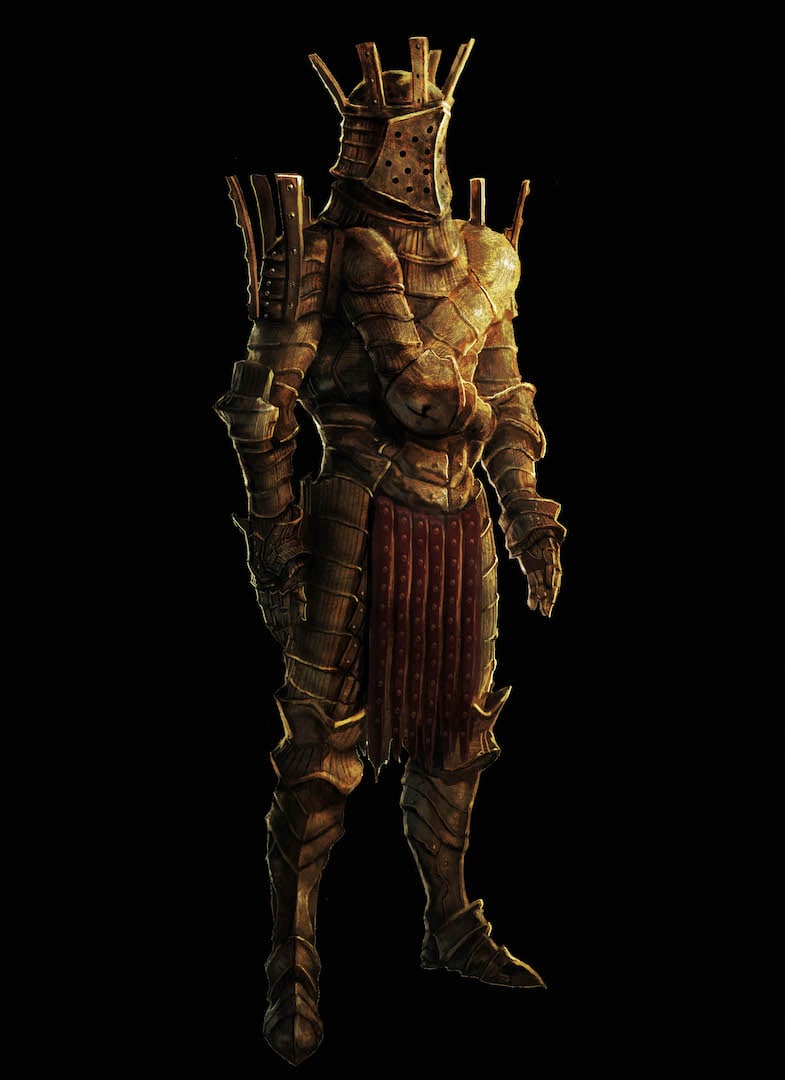
Knight Lautrec of Carim
Large humanoid, neutral evil
- Armor Class 18 (plate)
- Hit Points 135 (18d8+54)
- Speed 30 ft.
STR DEX CON INT WIS CHA 18 (+4) 16 (+3) 16 (+3) 14 (+2) 12 (+1) 15 (+2)
- Skills Athletics +7, Deception +8
- Senses Passive Perception 11
- Languages -
- Challenge 7 (2,900 souls)
Shotel Expert. Lautrec has trained tirelessly with his shotel sickles, using them to slip past enemy defenses. Lautrec has advantage on attacks against creatures wielding shields.
Ring of Favor and Protection. Lautrec possesses a magic ring blessed by the goddess Fina, granting him a +2 bonus to his Strength, Dexterity, and Constitution. (Already accounted for in his stats)
Actions
Multiattack. Lautrec makes four shotel attacks.
Shotel. Melee Weapon Attack: +7, reach 5 ft., one target. Hit: 7 (1d4+4) slashing
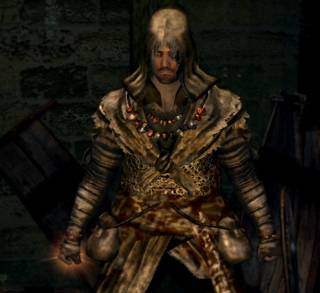
Laurentius of the Great Swamp
Medium humanoid, chaotic good
- Armor Class 14 (shield)
- Hit Points 84 (13d8+26)
- Speed 30 ft.
STR DEX CON INT WIS CHA 14 (+2) 14 (+2) 14 (+2) 10 (+0) 15 (+2) 17 (+3)
- Senses Passive Perception 12
- Languages Common
- Challenge 4 (1,100 souls)
Spellcasting. Laurentius is a 6th-level spellcaster. Its spellcasting ability is Charisma (spell save DC 13, +5 to hit with spell attacks). Laurentius has the following Sorcerer spells prepared:
1st level (4 slots): combustion, minor fireball, fire whip
2nd level (3 slots): iron flesh, flash sweat, fire orb
3rd level (3 slots): fireball
Actions
Battleaxe. Melee Weapon Attack: +4, reach 5 ft., one target. Hit: 7 (1d8+2) slashing
Battleaxe. (Two-handed) Melee Weapon Attack: +4, reach 5 ft., one target. Hit: 8 (1d10+2) slashing

Lesser Bell Gargoyle
Large monstrosity, unaligned
- Armor Class 14 (natural armor)
- Hit Points 57 (6d10+24)
- Speed 30 ft., fly 50 ft.
STR DEX CON INT WIS CHA 19 (+4) 11 (+0) 19 (+4) 3 (-4) 14 (+2) 10 (+0)
- Senses Passive Perception 12
- Languages -
- Challenge 5 (1,800 souls)
False Appearance. While the gargoyle remains motionless, it is indistinguishable from a normal statue.
Actions
Halberd. Melee Weapon Attack: +7, reach 5 ft., one target. Hit: 10 (1d10 + 4) bludgeoning damage.
Fire Breath (Recharge 5–6). The dragon head exhales fire in a 15--foot cone. Each creature in that area must make a DC 15 Dexterity saving throw, taking 27 (6d8) fire damage on a failed save, or half as much damage on a successful one.
Lordran Mage
Medium humanoid, neutral
- Armor Class 14 (mage armor)
- Hit Points 26 (5d8+5)
- Speed 30 ft.
STR DEX CON INT WIS CHA 9 (-1) 13 (+1) 12 (+1) 16 (+3) 14 (+2) 10 (+0)
- Damage Resistances Slashing
- Senses Passive Perception 12
- Languages Common
- Challenge 5 (1,800 souls)
Spellcasting. The Lordran Mage is a 5th-level Spellcaster. Its Spellcasting ability is Intelligence (spell save DC 14, +6 to hit with spell attacks). The Lordran Mage has the following Wizard Spells prepared:
Cantrips: soul arrow;
1st Level (4 slots): mage armor, heavy soul arrow, hush
2nd Level (3 slots): magic weapon, magic shield
3rd Level (3 slots): homing soulmass, soul spear
Actions
Dagger. Melee Weapon Attack: +4, reach 120 ft., one target. Hit: 4 (1d4+1 slashing)
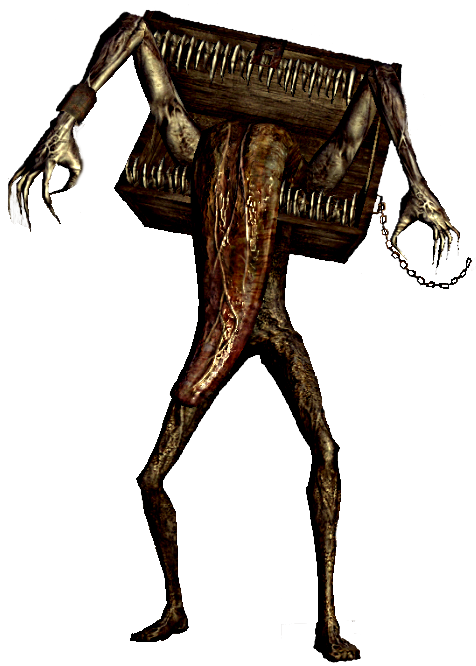
Lordran Mimic
Medium monstrosity (shapechanger), unaligned
- Armor Class 15
- Hit Points 135 (18d8+54)
- Speed 30 ft.
STR DEX CON INT WIS CHA 17 (+3) 15 (+2) 16 (+3) 5 (-3) 13 (+1) 8 (-1)
- Senses Passive Perception 11
- Languages -
- Challenge 5 (1,800 souls)
Shapechanger. The mimic can use its action to polymorph into an object or back into its true, amorphous form. Its statistics are the same in each form. Any equipment it is wearing or carrying isn't transformed. It reverts to its true form if it dies.
Adhesive (Object Form Only). The mimic adheres to anything that touches it. A Huge or smaller creature adhered to the mimic is also grappled by it (escape DC 13). Ability checks made to escape this grapple have disadvantage.
False Appearance (Object Form Only). While the mimic remains motionless, it is indistinguishable from an ordinary object.
Grappler. The mimic has advantage on attack rolls against any creature grappled by it.
Actions
Multiattack. The Mimic makes a bite and a claw attack
Bite. Melee Weapon Attack: +6, reach 5 ft., one target. Hit: 9 (1d10+3 piercing)
Claw. Melee Weapon Attack: +6, reach 5 ft., one target. Hit: 8 (1d8+3 piercing)
Devour. The mimic makes a bite attack against a target it is grappling. On a hit, the creature must make a DC 14 Strength saving throw. On a failure, the mimic may make another devour attack as a free action.
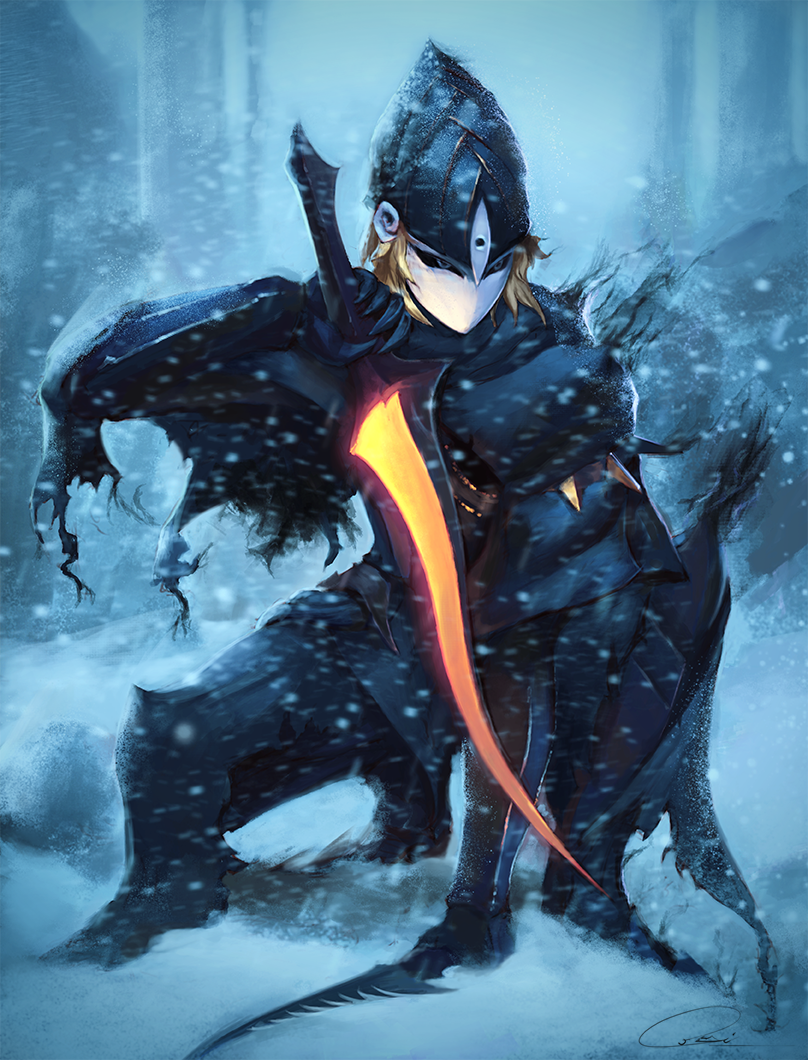
Lord's Blade Ciaran
Medium humanoid, lawful neutral
- Armor Class 20
- Hit Points 150 (20d8+60)
- Speed 30 ft.
STR DEX CON INT WIS CHA 12 (+1) 20 (+5) 17 (+3) 16 (+3) 17 (+3) 16 (+3)
- Senses Passive Perception 11
- Languages -
- Challenge 10 (5,900 souls)
Hornet Ring. Ciaran's weapon attacks score a critical hit on a 19 or 20.
Sneak Attack. Ciaran deals an extra 35 (10d6) damage when she hits a target with a weapon attack and has advantage on the attack roll, or when the target is within 5 ft. of an ally of Ciaran that isn't Incapacitated and Ciaran doesn't have disadvantage on the Attack roll.
Actions
Multiattack Ciaran makes two attacks, one with her Gold Tracer and one with her Silver Tracer.
Gold Tracer. Melee Weapon Attack: +12, reach 5 ft., one target. Hit: 12 (1d6+8) slashing damage.
Silver Tracer. Ranged Spell Attack: +6, range 30 ft., one target. Hit: 6 (16+8) lightning and the creature must succeed on a DC 15 Constitution saving throw or take 2d10 poison damage and become Poisoned for 1 minute.
Bonus Actions
Hynpnotizing Tracer Ciaran dances with her Gold Tracer and attempts to hypnotize a creautre that can see her within 30 feet. The creature must succeed on a DC 18 Wisdom saving throw or be stunned until the end of her next turn.

Man-Serpent Mage
Medium monstrosity, lawful evil
- Armor Class 14 (natural armor)
- Hit Points 90 (12d8+36)
- Speed 30 ft.
STR DEX CON INT WIS CHA 15 (+2) 17 (+3) 16 (+3) 5 (-3) 13 (+1) 8 (-1)
- Senses Passive Perception 11
- Languages -
- Challenge 5 (1,800 souls)
Magic Resistance. The Man-Serpent has advantage on saving throws against spells and other magical effects.
Actions
Flamberge. Melee Weapon Attack: +5, reach 5 ft., one target. Hit: 6 (1d6+2) slashing damage
Hurl Lightning. Ranged Spell Attack: +6, range 30 ft., one target. Hit: 6 (1d10) lightning and the creature must succeed on a DC 13 Constitution saving throw or become stunned until the end of their next turn.
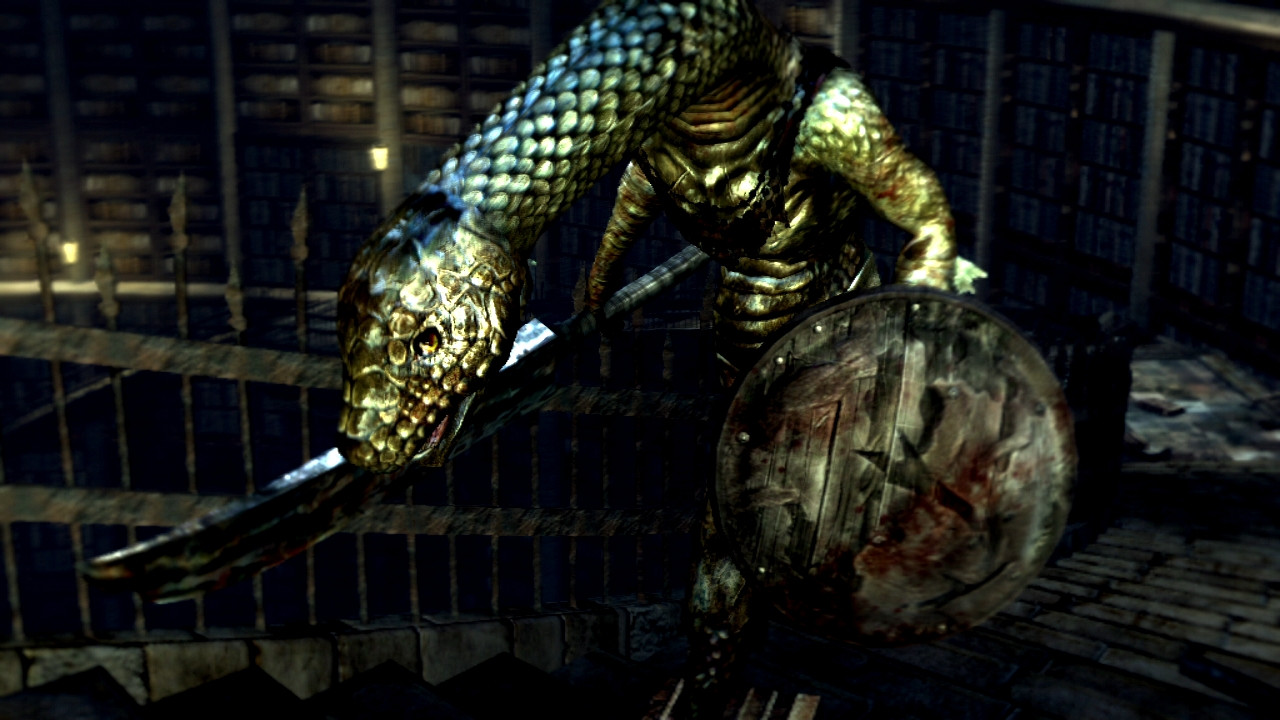
Man-Serpent Soldier
Medium monstrosity, lawful evil
- Armor Class 16 (natural armor, shield)
- Hit Points 127 (17d8+51)
- Speed 30 ft.
STR DEX CON INT WIS CHA 19 (+4) 13 (+1) 16 (+3) 5 (-3) 13 (+1) 8 (-1)
- Senses Passive Perception 11
- Languages -
- Challenge 5 (1,800 souls)
Magic Resistance. The man-serpent has advantage on saving throws against spells and other magical effects.
Actions
Multiattack. The Man-Serpent makes two greatsword attacks
Greatsword. Melee Weapon Attack: +7, reach 5 ft., one target. Hit: 11 (2d6+4) piercing damage

Maneater Mildred
Medium humanoid, neutral evil
- Armor Class 14 (shield)
- Hit Points 153 (18d8+72)
- Speed 30 ft.
STR DEX CON INT WIS CHA 19 (+4) 14 (+2) 18 (+4) 11 (+0) 14 (+2) 13 (+1)
- Senses Passive Perception 12
- Languages Common
- Challenge 7 (2,900 souls)
Actions
Multiattack. Mildred makes two Butcher Knife attacks.
Butcher Knife. Melee Weapon Attack: +7, reach 5 ft., one target. Hit: 9 (1d8+4) slashing and Mildred regains three hit points.
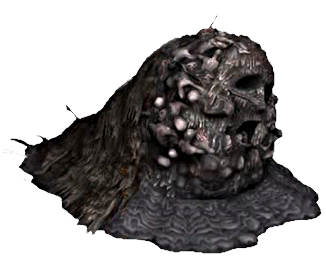
Mass of Souls
Huge undead, chaotic evil
- Armor Class 8
- Hit Points 229 (17d12+119)
- Speed 20 ft.
STR DEX CON INT WIS CHA 23 (+6) 6 (-2) 25 (+7) 1 (-5) 14 (+2) 5 (-3)
- Senses Passive Perception 12
- Languages -
- Challenge 8 (3,900 souls)
Actions
Multiattack. The Mass of Souls makes two Mouth Spear attacks and uses Create Wisp if able.
Mouth Spear. Melee Weapon Attack: +9, reach 5 ft., one target. Hit: 20 (3d8+6 slashing)
Create Wisp (Recharge 6). The Mass of Souls vomits a Wisp into an unoccupied space within five feet of it.
Manus, Father of the Abyss
Huge Aberration, Chaotic Evil
- Armor Class 22
- Hit Points 367 (21d20 + 147)
- Speed 40 ft., fly 80 ft
STR DEX CON INT WIS CHA 29 (+9) 14 (+2) 25 (+7) 16 (+3) 15 (+2) 19 (+4)
- Saving Throws DEX +9, CON +14, WIS +9, CHA +11
- Skills Perception +16, Stealth +9
- Damage Immunities Acid
- Senses Blindsight 60 ft., Darkvision 120 ft., Passive Perception 26
- Languages Common, Draconic
- Challenge 22 (33,000 XP)
Magic Resistance. Manus has advantage on saving throws against spells and other magical effects.
Legendary Resistances (3/day). If Manus fails a saving throw, he can choose to succeed instead.
Actions
Multiattack. Manus makes two Slam attacks and a Catalyst Strike attack.
Slam. Melee Weapon Attack: +16 to hit, reach 15 ft., one target. Hit: 32 (4d12 + 9) bludgeoning damage.
Catalyst Strike. Melee Weapon Attack: +16 to hit, reach 15 ft., one target. Hit: 27 (4d8 + 9) slashing damage.
Barrage (Recharge 6). Manus makes a Slam attack at a creature within 10 feet of him. On a hit, the attack does damage as normal and Manus can make 4 more Slam attacks at the same creature at advantage.
Legendary Actions
Manus can take 3 legendary actions, choosing from the options below. Only one legendary action option can be used at a time and only at the end of another creature's turn. Manus regains spent legendary actions at the start of its turn.
Detect. Manus makes a Wisdom (Perception) check.
Slam Attack. Manus makes a Slam attack.
Dark Orb Manus conjures a dark orb from his catalyst and hurls it at a creature within 30 feet of him. The creature must succeed on a DC 22 Dexterity saving throw or take 28 (8d6) bludgeoning damage, half as much on a success.
Lair Actions
On initiative count 20 (losing initiative ties), Manus can take a lair action to cause one of the following magical effects; Manus can’t use the same effect two rounds in a row; Manus can only take lair actions while below 50% of his maximum hit points:
Manus slams his catalyst on the ground, summoning a wave of dark magic in a 30 foot cone in front of him. Each creature in the cone's area must succeed on a DC 22 Strength saving throw or take 42 (12d6) bludgeoning damage and be pushed 15 feet away from Manus.
Manus raises his catalyst in the air, summoning a hail of dark magic in a 20-foot radius circle around him. Each creature caught in the area must succeed on a DC 22 Dexterity saving throw or take 45 (10d8) bludgeoning damage and be knocked prone.
Manus draws dark magic into himself, conjuring dark orbs in a 30-foot radius circle around him. Each creature in the area must succeed at a DC 22 Constitution saving throw or take 52 (8d12) bludgeoning damage and be dragged 15 feet closer to Manus.
Marvelous Chester
Medium humanoid, neutral evil
- Armor Class 14
- Hit Points 161 (17d12+51)
- Speed 5 ft., fly 50 ft.
STR DEX CON INT WIS CHA 10 (+0) 19 (+4) 18 (+4) 13 (+1) 15 (+3) 16 (+4)
- Skills Deception +7
- Senses Passive Perception 13
- Languages Common
- Challenge 7 (2,300 souls)
Actions
Multiattack. Chester makes three Sniper Crossbow attacks.
Sniper Crossbow. Ranged Spell Attack: +10, range 200/800 ft., one target. Hit: 23 (1d10+7) piercing damage.

Moonlight Butterfly
Huge aberration, chaotic neutral
- Armor Class 14
- Hit Points 161 (17d12+51)
- Speed 5 ft., fly 50 ft.
STR DEX CON INT WIS CHA 9 (-1) 16 (+3) 17 (+3) 19 (+4) 16 (+3) 17 (+3)
- Senses Passive Perception 13
- Languages Understands Draconic but can’t speak
- Challenge 6 (2,300 souls)
Avoidance. If the Moonlight Butterfly is subjected to an effect that allows it to make a saving throw to take only half damage, it instead takes no damage if it succeeds on the saving throw, and only half damage if it fails.
Displacement. The Moonlight Butterfly projects a radiant illusion, making it difficult to pinpoint exactly, causing attack rolls against it to have disadvantage. If it is hit by an attack, this trait is disrupted until the end of its next turn. This trait is also disrupted while the butterfly is incapacitated or has a speed of 0.
Actions
Multiattack. The Moonlight Butterfly makes a Soul Mass attack at two different creatures within range.
Soul Mass. Ranged Spell Attack: +7, reach 120 ft., one target. Hit: 23 (5d8) force
Soul Volley (Recharge 5-6). The Moonlight Butterfly fires a 30 foot cone of needle-like magic projectiles. Each creature in the cone must make a DC 15 Dexterity saving throw. A target takes 14 (4d6) force damage on a failed save, or half as much damage on a successful one.
Soul Detonation (Recharge Long Rest). The Moonlight Butterfly collects magical energy and releases it in a 20-foot sphere around itself. Each creature other than the butterfly must make a DC 15 Constitution saving throw. A target takes 28 (8d6) force damage on a failed save, or half as much damage on a successful one.

Mushroom Child
Small plant, unaligned
- Armor Class 8
- Hit Points 3 (1d6)
- Speed 20 ft.
STR DEX CON INT WIS CHA 7 (-2) 7 (-2) 10 (+0) 3 (-4) 14 (+2) 5 (-3)
- Damage Resistances Fire
- Senses Passive Perception 12
- Languages Sylvan
- Challenge 0 (0 souls)
Actions
Punch. Melee Weapon Attack: +0, reach 5 ft., one target. Hit: 1 bludgeoning
Mushroom Parent
Medium plant, unaligned
- Armor Class 8
- Hit Points 202 (27d8+81)
- Speed 20 ft.
STR DEX CON INT WIS CHA 20 (+5) 7 (-2) 17 (+3) 3 (-4) 14 (+2) 5 (-3)
- Senses Passive Perception 12
- Languages Sylvan
- Challenge 5 (1,800 souls)
Actions
Multiattack. The mushroom parent makes two punch attacks.
Punch. Melee Weapon Attack: +6, reach 5 ft., one target. Hit: 19 (4d6+5) bludgeoning
New Londo Banshee
Medium undead, chaotic evil
- Armor Class 12
- Hit Points 123 (19d8+38)
- Speed fly 30 ft.
STR DEX CON INT WIS CHA 10 (+0) 18 (+4) 14 (+2) 10 (+0) 12 (+1) 18 (+4)
- Damage Resistances Fire
- Damage Immunities Special
- Senses Passive Perception 11
- Languages -
- Challenge 5 (1,800 souls)
Curse Bearer. The banshee is a cursed being, and can only be harmed by those under the effect of the same curse. The banshee is immune to all damage, except damage caused by a cursed creature.
Incorporeal Movement. The banshee can move through other creatures and objects as if they were difficult terrain. It takes 5 (1d10) force damage if it ends its turn inside an object.
Actions
Multiattack. The banshee makes three Jagged Ghost Blade attacks.
Jagged Ghost Blade. Melee Weapon Attack: +6, reach 5 ft., one target. Hit: 11 (2d4+6) slashing
Wail (1/Day). The banshee releases a mournful wail, provided that she isn’t in sunlight. This wail has no effect on constructs and undead. All other creatures within 30 feet of her that can hear her must make a DC 13 Constitution saving throw. On a failure, a creature drops to 1 hit point.

New Londo Ghost
Medium undead, chaotic evil
- Armor Class 11
- Hit Points 58 (13d8)
- Speed fly 20 ft.
STR DEX CON INT WIS CHA 7 (-2) 16 (+3) 11 (+0) 10 (+0) 12 (+1) 17 (+3)
- Damage Immunities Special
- Senses Passive Perception 11
- Languages -
- Challenge 3 (700 souls)
Curse Bearer. The ghost is a cursed being, and can only be harmed by those under the effect of the same curse. The ghost is immune to all damage, except damage caused by a cursed creature.
Incorporeal Movement. The ghost can move through other creatures and objects as if they were difficult terrain. It takes 6 (1d10) force damage if it ends its turn inside an object.
Actions
Multiattack. The ghost makes two Jagged Ghost Blade attacks.
Jagged Ghost Blade. Melee Weapon Attack: +5, reach 5 ft., one target. Hit: 6 (1d4+3) slashing
Nito, Lord of the Dead
Huge undead, neutral
- Armor Class 18
- Hit Points 220
- Speed 20 ft.
STR DEX CON INT WIS CHA 27 (+8) 13 (+1) 22 (+6) 15 (+2) 19 (+4) 21 (+5)
- Saving Throws DEX +6, CON +11, WIS +9
- Skills History +9, Perception +9
- Damage Immunities Poison, Necrotic; Bludgeoning, Piercing, and Slashing from Nonmagical Attacks
- Senses passive Perception 19
- Languages Celestial
- Challenge 13 (10,000 souls)
Legendary Resistances (3/day). If Nito fails a saving throw, he can choose to succeed instead.
Turn Immunity. Nito is immune to any effect that turns undead.
Death Sense. Nito has been granted dominion over death itself. Nito knows the location of every living creature within his lair, and thus living creatures cannot hide from him. He also knows the current hit points of each creature in his lair. When a non-undead creature dies in his lair, nito gains temporary hit points equal to the number of the creature's maximum hit dice.
Actions
Multiattack. Nito can use his Frightful Presence. He then makes three attacks, two with his Gravelord Sword and one with his Paralyzing Touch. Nito can make a Sword Burst attack in place of a Gravelord Sword attack.
Gravelord Sword Melee Weapon Attack: +12 to hit, 60 ft., one target. Hit: (4d6+7 slashing) plus 2d6 necrotic damage.
Sword Burst Ranged Weapon Attack: +12 to hit, 60 ft., one target. Hit: (4d6+7 slashing) plus 2d6 necrotic damage.
Paralyzing Touch. Melee Spell Attack: +12 to hit, reach 5 ft., one creature. Hit: 10 (3d6) cold damage. The target must succeed on a DC 18 Constitution saving throw or be paralyzed for 1 minute. The target can repeat the saving throw at the end of each of its turns, ending the effect on itself on a success.
Frightful Presence. Each creature of Nito's choice that is within 120 feet of Nito and aware of it must succeed on a DC 16 Wisdom saving throw or become frightened for 1 minute. A creature can repeat the saving throw at the end of each of its turns, ending the effect on itself on a success. If a creature's saving throw is successful or the effect ends for it, the creature is immune to the Nito's Frightful Presence for the next 24 hours.
Miasma of Death (Recharge 6). Nito gathers death energy and releases it in a 20 foot radius centered around himself. Each creature in that area must make a DC 17 Dexterity saving throw, taking 18d6 necrotic damage on a failed save, or half as much damage on a successful one.
Legendary Actions
Nito can take 3 legendary actions, choosing from the options below. Only one legendary action option can be used at a time and only at the end of another creature’s turn. Nito regains spent legendary actions at the start of its turn.
Sword Burst. Nito makes a Sword Burst attack.
Reanimate. (2 Actions) Nito points towards an undead corpse within 30 feet of him. The corpse returns to life at full hit points.
Move. Nito moves up to his movement speed without provoking attacks of opportunity
Lair Actions
On initiative count 20 (losing initiative ties), Nito can take a lair action to cause one of the following magical effects; Nito can’t use the same effect two rounds in a row:
On initiative count 20 (losing initiative ties), Nito can take a lair action to cause one of the following magical effects; Nito can’t use the same effect two rounds in a row:
Nito imbues corpses nearby with necrotic energy, creating 2d4 catacombs skeletons or one giant skeleton in unoccupied spaces within the lair. Skeletal hands sprout from the ground in a 15-foot radius of Nito’s choosing. Any creature in the area when the hands sprout must succeed on a DC 16 Strength saving throw or become restrained until the next lair action.
Nito calls forth the spirits of creatures that died in its lair. These apparitions materialize and attack one creature within the lair. The target must succeed on a DC 16 Constitution saving throw, taking (10d6) necrotic damage on a failed save, or half as much damage on a success. The apparitions then disappear.
Oolacile resident
Medium aberration, chaotic evil
- Armor Class 16 (natural armor)
- Hit Points 135 (14d8+56)
- Speed 40 ft.
STR DEX CON INT WIS CHA 17 (+3) 16 (+3) 19 (+4) 6 (-2) 15 (+2) 11 (+0)
- Skills Athletics +6
- Senses Passive Perception 12
- Languages -
- Challenge 5 (1800 souls)
Actions
Multiattack. The Oolacile resident makes four Slam attacks
Slam. Melee Weapon Attack: +6, reach 5 ft., one target. Hit: 10 (1d12+3) bludgeoning damage
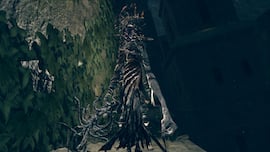
Oolacile sorceress
Medium aberration, chaotic evil
- Armor Class 14 (natural armor)
- Hit Points 105 (14d8+42)
- Speed 30 ft.
STR DEX CON INT WIS CHA 12 (+1) 16 (+3) 16 (+3) 6 (-2) 16 (+3) 18 (+4)
- Skills Perception +6
- Senses Passive Perception 16
- Languages -
- Challenge 6 (2300 souls)
Actions
Multiattack. The Oolacile sorceress makes two Dark Orb attacks
Dark Orb. Ranged Spell Attack +7, range 60 ft., one target. Hit: 18 (5d6) bludgeoning damage
Claw Melee Weapon Attack: +4, reach 5 ft., one target. Hit: 6 (1d8+1) bludgeoning damage
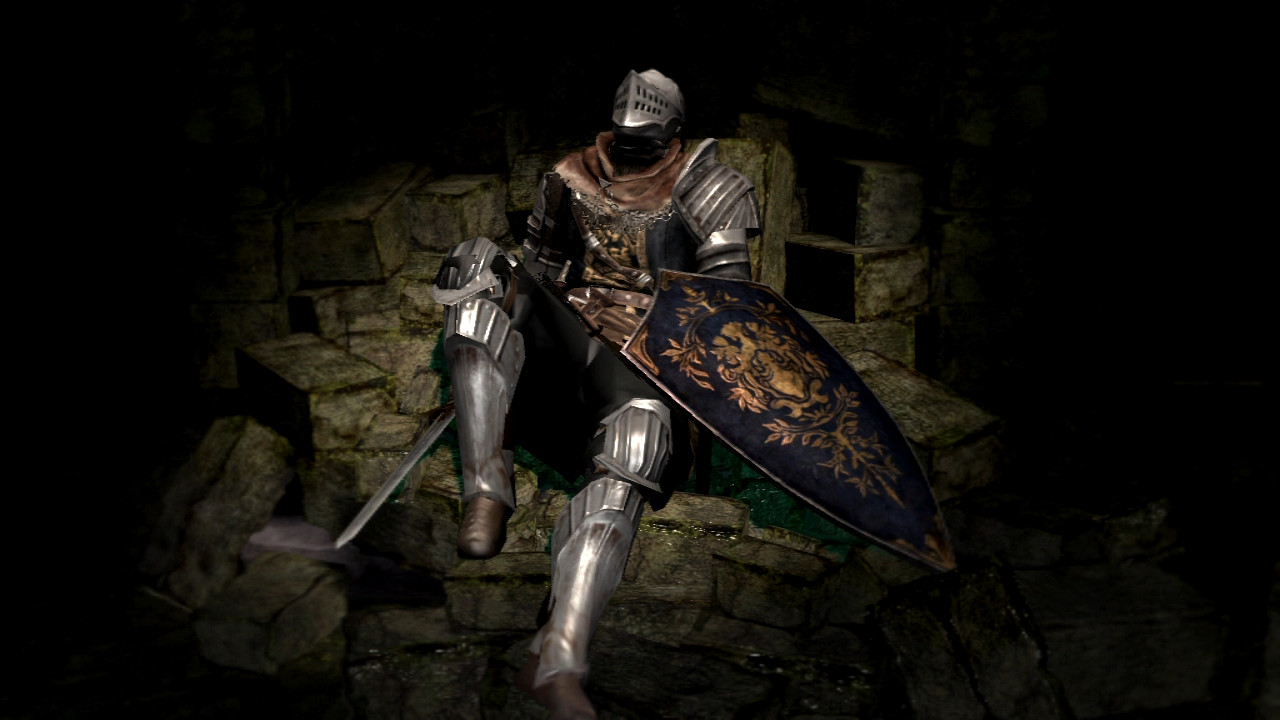
Oscar of Astora
Medium undead, unaligned
- Armor Class 20 (plate, shield)
- Hit Points 135 (18d8+54)
- Speed 30 ft.
STR DEX CON INT WIS CHA 15 (+2) 18 (+4) 16 (+3) 11 (+0) 14 (+2) 10 (+0)
- Senses Passive Perception 12
- Languages -
- Challenge 7 (2,900 souls)
Actions
Multiattack. Oscar makes three Astora Straight Sword attacks
Astora Straight Sword. Melee Weapon Attack: +7, reach 5 ft., one target. Hit: 9 (1d8+4) slashing plus 4 (1d6) radiant damage

Painting Guardian
Medium humanoid, lawful neutral
- Armor Class 15 (armored robes)
- Hit Points 82 (11d8+33)
- Speed 30 ft.
STR DEX CON INT WIS CHA 12 (+1) 18 (+4) 16 (+3) 12 (+1) 15 (+2) 10 (+0)
- Senses Passive Perception 12
- Languages -
- Challenge 2 (450 souls)
Actions
Multiattack. The painting guardian makes three curved sword attacks or two throwing knife attacks.
Curved Sword. Melee Weapon Attack: +6, reach 15 ft., one target. Hit: 8 (1d6 + 4) piercing damage
Throwing Knife. Ranged Weapon Attack: +6, range 20/60ft., one target. Hit: 7 (1d4 + 4) piercing damage.
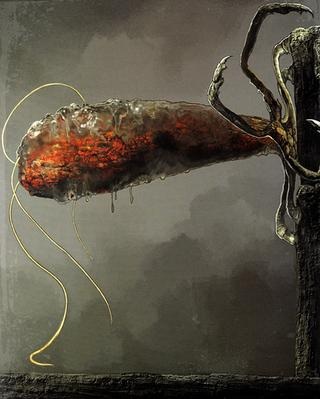
Parasitic Wall Hugger
Large monstrosity, unaligned
- Armor Class 16 (natural armor)
- Hit Points 218 (23d10+92)
- Speed 0 ft.
STR DEX CON INT WIS CHA 20 (+5) 1 (-5) 18 (+4) 2 (-4) 11 (+0) 4 (-3)
- Senses Passive Perception 10
- Languages -
- Challenge 6 (2,300 souls)
Actions
Multiattack. The Wall Hugger makes three tentacle whip attacks.
Tentacle Whip. Melee Weapon Attack: +8, reach 15 ft., one target. Hit: 12 (2d6+5) slashing

Phalanx
Medium undead, chaotic neutral
- Armor Class 15 (shield, natural armor)
- Hit Points 45 (6d8+18)
- Speed 10 ft.
STR DEX CON INT WIS CHA 16 (+3) 10 (+0) 16 (+3) 6 (-2) 8 (-1) 5 (-3)
- Senses Passive Perception 9
- Languages -
- Challenge 2 (450 souls)
Pack Defense. The Phalanx gains a +1 bonus to AC for each other Phalanx creature within five feet of it.
Actions
Javelin. Ranged Weapon Attack: +5, reach 5 ft., one target. Hit: 10 (2d6+3) slashing
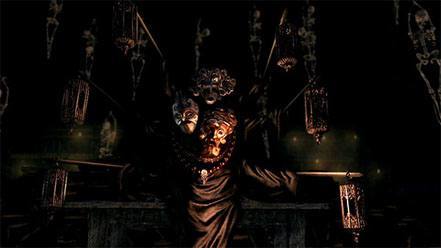
Pinwheel
Medium undead, chaotic evil
- Armor Class 16 (mage armor)
- Hit Points 221 (26d8+4)
- Speed 20 ft., fly 20 ft.(hover)
STR DEX CON INT WIS CHA 13 (+1) 16 (+3) 18 (+4) 17 (+3) 15 (+2) 19 (+4)
- Senses Passive Perception 12
- Languages Common
- Challenge 9 (5,000 souls)
Legendary Resistances (3/day). If Pinwheel fails a saving throw, it can choose to succeed instead.
Mask of the Father. Pinwheel’s carrying capacity is calculated as if he were a Large creature.
Mask of the Mother. Pinwheel’s maximum hit points are increased by 26 (included in his hit point total)
Mask of the Child. When Pinwheel fails on a Constitution saving throw, he makes subsequent saving throws to end that effect at advantage.
Actions
Multiattack. Pinwheel makes two Hurl Flame attacks and uses Conjure Duplicates if able.
Hurl Flame. Ranged Weapon Attack: +8 to hit, 60 ft., one target. Hit: 13 (2d8+4) fire
Conjure Duplicates (Recharge 5-6). Pinwheel conjures two illusory duplicates of itself in unoccupied spaces within 30 feet of itself. As part of this action, it can switch spaces with any duplicate within 30 feet of it. A duplicate uses the same stats as Pinwheel, except that it has 1 hit point and does not have multiattack, Conjure Duplicates, or legendary actions. A duplicate reduced to 0 hit points vanishes.
Legendary Actions
Pinwheel can take 3 legendary actions, choosing from the options below. Only one legendary action option can be used at a time and only at the end of another creature's turn. Pinwheel regains spent legendary actions at the start of its turn.
Hurl Flame. Pinwheel makes a hurl flame attack.
Move. Pinwheel moves up to its speed without provoking opportunity attacks.
Frightening Gaze (Costs 2 Actions). Pinwheel, or one of its duplicates, fixes its gaze on one creature it can see within 10 feet of it. The target must succeed on a DC 18 Wisdom saving throw against this magic or become frightened for 1 minute. The frightened target can repeat the saving throw at the end of each of its turns, ending the effect on itself on a success. If a target's saving throw is successful or the effect ends for it, the target is immune to the Pinwheel's gaze for the next 24 hours.

Pisaca
Medium aberration, neutral evil
- Armor Class 14
- Hit Points 123 (19d8+38)
- Speed 30 ft.
STR DEX CON INT WIS CHA 18 (+4) 14 (+2) 15 (+2) 6 (-2) 16 (+3) 1 (-5)
- Damage Resistances Bludgeoning, Piercing, and Slashing from Nonmagical Attack
- Senses Passive Perception 13
- Languages -
- Challenge 4 (1,100 souls)
Actions
Multiattack. The Pisaca makes two attacks, one with its beak and one with its tentacles.
Beak. Melee Weapon Attack: +4, reach 5 ft., one target. Hit: 18 (4d4 + 4) piercing damage.
Spit Acid. Ranged Weapon Attack: +4, range 30 ft., one target. Hit: 9 (2d6+2) acid damage.
Tentacles. Melee Weapon Attack: +6, reach 10 ft., one target. Hit: 8 (1d10 + 2) piercing damage

Prince Ricard
Medium undead, unaligned
- Armor Class 18 (plate)
- Hit Points 127 (17d8+51)
- Speed 30 ft.
STR DEX CON INT WIS CHA 15 (+2) 18 (+4) 16 (+3) 11 (+0) 14 (+2) 10 (+0)
- Senses Passive Perception 12
- Languages -
- Challenge 7 (2,900 souls)
Actions
Multiattack. Prince Ricard makes three rapier attacks or two longbow attacks
Ricard’s Rapier. Melee Weapon Attack: +8 to hit, reach 5 ft., one target. Hit: 10 (1d8+5) piercing
Longbow Ranged Weapon Attack: +7 to hit, range 150/600 ft., one target. Hit: 9 (1d8+4) piercing
Reactions
Parry. Ricard adds 4 to its AC against one melee Attack that would hit it. To do so, he must be able to see its attacker. If this causes the attack to miss, Ricard can make a Rapier attack at advantage against the attacker as part of this reaction.
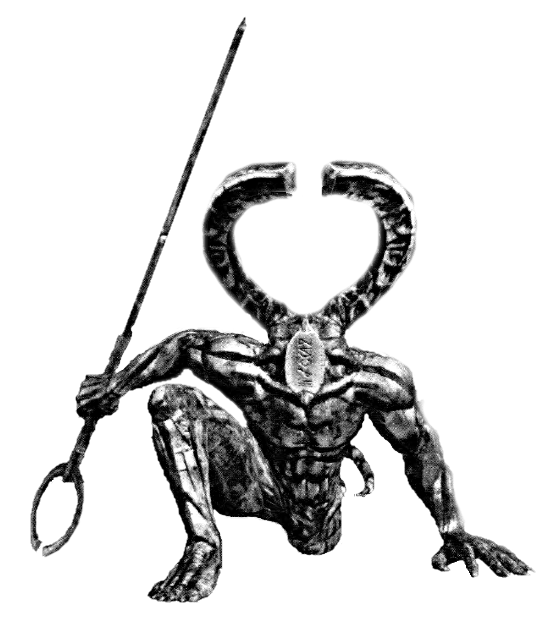
Prowling Demon
Large fiend(demon), chaotic neutral
- Armor Class 17 (natural armor)
- Hit Points 149 (13d10+78)
- Speed 30 ft.
STR DEX CON INT WIS CHA 18 (+4) 14 (+2) 22 (+6) 10 (+0) 15 (+2) 13 (+1)
- Senses Passive Perception 12
- Languages -
- Challenge 7 (2,900 souls)
Actions
Multiattack. The demon makes two attacks with its Titanite Catch Pole.
Titanite Catch Pole. Melee Weapon Attack: +7, reach 15 ft., one target. Hit: 15 (2d10 + 4) bludgeoning damage.
Lightning Ray. Ranged Spell Attack: +6, range 60 ft., one target. Hit: 18 (4d8) lightning
Leaping Strike. The Prowling Demon leaps 20 feet to a space he can see within range. Any creature in the demon’s space when it lands must make a Dexterity saving throw. On a failure, the creature takes 21 (6d6) bludgeoning damage. A creature takes half damage on a success.

Quelana of Izalith
Medium humanoid, chaotic good
- Armor Class 13 (shield)
- Hit Points 117 (18d8+36)
- Speed 30 ft.
STR DEX CON INT WIS CHA 19 (+4) 14 (+2) 15 (+2) 11 (+0) 14 (+2) 20 (+5)
- Damage Resistances Fire, Poison
- Senses Passive Perception 12
- Languages Common
- Challenge 8 (3,900 souls)
Rusted Iron Ring. Quelana is not slowed by difficult terrain caused by water and similar natural hazards.
Spellcasting. Quelana is a 10th-level spellcaster. Her spellcasting ability is Charisma (spell save DC 18, +10 to hit with spell attacks). Quelana has the following sorcerer spells prepared: 1st level (4 slots): burning hands, combustion, minor fireball, fire whip
2nd level (3 slots): fire orb, fire surge, iron flesh
3rd level (3 slots): fireball, firestorm
4th level (2 slot): great chaos fireball, immolate self
5th level (1 slot): chaos storm
Actions
Dagger. Melee Weapon Attack: +5, reach 5 ft., one target. Hit: 5 (1d4+2 piercing)
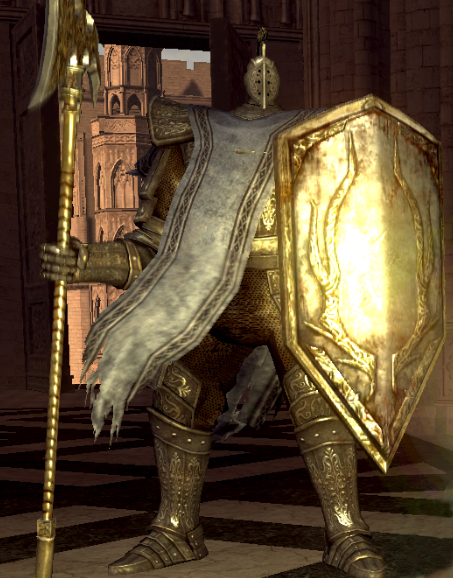
Royal Sentinel Giant
Huge giant, lawful neutral
- Armor Class 19 (natural armor, shield)
- Hit Points 202 (15d12+105)
- Speed 20 ft.
STR DEX CON INT WIS CHA 25 (+7) 10 (+0) 24 (+7) 9 (-1) 15 (+2) 10 (+0)
- Senses Passive Perception 12
- Languages -
- Challenge 9 (5,000 souls)
Actions
Multiattack. The giant makes three Halberd attacks.
Halberd. Melee Weapon Attack: +11, reach 15 ft., one target. Hit: 24 (3d10 + 7) bludgeoning damage.
Shield Slam. Each creature within ten feet of the giant must succeed at a DC 15 Dexterity saving throw or take 28 (5d10) bludgeoning damage and be knocked prone. A creature takes half damage on a success.
Healing Burst The giant and each of its allies within ten feet of it regains 30 (4d10+8) hit points.
Wrath of the Gods The giant casts wrath of the gods (spell save DC 16) at 4th level.
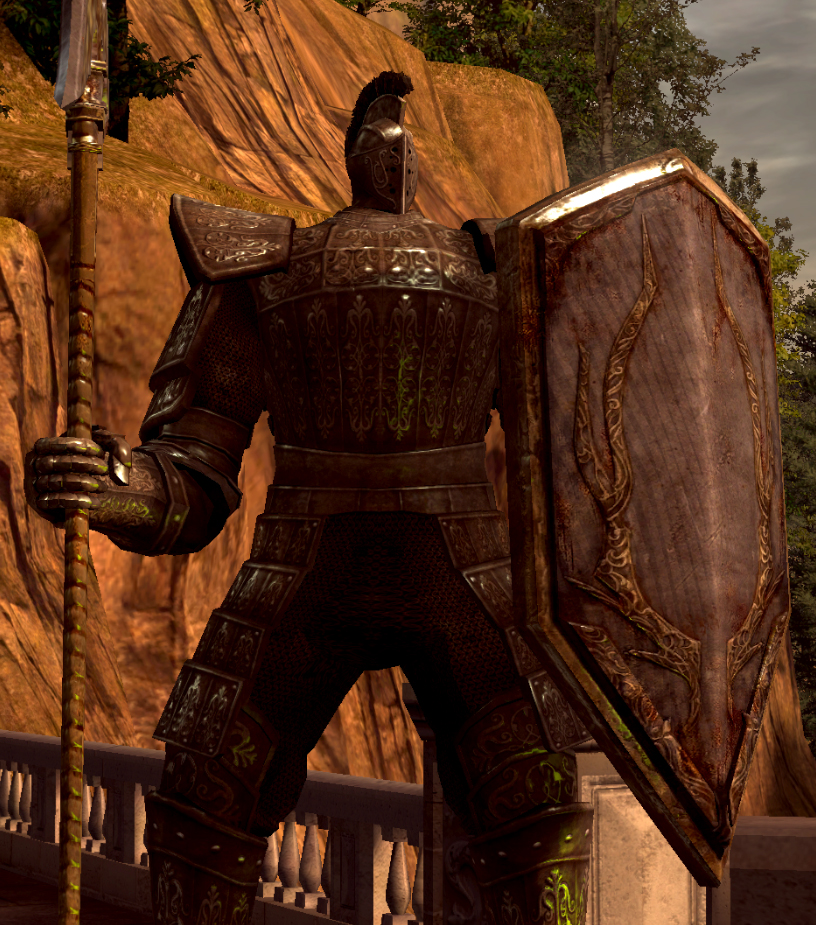
Sentinel Giant
Huge giant, lawful neutral
- Armor Class 17 (half plate, shield)
- Hit Points 162 (13d12+78)
- Speed 30 ft.
STR DEX CON INT WIS CHA 23 (+6) 8 (-1) 22 (+6) 9 (-1) 15 (+2) 10 (+0)
- Senses Passive Perception 12
- Languages -
- Challenge 8 (3,900 souls)
Actions
Multiattack. The giant makes two Halberd attacks.
Halberd. Melee Weapon Attack: +9, reach 15 ft., one target. Hit: 23 (3d10 + 6) bludgeoning damage.
Shield Slam. Each creature within five feet of the giant must succeed at a DC 16 Dexterity saving throw or take 22 (4d10) bludgeoning damage and be knocked prone. A creature takes half damage on a success.

Sanctuary Guardian
Large Monstrosity, lawful neutral
- Armor Class 18
- Hit Points 300 (16d20+112)
- Speed 30 ft., fly 60 ft.
STR DEX CON INT WIS CHA 23 (+6) 18 (+4) 24 (+7) 13 (+1) 19 (+4) 10 (+1)
- Damage Resistances Lightning
- Damage Immunities Poison
- Condition Immunities Poisoned
- Saving Throws Strength +11, Dexterity +9, Constitution +12
- Skills Athletics +11, Perception +9
- Senses Passive Perception 19
- Languages -
- Challenge 16 (15,00 souls)
Legendary Resistances (3/day). If the Sanctuary Guardian fails a saving throw, it can choose to succeed instead.
Flyby: The Sanctuary Guardian doesn't provoke Opportunity Attacks when it flies out of an enemy's reach.
Stalwart: The Sanctuary Guardian has advantage on ability checks and saving throws made to avoid being grappled or knocked prone.
Actions
Multiattack. The Sanctuary Guardian makes four attacks: one with its Bite, one with its Horns, one with its Claws, and one with its Tail. It can use its Hurl Lightning attack in place of its Bite or Horns.
Bite. Melee Weapon Attack: +11 to hit, reach 5 ft., one target. Hit: 16 (2d10 + 6) piercing damage.
Claws. Melee Weapon Attack: +11 to hit, reach 5 ft., one target. Hit: 14 (2d6 + 6) slashing damage.
Horns. Melee Weapon Attack: +11 to hit, reach 5 ft., one target. Hit: 15 (2d8 + 6) bludgeoning damage.
Tail. Melee Weapon Attack: +11 to hit, reach 15 ft., one target. Hit: 13 (2d4 + 6) piercing damage. The target must succeed on a DC 17 Constitution saving throw or take 18 (5d6) poison damage.
Hurl Lightning. The sanctuary guardian collects electricity and shoots it out of its mouth, targeting a 5-foot radius sphere within 60 feet. Each creature in that area must make a DC 16 Dexterity saving throw, taking 14 (4d6) lightning damage on a failed save and be stunned until the end of their next turn. A creature takes half as much damage on a successful save and is not stunned.
Legendary Actions
The Sanctuary Guardian can take 3 legendary actions, choosing from the options below. Only one legendary action option can be used at a time and only at the end of another creature’s turn. The Sanctuary Guardian regains spent legendary actions at the start of its turn.
Bite. The Sanctuary Guardian makes a Bite attack
Move. The Sanctuary Guardian moves up to its speed without provoking opportunity attacks.
Wing Attack (Costs 2 Actions) The Sanctuary Guardian beats its wings. Each creature within 10 feet of the Sanctuary Guardian must succeed on a DC 19 Dexterity saving throw or take 15 (2d6 + 8) bludgeoning damage and be knocked prone. The Sanctuary Guardian can then fly up to half its flying speed.

Seath the Scaleless
Gargantuan dragon, neutral evil
- Armor Class 18
- Hit Points 280 (16d20+112)
- Speed 30 ft., fly 50 ft.
STR DEX CON INT WIS CHA 27 (+8) 8 (-1) 25 (+7) 20 (+5) 18 (+4) 17 (+3)
- Saving Throws DEX +4, INT +10, WIS +9
- Skills Arcana +15, History +15, Nature +15, Religion +15, Perception +9
- Damage Resistances Force
- Damage Immunities Special*
- Senses Truesight 120 ft., Passive Perception 19
- Languages Draconic, Celestial, Common
- Challenge 14 (11,500 souls)
Legendary Resistances (3/day). If Seath fails a saving throw, he can choose to succeed instead.
*Primordial Crystal. Centuries of research into the Primordial Crystal has granted Seath a facsimile of the stone scales that granted immortality to his brethren. While the crystal is intact, Seath is immune to all damage.
Spellcasting. Seath is an 11th-level Spellcaster. Its Spellcasting ability is Intelligence (spell save DC 18, +9 to hit with spell attacks). Seath has the following Wizard Spells prepared:
Cantrips: soul arrow
1st Level (4 slots): mage armor, heavy soul arrow, hush
2nd Level (3 slots): magic weapon, magic shield, see invisibility
3rd Level (2 slots): dispel magic, soul spear, soul mass
4th Level (3 slots): crystal magic weapon, crystal soul spear, homing crystal soulmass
5th Level (2 slots): white dragon breath
Actions
Multiattack. Seath can use his Frightful Presence. He then makes three attacks, two with his Gravelord Sword and one with his Paralyzing Touch.
Bite. Melee Weapon Attack: +12 to hit, reach 10 ft., one target. Hit: 18 (2d10 + 7) piercing damage plus 4 (1d8) force damage.
Claw. Melee Weapon Attack: +12 to hit, reach 5 ft., one target. Hit: 14 (2d6 + 7) slashing damage.
Tail. Melee Weapon Attack: +12 to hit, reach 15 ft., one target. Hit: 16 (2d8 + 7) bludgeoning damage.
Frightful Presence. Each creature of Seath's choice that is within 120 feet of Seath and aware of him must succeed on a DC 16 Wisdom saving throw or become frightened for 1 minute. A creature can repeat the saving throw at the end of each of its turns, ending the effect on itself on a success. If a creature's saving throw is successful or the effect ends for it, the creature is immune to the Seath's Frightful Presence for the next 24 hours.
Crystal Breath (Recharge 5–6). Seath exhales an icy blast in either a 60-foot cone, a 120-foot line, or a 20 foot radius around himself. Each creature in the area must make a DC 19 Constitution saving throw, taking 54 (12d8) force damage on a failed save, or half as much damage on a successful one. Until the beginning of Seath’s next turn, crystals sprout from the area as well, creating difficult terrain for all creatures other than Seath. A creature who ends their turn in the space of a crystal must succeed on a DC 15 Constitution saving throw or die instantly and become cursed.
Legendary Actions
Seath can take 3 legendary actions, choosing from the options below. Only one legendary action option can be used at a time and only at the end of another creature’s turn. Seath regains spent legendary actions at the start of its turn.
Tail Slam. Seath makes a tail attack
Spell (Costs 2 Actions). Seath casts a spell of 3rd level or lower
Lair Actions
On initiative count 20 (losing initiative ties), Seath can take a lair action to cause one of the following magical effects; Seath can’t use the same effect two rounds in a row:
Seath summons a cluster of crystals in a 10-foot radius of his choosing that he can see. The crystals function as if they were made by Seath’s Crystal Breath, and disappear at after the next Lair Action
Seath generates a pulse of magical energy, disrupting the concentration of creatures in his lair. Each creature of Seath’s choosing must succeed on a DC 15 concentration check. On a failure, the creature loses concentration and takes 4d6 psychic damage.
All of the crystals formed by Seath glow brightly and explode, throwing piercing shards towards every creature within five feet of a crystal formation. Each creature in the area must succeed on a DC 15 Dexterity saving throw or take 21 (6d6) piercing damage. Afterwards the crystals disappear.

Sewer King
Huge beast, unaligned
- Armor Class 15
- Hit Points 149 (13d12+65)
- Speed 40 ft.
STR DEX CON INT WIS CHA 21 (+5) 13 (+1) 20 (+5) 4 (-3) 16 (+3) 7 (-2)
- Damage Resistances Poison
- Senses Darkvision 60 Ft., Passive Perception 13
- Languages -
- Challenge 6 (2,300 souls)
Pack Tactics. The Sewer King has advantage on an Attack roll against a creature if at least one of the Sewer King’s allies is within 5 feet of the creature and the ally isn’t Incapacitated.
Actions
Multiattack. The Sewer King makes a bite and claw attack.
Bite. Melee Weapon Attack: +8, reach 5 ft., one target. Hit: (3d6 + 5) piercing damage and the target must make a DC 13 Constitution saving throw
Claw. Melee Weapon Attack: +8, reach 5 ft., one target. Hit: (4d4 + 5) piercing damage and the target must make a DC 13 Constitution saving throw
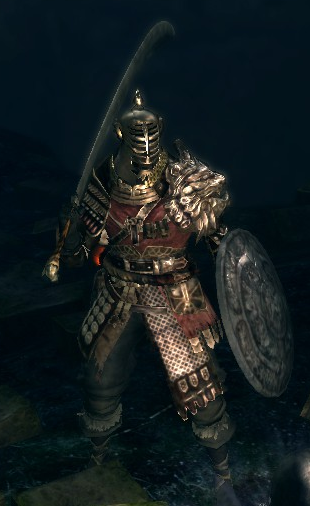
Shiva of the East
Medium humanoid, neutral
- Armor Class 18 (plate)
- Hit Points 136 (16d8+64)
- Speed 30 ft.
STR DEX CON INT WIS CHA 18 (+4) 18 (+4) 18 (+4) 10 (+0) 15 (+2) 11 (+0)
- Saving Throws Constitution +7, Dex +7, Wisdom +5
- Damage Resistances Slashing
- Senses Passive Perception 12
- Languages Common, Eastern
- Challenge 6 (2,300 souls)
Rapid Strike. When Shiva takes the Attack action on his turn and has advantage on an attack roll against one of the targets, he can forgo the advantage for that roll to make an additional weapon attack against that target, as part of the same action.
Actions
Multiattack. Shiva makes three Murakumo attacks
Murakumo. Melee Weapon Attack: +8, reach 120 ft., one target. Hit: 11 (2d6+4) slashing
Bonus Actions
Fighting Spirit (3/Long Rest). Shiva gives himself advantage on all weapon attack rolls until the end of the current turn. When he does so, he also gains 10 temporary hit points.
Siegmeyer of Catarina
Medium humanoid, lawful good
- Armor Class 20 (plate, shield)
- Hit Points 123 (19d8+38)
- Speed 30 ft.
STR DEX CON INT WIS CHA 15 (+2) 8 (-1) 15 (+2) 10 (+0) 8 (-1) 13 (+1)
- Senses Passive Perception 9
- Languages Common
- Challenge 5 (1,800 souls)
Blue Tearstone Ring. Whenever Siegmeyer’s health drops below 20% of his maximum hit points (<25), he has resistance to all damage
Actions
Multiattack. Siegmeyer makes two Zweihander attacks.
Zweihander. Melee Weapon Attack: +5, reach 5 ft., one target. Hit: 9 (2d6+2) slashing
Spike Shield. Melee Weapon Attack: +5, reach 5 ft., one target. Hit: 6 (1d6+2) piercing
Reactions
Spike Parry. When a creature misses Siegemeyer with an attack, he can make a spike shield attack at them.
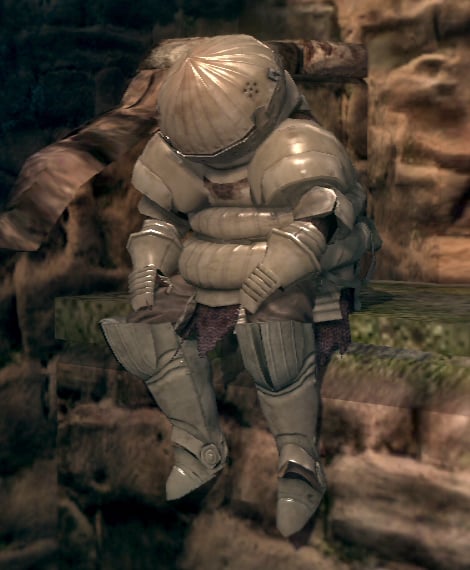
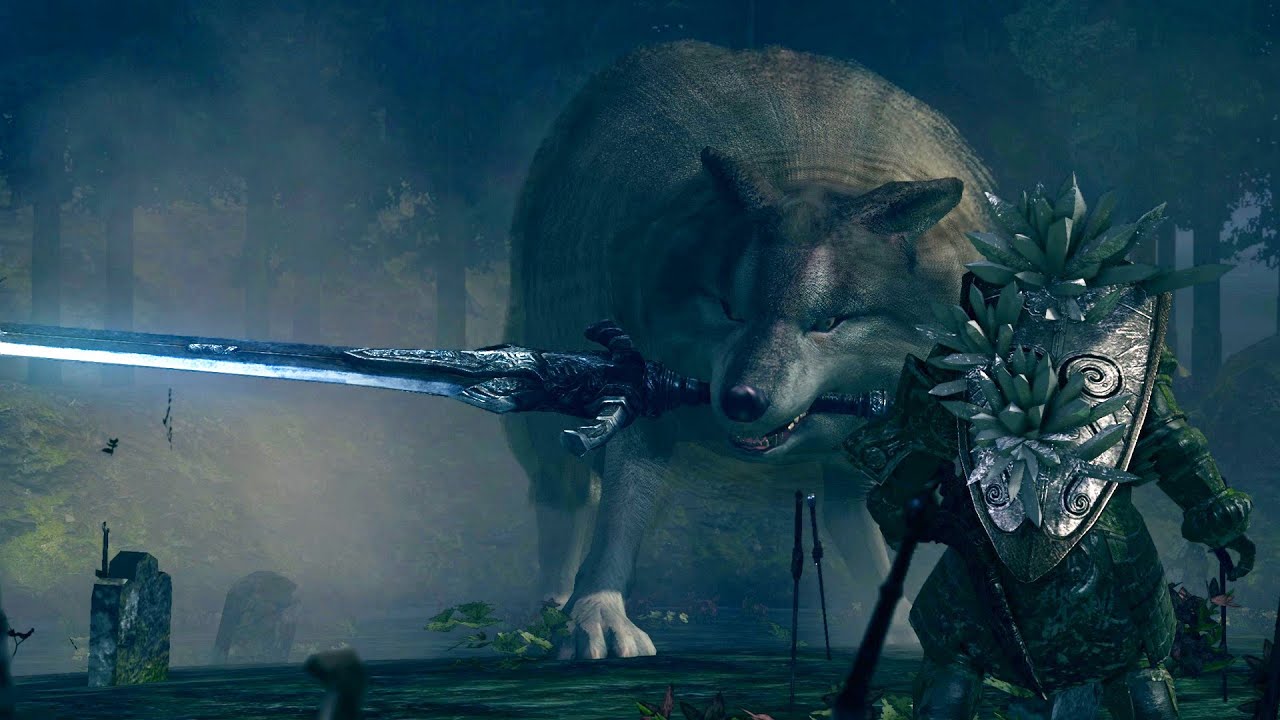
Sif, the Great Gray Wolf
Huge beast, neutral good
- Armor Class 14
- Hit Points 253 (22d12+110)
- Speed 40 ft.
STR DEX CON INT WIS CHA 24 (+7) 18 (+4) 21 (+5) 6 (-2) 17 (+3) 10 (+0)
- Senses Passive Perception 13
- Languages Understands Common but can’t speak
- Challenge 13 (10,0000 souls)
Legendary Resistance (3/day). If Sif fails a saving throw, it can choose to succeed instead.
Relentless Guardian. If Sif takes damage that would reduce it to 0 hit points, it is reduced to 1 hit point instead and she gains one level of exhaustion.
Actions
Multiattack. Sif makes three greatsword attacks.
Greatsword. Melee Weapon Attack: +12 to hit, reach 15 ft., one target. Hit: 28 (6d6+7) slashing
Sword Spin (Recharge 5-6). Sif shifts the sword in her mouth and it in a massive circle around her. Each creature within 15 feet of her must make a DC 20 Dexterity saving throw. A target takes 45 (10d8) slashing damage on a failed save, or half as much damage on a successful one.
Reactions
Parry. Sif adds 5 to her AC against one melee Attack that would hit it. To do so, Sif must be able to see her attacker
Legendary Actions
Sif can take 3 legendary actions, choosing from the options below. Only one legendary action option can be used at a time and only at the end of another creature's turn. Si regains spent legendary actions at the start of its turn.
Quick Slash (Costs 2 actions). Sif makes a greatsword attack.
Leap. Sif moves up to its speed without provoking opportunity attacks.
Detect. Sif makes a Wisdom (Perception) check.

Silver Knight
Medium celestial, lawful neutral
- Armor Class 18 (plate), 20 with shield
- Hit Points 157 (21d8+63)
- Speed 30 ft
STR DEX CON INT WIS CHA 19 (+4) 18 (+4) 17 (+3) 13 (+1) 15 (+2) 15 (+2)
- Senses Passive Perception 12
- Languages Celestial
- Challenge 8 (3,900 souls)
Actions
Multiattack. The Silver Knight makes three melee or two ranged attacks.
Longsword. Melee Weapon Attack: +8, reach 5 ft., one target. Hit: 10 (1d8 + 5) slashing damage, 11 (1d10+5) two-handed
Pike. Melee Weapon Attack: +8, reach 10 ft., one target. Hit: 11 (1d10 + 5) slashing damage.
Greatbow. Melee Weapon Attack: +7 to hit, reach 10 ft., one target. Hit: 10 (1d10 + 4) piercing damage and the creature must succeed on a DC 12 Strength saving throw or be knocked backwards 10 feet.

Skeleton Baby
Tiny undead, chaotic evil
- Armor Class 12
- Hit Points 3 (2d4-2)
- Speed 30 ft.
STR DEX CON INT WIS CHA 6 (-2) 15 (+2) 8 (-1) 6 (-2) 9 (-1) 1 (-5)
- Damage Immunities Poison
- Condition Immunities Exhaustion, Poisoned
- Senses Passive Perception 9
- Languages -
- Challenge 1/4 (50 souls)
Actions
Poisonous Touch. Melee Weapon Attack: +4, reach 5 ft., one target. Hit: 4 (1d6) poison damage and the creature must make a DC 10 Constitution saving throw or become poisoned for one minute. While poisoned this way, the creature takes 1d6 Poison damage at the start of their turns. At the end of each of its turns, the target can make another Constitution saving throw. On a success, they are no longer poisoned.
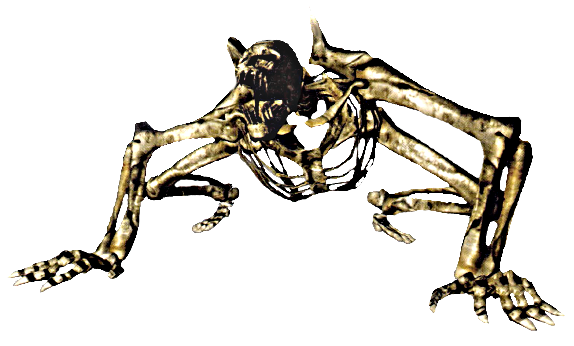
Skeleton Beast
Large undead, chaotic evil
- Armor Class 15 (natural armor)
- Hit Points 144 (17d10+51)
- Speed 30 ft.
STR DEX CON INT WIS CHA 21 (+5) 15 (+2) 17 (+3) 6 (-2) 12 (+1) 4 (-3)
- Damage Vulnerabilities Bludgeoning
- Damage Immunities Poison
- Condition Immunities Exhaustion, Poisoned
- Senses Passive Perception 11
- Languages -
- Challenge 6 (2,300 souls)
Hostile. As a Bonus Action, the skeleton can move up to its speed toward a Hostile creature that it can see.
Actions
Multiattack: The Skeleton Beast makes three maul attacks
Maul Melee Weapon Attack: +9 to hit, reach 5 ft., one target. Hit: (4d6+5 slashing).
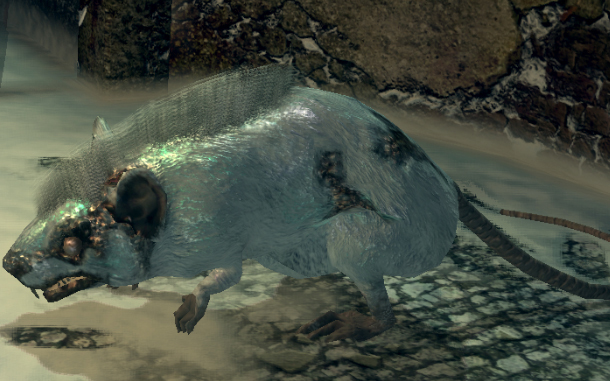
Snow Rat
Medium beast, unaligned
- Armor Class 13
- Hit Points 40 (9d8)
- Speed 40 ft.
STR DEX CON INT WIS CHA 16 (+3) 18 (+4) 11 (+0) 3 (-4) 14 (+2) 7 (-2)
- Damage Resistances poison
- Condition Immunities poisoned
- Senses Passive Perception 12
- Languages -
- Challenge 3 (700 souls)
Keen Smell. The rat has advantage on Wisdom (Perception) checks that rely on smell.
Pack Tactics. The rat has advantage on an attack roll against a creature if at least one of the rat's allies is within 5 feet of the creature and the ally isn't incapacitated.
Actions
Multiattack. The Snow Rat makes two bite attacks.
Bite. Melee Weapon Attack: +5, reach 5 ft., one target. Hit: 13 (4d4 + 3) piercing damage and the target must succeed on a DC 13 Constitution saving throw or become poisoned until the end of its next turn. At the end of each of its turns, the target takes 7 (2d6) poison damage and can make another Constitution saving throw. On a success, they are no longer poisoned.

Solaire of Astora
Medium humanoid, lawful good
- Armor Class 17 (breastplate, shield)
- Hit Points 75 (10d8+30)
- Speed 30 ft.
STR DEX CON INT WIS CHA 18 (+4) 13 (+1) 16 (+3) 9 (-1) 15 (+2) 16 (+3)
- Senses Passive Perception 12
- Languages -
- Challenge 5 (1,800 souls)
Spellcasting. Solaire is a 5th-level Spellcaster. His Spellcasting ability is Wisdom (spell save DC 14, +6 to hit with spell attacks). Solaire has the following Cleric Spells prepared:
1st Level (4 slots): lightning spear, shield of faith, cure wounds
2nd Level (3 slots): lesser restoration, tranquil walk of peace
3rd Level (2 slots): daylight, replenishment
Actions
Multiattack. Solaire makes two longsword attacks.
Longsword. Melee Weapon Attack: +6, reach 5 ft., one target. Hit: 8 (1d8+3) slashing
Lightning Spear. Ranged Spell Attack: +6, range 120 ft., one target. Hit: 18 (4d8) lightning

Stone Guardian
Large construct, unaligned
- Armor Class 17
- Hit Points 105 (10d10+50)
- Speed 30 ft.
STR DEX CON INT WIS CHA 19 (+4) 8 (-1) 21 (+5) 3 (-4) 15 (+2) 1 (-5)
- Damage Resistances Force
- Damage Immunities Poison, Psychic;
- Senses Passive Perception 12
- Languages -
- Challenge 4 (1,100 souls)
Magic Resistance. The guardian has advantage on saving throws against spells and other magical effects.
Magic Weapons. The guardian weapon attacks are magical.
Actions
Multiattack. The Stone Guardian makes two greatsword attacks.
Greatsword. Melee Weapon Attack: +6 to hit, reach 5 ft., one target. Hit: 13 (2d8+4) slashing damage
Slow (Recharge 5-6). The guardian targets one or more creatures it can see within 10 ft. of it. Each target must make a DC 14 Wisdom saving throw against this magic. On a failed save, a target can't use reactions, its speed is halved, and it can't make more than one attack on its turn. In addition, the target can take either an action or a bonus action on its turn, not both. These effects last for 1 minute. A target can repeat the saving throw at the end of each of its turns, ending the effect on itself on a success.
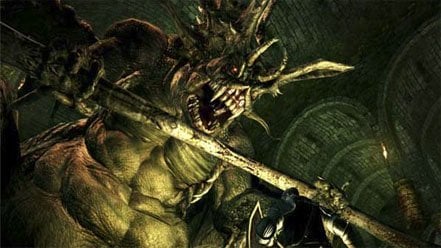
Stray Demon
Huge fiend(demon), chaotic evil
- Armor Class 14
- Hit Points 256 (19d12+133)
- Speed 30 ft.
STR DEX CON INT WIS CHA 23 (+6) 8 (-1) 25 (+7) 10 (+0) 12 (+1) 16 (+3)
- Senses Passive Perception 11
- Languages Common
- Challenge 12 (8,400 souls)
Brute. A melee weapon this creature wields deals one extra die of damage when the demon hits with it.
Siege Monster. The demon deals double damage to objects and structures.>
Actions
Multiattack. The Stray Demon makes three Catalyst attacks.
Izalith Catalyst. Melee Weapon Attack: +11, reach 15 ft., one target. Hit: 24 (4d8+6 bludgeoning).
Demonic Explosion (Recharge 6). The demon summons a great magical explosion from his catalyst in a 30 foot cube that he can touch. Each creature in that area must make a DC 17 Dexterity saving throw, taking 53 (15d6) force damage on a failed save, or half as much damage on a successful one.
Taurus Demon
Large fiend(demon), chaotic evil
- Armor Class 14
- Hit Points 150 (19d10+50)
- Speed 30 ft.
STR DEX CON INT WIS CHA 19 (+4) 10 (0) 21 (+5) 10 (0) 15 (+2) 12 (+1)
- Senses Passive Perception 12
- Languages -
- Challenge 4 (1,600 souls)
Charge. If the demon moves at least 10 feet straight toward a target and then hits it with a greataxe on the same turn, the target takes an extra 9 (2d8) piercing damage. If the target is a creature, it must succeed on a DC 14 Strength saving throw or be pushed up to 10 feet away and knocked prone.
Siege Monster. The demon deals double damage to objects and structures.
Reckless. At the start of its turn, the demon can gain advantage on all melee weapon attack rolls it makes during that turn, but attack rolls against it have advantage until the start of its next turn.
Actions
Multiattack. The demon makes two greataxe attacks.
Demon's Greataxe. Melee Weapon Attack: +7 to hit, reach 10 ft., one target. Hit: 21 (3d10+4) slashing damage

Titanite Lizard
Tiny monstrosity, unaligned
- Armor Class 15 (natural armor)
- Hit Points 19 (13d4-13)
- Speed 30 ft.
STR DEX CON INT WIS CHA 3 (-4) 14 (+2) 8 (-1) 2 (-4) 11 (+0) 5 (-3)
- Skills Perception +2, Stealth +4
- Senses Passive Perception 12
- Languages -
- Challenge 0 (0 souls)
Actions
Dimension Door (1/Long Rest). The Titanite Lizard teleports to an unoccupied space within 400 feet.

Torch Hollow
Medium undead, chaotic evil
- Armor Class 11
- Hit Points 16 (3d8-3)
- Speed 30 ft.
STR DEX CON INT WIS CHA 9 (-1) 13 (+1) 12 (+1) 3 (-4) 9 (-1) 1 (-5)
- Senses Passive Perception 9
- Languages -
- Challenge 1/8 (25 souls)
Actions
Multiattack. The Torch Hollow makes three Torch attacks
Torch. Melee Weapon Attack: +1, reach 5 ft., one target. Hit: 5 (1d10-1 fire)
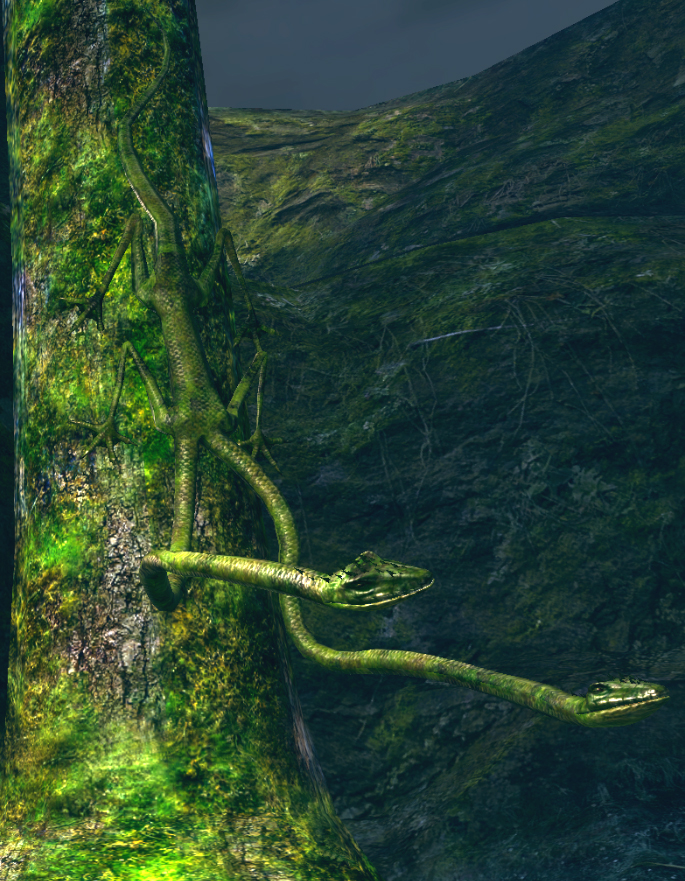
Tree Lizard
Medium beast, unaligned
- Armor Class 13 (natural armor)
- Hit Points 66 (12d8+12)
- Speed 30 ft.
STR DEX CON INT WIS CHA 9 (-1) 15 (+2) 12 (+1) 3 (-4) 15 (+2) 5 (-3)
- Condition Immunities blinded, deafened, poisoned
- Senses Passive Perception 12
- Languages -
- Challenge 1 (200 souls)
False Appearance. While the lizard remains motionless, it is indistinguishable from a tangle of vines.
Two Heads. The tree lizard has advantage on Wisdom (Perception) checks and on saving throws against being blinded, charmed, deafened, frightened, stunned, and knocked unconscious.
Actions
Multiattack. The tree lizard makes two bite attacks
Bite. Melee Weapon Attack: +4, reach 10 ft., one target. Hit: 6 (1d6+2) piercing plus 11 (3d6) poison damage.
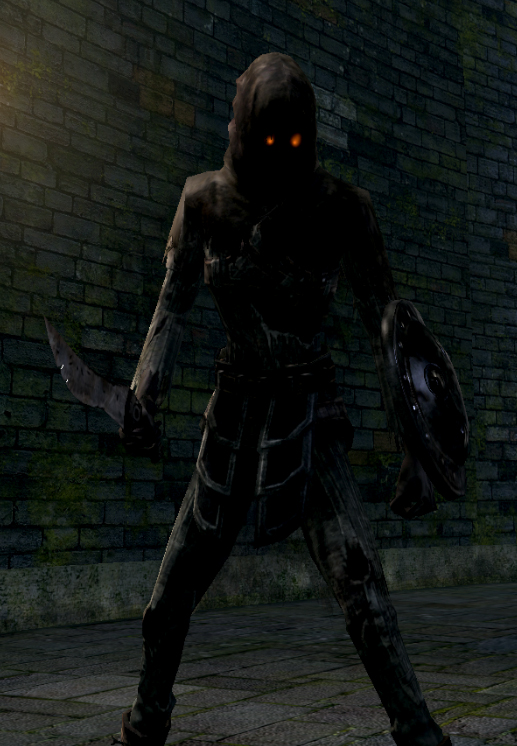
Undead Assassin
Medium undead, chaotic evil
- Armor Class 15
- Hit Points 66 (12d8+12)
- Speed 30 ft.
STR DEX CON INT WIS CHA 10 (+0) 16 (+3) 12 (+1) 10 (+0) 12 (+1) 10 (+0)
- Skills Stealth +7, Acrobatics +5
- Senses Passive Perception 11
- Languages -
- Challenge 2 (450 souls)
Sneak Attack (1/Turn). The Assassin deals an extra 14 (4d6) damage when it hits a target with a weapon Attack and has advantage on the Attack roll, or when the target is within 5 ft. of an ally of the Assassin that isn't Incapacitated and the Assassin doesn't have disadvantage on the Attack roll.
Actions
Dagger. Melee Weapon Attack: +5, reach 5 ft., one target. Hit: 7 (1d4+4) piercing damage. This attack has advantage if the target missed the assassin with a melee attack since it’s last turn.
Bonus Actions
Hide The Undead Assassin takes the hide action
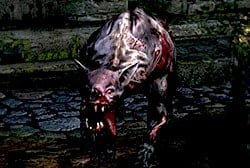
Undead Attack Dog
Medium beast, unaligned
- Armor Class 13 (natural armor)
- Hit Points 11 (2d8+2)
- Speed 40 ft.
STR DEX CON INT WIS CHA 12 (+1) 15 (+2) 12 (+1) 3 (-4) 11 (+0) 6 (-2)
- Skills Perception +3, Stealth +4
- Senses Passive Perception 13
- Languages -
- Challenge 1/4 (50 souls)
Keen Hearing and Smell. The dog has advantage on Wisdom (Perception) checks that rely on hearing or smell.
Pack Tactics. The dog has advantage on an attack roll against a creature if at least one of the dog’s allies is within 5 ft. of the creature and the ally isn't incapacitated.
Actions
Bite. Melee Weapon Attack: +4, reach 5 ft., one target. Hit: 7 (2d4 + 2) piercing damage. If the target is a creature, it must succeed on a DC 11 Strength saving throw or be knocked prone.
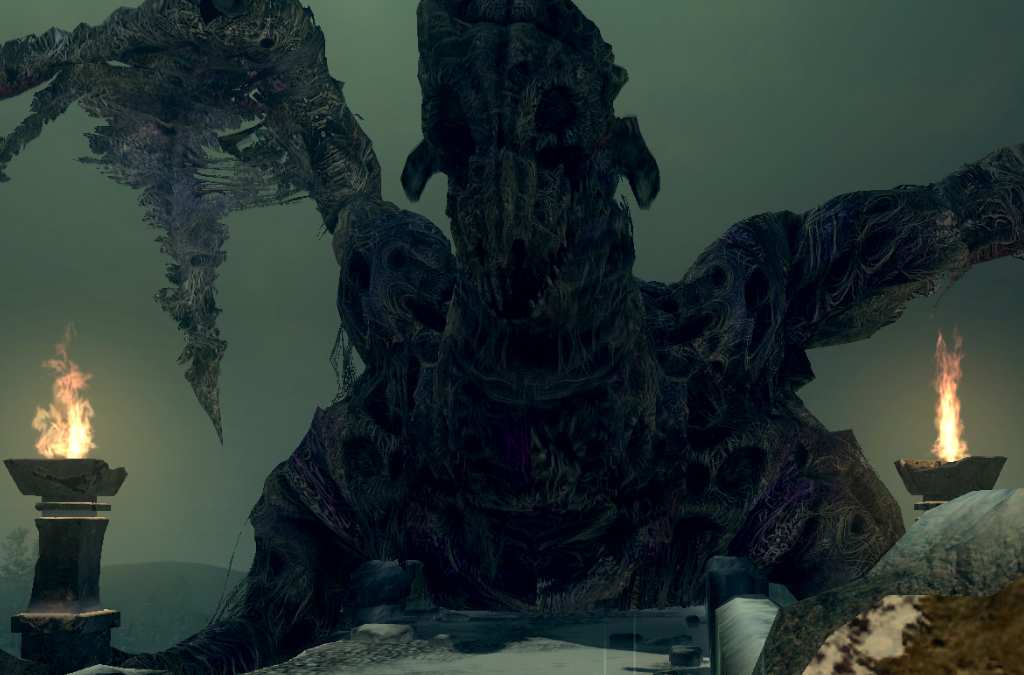
Undead Dragon
Huge undead dragon, chaotic evil
- Armor Class 16
- Hit Points 212 (17d12+102)
- Speed 0 ft.
STR DEX CON INT WIS CHA 25 (+7) 3 (-4) 22 (+6) 10 (+0) 15 (+2) 8 (-1)
- Senses Passive Perception 12
- Languages None
- Challenge 10 (5,900 souls)
Crippled. The Undead Dragon does not have legs, and cannot move from the cliff it is clutching. It automatically fails Dexterity saving throws.
False Appearance. While the dragon remains motionless, it is indistinguishable from a corpse.
Actions
Multiattack. The dragon makes three attacks, two with its claws and one with its bite.
Claw. Melee Weapon Attack: +12, reach 10 ft., one target. Hit: 18 (3d6+7) piercing plus 4 (1d6) poison damage.
Bite. Melee Weapon Attack: +12, reach 15 ft., one target. Hit: 24 (3d10+7) piercing plus 4 (1d6) poison damage.
Toxic Breath (Recharge 5-6). The dragon exhales poisonous gas in a 30-foot cone. Each creature in that area must make a DC 18 Constitution saving throw, taking 56 (16d6) poison damage on a failed save, or half as much damage on a successful one.
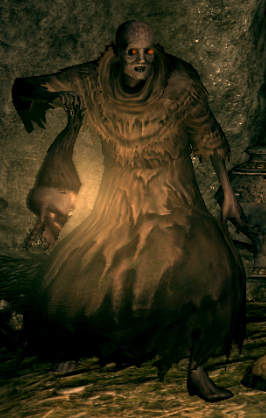
Undead Necromancer
Medium undead, chaotic evil
- Armor Class 13
- Hit Points 7 (9d8+27)
- Speed 30 ft.
STR DEX CON INT WIS CHA 10 (+0) 14 (+2) 16 (+3) 13 (+1) 12 (+1) 17 (+3)
- Senses Passive Perception 11
- Languages Common
- Challenge 9 (5,000 souls)
Necromancer. Any skeletons the necromancer has created return to full hit points at the beginning of the Necromancer’s turn. This ability only functions if the necromancer is alive and conscious.
Actions
Multiattack. The necromancer makes two Hurl Flame attacks
Hurl Flame. Ranged Weapon Attack: +5, 30 ft., one target. Hit: 8 (1d8+3 fire)
Animate Skeleton. The necromancer points towards a corpse it can see within 30 feet of it, raising it as a catacombs skeleton.
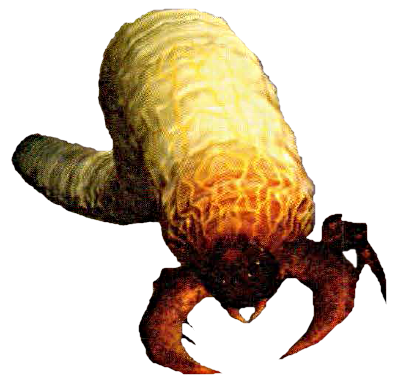
Vile Maggot Swarm
Medium swarm of tiny fiends, chaotic neutral
- Armor Class 9
- Hit Points 39 (6d8+12)
- Speed 40 ft.
STR DEX CON INT WIS CHA 2 (-4) 12 (+1) 14 (+2) 10 (+0) 7 (-2) 9 (-1)
- Senses Passive Perception 8
- Languages -
- Challenge 2 (450 souls)
Swarm. The swarm can occupy another creature’s space and vice versa, and the swarm can move through any opening large enough for a Tiny maggot. The swarm can’t regain hit points or gain temporary hit points.
Actions
Bite. Melee Weapon Attack: +3, reach 0 ft., one target. Hit: 10 (4d4) piercing damage
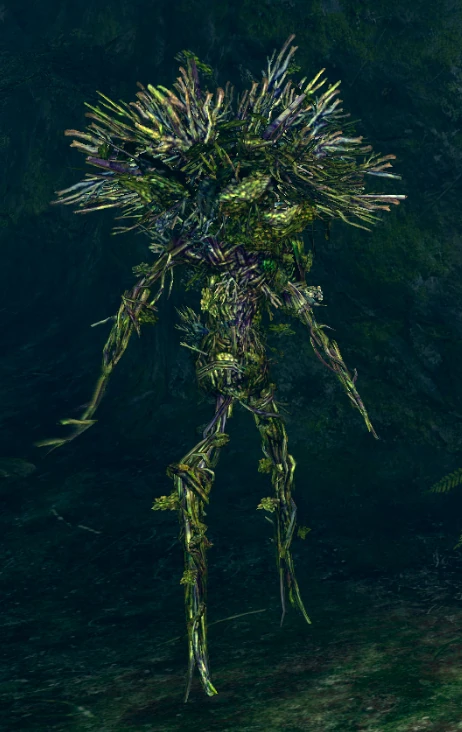
Vine Ent
Medium plant, unaligned
- Armor Class 13 (natural armor)
- Hit Points 66 (12d8+12)
- Speed 30 ft.
STR DEX CON INT WIS CHA 16 (+3) 11 (+0) 13 (+1) 2 (-4) 12 (+1) 5 (-3)
- Damage Vulnerabilities Fire
- Condition Immunities blinded, deafened, poisoned
- Senses Passive Perception 11
- Languages -
- Challenge 1 (200 souls)
False Appearance. As an action, the vine ent can bury itself into the ground. While the ent remains motionless, it is indistinguishable from a tangle of leaves and vines. The ent can unbury itself as a bonus action.
Actions
Multiattack. The Vine Ent makes two vine attacks
Vine. Melee Weapon Attack: +5, reach 10 ft., one target. Hit: 7 (1d6+3) slashing damage
Devour. The Vine Ent makes a vine attack at a creature within five feet of it. On a hit, the creature must make a DC 13 Constitution saving throw, taking 18 (5d6) piercing damage on a failure. The creature takes half damage on a success.
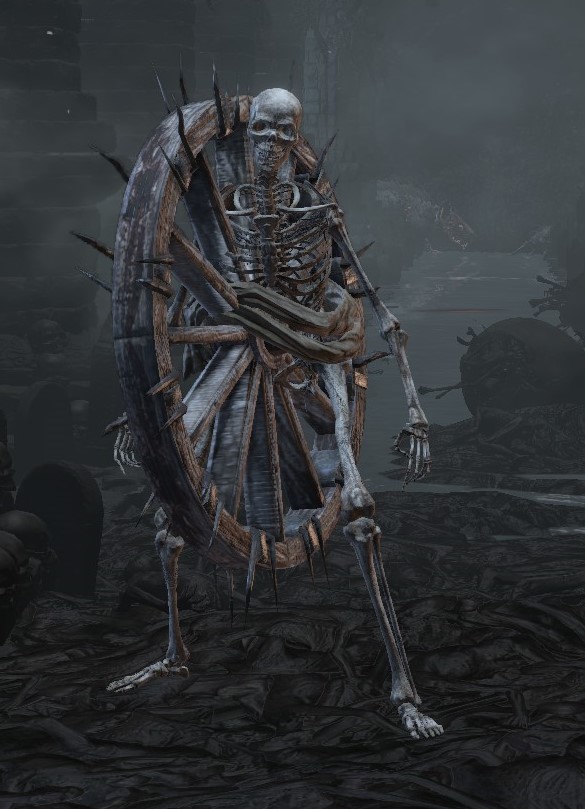
Wheel Skeleton
Medium undead, chaotic evil
- Armor Class 14
- Hit Points 67 (9d8+27)
- Speed 10 ft.
STR DEX CON INT WIS CHA 10 (+0) 10 (+0) 16 (+3) 6 (-2) 8 (-1) 5 (-3)
- Damage Vulnerabilities Bludgeoning
- Damage Resistances Piercing
- Damage Immunities Poison
- Senses Passive Perception 9
- Languages -
- Challenge 2 (450 souls)
Actions
Wheel Charge. The wheel skeleton tucks into a roll and charges in a specific direction up to its 50 ft. The skeleton cannot turn while changing. Any creature it collides with must succeed on a DC 13 Dexterity saving throw or take 7 (2d6) slashing damage. On a failure, the skeleton can use five feet of its remaining movement in the charge to force the creature to make another saving throw. On a success, the skeleton passes through the creature's space and continues rolling in the same direction. The skeleton does not provoke attacks of opportunity while charging.

Wisp
Tiny undead, chaotic evil
- Armor Class 13
- Hit Points 15 (10d4-10)
- Speed 15 ft.
STR DEX CON INT WIS CHA 2 (-4) 16 (+3) 8 (-1) 1 (-5) 13 (+1) 5 (-3)
- Senses Passive Perception 11
- Languages -
- Challenge 1 (200 souls)
Actions
Detonate. The Wisp explodes in a 10 foot radius magical burst. Each creature caught in the burst must succeed on a DC 14 Dexterity saving throw or take 22 (4d10) force damage, or half on a successful save.
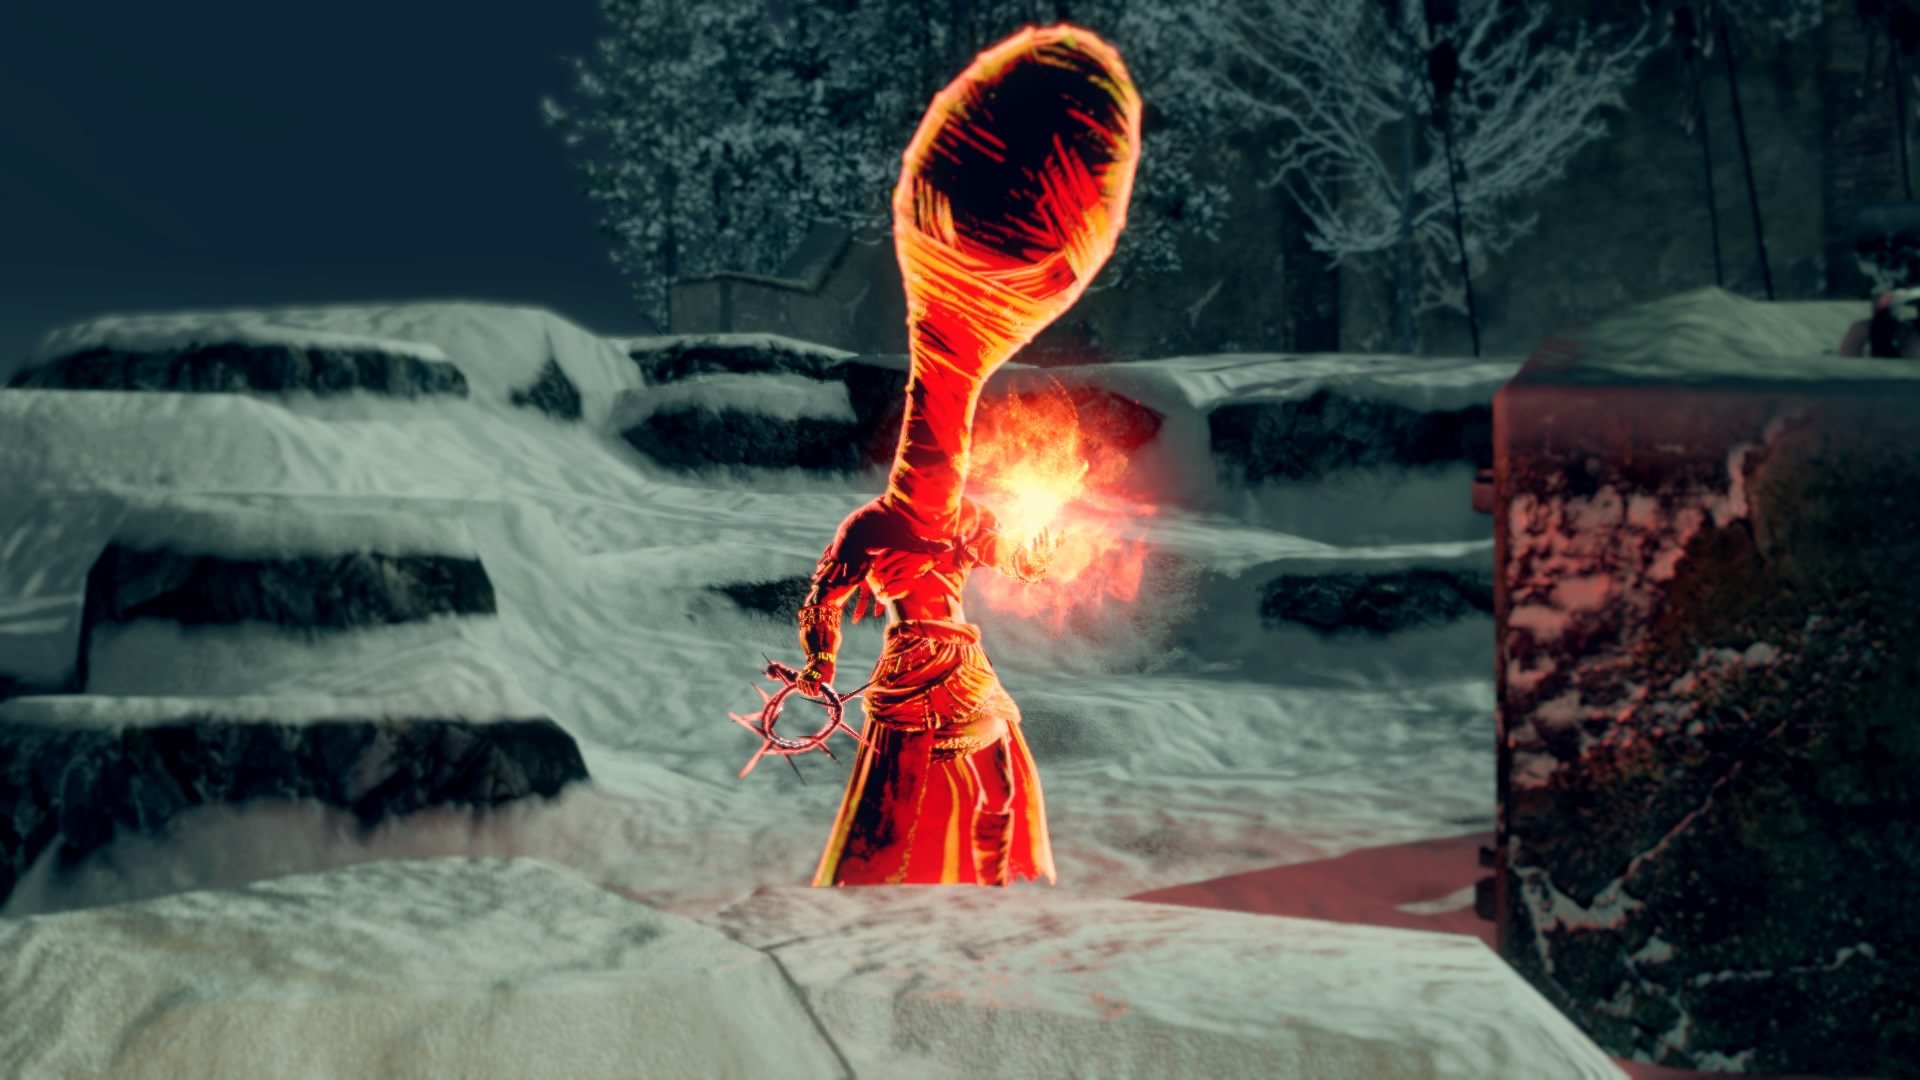
Xanthous King Jeremiah
Medium humanoid, neutral evil
- Armor Class 16
- Hit Points 90 (10d4-10)
- Speed 30 ft.
STR DEX CON INT WIS CHA 11 (+0) 18 (+4) 14 (+4) 12 (+1) 15 (+2) 19 (+4)
- Senses Passive Perception 12
- Languages -
- Challenge 9 (5000 souls)
Spellcasting. Laurentius is an 8th-level spellcaster. Its spellcasting ability is Charisma (spell save DC 16, +8 to hit with spell attacks). Laurentius has the following Sorcerer spells prepared:
1st level (4 slots): combustion, minor fireball, fire whip
2nd level (3 slots): iron flesh, flash sweat, scorching ray
3rd level (3 slots): fireball, power within
4th level (2 slots): toxic mist
Actions
Multiattack. Jeremiah makes two chain whip attacks.
Chain Whip. Melee Weapon Attack: +8 to hit, reach 10 ft., one target. Hit: 7 (1d8+2 slashing)
Appenfix C Covenants
Covenants are factions within the world of Lordran.
Warriors of Sunlight
Gwyn’s firstborn son was struck from history’s recollection after a betrayal, though he still watches over those that would brave battle in service to others. The Warriors of Sunlight are knights and clerics that serve others in their quest to prove their valor to the nameless war god.
Joining.
The Sunlight Altar can be found near the gatehouse at the end of the Hellkite Drake’s Bridge. A creature with a Wisdom score of 17 or higher can commune with the statue and join the Warriors of Sunlight covenant. This requirement is reduced by 1 each time a character uses the white sign soapstone to help another undead and slays the area’s boss.
Advancement.
Members of the Warriors of Sunlight can rise within its ranks by offering Sunlight Medals to the Sunlight Altar. The number of medals needed to advance to the next rank and that rank’s rewards are listed below. Sunlight Medals are most commonly obtained by assisting other undead with the use of the white sign soapstone. If a boss is defeated by a Warrior of Sunlight summoned by another undead (or is at least present when it is slain), they are rewarded with a sunlight medal when they return to their world.
If a Sunlight Warrior advances to Rank 3 within the covenant, their lightning spear and sunlight spear miracles are permanently improved. Both spells are cast as if the spell slot used to cast them are one level higher.
Abandonment.
If a Warrior of Sunlight abandons their covenant, they lose the ability to cast sunlight spear if they have learned it. They also lose the benefits of their Rank 3 ability if they’ve achieved it. A warrior can rejoin the Warriors of Sunlight by offering a sunlight medal to the Sunlight Altar, losing all of their previous covenant ranks in the process.
| Rank | Items to Advance | Rewards |
|---|---|---|
| 0 | 1 | Sunlight Longsword, Sunlight Shield |
| 1 | 2 | Scroll of Lightning Spear |
| 2 | 3 | Scroll of Sunlight Spear |
| 3 | 4 | Covenant Miracle Improvement |
Princess Guard

An undead granted audience with Princess Gwynevere can enter into a covenant with her. Members of the Princess Guard channel the Princess’s light to heal the injured and further the gods’ plans.
Joining.
Princess Gwynevere can enter any undead into her covenant if they kneel in front of her and request it. Once they join, the Princess gives them a ring of the sun princess and expresses her gratitude.
Advancement.
The Princess Guard do not have ranks to rise within. It merely allows the use of the soothing sunlight and bountiful sunlight miracles once they are found in the Pisacas nearby in the Duke’s Archives.
Abandonment.
If a member of the Princess Guard abandons their covenant, they lose the ability to cast the soothing sunlight and bountiful sunlight. The ring of the sun princess continues to work as normal. Characters can return to the covenant by approaching Gwynevere and asking forgiveness, which she gives freely.
Way of White

The Way of White is the largest religion in Lordran, the common belief among the citizenry in the gods of Anor Londo. Any knight or cleric belonging to this covenant can enter others who express a sincere desire to enter into the God’s service. Their main envoys within the adventure are Reah’s company traveling into the Catacombs in pursuit of the Rite of Kindling.
Joining.
Petrus and Reah of Thorolund will both join the players in a covenant with the Way of White if they are asked.
Advancement.
The Way of White has no ranks to advance within.
Abandonment.
Adherents who have severed ties with the Way of White can request re-entry into the covenant from another adherent like Petrus. Such clerics are honor-bound to forgive the petitioner and allow them to return.
Invasion Protection (TODO)
Darkwraith
After the Four Kings were tempted by Darkstalker Kaathe, the art of Lifedrain proliferated in New Londo. As the dark grew, so did the Darkwraiths. The gods feared the Dark’s advance so much they flooded the city and the Darkwraiths with it. The Dark never drowned though, they merely waited until the seal was broken to re-emerge. Most of the living Darkwraiths have been driven mad by this, but Darkstalker Kaathe is still eager to collect humanity and spread Lifedrain.
Joining.
Darkstalker Kaathe can enter into a covenant with an undead who has not chosen to follow Frampt’s path. A creature enters this covenant becomes a Darkwraith, and is given a dark hand and the power of Lifedrain.
Advancement.
Darkwraiths can gain more power and status to Kaathe by offering him humanity. The amount of humanity needed to advance to the next rank and that rank’s rewards are listed below.
Once a Darkwraith advances to Rank 3, the Dark Hand’s save DC is increased by 2.
Abandonment.
The dark hand continues to function if a Darkwraith abandons their covenant, though the red eye orb does not. Though they will not be able to rejoin unless their sin is absolved by Pardoner Oswald.
| Rank | Items to Advance | Rewards |
|---|---|---|
| 0 | 1 | Dark Hand |
| 1 | 3 | Red Eye Orb |
| 2 | 7 | Darksword, Darkwraith Armor |
| 3 | - | Dark Hand Improvement |
Forest Hunters
The Forest Hunters are guardians of the Darkroot Garden and the covenant of artorias beyond it. Alvina is the leader of the covenant, along with its captain Shiva of the East. Forest Hunters are duty-bound to protect the Garden from intruders, and will be summoned to destroy trespassers in other worlds.
Joining.
If she is found by the characters, she will be initially impressed with their strength on account of slaying the other Forest Hunters. Alvina offers the party membership in her covenant, initiating them into the Forest Hunters if they agree. She will vanish amicably if they decline.
Advancement.
Upon first joining the covenant, a Forest Hunter will receive the cat covenant ring, which if worn will allow the character to be summoned to invade other undead traveling into Darkroot Garden. Each time they successfully slay an invader, the hunter will advance one rank within the covenant.
After they receive the Ring of Fog, each rank they advance within the covenant rewards the hunter with a divine blessing.
Abandonment.
Alvina and the rest of the forest hunters will turn against the players if any of them harm another forest hunter, or if they leave the covenant through other methods. The cat ring no longer functions, but the ring of fog still does after this.
| Ranks | Rewards |
|---|---|
| 0 | Cat Covenant Ring |
| 1 | Divine Blessing |
| 2 | Ring of Fog |
| 3+ | Divine Blessing |
Path of the Dragon
Dragon Apostles seek to transcend their mortal shell and imitate the immortal dragons felled by the gods so long ago. The Stone Dragon hidden in Ash Lake acts as this covenants patron, and will accept dragon scales in return for additional power in the form of draconic transformation.
Joining.
One can enter into a covenant with the Stone Dragon of Ash Lake by communing with it in person. A new disciple receives a Dragon Head Stone that can be used to partially transform into a dragon. They are also given the dragon eye, which allows the disciple to invade the worlds of other undead carrying dragon scales to steal.
Advancement.
Dragon scales must be offered to the Stone Dragon to advance within the Path of the Dragon covenant. The number of dragon scales needed to advance to the next rank and that rank’s rewards are listed below.
Abandonment.
Both the Dragon Head Stone and Dragon Torso Stone cease to function if a disciple leaves the Path of the Dragon covenant. The covenant can be rejoined by communing with the Stone Dragon, but all of the disciples' previous ranks are lost in the process.
| Rank | Scales to Advance | Rewards |
|---|---|---|
| 0 | 1 | Dragon Eye, Dragon Head Stone |
| 1 | 2 | Dragon Head Stone Improvement |
| 2 | 3 | Dragon Torso Stone |
| 3 | - | Dragon Torso Stone Improvement |
Blade of the Dark Moon

The only true god remaining in Anor Londo is Dark Sun Gwyndolin, maintaining an illusion over the entire city to help direct undead to rekindle the First Flame. Long ago he created the Blades of the Darkmoon to punish those that would transgress against the Gods. Any undead who harms Gwyndolin or dispells Gwynevere’s illusion in her chambers are sinners in the eyes of the Dark Moon. The Blades hunt down sinners in their worlds and are rewarded by Gwyndolin with powerful miracles.
Joining.
The statue of Lord Gwyn against the wall underneath the Anor Londo cathedral is illusory. Interacting with it all causes it to dissolve away, revealing a staircase down a narrow hallway. A small prayer rug has been stretched in front of the fog gate at the base of the stairs. A creature wearing a darkmoon seance ring can kneel at this rug and commune with Dark SunGwyndolin. During this communion, they may choose to join the Blades of the Darkmoon Covenant.
Advancement.
Upon first joining the covenant, a Blade of the Darkmoon will receive the Blue Eye Orb, which if used will allow the character to be summoned to invade a guilty undead in another world. Each time they successfully slay a sinner, the blade will advance one rank within the covenant.
When a Blade advances to 2nd and 3rd rank, their Darkmoon Blade miracle is cast as if as a spell of slot of one or two levels higher respectively was used.
Abandonment.
A Blade of the Darkmoon will be rejected from their covenant if they harm either Gwyndolin or his illusion of Gwyenevere. A Blade who leaves the covenant in any way are considered sinners, and cannot rejoin the covenant until their sin is pardoned by Oswald of Carim. Even if they are pardoned, they can only join again if the illusion of Gwynevere has not been dispelled and Gwyndolin still lives. All ranks in this covenant are lost when a Blade rejoins it.
| Rank | Rewards |
|---|---|
| 0 | Blue Eye Orb, Darkmoon Blade Covenant Ring |
| 1 | Scroll of Darkmoon Blade, Darkmoon Talisman |
| 2 | Darkmoon Blade Improvement |
| 3 | Darkmoon Blade Improvement |
Gravelord Servant
Of all the gods, Gravelord Nito is perhaps the most obscure in his motives. Even members of his covenant, the Gravelord Servants, rarely understand his will beyond encouraging death in every world. Gravelord Servents use previous eyes of death to
Joining.
In order to become a Gravelord Servant, an undead must use a secret entrance within the catacombs to be transported straight to Nito’s lair. There, the undead can supplicate themselves before the Gravelord and offer him an eye of death. In exchange, he will allow them to enter his service and give them a gravelord sword and a scroll of gravelord sword dance.
Advancement.
Gravelord Servants gain power by offering Eyes of Death to Gravelord Nito. The number of eyes of death needed to advance to the next rank and that rank’s rewards are listed below. If a Gravelord Servant advances to Rank 3 within the covenant, their covenant miracles are permanently improved. Both spells are cast as if the spell slot used to cast them are one and two levels higher at ranks 2 and 3 respectively.
New eyes of death can be attained by using an eye of death to curse another world.
Abandonment.
Former gravelord servants who betray their covenant can still use their covenant miracles. Killing Nito himself does not constitute a betrayal of the covenant, but servants can no longer advance within the covenant if they do. Otherwise, a creature that abandons the Gravelord Servant covenant can rejoin it if Nito is alive and they offer another Eye of Death. Abandoning the Gravelord Servant covenant forfeits all previous ranks they may have had.
| Rank | Eyes to Advance | Rewards |
|---|---|---|
| 0 | 1 | Gravelord Sword, scroll of gravelord sword dance |
| 1 | 2 | Gravelord Greatsword Dance |
| 2 | 3 | Gravelord Miracle Improvement |
| 3 | - | Gravelord Miracle Improvement |
Chaos Servant
The Daughter’s name has been lost to time, and she speaks only the ancient language of Izalith. The only method the characters have to communicate with her is the old witch’s ring. If worn, the Daughter of Chaos will speak to the players as if they were her sister Quelaag. She is blind and weak, unable to understand her sister’s death even if it is explained to her. Quelaag and her sister entered into a covenant long ago, and more recently Kirk, Knight of Thorns, was bonded to her as well.
Joining.
A player can enter the Chaos Servant covenant by communing with the Daughter of Chaos wearing the old witch’s ring. There are no immediate rewards for doing so beyond Einghy recognizing them as fellow servants and offering his wares to them.
Advancement.
A player who enters into a covenant with the Daughter of Chaos can give her excess humanity to advance within it. The higher the character’s ranks within the covenant, the more she seems to recover herself. Achieving the final rank in the covenant will grant the Daughter’s blessing, opening the large door barring the shortcut from the Demon Ruins to Lost Izalith.
Abandonment.
Killing the Daughter of Chaos will end future advancement in the covenant, however leaving the covenant does not have any effect beyond losing Einghy’s favor. If it is rejoined later, all of their ranks in the Chaos Servant covenant are removed.
| Rank | Humanity to Advance | Rewards |
|---|---|---|
| 0 | 1 | Einghy’s Favor |
| 1 | 3 | Great chaos fireball |
| 2 | 7 | Scroll of chaos storm |
| 3 | - | Lost Izalith Shortcut |
Art Credits
Adventure Description
Around the Bonfire Inkyh
Vinheim Scholar sjmillerart
Sister Friede sjmillerart
Pyromancer PizzaSurgeon
Northern Undead Asylum
Undead Asylum CGI Emil Rasmussen and Narcis Calin
Undead Asylum Concept Art From Software
Asylum Demon Xier
Oscar & The Chosen Undead Raging Spaniard
Undead Pilgrimage jjcanvas
Firelink Shrine
Firelink Shrine DRAGONizm
Firelink Shrine @Francoyovich
Undead Burg
Undead Burg - Dark Souls Rebecca O
Hellkite sohlol
Solaire of Astora Kaithzer
Taurus Demon Patcas
Undead Parish
Bell Gargoyle ddal84
Andre - Dark Souls @bluestraycatart
Darkroot Garden
Dark Souls Mushroom People Sormia
Great Gray Wolf Sif @bluestraycatart
Darkroot Basin
Dark Souls Hydra Kalmahul
Dusk of Oolacile mournfulwizard
Lower Undead Burg
Welcome To The Undead Burg Vadim Galuza
Dark Souls Capra Demon OniRuu
The Depths
Dark Souls 1 : Gaping Dragon H.K.
Dark Souls Butcher EPoole8
Cursed SackClothSamuel
Blighttown
Blighttown Cook and Becker
Parastic Wall Hugger Concept Art From Software
Quelana of Izalith Yanchong Lim
Chaos Witch Quelaag Christian Willett
Valley of Drakes
Dark Souls 5e Fan Recreation Project Evie Shudder
Undead Asylum Revisit
Dark Souls - Stray Demon OniRuu
Sens Fortress
Sens Fortress FutureKaze
Titanite Demon カワグチ
Iron Tarkus Versus the Iron Golem LessDraws
Anor Londo
Dark Souls - Anor Londo lasplinter
Dark Souls: Dark Sun Gwyndolin Theocrata
Dark Souls Silver Knight Rene Kovak
Commission: Ornstein and Smough GLV-DA
Gwynevere Concept Art From Software
Painted World of Ariamis
Painted World of Ariamis Concept Art lasplinter
Dark Souls Crossbreed Priscilla MokaPot
New Londo Ruins
New Londo Ruins Elka Art
Four Kings of New Londo GuidoMNG
Dark Souls Darkwraiths SkizzleBoots
Catacombs
Pinwheel Juroart
Tomb of Giants
Dark Souls Catacombs EEdwardNigma
Catacombs Halls JamesWolf
Pinwheel Juroart
Duke's Archives
Seath & Logan Alexander Buckely
Dukes Archives Concept Art From Software
Crystal Cave Piotr Dura
Seath the Scaleless Anton Oxenuk
Demon Ruins
Demon Ruins Concept Art From Software
Catacombs Halls JamesWolf
Pinwheel Juroart
Lost Izalith
Dwarven Caverns Vempirik
Centipede Demon OniRuu
Siegmeyer @PiecesOfReese
Bed Of Chaos OniRuu
Ask Lake
Ash Lake Art by A.E.B.
Everlasting Dragon madowl_7
Royal Wood
Dark Souls: Artorias karniz
Kalameet TizianoDile
Hawkeye Gough @3_q58
Oolacile Township
Chained Prisoner Concept Art From Software
Chasm of the Abyss
Last Light Kirsi Salonen
Artorias vs Manus Max58
Kiln of the First Flame
Kiln of the First Flame Apljck
Gwyn JamesWolf
NPC Art
Alvina of the Darkroot Wood rirth
Anastacia of Astora karniz
Anastacia of Astora karniz
Big Hat Logan Concept Art FromSoftware
Andre of Astora ch-peralta
Rickert of Vinehim gothicalanima
Blacksmith Vamos John Delvin
Crestfallen Warrior swordofmoonlight
Crossbreed Prisiclla Nakama-Kai
Darkmoon Knightess @buriedinembers
Fair Lady talert
Domhnall of Zena buskar
Dusk of oolacile amalimirror
Eingyi Concept Art From Software
Giant Blacksmith Levente Hernadi
Griggs of Vinheim sjmillerart
Ingward the Sealer Concept Art From Software
Knight Lautrec of Carim mrpk
Laurenius of the Great Swamp IcedWingsArt
Lord's Blade Ciaran Kevin Lisiecki
Marvelous Chester MenasLG
Oswald of Carim Eoghan Carrigan
Trusty Patches UndeadChestnut
Petrus of Thorolund Nathan Anderson
Quelana of Izalith UmbrellaInc2903
Reah of Thorolund Cal Santiago
Shiva of the East John Delvin
Sieglinde of Catarin Mike Kime
Siegmeyer of Catarina Juan Costa
The Despair of Solaire EJRidgeway82
Undead Merchant Naomi Baker
Undead Female Merchant /u/Marry_Mind
Bestiary Art
Anor Londo Gargoyle zveen
Artorias, The Abysswalker Ron-Faure
Asylum Demon Concept Art From Software
Basilisk Concept Art From Software
Berenike Knight Concept Art From Software
Big Hat Logan Concept Art From Software
Black Dragon Kalameet MattBarley
Black Knight Wallpaper WallpaperAccess
Channeler Concept Art From Software
Chaos Bug Concept Art From Software
Crow Demon Concept Art From Software
Dragonslayer Ornstein の竜狩りオーンスタを描きました
Firesage Demon kalezar
Gaping Dragon Azany
Gwyn, Lord of Cinder so-taro
Iron Golem Vs Tarkus sohlol
Knight Kirk u/cgrobelski
Knight Lautrec Concept Art From Software
Maneater Mildred NastyNoser
Manus, Father of the Abyss @Shimhaq
Moonlight Butterfly VaryanaDraws
New Londo Ghosts Fan Art From Software
Gravelord Nito Sstarkm
Parastic Wall Hugger Concept Art From Software
Seath the Scaleless Dark Souls : Age of Fire Issue 2
The Fire Fades.
Will You?
The Age of Fire is coming to an end. An Age of Dark is growing each day. You are a cursed undead, made to wander the world of Lodran in search of the ancient lords. An ancient prophecy tells of a Chosen Undead that will link the First Flame, prolonging Lord Gwyn's Age of Fire once again, and offering respite to the hoards of hollowed undead. But darker forces lurk in the recesses of Lordran, offering secrets forgotten to time.
Dark Souls : Age of Fire keeps the spirit of both the original hit game as well as classic D&D adventures. Every monster, NPC, item, and area has been converted to allow you and your players to experience all that Dark Souls I has to offer. Prepare to die!