

Tough Slaading
Preamble
Tough Slaading is a fifth edition adventure designed for four 3rd-level characters that takes place east of Daggerford along the Delimbiyr river. Secomber is a small town known for its proximity to The High Forest and Southwood. In this adventure the party will be neck deep in cultist activity as they investigate the disappearance of a local townsperson. Although this adventure was created with Secomber in mind, this adventure can be dropped into any setting that has ruins nearby. It works well as a side quest whenever the characters are looking for a new town to rest in.
Backstory
Home to mostly Halflings and Humans, the resilient Secomber sits east of Daggerford on the Delimbiyr River. Despite being plagued by orc raids Secomber remains a common stopping point for brave adventurers wishing to explore The High Forest to the north, Southwood to the Northeast, or the Athlantan ruins to the east.
A thousand years ago, Hastarl, capital city of the Athlantar empire stood where Secomber now resides. Ruled in secret by Magelords, a cruel and talented sect of wizards Athlantar prospered for many years. Fearing potential claims to the throne the Magelords began killing off any prince or Magelord who opposed their reign. The youngest prince Elminster Aumar fled the city in secret only to return after nearly a decade to lead an assault on the capital city. There he struck down the last remaining prince and his Magelord Undarl. Elminster gave the city back to the people and set off for his own adventure.
Years later Athlantar, and Hastal with it, were destroyed by an Orc horde. Now, centuries later Humans, halflings, and others have resettled the lands and propped up the city of Secomber. Regular tributes have kept the Orc raids at bay for the past few months but the threat is always on the minds of the residents of Secomber. Recently townsfolk have started to disappear as rumors of Orc activity in the nearby Athlantan ruins spreads through town.
Overview
Summoned by Solomon Payne to Secomber amidst the unending threats of Orc raids the party must set out to find the missing Helmite, Amos Stapleton. Solomon sent Amos to gather intel after receiving word of increased Orc activity in the Athlantan ruins east of town. It has been days and Amos has yet to return. Solomon fears the worst and will reward the party immensely if they can bring him back and gather any intel on the potential Orc raid.
The characters will quickly discover that cultists and not Orcs are the problem and delve into their hideout looking for clues to Amos’ whereabouts. Little do they know Solomon isn’t the man they thought he was. Determined to return the Magelords to power he has begun creating an army of Slaad. \columnbreak
However, Solomon realized that his creation needs strong hosts for its offspring and has begun sending adventurers to their untimely demise. With enough Slaad under his command Solomon plans to overrun Secomber, then Daggerford and eventually all of Toril.
Adventure Hooks
The characters have spent the night at The River’s Stone, a modest establishment in Secomber known for housing adventurers. During breakfast or as the characters leave the tavern Solomon Payne approaches them.
Read or paraphrase the following:
A DC 10 Intelligence (History or Religion) check identifies the man as Solomon Payne, town overseer and Head of the Temple of Helm (as indicated by the blue Eye of Helm sigils on his robes). Interrupting any response the players may have, he continues

As far as the characters can tell, Solomon is most concerned bringing Amos home safely. He is willing to pay 150 gold for his return and a bonus of 50 gold for any information about Orc activity the characters drum up.
What the characters don’t know is that Solomon is a 12th level spell caster sending them to what he hopes will be their death. While they are gone Solomon casts scrying on a memorable party member twice a day to keep tabs on them.
Bridge
The adventure starts in the late afternoon with the characters at the edge of the ruins ready to start searching for clues. When the players are ready to proceed read or paraphrase the following:
As the characters explore the ruins the fog plays tricks on them with glimpses of shadowy figures on the edges of their vision. A successful DC 12 Wisdom (Survival) check reveals two sets of tracks leading deeper into the ruins.
The tracks wind through the ruins eventually leading the characters to the The Ancient Retreat entrance. Another successful DC 13 Wisdom (Survival) check reveals the paw prints below to a canine.
The Ancient Retreat
Solomon and his followers have made this once forgotten temple their base of operations. Their ruse is simple, a pair of stilts an and a well made Orcish mask allows them to collect the tributes that the people of Secomber believe are keeping the Orcs at bay. While their numbers are few the Red Slaad Solomon is nursing presents a formidable threat.
Hideout Locations
A low lying fog permeates the complex invading from The High Moor to the south, enough so that any tiny creatures scurrying about are lightly obscured and creating a sense of unease.
Ceilings
Hallways are 10 feet high and rooms have 15-foot-high ceilings unless otherwise noted.
Walls
The walls of the ruins are carved from solid stone as if it were dug out of the surrounding terrain.
Floors
The floors are smooth, natural stone obscured by an ever present layer of fog.
Doors
Unlike the walls, floors, and ceilings all doors are made of wood with iron knobs, hinges, built-in locks, and seem to be a recent addition. They are unlocked unless the text states otherwise. A locked door can be picked with thieves’ tools and a successful DC 10 Dexterity check. A door can also be broken down with a successful DC 20 Strength check.
Illumination
Lit torches sit in ancient stone sconces providing dim light throughout the entire complex except where noted.
1 - Entrance
Encounter: Cult Fanatic & Death Dog. A Cult Fanatic sits with his back against the large door appearing to have dozed off. They have propped themselves up with a pair of stilts and an Orcish mask covers their face. A single Death Dog lay next to him facing the stairs and lazily gnawing on a large bone. With it’s passive perception of 15 the Death Dog alerts it’s handlers and immediately attacks any intruders.
2 - Foyer
This foyer is a relic of a bygone era and any hint of extravagance has been lost to the sands of time. The amount of rubble makes it impossible to discern what the eastern portion of the room once looked like or contained.
3 - Dining Area
This area is a makeshift dining room and kitchen for the Cult Fanatics Solomon has brought under his wing. With a successful DC 15 Wisdom (perception) check at the door the characters hear two Cult Fanatics discussing the prospect of becoming a Magelord under Solomon’s tutelage.
Two average-looking humans wearing black cloaks are eating and talking at one of the nearby tables.
Combat Encounter Cult Fanatics: The 2 Cult Fanatics Immediately stand and attack anyone they don’t recognize. 1 rushing into melee the other throwing their knife (dagger)
Closets
The closet on the left is full of various barrels and crates. The barrels and crates contain salted pork, various spices, sugar, flour, and ale. A successful DC 12 Intelligence (History) check reveals the Secomber sigil adorns each barrel and crate.
The Closet to the right is full of gear the cultists use to maintain their ruse: 4 Orc masks, 4 pairs of stilts with Orc footprints, and 1 greataxe, 4 javelins and 3 sets of hide armor.
4 - The Lords’ Hall
The double doors that lead into this hallway are unlocked.
Two doors stand opposite each other just before another hallway intersects. The door to the right is left open and any character who looks inside sees another caved-in room that the cultists have begun to dig out. The door to the left is unlocked.
The hallway continues around a corner to the left ending in another pair of double doors.
5 - Sleeping Quarters
The members of this cult keep their beds and chests tidy with nary a wrinkle to be found
Treasure
At the foot of each bed is a well worn, wooden chest. Each containing a set of Cleric’s vestments and 2 sets of Peasant’s outfits. Three of the wooden chests contain coin pouches. The total amounts to 251 cp, 32 sp, and 4 gp.
With a successful DC 15 Intelligence (Investigation) check the characters find a false bottom in one of the chests. Located inside are a few sheets of parchment with barely legible common written on them. The first few pages are filled with doodles and terrible poems about the writer’s love for ale. The last page of the pile has a hastily written note:
6 - Slaadpole Pool
This room serves a nursery for the slaadpoles, giving them a place to swim and rest. The room is devoid of light as none of it’s creatures rely on it to see.
With a successful DC15 Wisdom (perception) check 2 tadpole-like creatures can be seen sleeping between two of the larger rocks with a collection of small bones laying nearby.
Combat Encounter Slaadpole Guardians: If a player sticks their hand in the water or attempts to touch the Slaadpoles the 4 Duodrones spring to life and attack. 1 Shadow joins the fray on the round after the Duodrone’s attack.
7- Solomon’s Office
Solomon uses this room to house and feed his Red Slaad. While he is away the Slaad has free reign of the room. He uses its control gem (always in his possession) to return it to the cage while he works on his nefarious plans at his desk.
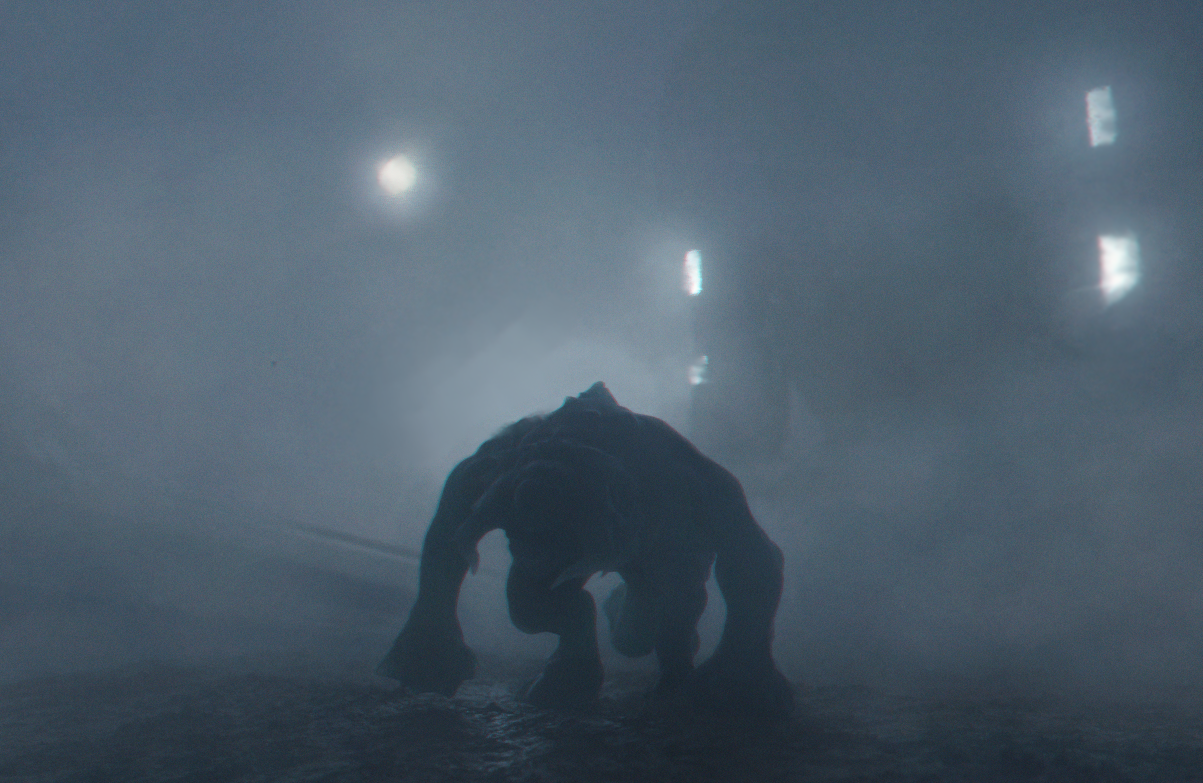
Combat Encounter As Slaad as it gets. One Red Slaad attacks the characters. Once the Slaad successfully infects a character it will move to a new target. If there are no more infection targets the Slaad will attempt to knock the characters unconscious.
Desk
Use the table below to determine what information to reveal to the characters with a successful Intelligence (Investigation) check.
| DC | What the characters learn |
|---|---|
| 10 | Details of the tributes meant for the Orcs. |
| 12 | Instructions on proper stride length on stilts |
| 15 | Opened letters addressed to Solomon Payne discussing the history of the Magelords. |
| 18 | Family tree tracing Solomon Payne back to Magelord Undarl and a manifesto detailing Solomon’s plan to raise a Slaad army to gain control of Faerûn, restoring the Magelords to their former glory. |
Treasure
The small colorful sack hanging of the desk chair is a bag of holding. Searching through the desk rewards the players with a potion of healing and a potion of invisibility. Coin pouches of varying size fill one of the drawers. The total amounts to 1,520 cp, 338 sp, and 49 gp.
Adventure Conclusion
If the characters kill the Slaad, or uncover his betrayal, Solomon flees Secomber using a teleportation circle hidden in Helm’s Temple. At your discretion, he could reappear in later adventures.
When the characters return they can easily find a town elder once they realize Solomon has fled the city. The elders are flabbergasted at the news of Solomon’s betrayal but thank the party for ridding the town of him. Additionally they are willing to pay them the amount Solomon promised.
The Ancient Retreat With Locations
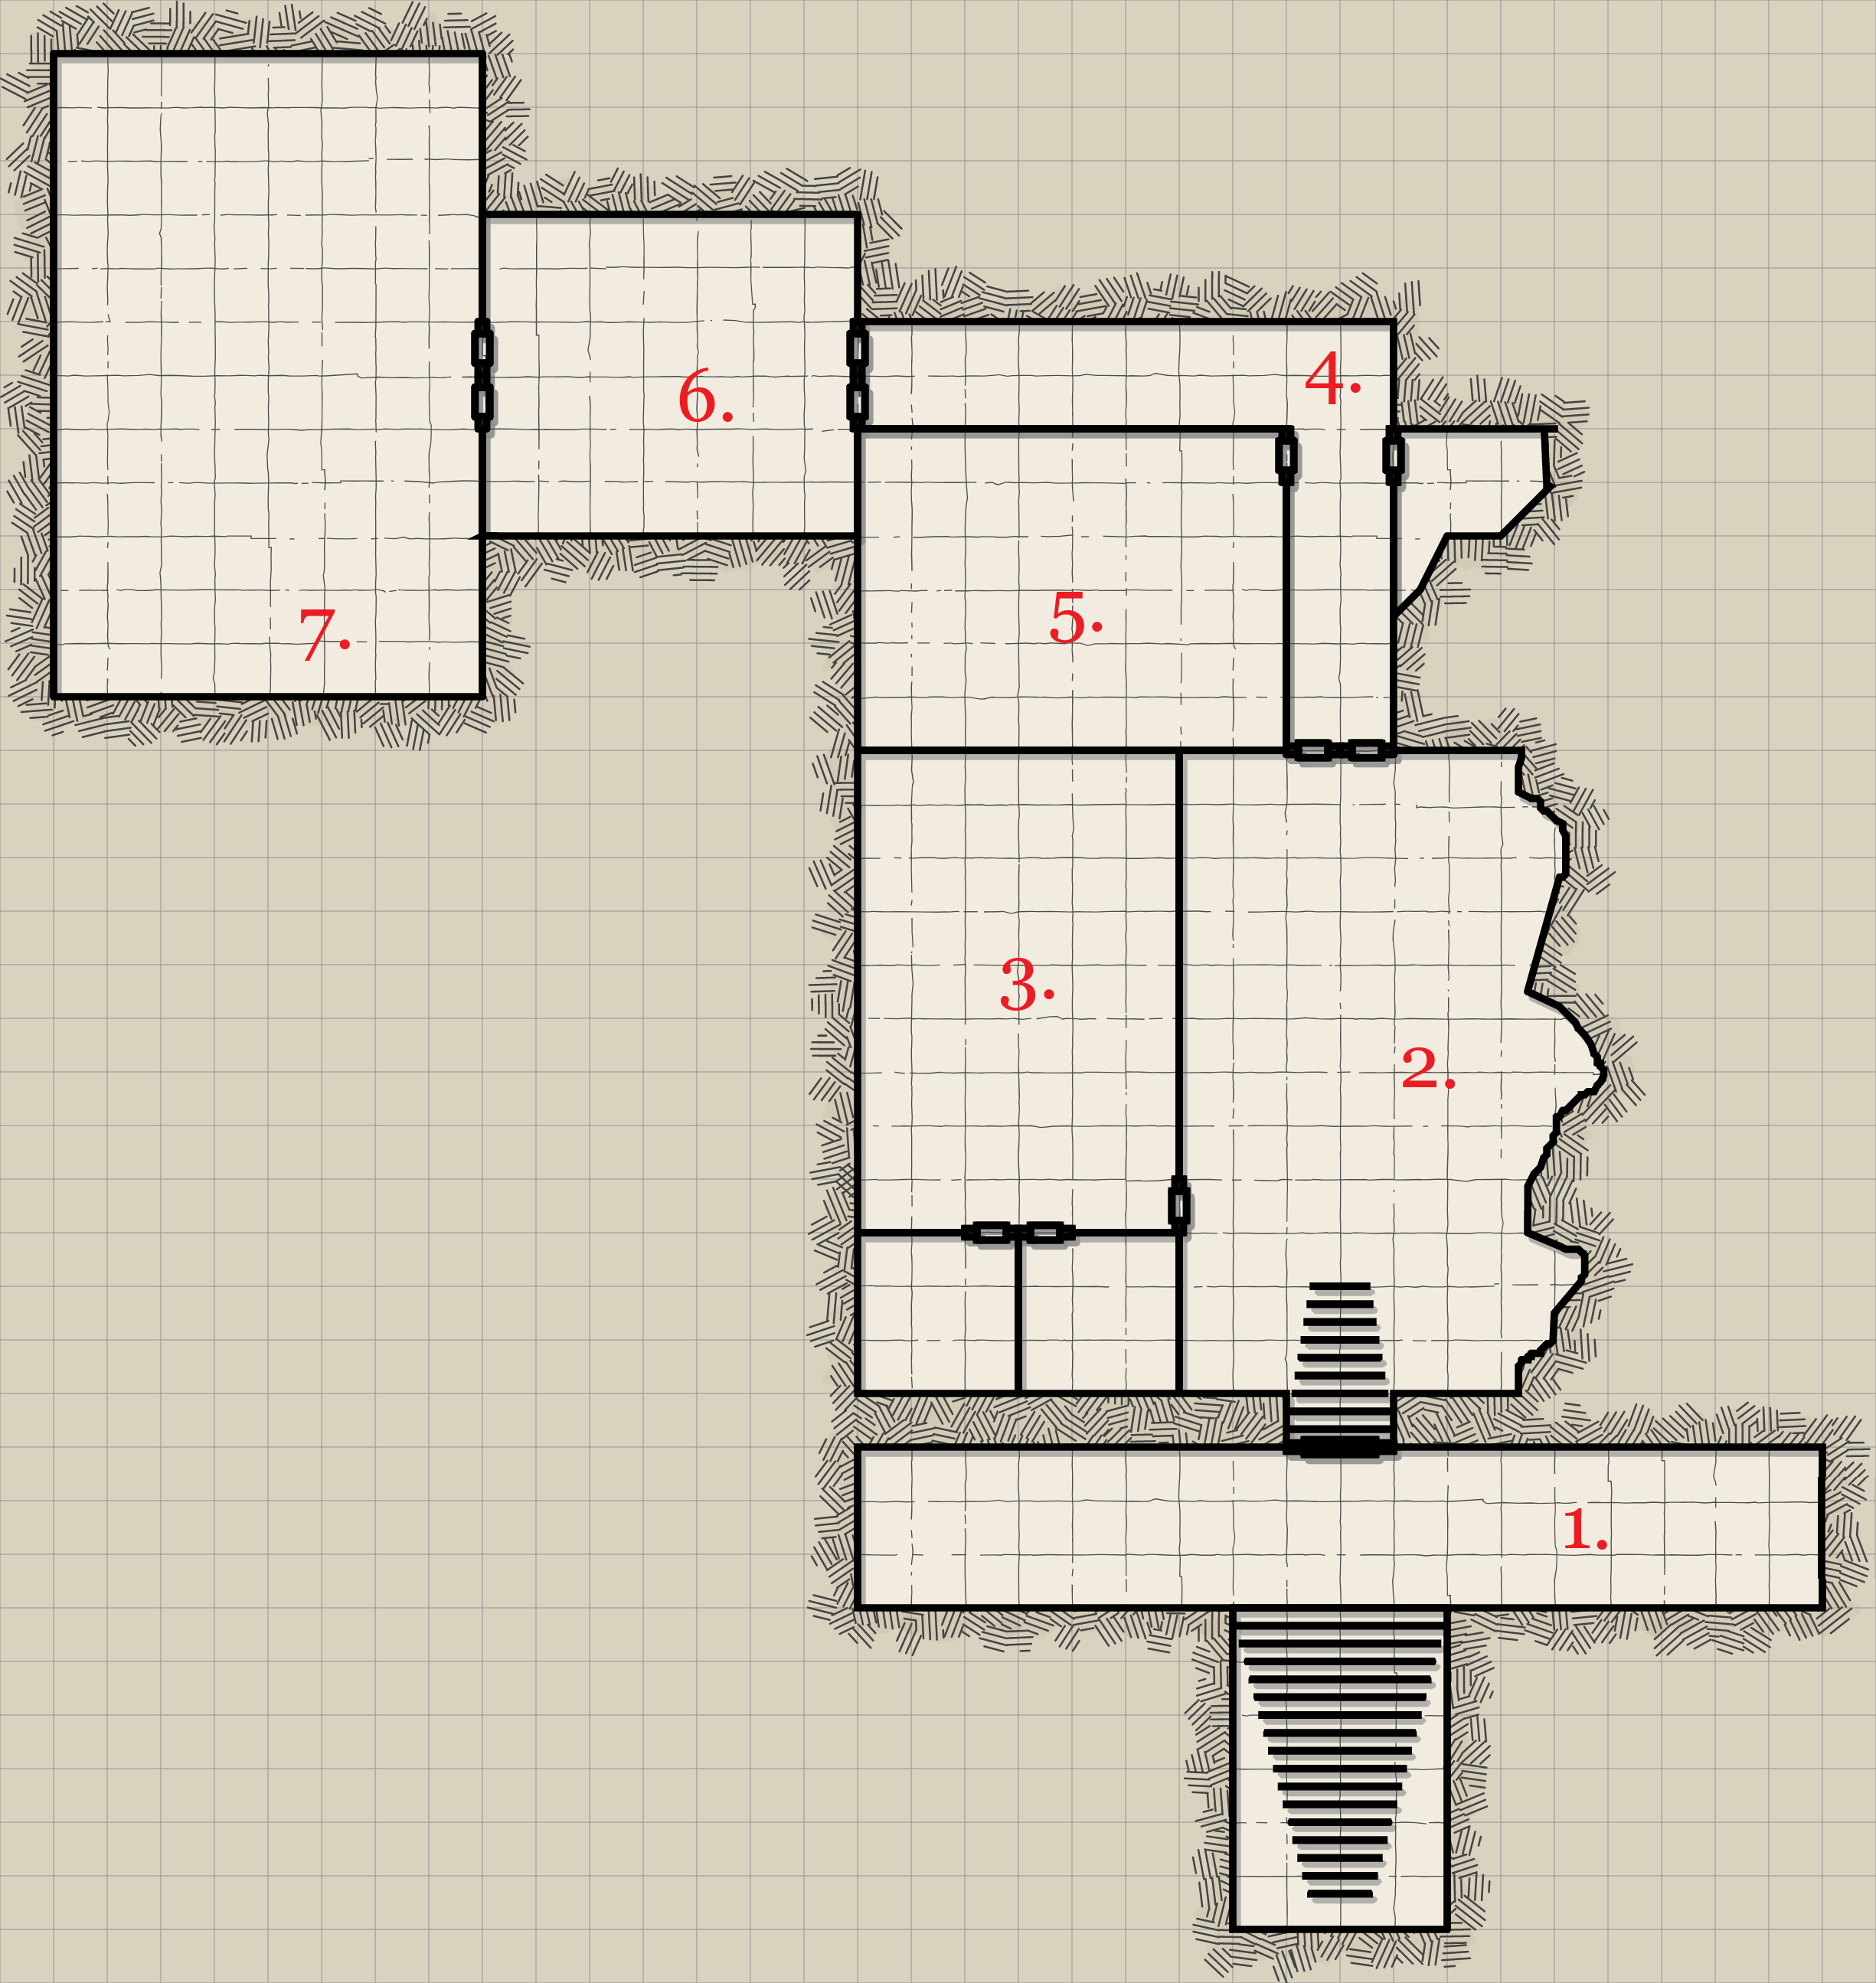
Player's Map of The Ancient Retreat
