A PLAYER'S GUIDE

A PLAYER'S GUIDE

This document is unofficial Fan Content permitted under the Fan Content Policy. Not approved/endorsed by Wizards. Portions of the materials used are property of Wizards of the Coast. ©Wizards of the Coast LLC.
Credits
This campaign has been running for over 3 years now, and we have a lot of credits to give out to people without whom this campaign would not be the same. In this time we've had DMs join and leave, we've created not just a connected campaign of one shot adventures but a persistent world with downtime activities too, and the following is a list of those who've left a lasting impact on the campaign, past and present.
| Andy | Originator, DM, World Builder |
| Matt | Originator, DM |
| Neil | Originator, DM |
| Jonathan | DM, World Builder |
| Derek | DM |
| Nuno | DM, World Builder |
| Sean | DM |
| Josh | DM |
| Dasha | DM, World Builder |
| Guido | DM, DTDM |
| Alexandros | DM |
| Thomas | DM |
| Tarek | DM |
| Toby | DM, DTDM |
| Ian | DM |
| Jamie | DM |
| Anthony | DTDM |
| Jason | DTDM |
| Jay | Guest DM |
| Nick | Guest DM |
| Ross | Guest DM |
| Ruthie | Guest DM |
| Scott | Guest DM |
We are grateful also to all of our players past, present, and future.
Layout and Editing
The contents of this Player's Guide has been put together by Jonathan and Guido.
Downtime Activities
The rules for downtime activities found in this Players Guide are based off of those found in Xanathar's Guide to Everything, and have been adapted by the Kantas Downtime DMs to better suit our campaign needs.
The rules for pets were originally inspired by Animal Training (5e Rules) by E.R.F. Jordan.
Document Version: 2.0
Art and Images
We hope that readers will check out and support all the artists whose works we have included in this document.
| Artist | Page |
|---|---|
| Giacomo Galloni | cover |
| Mark Molnar ©WotC | 4 |
| Mike Fong | 5 |
| A. J. Manzanedo | 6 |
| Viktor Titov | 7 |
| Raluca Iosifescu | 8 |
| Barry Brown Jr. | 9 |
| Tim Shepherd | 10 |
| Tim Shepherd | 11 |
| Onur Bakar | 13 |
| Tomas Osang Muir | 14 |
| Flora Silve | 16 |
| Giorgio Grecu | 17 |
| Tiago Sousa | 19 |
| Alexander Forssberg | 20 |
| Cameron Mcfarlane | 21 |
| bcnyArt | 22 |
| ©WotC | 23,28 |
| Rudy Siswanto | 31 |
| Moniek Schilder | 32 |
| Lucas Parolin | 33 |
| Renato Prezioso | 34 |
| Andrew Bosley | 36 |
| Tanguy Talbert | 38 |
| Chris Waller | 39 |
| Artist | Page |
|---|---|
| David Tenorio | 40 |
| Kristinn Geirsson | 41 |
| April Prime | 44 |
| Vladimir Krisetskiy | 46 |
| Caroline Gariba | 47 |
| Yiming Nie | 48 |
| Tomek Larek | 49 |
| Marco Texeira | 51 |
| Carlos Arl | 52 |
| Nuare Studio | 53 |
| Naranbaatar Ganbold | 54 |
| Anastasia Shevchenko | 55 |
| Renato Prezioso | 56 |
| Laura Galli | 57 |
| Eben Schumacher | 58 |
| ©Paizo Inc | 59 |
| Jake Siano | 61 |
| Ilina Naydenova | 62 |
| Noe Narcisse | 63 |
| Manuel Castañón | 64 |
| Elisa Galvan | 65 |
| Alexander Nanitchkov | 66 |
| Jean-Baptiste Monge | 67 |
| Ricardo Ow | 68 |
| sandara | 69 |
Contents
-
4Introduction
-
5The Story so Far
- 5Before the Campaign: Founding Daring Heights
- 6Season 1: Twilight over Daring Heights
- 7Season 2: The Coming Green Tide
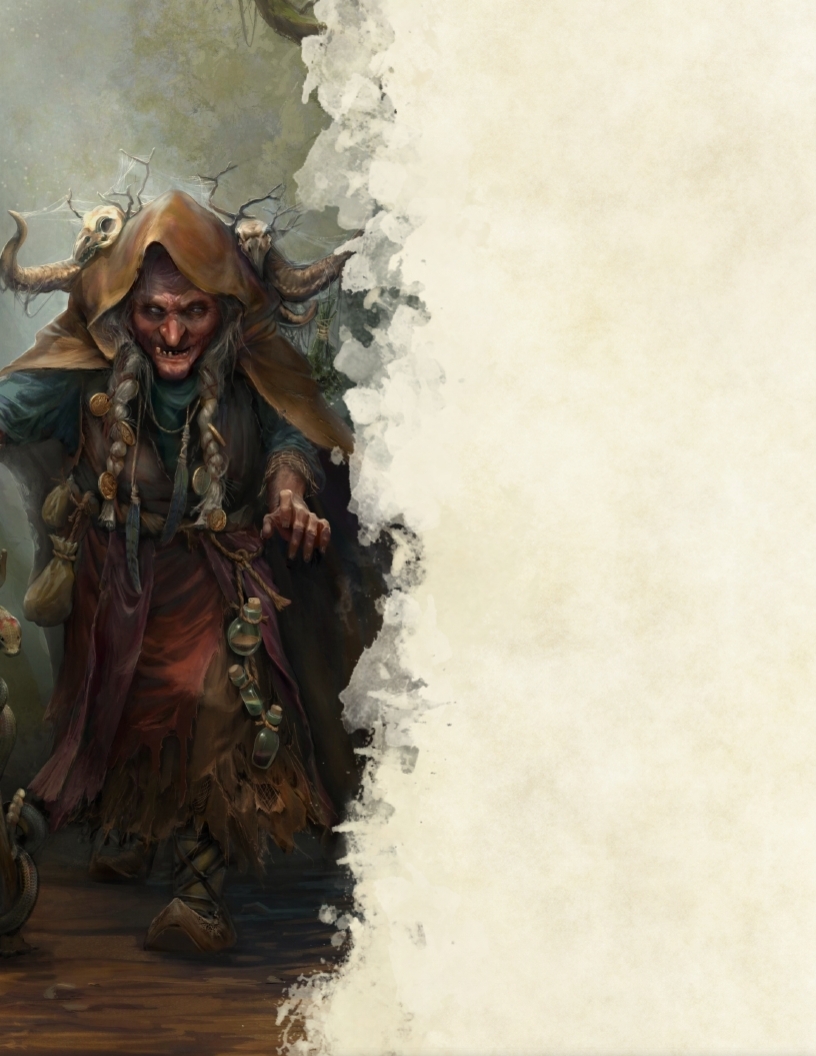
- 8Season 3: The Witch’s Hold
- 10Season 4: The Amaranthine Games
- 12Season 5: The Winds of War
-
13The Kantas Gazeetteer
- 13The Best-known Lands
- 15Further Afield
-
17Part 1 Getting Started
-
18Getting Started in Kantas
- 18Character Options
- 19Levelling Characters
- 21Kantas House Rules
- 24Equipment
-
32Organisation of Play
-
14Part 2 Downtime in Kantas
- 34Introduction
- 34Downtime Activity Slots
- 34Downtime Inspiration
- 35Living and Travelling
- 36Trading Between Adventures
- 37Bardic Performance
- 39Brewing
- 41Building a Shelter
- 42Business
- 45Carousing
- 47Crafting Items
- 51Crime and Punishment
- 53Gambling
- 54Pit Fighting
- 55Relaxation
- 56Religious or Civil Service
- 57Research
- 58Tailing and Scouting
- 60Training: Languages and Tools
- 61Training: Physical and Martial
- 62Work
- 63Backgrounds Features and Downtime
-
64Pet Bonding and Training
- 65Bonding and Standing
- 66Training
- 68Issuing a Command
- 68Pets in Combat
- 69Pet Maintenance
- 69Upkeep Costs
- 69Neglect

Introduction
Hail and well met, traveler Welcome to The Kantas Expanse, a land rich with opportunity and adventure. This campaign setting is designed to accommodate a large number of players and multiple Dungeon Masters. Taking elements of Ars Ludi’s West Marches Campaign, adding features of our own, and building a persistent campaign world for anyone to enjoy.
The Kantas Expanse was first established in April of 2017, where The London RPG Community (then Shoreditch Roleplayers) launched with some ground rules and three pre-planned one shot sessions to act as introductions to the campaign setting of Kantas, and the hometown of Daring Heights. After that first session it was largely up to the players to decide what to play, with whom, and when.
A key part of running this campaign is the rumours and post-session write ups. It is through both of these that the campaign of Kantas is evergreen with material and persistent for the adventurers—do they want to revisit a satyr they crossed paths with the week before because that satyr had hinted at a looming threat to the area? The players can submit an adventure hook for the DMs to pick up and develop into a future session. NPCs can drop requests and rumours, even allowing some plot hooks to go stale if the players decide to go in a different direction.

Looking for the next great (ad)venture? Step through the portal to the bustling town of Daring Heights, a thriving town on the new frontier of Toril: Kantas. A vast continent rich in space, history, resources and opportunity.
Entire civilisations you’ve never encountered or even dreamed of thrive here. The land is not without danger, but for the intrepid merchant this is a town where fortunes can be made. Defended by our large, heroic guild of adventurers, you will have a safe haven at Daring Heights to seek opportunity from, blessed by Waukeen herself.
My name is Viscount Willum Daffle, founder and mayor of this town. Join me and discover a world of possibility and excitement you didn't think still existed on the material plane!
How To Join Kantas Right Now
- Read the Introduction
and Part 1 of this Guide.- Join our Discord and meet
the other players and DMs.- Create your character on D&D Beyond (while getting all the WotC sourcebooks for free).
- Ask the DMs for a first-timer boost to get into the next Beginner Friendly game.

The story so Far
If you’ve ever heard of Baldur’s Gate, of Neverwinter or Waterdeep, then you are familiar with the continent of Faerûn, or as it is sometimes known, the Forgotten Realms. It is the setting for most standard D&D adventures. The world that Faerûn sits on is known as Toril.
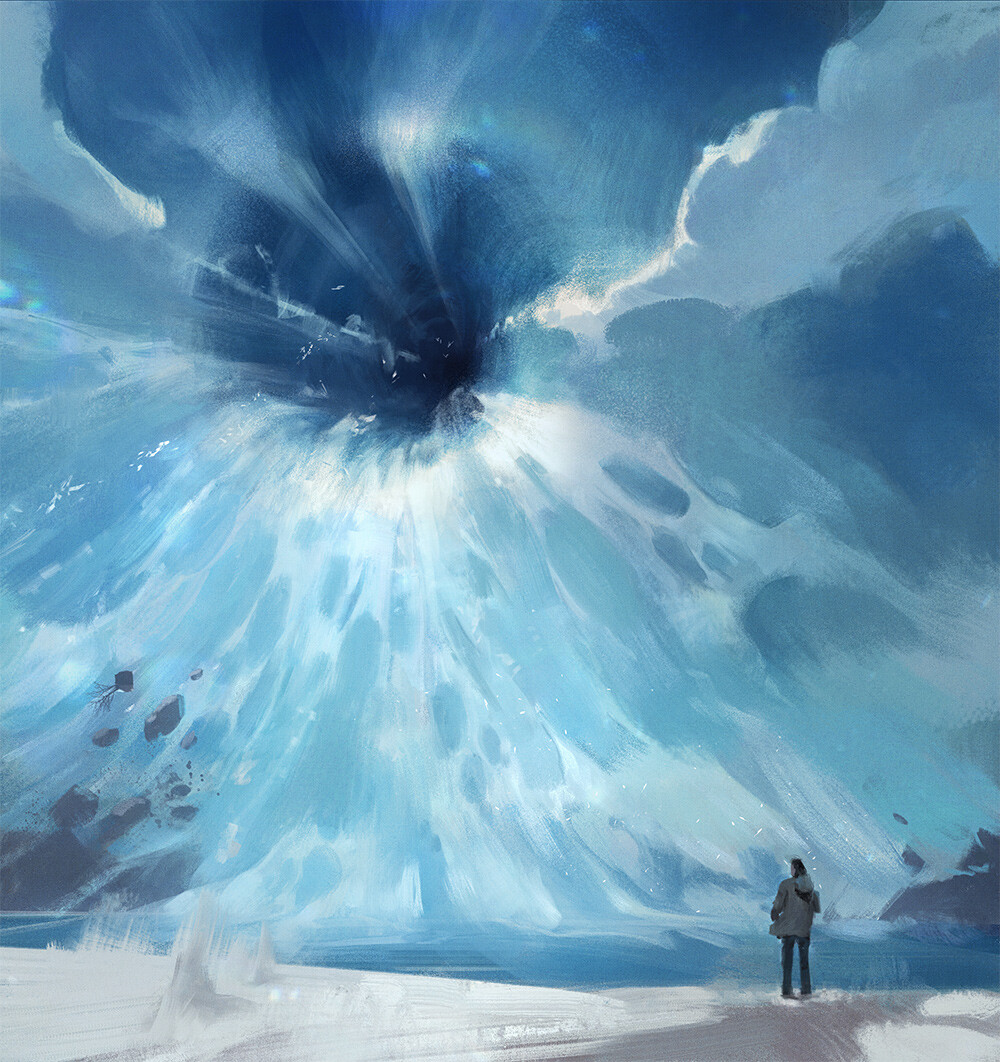
Our campaign concerns another continent on Toril, however; one which until recently was completely unknown to the denizens of Faerûn, or indeed any other land on Toril. This mysterious continent is known by its denizens as Kantas, or the Kantas Expanse. It has remained hidden from all others by virtue of a few strange features of the land. Firstly, the barriers between planes seem unusually thin here - portals and gateways to other planes and locations are a regular occurrence. Secondly, a great storm system, presumably stirred up by all the multi-planar activity, has encircled the continent, making ship travel ill-advised (though safer passages through have since been found). Finally, and most controversially to cartographers, no one seems to quite be able to pin down the actual size of the continent. Some feel it is clearly vast—a third of the size of Faerûn at least. Others swear that when trying to place it on a map, it seems to take up only a tiny amount of space.
More research needs to be done, but suffice to say it is one of the great mysteries of the continent—just what is it and how did it come to exist?
Summary:
- Kantas is a continent on Toril, new to the people of Faerûn.
- It is planarly-unstable and portals are common. The reason is a mystery.
Before the Campaign: Founding Daring Heights
A wealthy human merchant named Willum Daffles and his Aasimar friend, the wizard Aurelia Archselon, used to travel together from time to time to escape the rigours of business and study. They were both a fan of exploring and hiking, and one day near the Sea of Fallen Stars, on a stormy outcropping they really shouldn’t have been on, they discovered a portal—a rift in the air.
Stepping through they found themselves on a hilltop in an area they didn’t recognise, a forest to the south. Time and research led them to realise that they were in a continent far from home, and finding a few nearby locals, in particular a witch named Granny Longtooth.
They learned that the land was called Kantas, and that the portal they had discovered was a wholly unique, stable portal between Kantas and Faerûn.
As a merchant, Daffles saw an opportunity, and six months later, Daring Heights was founded, as they brought construction crews and materials through. It was a dangerous land though, it was rapidly discovered, and Daffles also decided to draw adventurers to the town by commissioning a large inn to be built in the new town dedicated to providing adventurers with a base of operations. Thus, the Three Headed Ettin was built. Flyers were sent out across Faerûn to let people know of this new town of opportunity and profit to be made, for merchants and adventurers alike, and many flocked to the town.
Summary:
- A stable portal between Faerûn and Kantas was discovered by a merchant named Daffles and a wizard named Aurelia.
- Daring Heights was built by them on the other side of the portal.
- Granny Longtooth was a witch nearby in Kantas.
- Daring Heights was made to be attractive to adventurers for protection and exploration—specifically with the Three Headed Ettin tavern.
Season 1: Twilight over Daring Heights
Our campaign actually began about a year and a half after the town was founded, two years from when the portal was discovered. A whole wave of adventurers had come before and the town is quite established, with a stone quarry built in the base of the mountains to the west and a small lumber operation to the south. Farms have been established over the surrounding hills, though they are still cultivating the land, and a port at the sea to the east had failed after it was overrun by monsters.
Requests for aid and jobs for adventurers are pinned to a notice board known as the Rumour Mill in the Three Headed Ettin. Travel to and from Faerûn is accomplished via the portal, which stands in the centre of town, now surrounded by a large teleportation circle crafted by Aurelia, who maintains and controls the portal and thus access between Faerûn and Kantas.
Early games focused on exploring the lands around Daring Heights. The Unicorn guardian of the Feythorn Forest to the south was met and negotiated with for modest lumber rights. Firbolg were also met in the forest, a small tribe of peaceful folk, along with the Erina, hedgehog folk who also lived near to Daring. The port to the east was reclaimed from the Grung by a pair of adventurers in the name of a merchant named Kensington. Caves were explored, the quarry was exorcised of ghosts. And a vast city far to the north-west called Kundar—a city of Kobolds and Dragonborn, where the Kobolds ruled and the Dragonborn were oppressed, though the city was otherwise open and welcoming of newcomers.
One other adventure of note involved the incubus, Pascal, who tricked adventurers and priests of Waukeen alike into a set of rituals that involved human sacrifice. He escaped.
Also discovered however was signs of a strange, mutated set of creatures—twisted beings tied to the Shadowfell. They seemed to be local creatures—orcs, kobolds, who had been corrupted somehow, sprouting spikes, tentacles and so forth, as well as becoming uniquely hostile. These creatures, the Twilight, as they came to be known, were based in the northern Angelbark Woods in a large seemingly semi-organic fortress by a deep river gorge. As Twilight numbers increased, a group set out with local ranger Keladry to destroy the bridge to and from the base, to stifle their growth.
The operation was successful, but Keladry was captured in battle. When they next saw her she had been corrupted, was now a Twilight and served as a general for their forces.
The situation grew increasingly dire, with the Twilight growing stronger under Keladry’s marshalship, and the adventurers learned that a Shadowfell noble was behind the incursion—a man half-Shadar Kai, half-human and so was seeking to prove the power of mixing Material and Shadowfell creatures with this army. The adventurers also met orcs to the north who were scouting the threat themselves, though they could not convince the rest of the orcish horde to deal with the problem.
Finally, Daring Heights resolved to deal with the threat head-on. Adventurers negotiated with the Erina, the orcs they had met, both Grungs and Bullywugs in the bog to the east, and along with a militia from Daring Heights itself an army was coordinated and headed north to assault the Twilight Fortress. A group of adventurers took a different route with the rocs, going via the Underdark through a passage they had learned of via another Faerûnian merchant named Ambar, a slaver who had been cooperating with the Twilight to bring more people to be converted into soldiers.
A fierce battle raged on the surface, the combined forces against a horde of Twilight orcs, humans, even giants led by the viciously powerful Keladry. Meanwhile, the underground strike team came up into the base from beneath and made their way up, disrupting the corruption ritual and ultimately slaying Duke Reavan Lust, the man at the centre of it all. Keladry too was slain on the battlefield and the Twilight were all dispersed as the focal point collapsed. There were many casualties, but the Twilight threat was defeated, and Daring Heights survived its first great threat.
Summary:
- Campaign began with Daring Heights about eighteen months old.
- Season 1 established the surrounding area—quarry in mountains to the west, port in swamp to the east, forest to the north and south.
- The Twilight were an army of local beings mutated with Shadowfell rituals into a semi-mindless army that conquered the Northern Forest.
- The NPC Ranger Keladry was corrupted and became a Twilight general.
- Adventurers gathered Erina, Bullywug, Grung, Orc and Daring Heights allies into an army and defeated them.

Season 2:
The Coming Green Tide
Threats and mysteries continued to develop across Kantas, but the area around Daring Heights, and the steadily growing Port Ffirst had become largely safe. Yuan-Ti snuck through the portal from Faerûn to reactivate an ancient superweapon in a mausoleum in the western mountains, though it was destroyed before it could wreak havoc on the countryside. An earthquake opened a chasm leading to the Underdark just outside Daring’s northern borders, and adventurers quickly found and looted an ancient puzzle tomb there. A stone portal in the northern forest was reactivated and made to link to several different planes, including Sigil.
Granny Longtooth, who had been set up in a cottage outside the town since it was founded, offered powerful magic and aid to those would agree to her terms. She always said that she never took gold and people could always afford her prices, and those were both true, technically. One day her entire cottage vanished from its place south of Daring, and a great dark sphere was found in the same relative location in the Feywild. Granny had upgraded, creating a demiplane for herself in the Feywild which she called the Witchhold, a fetid place around a great tree where she gathered witches to her for deals and bargains, naming herself Queen Longtooth. Though disturbing, she claimed she posed no direct threat to Daring Heights.
When Pascal the incubus was found to be a guest under her care however, adventurers demanded the right to kill him, which Granny granted in the form of a duel. Ultimately, Pascal was sealed inside Nowhere the warlock’s knife, contained, if not gone.
It was around this time that the rumours of orcs in the mountains began to build. They had heard of the wealthy new, lightly defended town and decided it was worth their time to destroy. Small blue creatures known as Xvarts also seemed to be working with them. They numbered in the thousands, so the town started working on its defenses.
Allies were sought again, though fewer this time were found. To the south, the dwarven citadel of Vorsthold was discovered and ultimately persuaded to donate arms and armour, though no soldiers, to the effort.
It came to light that the Xvarts were actually the driving force behind this orcish invasion. Their god, Raxivort was a demon in hiding who possessed a powerful artifact called the Infinity Spindle and had used it to augment the Xvarts into a formidable fighting force. They were determined to take over Daring Heights and use its portal to find their hidden god and travel to him, to be at his side and help him conquer the multiverse.
As the orcs and Xvarts marched on Daring, Aurelia used her magic to conjure an entire fortress out of the ground, placing it between the orcs and the city to absorb their assault. Some adventurers stayed in the city as the last line of defence of the portal, along with some of the strongest members of the citizenry including Aurelia herself. The citizens of Daring Heights were evacuated through the portal back to Faerûn to a temporary camp set up there. A group of incredibly powerful Xvarts led a small force of several hundred against the city directly.
Through guerilla
tactics and the combined
might of the adventurers, they
were able to disrupt the Xvarts’ plans
and secure the portal. However, to their horror,
they realised that the battle at the fortress had not gone
well, and the thousands of orcs had overrun their friends and allies and were descending upon the city. Desperate, Aurelia ushered everyone through the portal to evacuate, and then destroyed the portal, unravelling some of its arcane threads so that while it was still a site of power, the stable link between Faerûn and Kantas was severed forever. And so Daring Heights was conquered by the orcs, with many adventurers captured and kept in the orcish war camp.
The survivors gathered in the camp in Faerûn. Mayor Daffles was missing and people looked to Aurelia for guidance. Ultimately, the Feywild came to the rescue. A deal was made with the Bear King, who ruled a city in Kantas as well. He agreed to chase the orcs out of Daring via a vast swarm of bees. Adventurers were assisted by a pack of bearfolk in exchange for a percentage of profits, a standing alliance and a set of three small stones to be placed around the city. Daring Heights was restored, though much lay in ruins. The orcs were routed, the Xvarts defeated, and people began to return. Without Daffles, a Council was formed to rebuild the city to its former glory. And so a year passed.
Summary:
- Mostly exploring the same areas. New areas include Vorsthold, an underground Dwarven citadel.
- Granny revealed herself to be even more powerful than imagined, and set up a demiplane to rule over in the Feywild as a Witch Queen—not directly threatening Daring Heights yet though.
- Xvarts wanted to reach their god by using Daring’s portal, so they got local orc tribes to attack en masse. They overran Daring Heights, but Aurelia evacuated back to Faerûn through the portal and then partially destroyed it so that it couldn’t be used.
- In the aftermath, the city was retaken by the Bear King, an ally Feywild Lord. The city entered a period of rebuilding.
Season 3:
The Witch’s Hold
A year later, the city was rebuilt and prospering more than ever. At the end of the year, adventuring restarted.
The first order of business was tracking down the godling Raxivort, whose Xvarts had incited the invasion in the first place. Adventurers located his demiplane, stormed in, struck down the godling and returned the artifact granting him power to Nowhere’s patron of all people—a fiend.
A blue dragon was defeated under Kundar, hoarding information. Will, the angel of the Angelbark Forest, was saved from danger twice. A group of elves, the Galavir, potentially native to Kantas, were discovered in the Western mountains cut off from their soul migratory patterns by a Marid, who was summarily slain.
While Daring had been rebuilding, Port Ffirst had been flourishing. Lord Kensington had averted his gaze from the town when he was inducted into the City Council of Daring Heights and that, in addition to Voros Lenoir, merchant and sailor extraordinaire having finally discovered the maritime route from the Sword Coast to the shores of Kantas was the spark needed to ignite the growth of Port Ffirst.
Voros, alongside his much more business-oriented brother, Soros, sold all their businesses in the Sword Coast in search of a new life and found a Port Ffirst full of potential but forgotten by time and severely put beneath the needs of Daring Heights. In the year Daring Heights was being rebuilt, Port Ffirst grew tenfold in size and population with the construction of New Town and the Tritooth Wharf.
As expected, a new town growing out of the pockets of rich merchants attracts individuals of the criminal type. All small criminal activities were quickly snuffed out with the arrival of the mysterious vigilante-style masked thief by the name of Laeruna the Red. What started as a group of three or four able individuals quickly expanded and became a network of informants in the underbelly of Port Ffirst.
The growth spurt the small town undertook was clearly underestimated by the Lenoir brothers and basic resources were becoming a very expensive problem. To fight this, they brought in an expert on farming communities in Faerûn—Jill Graben. After invaluable help from the new adventurers that slowly flocked to Port Ffirst, an area in the nearby forest was vacated to allocate a farming community.
With the food problem beginning to be less of a nuisance, the Lenoirs called in some remaining favours to bring over new businesses and maritime security. This marked the arrival in town of the Grey Zephyr Armada, led by Admiral Jarnos Saltborn. Several merchants also arrived, including blacksmithing, leatherworking and magical services. Karlessa Highbringer, native to Kantas was also persuaded to start a business in Port Ffirst and opened the enchanting shop The Blue Soul Arcanum. The areas comprising Daring Heights and Port Ffist started at this time to be collectively called the Dawnlands by inhabitants.
Meanwhile, adventurers from Daring Heights discovered an alarming new threat: an army of giants, trolls and even a few young dragons was being massed in the western mountains.
Afraid of a repeat of the orcish invasion, the adventurers investigated and discovered it to be organised by none other than Nowhere, the warlock adventurer who was a colleague to so many in Daring Heights. It turned out that his army was not heading for Daring, but for Witchhold, the seat of Granny Longtooth’s power. He thought she was too great a threat and must be dealt with, and had spent the last year amassing this power. His motives were strange and oddly personal, as Granny had been careful not to pose a direct threat to Daring for some time.
As things progressed, people came to understand that Nowhere had been Granny’s apprentice for years now, learning her witchcraft and means of dark bargains. Using them himself, he had become extremely powerful, even freeing the demon Pascal from his knife and using him as an assistant and general. He knew that one day Granny would become a threat, even if she wasn’t posturing now.
So he resolved to end her. The adventurers were conflicted in this, as Nowhere’s methods were repeatedly shown to be heartless and manipulative, even as he tried to convince others not to be puppets to Granny’s plans.
Ultimately, Granny and Nowhere faced each other with their respective forces on a plain in the Feywild. The adventurers located a series of artifacts which would bind both the witch and the warlock, and give them the opportunity to eliminate one of the threats utterly. A huge debate ensued and only a handful could even resolve to commit such an act. The trap sprung, the great Queen Granny Longtooth of Witchhold was destroyed by this Arbiter’s Disc, Nowhere knocked out and taken back to Daring to stand trial. Nowhere put up no objections, and agreed to go along entirely with the council’s ruling on his actions. The result was exile, by a narrow margin, and Nowhere was sent away, never to return.
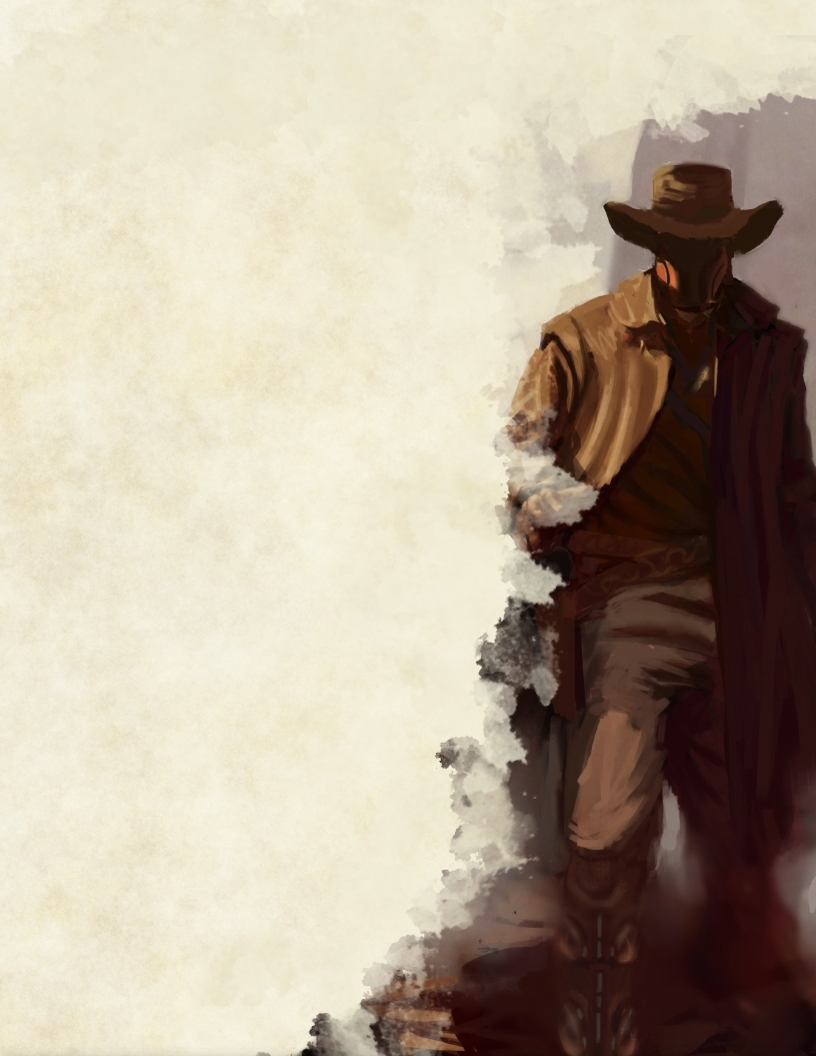
While all this was happening over in Daring Heights and in the Feywild, Port Ffirst was mostly untouched by the war. This all changed with the arrival of a new player in town. Crashing through a portal into the Flourished Hook, a high-class tavern in town, down came tumbling Langston Farstep, renowned Bounty Hunter from Faerûn working mainly in Kundar recently. He recruited some adventurers in Port Ffirst to aid him in putting an end to the Witchhold and stealing its source of energy—a mote containing all the souls Granny Longtooth had acquired.
Although they did succeed in destroying the Witchhold, unexpectedly, Langston Farstep stole the Mote at the last minute, stepping through a portal, several feet up some ichory vines, where Kundar could be seen on the other side.
Summary:
- Daring Heights is rebuilt to its former glory over a year.
- Raxivort, the godling, is slain.
- Local elves, the Galavir, discovered in the Sunset Spine.
- Maritime route discovered between Faerûn and Kantas by the Lenoirs—who take over Port Ffirst economically and expand it greatly.
- Laeruna the Red starts criminal activity in Port Ffirst.
- Lenoirs bring in the Grey Zephyr Armada as well as other merchants and services.
- Characters kill Granny and put Nowhere on trial for many crimes, ending with his exile from Daring Heights.
- Nowhere (a PC) raised an army of giants to fight Granny Longtooth, seeing her as a true threat. He had secretly been her apprentice for much of the first two seasons.
- Langston Farstep, bounty hunter, leads adventurers to steal the mote containing all of the souls
Granny had acquired and then
disappeared with it, betraying
everyone.
Season 4:
The Amaranthine Games
Following Nowhere’s exile and Langston’s escape, life returned back to what counts as normalcy in the two towns of Daring Heights and Port Ffirst. Naturally, a group almost immediately set out for the far north at the direction of halfling child-prophet Idari Shortcrust and slew a vampiric duchess who was ruling over the kobold mining village of Kurzig Vondar north of the Angelbark Forest. “Normalcy” indeed.
The vampire, Duchess Khalister, gave people pause when they considered another figure in town who remained anonymous—known only as The Duchess herself. She was an information dealer of sorts who had sent many tips the adventurers’ way, including the location of the Arbiter’s Disc, but all attempts to ascertain her true nature failed. Her intent however, seemed clear, to help Daring thrive.
The strange elven tribe of Galavir, free of their Marid master, sought out the angel Will to learn what would become of their souls now. Will and the adventurers broke the remaining seals the Marid had left behind and freed these souls to rejoin the great elven cycle of souls.
Then a great plague struck Daring Heights—the Lassitude. It was a virulent, though rarely fatal, disease that sapped all energy away. The cause was determined to be Fey disguised as priests “helping” the town with blessings. They were chased to the Feywild and dispatched while clerics and doctors from Kundar aided local physicians in perfecting and distributing a cure. One hundred twenty-two died in total, a memorial raised in the graveyard as a marker for the burned dead.
This event shook Daring Heights, and they had had to quarantine themselves for the duration, but it was also the first time—in the Feywild—that the term the Amaranthine Games was heard.
Later, it would be
discovered that the whole
plague was orchestrated by the River King, a Fey Lord, to diminish the light that Daring shone in the Feywild, and lessen the Queen of Night and Magic’s standing in the games.
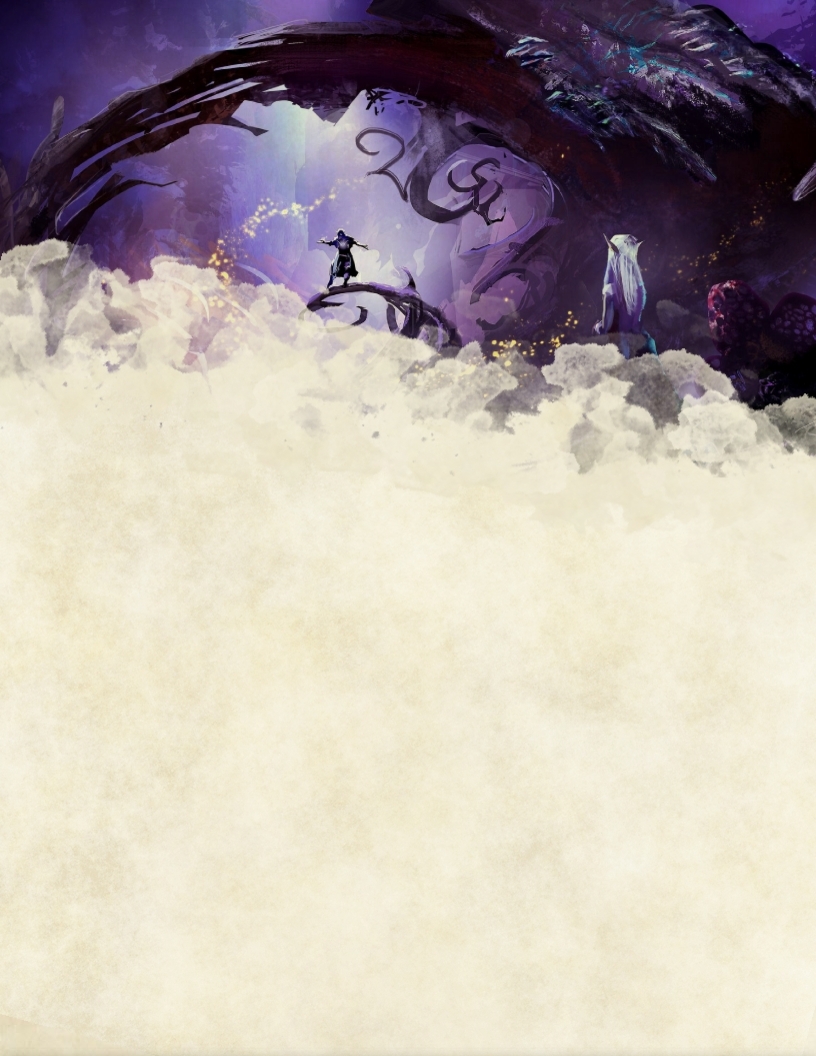
Shortly after, Vorsthold claimed it’s debt from Daring—aid in the Underdark, and adventurers battled an Elder Brain in a Githzerai fortress to pay this debt off. Meanwhile, the Amaranthine Games were beginning to drag more heroes from Daring into their wake. The Games seemed to be a series of completely random, off-the-wall competitions between teams or individuals representing some of the foremost Lords and Ladies of the Feywild. The first main event was a contest in the Shadowfell to be the person holding a particular skeletal cat in a monumental mountainous mausoleum at the end of two hours. The players were victorious and their “patron”, the Queen of Night and Magic, received points for their efforts. Another game, a footrace up and down a mountain (it was a volcano) became even more chaotic with the announcement of a fifth team for these games.
The four main players of the Amaranthine Games were: Queen Sarastra Aestruum—the Queen of Night and Magic and linked to Daring Heights by way of the Bear King, her vassal; King Ulorian the River King; Queen Titania the Summer Queen; Queen Morinn—the Snow Queen. Now, the fifth, turned out to be Jack, the Fool of Queen Sarastra’s court. Jack was a modron, specifically a Hexadrone from Mechanus who had become a Fool through a poor contract and wanted to use these games to free himself. He was, frankly, mad. Jack was cunning though, and hired the adventurers to fetch a champion for him from the same prison that held the Druid Daisy’s great-grandmother Khazifa—locked in the First Bank of Primus.

They freed Khazifa and a metal warrior named Ward, who promptly joined Jack’s side in payment. Other ijinks ensued including Langston Farstep—on the River King’s team—turning Rholor and his adventurer escort into children in the Feywild to try and get rid of them. Eventually all the scheming and gaming came down to a grand series of final game—the Amaranthiad—held in a specially made stadium.
The final games were epic in scale and mind-boggling in nature, but ultimately the Grand Final was set to decide it all. Each team—now many adventurers participating on each side—was allowed to design a giant mechanical warrior which they then pitted against each other in a vast arena—each team piloting the mech from within.
The battle was epic in every sense, but ultimately the winner was crowned and Queen Titania of Summer was named the winner of the games. Now, there was a secondary prize at stake here—the winner of the Games was able to ascend a single individual, be they Fey or not, to the ranks of the Fey nobility. Rholor and Sunday were both potentials for this honour, but Titania’s win sealed this prize for Sunday. Everyone was therefore stunned when Sunday turned it down outright and left the stadium. And thus, with Queen Titania laughing in the dirt as Sunday walked away, the Amaranthine Games closed.
Once more, Daring Heights was on the spotlight when it came to the big players of Kantas. During the beginning of the games, the Fey Lords and Ladies were still focused on Daring as the main settlement of the foreigners from another continent and that led to Port Ffirst, once more, coming out almost unscathed from the entire predicament Kantas was facing. This led to several interesting developments in the port town.
First of all, Countess Arnis Jinlin continued in her demand to claim some of the mercantile power owned by the Lenoir brothers. After several methods proved to be in vain she resorted to less orthodox approaches and hired adventurers to help her in locating the infamous and misleading Laeruna the Red.
After a successful locating mission, Laeruna agreed to meet with the Countess hence starting a very profitable and dangerous relationship between the two women. From this point on, working hand in hand, the Jinlin estates slowly started acquiring more and more allies and businesses.
Meanwhile, the Lenoirs noticed something askew and Soros was forced to deal with the matter, spending less time every day heading the Flourished Hook.
This led to Soros hiring Himal Maskay to help manage the Flourished Hook and deal with more “delicate” business while he was trying to understand how the Countess suddenly started weilding so much power with such ease.
On another note, Mundungus Keyhorn, last of the faithful to Kensington in Port First, perished after striking a deal with a group of Yuan-ti from Chult and an emissary of the Lady of the Sixth Hell, Glasya. This powerful devil was summoned by a secret society called The Cult of the Lady formed by rich farmers opposed to the Lenoir brothers. With the support of the Cult and Glasya’s minions, Mundungus managed to hire a sizeable crew of pirates and cut-throats from the Sword Coast to try and harass the Lenoir brothers at sea, but was double-crossed and killed by the entities he got in league with.
The efforts the Lenoirs put in re-establishing their dominance were not in vain. A few months after they started ramping up their influence once more, the Grey Zephyr Armada, under their command accidentally discovers the port town of a kingdom on the East coast of the Sea of Storms—the city of Cape Za’suul in the kingdom of Kul’Goran. Naturally, the Lenoir brothers pushed for a healthy business relationship with these newfound allies and promptly set up a trading deal with them.
All of a sudden, Port Ffirst got involved directly and indirectly in the Amaranthine Games. First, because of the plague that struck Daring Heights, many of the healthy citizens decided to take refuge in Port Ffirst causing a problem of overpopulation and lack of resources. Luckily, the situation was dealt with quickly and no major issues arose from it.
Around the same time, Jack decided to replicate what Queen Sarastra had set in place in Daring Heights by having adventurers place feystones around Port Ffirst creating a second Beacon in the feywild—this one where Port Ffirst would stand and under Jack’s control. Towards the end of the Amaranthiad, the Lenoirs, excited by the recent maritime discoveries, strongarm a famous cartographer, Nappin Gyrowistle, into moving to Port Ffirst to work for them.
Summary:
- The Lassitude, a plague, struck Daring Heights—this was cured and later discovered to be linked to the Amaranthine Games.
- The Amaranthine Games were the Feywild Olympics and full of bizarre games. It was a contest between four Kings and Queens of the Feywild and Jack—the court fool of one of the queens and a surprise entrant in the games seeking to win his freedom.
- Countess Jinlin with Laeruna gained a stronger foothold in Port Ffirst.
- As part of the games, Jack had adventurers create a beacon in the Feywild on the Port Ffirs’s location in his honour, to match the beacon of Daring Heights.
- The finale of the Amaranthine Games saw Queen Titania
win after a 27 player 4 table giant mech fight. She
offered an elevation to the nobility to Sunday (a PC)
who declined.
Season 5:
The Winds of War
Turning away from matters in the Feywild, adventurers found that the attention of Daring Heights had become focused on establishing good relations with a nation encountered across the Sea of Tears—the republic of K’ul Goran. This was a country of Minotaurs and Air Genasi, as well as a curious mix of the two known as Aerotaurs.
An ambassador was hired to represent the Dawnlands, a half-elf called Girelle Veluss, whose initial purposes were more about negotiating trade deals but quickly developed into a full formal ambassadorship. In order to show off the wealth of adventuring talent that the Dawnlands could provide, he quickly set out to hire parties to help K’ul Goran with a number of problems they were having. Much of this involved supplementing the Errant Guard—the K’ul Goran equivalent of adventurers, though more tied to the military.
K’ul Goran was the largest civilisation thus far met—multiple cities and a well-structured society. It had two quirks though—wind howled everywhere due to a thin barrier with the Plane of Air, and blood dropped on the ground immediately vanished into the dirt. “Pray that the Ground isn’t Thirsty” was a common warning.
Meanwhile, the investigation of three menhirs not far from the village of New Hillborrow led to the discovery of signs of ancient yuan-ti civilisation unknown to the new habitants of the Dawnlands. By activating these stones a group of adventurers were teleported to an ancient temple under the volcanic island off the coast of Port Ffirst. Other ruins were subsequently discovered at various locations. The fragments of books, items, and temple iconography found by adventurers while exploring these ruins allowed two renowned scholars Ernetta Jund and Oriloki (a PC) to piece together hints of an ancient yuan-ti nation—the Province of the Cobra—spanning over the contemporary Downlands and beyond the Sunset Spine into the desert.
This Tribe developed unique philosophical and religious beliefs. Their old god Mershhaulk became seen as a messenger testing its followers by seemingly asking for violence and sacrifices only to see if they are instead ready to end the circle of worship and ascend to a higher state of being. These beliefs offended the powerful yuan-ti empire in the lands now known as Chult and war was waged against the heretics. To avoid total annihilation the Tribe of the Cobra struck a pact with Glasya to finalise a spell able to hide and preserve the survivors until on day they will finally be free to ascend. With the spell ready, however, the clergy decided not to pay the heavy price in souls required by Glasya. They instead hid from their enemies and called on Mershhaulk to use much of his remaining strength to temporarily banish Glasya and her minions from Kantas.
Almost a millennium later the actions of Mundungus Keyhorn and the cult of the Lady unwittingly offered Glasya a way back into the lands she had been banished from. Glasya sent one of her lieutenants to exact revenge as the hidden Yuan-ti woke up from their magic-induced stasis thanks to a last cry from their old protector Mershhaulk.
Unknown to most, a cat-and-mouse game started in the Dawnlands between Te’zeer, lieutenant of Glasya, and the last of the tribe of the Cobra. Adventurers also got involved and various battle were fought as devils prowled the ancient yuan-ti sites and the scattered few survivors started a desperate march into the desert looking for the Forbidden City where they believe their destiny will be met.
As these events were unfolding, on the other side of the sea it became apparent that the sprawling nation of K’ul Goran was having trouble with giants on their eastern borders, and these conflicts shortly erupted into full scale warfare. Suddenly, the missions adventurers were getting hired for were part of a massive military strategy, sabotaging giants’ supplies and military production.
The war was devastating for K’ul Goran. The forts on their Eastern border were demolished and a few weeks later the giants laid siege to the easternmost city of Jarvenol, and promptly entered and sacked the city. Other forces came into play—a group of reclusive elves called the Gotresham from the north appeared to be joining in the chaos as their own side, fighting giant and minotaur alike; and from underground to the south erupted the Shunned, a conglomeration of goblinoid and other monstrous races who had grievances against the K’ul Goran people.
The reason for the giant invasion was still a mystery though, and their tactics were proving oddly cunning. The Storm Giant leading them was discovered to be an illusion and when a fiend was discovered deceiving a Djinn Senator in the capital city into delaying the military’s responses, it became clear that some other force was manipulating events.
Ultimately, the war came to a head with a country-wide assault by hordes of giantfolk from Ogres to Cloud Giants. Adventurers, now fast allies of the local forces, fought against this invasion in multiple different locations, including at the capital city of Zot Goran where Cloud Giants bent the weather into a ferocious blizzard. The real leader of the giants—another Storm Giant—was found in a pocket dimension and freed, just as the false leader (an illusion created by an Arcanaloth named Mogtron) was dispelled and Mogtron defeated. The true leader called off the assault and the various giant forces began to retreat.
The damage had already been done however. The blood spilled on the battlefields across the country all drained into the ground and activated some kind of ancient ritual, and a blazing runic circle appeared, circumscribing most of the country. It faded quickly, and nothing immediately happened as a result, but it was clear something terrible had just happened, and adventurers were forced to reflect on Mogtron’s final words: “We’ve already won.”
Summary:
- The relationship between Daring Heights and K’ul Goran deepened greatly and adventurers encountered much of their society and culture. The Errant Guard in particular, as adventurer-like warriors, became friends of many.
- Giants invaded the country and war broke out. This was discovered to have been provoked by fiends.
- K’ul Goran survived the invasion and won but the blood from the conflict fueled some mysterious ritual that caused a huge flaming runic circle to appear.
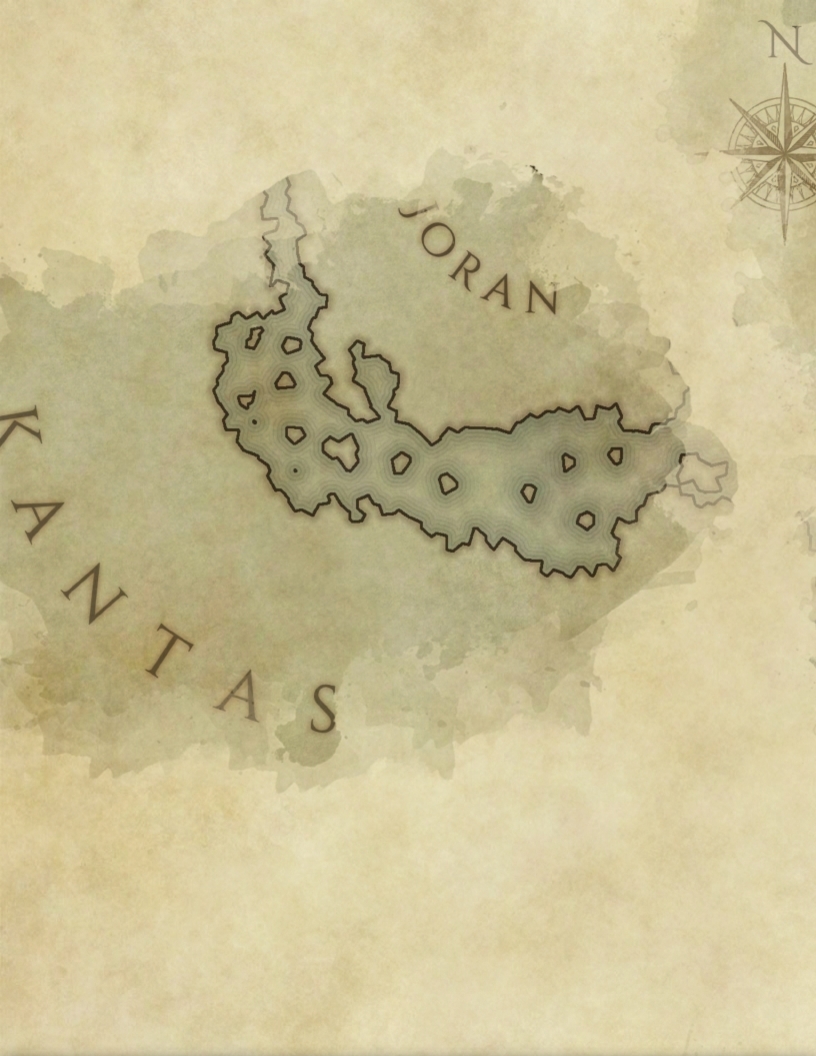
The Kantas Gazeetteer
Moving to a new area means a lot of new places to get the hang of. These pages summarize what your character’s new neighbours might have to say about some of the main locations around Kantas. Of course, local knowledge is not always totally reliable …
The best-known lands
Whether your character lives in Daring Heights, Port Ffirst, or New Hillborrow, most of their fellow inhabitants will know a bit about these places, even if they haven’t been there themselves.
The Dawnlands
This is what the settlers from Faerûn call the area of hills, fields, and plains where they first arrived in Kantas. It’s an area of about 400,000 to 450,000 acres (roughly the size of Greater London). It extends north to the edge of the Angelbark Wood, south to the Feythorn Forest, west to the Sunset Spine mountains, and east to the Sea of Tears—or at least to the Frog Bog, which inhabitants of Port Ffirst tend to think of as separate from the Dawnlands. For the most part the Dawnlands are fairly safe, though bandits, gnolls, and goblins are not unknown.
Daring Heights
This walled town of over 3,000 people was the first Faerûnian settlement in Kantas, built on the initiative of its first—and now departed—mayor Viscount Willum Daffles. It stands on a hill roughly mid-way between the mountains and the sea, quite near the northern edge of the Feythorn Forest. It has four main wards: Castleside (the northern area where Fort Daring is built into the wall); Graveside (south); Stoneside (west); and Swampside (east). In the centre is Old Town, which includes Portal Plaza, originally the location of the now-collapsed magical gateway between Faerûn and Kantas, now the site of the town’s permanent teleportation circle. Daring Heights is run by a Council and has a town Guard and a small standing army. Notable sites include temples of Waukeen and Selûne and the new Daring Academy.
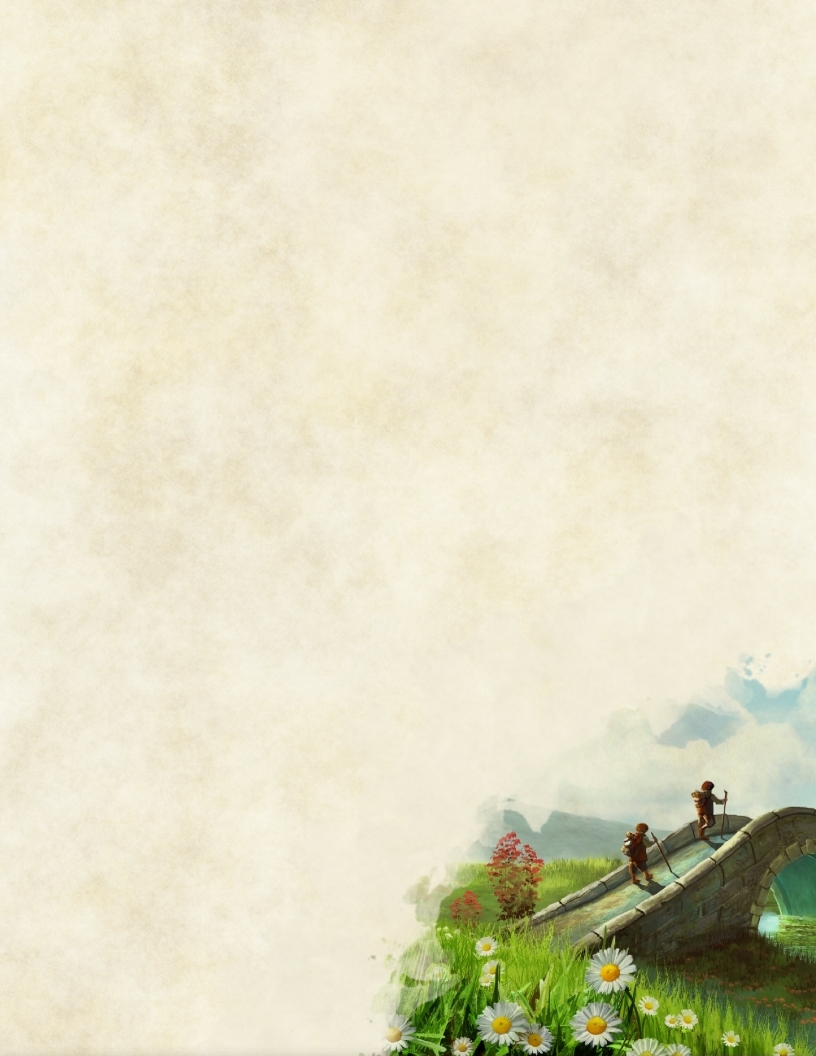
New Hillborrow
A small village of small folk, New Hillborrow is inhabited mostly by halflings, with a sizeable minority of gnomes. Largely a farming village, it is starting also to become known as a stop-off on the journey along the Swamp Way between Daring Heights and Port Ffirst (about 20 miles from the former and about 15 miles from the latter)—just turn off the road at the small statue of Sheela Peryroyl and head a couple of miles north into the hills.
Major travel routes
The most travelled path in the Dawnlands is the Swamp Way, which joins Port Ffirst and Daring Heights. It runs roughly east from Daring until it reaches the edge of the Frog Bog, from where it takes a rather marshy detour, occasionally over raised wooden walkways, along the southern edge of the swamp where it meets the Feythorn Forest. The journey is a little more than 30 miles in all. Older than the Swamp Way but less used is the route between Daring Heights and Stoneleaf. It’s called the Stone Road, not because it’s paved with stone (it isn’t) but because its original purpose was to transport stone to the town. It runs east-west and is about 20 miles long. Another major route branches off the Stone Road and leads north-north-west to Kundar.
Other landmarks
There are many other commonly known landmarks in the Dawnlands including:
Evenbloom Hill, a hill covered with purple flowers nearly three hours north-east of Daring Heights, where it’s said to be possible to cross into the Feywild;
Cleft Hill, in the foothills of the Sunset Spine west-north-west of Daring Heights;
the Coldshaw River, flowing down from the mountains into a lake near the Dell;
the “dry river bed” that runs roughly north-south from near Kundar, crossing the Stone Road as it goes;
the “People”, a group of tall standing stones in the dry river bed near where it crosses the Stone Road;
the “draconic arch”, a stone archway south-west of the People;
the “fortress ravine”, the site of a waterfall in the hills west of Daring Heights;
Greenleaf, a hamlet two to three hours north-west of Daring;
the Hugging Rocks, a pair of entwined standing stones near the Stone Road that marks the beginning of the foothills of the Sunset Spine;
Silva’s tree, a tree standing in the dry river bed about half a day south-west of Daring Heights;
the Snake Stones, a set of three standing stones north-east of New Hillborrow;
the “sunken tower”, an old half-buried tower 10 miles north of Daring;
Upper Bloody Creek (sometimes just called Bloody Creek), a village north of Daring
Heights near the edge of the Angelbark Wood.
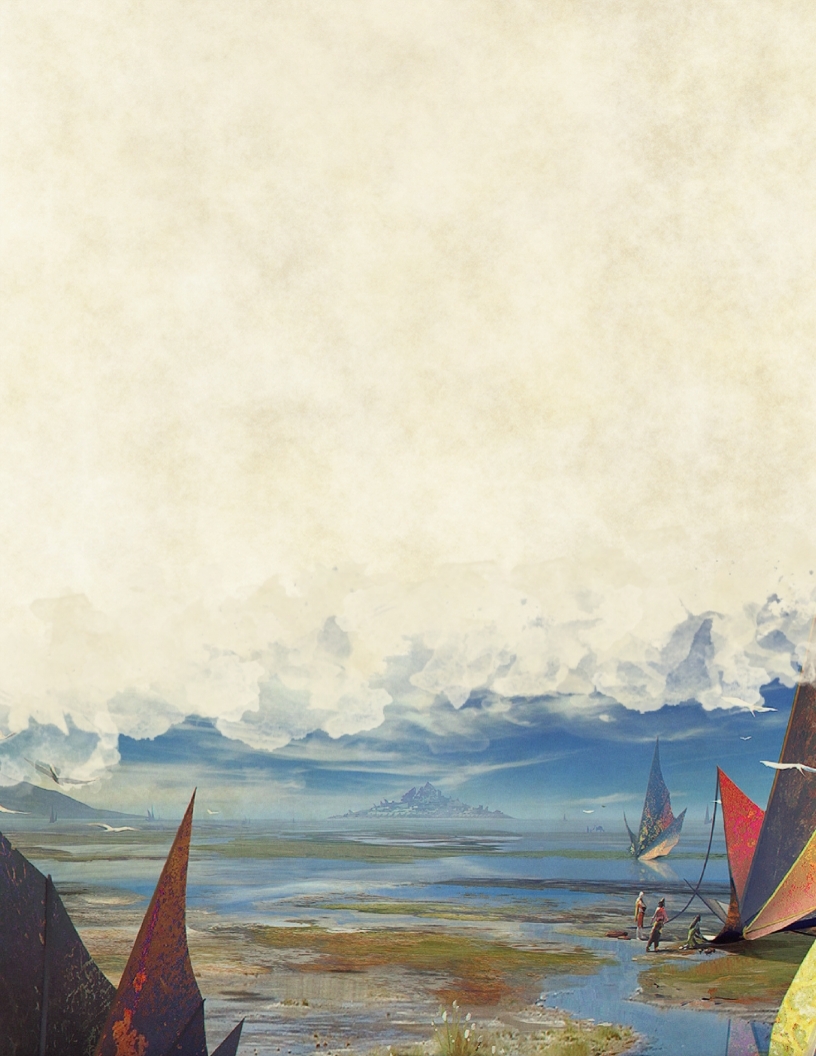
The Frog Bog and the near coast
The eastern coast of Kantas (sometimes jokingly called “the Shield Coast” by people from Faerûn) runs very roughly north-south.
Port Ffirst
On the coast, north of the Feythorn Forest and south-east of the Angelbark Wood, stands Port Ffirst. This small town (or large village) was first established by Lord Kensington a couple of years after the founding of Daring Heights. After a slow start, the settlement has grown in the last year or two into a bustling port largely controlled by the Lenoir brothers. Its main neighbourhoods are the down-at-heel Old Town (including Old Port and Market Quay), the prosperous New Town, the Tritooth Wharf to the north, and the small island called the Hidden Quay. Notable sites include the Temple of Two Faiths (shared between Milil and Umberlee).
A few miles of farmland separate Port Ffirst from the Frog Bog to the west.
The Frog Bog
This swamp lies at the eastern edge of the Dawnlands, just west of Port Ffirst. It’s known as dangerous territory, inhabited by intermittently warring groups of grungs and bullywugs, not to mention the giant spiders, will-o’-wisps, and so on.
Lightning Bay
A few hours’ sail south from Port Ffirst along the coast is the beach resort of Lightning Bay, a holiday spot for Dawnlanders. The resort is surrounded on its landward side by the Feythorn Forest.
The Feythorn Forest and beyond
This dark coniferous forest stretches away south of the Dawnlands. Its northern fringe is reasonably well explored, and the adventurers and foresters of Daring Heights may mention landmarks such as “the buried tower”, “the three stones”, “Gegrun’s temple”, “the Turnabout Tree”, or “the valley of beautiful flowers”. Crossing the Feythorn from north to south is said to take about five days, barring mishaps. The forest is believed to be watched over by a unicorn named Aribeth.
Willow Glade / Granny’s cottage
About a mile south-east of Daring Heights, at the edge of the Feythorn, stands an immense willow, at least 80 feet high. Some early Daring settlers still refer to the area as “where Granny’s cottage was” and tell how, until quite recently, there stood the cottage of a notorious witch. One day, they say, the cottage was simply gone; and, not long after, the willow suddenly appeared just a furlong or two away.
Tree-shrine of Silvanus
A few miles east from Willow Glade, only a few minutes into the forest, is a shrine to the god Silvanus, built / grown up among the tree branches.
The firbolgs
Most people know there’s a community of firbolgs living in the Feythorn, not too far from Daring Heights, but nobody knows exactly where.
The mysterious mountain
Some people swear that once you get a few hours into the forest you can sometimes see a huge solitary mountain off to the east. But surely such a peak should be visible from Daring Heights?
The Dell
There’s said to be a village of erina (or “hedgehog people’ as humans often call them) named the Dell near the north-western edge of the forest.
The southern mountains
There are vague tales of mountains beyond the south-eastern edge of the Feythorn.
The Sunset Spine and beyond
This range of mountains stretches roughly north-south and totally dominates the western horizon of the Dawnlands. They are far from safe, with roaming gnolls and goblins, not to mention what some believe to be the survivors of an ancient yuan-ti civilization.
Stoneleaf
Much of Daring Heights was built with stone quarried from the Sunset Spine mountains at their nearest point, about 20 miles west of the town. The quarry and the village that grew alongside it are both named Stoneleaf. For some years they were overrun by undead and other uncanny creatures, but quarrying has recently begun again under the management of the Olem-Murnelvar Trading Company.
Other mines and quarries
Stoneleaf is not the only place in the Sunset Spine where settlers have delved. Others include the Copperforge mine, Bettia’s quarry, Grey Tree, and Kerfuffle’s mine. The Guild of the Emerald Tradition also operates a number of mines in the Spine.
Galavir
It’s fairly common knowledge that there’s a village of elves up in the mountains, a couple of days’ journey from Daring Heights, called Galavir. People say these elves have hair that floats as if underwater and that they eat and drink nothing but the water of a lake in their village.
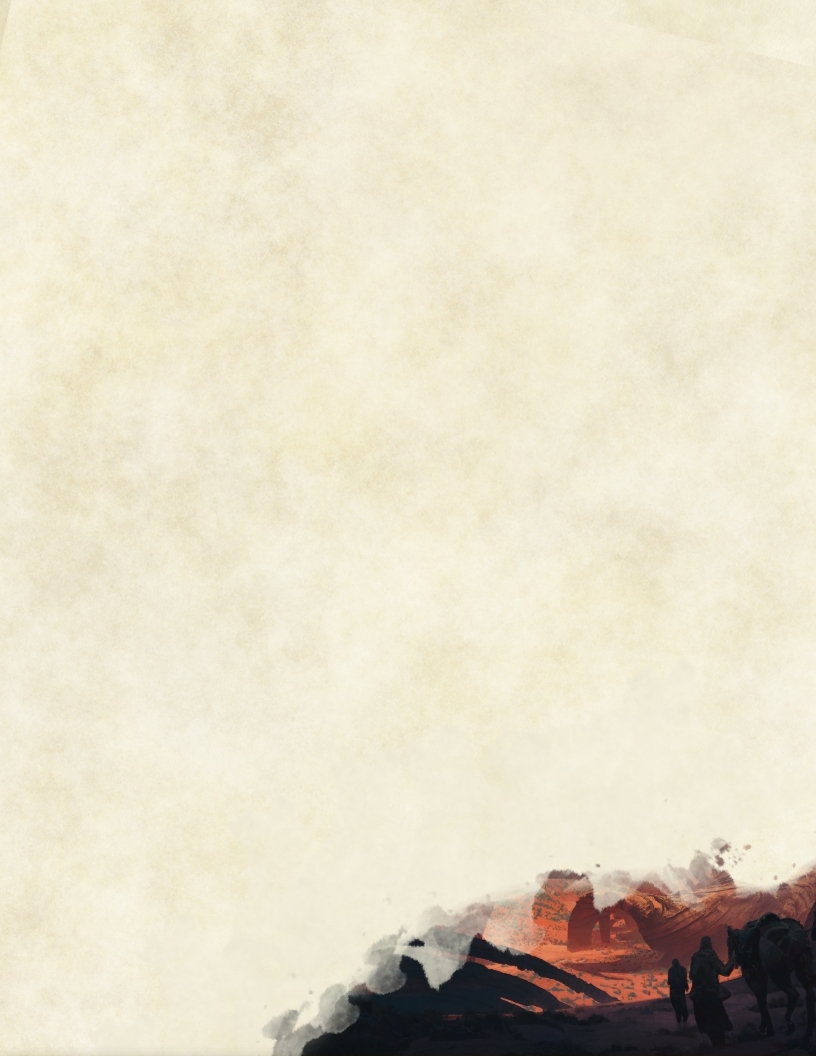
The western desert
A huge desert is believed to lie west of the Spine, partly rocky, partly sandy. Rumours also exist of a fabled yuan-ti
city buried under the sand.

The Angelbark Wood and beyond
Believed to be even bigger than the Feythorn Forest, the Angelbark Wood is a temperate forest that can be reached within a day from Daring Heights or Port Ffirst. It takes its name from the celestial being named Will who is said to inhabit and watch over it. Its other inhabitants are said to include friendly but elusive werefolk and a small settlement of erina.
The Beacon Tree
Also called the Lighthouse Tree or Tree of Safe Harbour, this is remembered as an important landmark by early explorers of the area, though few people travel in that direction now. It is an extremely tall tree on the edge of the Angelbark Wood, north and a little east of Daring Heights. People say that it glows in the dark and that its fruit has restorative properties.
The Angelbark Portal
Many Dawnland adventurers have heard of, and some have used, this ancient stone arch in the Angelbark Wood that acts as a portal to a number of other planes – each with a different key or password.
Rowan’s Glade
A few Dawnland adventurers know of a place deep in the Anglebark where a river has cut a deep gorge in the ground and left a roughly triangular patch of forest standing alone, surrounded by the chasm. Or or two remember when this was the stronghold of the Twilight, creatures corrupted by exposure to the Shadowfell plane. Nowadays the place has a better reputation as the home of the dryad Rowan.
Forestroost
Some have heard of this settlement of aarakocra and kenku somewhere in the Angelbark but its location is mysterious.
The far north
Only a handful of Dawnlanders have ever been beyond the northern edge of the Angelbark. There are rumoured to be grassy hills, rivers, and a mountain range named Ux Verthica. Some speak of a kobold village named Kurzig Vondar, renowned for mining and crafting precious metals.
Further afield
These are places that many settlers are only vaguely aware of, or in some cases may not have heard of at all.
The Scorching Badlands
North-west of the Dawnlands, north of the Sunset Spine and west of the Angelbark Wood, the land gets hotter and drier and is known as “the Scorching Badlands”.
Kundar
The main landmark of the Badlands is the huge city of Kundar, which has a few trade links with Port Ffirst and Daring Heights. One can walk or ride there from Daring Heights in about four days, or for a fee one can use the city’s teleportation circle. Kundar is inhabited and ruled by kobolds, with a servant class of dragonborn and small proportions of other races like tabaxi and orcs. Kundarian technology is said to be very advanced, with aqueducts, tall buildings, and street-lights.
The ancient dungeon
Near Kundar there is said to be an ancient underground complex, which some have nicknamed “the tomb of horrors”. The few who have entered it consider themselves lucky to have escaped alive.
The Underdark
The Underdark extends under Kantas just as it does under Faerûn – or maybe this is a separate Underdark entirely. These deep places are believed to be inhabited by drow, duergar, mind-flayers, myconids, and many dangerous creatures.
The Daring Chasm
The best known access to the Underdark is from a chasm outside the northern wall of Daring Heights, sometimes jokingly called “Daring Depths”. Those who dare to descend into the chasm can sometimes hire a rope ladder from a local farmer.
Vorsthold
People say that beyond the southern edge of the Feythorn Forest is an entrance to a huge subterranean city of dwarves. Vorsthold is rumoured to be in a constant state of war or siege from enemies such as duergar, beholders, drow, and mind-flayers.
Ambar’s portal
At one time there were rumours that a slave-trader named Ambar had found and gained control of a second stable portal between Kantas and Faerûn, which was somewhere in the Underdark north of Daring Heights.
Xarribia and Aeschira
Few but adventurers have heard of these two drow settlements in the Kantas Underdark. Xarribia is not too far down the tunnels from the chasm outside Daring Heights; Aeschira is said to be much larger and further away.
The Sea of Tears and the further coast
The Sea of Tears lies east of Kantas and west of Joran. Though a small portion of the Kantas coast around Port Ffirst is quite well known to inhabitants of the Dawnlands, the stretches further north and south, and the sea itself, are less familiar.
Zeyshel
Some Dawnlanders know that at the bottom of the sea, not far from Port Ffirst, lies a city of tritons named Zeyshel. It has little interaction with the surface-dwellers but is fairly friendly (by tritons standards).
Ratfolk settlements
Explorers have reported one or two settlements of ratfolk on and in the Sea of Tears. One, called Clansky Port, is said to be on an island somewhere off the coast. Another larger settlement is thought to be somewhere on the coast north of Port Ffirst, perhaps named Manus Refuge.
The islands
There are numerous islands in the Sea of Tears, but few have been charted. Some are said to be inhabited, including the Tolomak Islands and a group just called “the four islands”. Others, like Ghoul Island and the Island of Sekolah, are spoken of as places to avoid. There are also stories of a drifting island called Ka’ohu Kina inhabited by aarakocra and carrying in its depths a giant egg.
Nuyeya
Some Dawnlanders are vaguely aware of the Bear Kingdom, with which Daring Heights has established diplomatic relations. It’s said to be mostly in the Feywild but with at least one settlement in Kantas named Neuyeya. It supposedly lies far up the coast to the north, where the edge of the Angelbark Wood meets the sea.
Joran
To the north-east and east, across the Sea of Tears, is another continent called Joran that Dawnlanders have begun to visit in the last few years.
K’ul Goran
The republic of K’ul Goran is bounded to the west by the Sea of Tears, to the north and east by the Jar’s Skyreach mountains, and to the south by jungles. It’s also said to be in some sense “next to” the Plane of Air. The land is hilly and fertile though perpetually swept by unnaturally powerful winds. Its people are cultured and musical, consisting mostly of minotaurs, air genasi, and aerotaurs (a mixture of the two races). News and citizens of K’ul Goran come the Dawnlands relatively often through trade with Port Ffirst, diplomatic ties with Daring Heights, and refugees from the recent upheavals and conflicts in the republic. Dawnlanders may have heard mention of some of K’ul Goran’s cities and towns such as the capital Zot Goran, Jarvenol, Maray, the recently destroyed Cape Za’Suul, and Nrav’Garat. There are also rumours of a network of outcasts called the Shunned living underground in K’ul Goran with a place called the Crystal Spire as their headquarters.
Gotre’sham
North of K’ul Goran, in the Jar’s Skyreach mountains, it’s said that there live elves called the Gotre’sham.
Giants
The parts of Jar’s Skyreach that lie east of K’ul Goran are inhabited by giants, who not long ago invaded the republic – though some say they were manipulated into doing so by other forces.
PART 1
Getting Started

Getting Started in Kantas
If you are new to Dungeons & Dragons 5e, there are too many websites and tools out there to help with character creation to mention, so we'll stick the the official ones on paper: You can get a hold of the Basic Rules for free from the D&D official website before investing in a copy of the Player's Handbook, or and of the other books below. You can create and manage all your Kantas characters on D&D Beyond.
Character Options
You may use only officially published Wizards of the Coast content from the sources listed below to create your character.
Sourcebooks
- Player's Handbook
- Elemental Evil Player's Companion
- Volo's Guide to Monsters
- Sword Coast Adventurer's Guide
- Xanather's Guide to Everything
- Mordenkainen's Tome of Foes
- One Grung Above
- The Tortle Package
- Lost Laboratory of Kwalish
Adventure Books
- Curse of Strahd
- Ghosts of Saltmarsh
- Hoard of the Dragon Queen
- Lost Mine of Phandelver
- Out of the Abyss
- Princes of the Apocalypse
- Rise of Tiamat
- Storm King's Thunder
- Tomb of Annihilation
- Dragon Heist
- Dungeon of the Mad Mage
- Dragon of Icespire Peak


Races
Starting races include (alphabetically): Aarakocra, Aasimar, Bugbear, Dragonborn, Dwarves, Elves, Firbolg, Genasi, Gith, Goblin, Goliath, Gnome, Grung, Half-Elf, Halfling, Half-Orc, Hobgoblin, Human, Kenku, Kobold, Lizardfolk, Orc, Tabaxi, Tiefling, Tortle, Triton, and Yuan-ti Pureblood.
All published subraces and/or variants from the allowed sources are available for the races listed here.
Free Access to Sourcebooks!
The Kantas Expanse campaign use D&D Beyond to give its players free, legal access to all official Wizards of the Coast sourcebooks. You can sign up for free on D&D Beyond and manage your Kantas characters there while being able to read all the sourcebooks for free.
Check our Discord and ask for details and links to our Kantas D&D Beyond Campaigns.
Classes & Subsclasses
Pick from the Player's Handbook and feel free to use any of the additional options from Sword Coast Adventurer's Guide, or Xanathar's Guide to Everything.
Stats
To keep the game simple and player's on an even playing field, we use the standard array option from the Player's Handbook: {15, 14, 13, 12, 10, 8}.
Background
Any background from Player's Handbook, Sword Coast Adventurer's Guide, or Xanathar's Guide to Everything. There are additional background options available in some adventure modules such as "Haunted One" from Curse of Strahd, or "Fisher" and "Marine" from Ghosts of Saltmarsh.
Only backgrounds listed in the allowed sources can be chosen. Background customisation by, for example, swapping feats and proficiencies is not allowed. The DMs are however always happy to help players tweak the general description of a background to better fit their character.
Starting Equipment
Use the Equipment options of your chosen race, class, and background; alternatively, if you have a specific vision you can trade equivalent starting equipment. We encourage characters to start with the explorer's pack rather than choosing between different packs.
Multi-classing and Feats
Both options are available in the Kantas Expanse campaign; Feats in place of Ability Score Increase, and multi-classing at any level as long as the Ability Score requirements are met.
Alignment
Do start with whatever alignment feels right for your character, but know that this is not license to be rude to others at the table, in or out of character. See our Code of Conduct for more information.

A Note to Players
Related to the Alignment section on the previous page, this is an open and shared campaign and, therefore, we ask that players try to adopt a “yes, and” approach when it comes to sharing the campaign with others. Please be flexible, sometimes toes may get stepped on unintentionally when it comes to characters overlapping in activites, we ask that you maintain being a cooperative player for the sake of everyone's fun.
Character Avatars
We encourage our players to create their own avatars, otherwise using art licensed for non-commercial redistribution, or getting permission to use existing art from the owner. We also have some budding artists among us if you'd like to involve them. Otherwise, we also recommend the following online avatar creator: RinmaruGames and HeroMachine
Levelling Characters
Levelling characters in the The Kantas Expanse campaign is based on participation milestones. All new player's of the Kantas campaign start their first characters at level 2. You can also start at level 1, should you wish, and level up as described in the Levelling Up table.
Your character levels up after playing a certain number of sessions at their previous level. The Levelling Up table shows the number of sessions you have to play at each level before earning your next level. Counting sessions played and levelling up your character is not optional.
If your character would level up part way through a multi-parter session, levelling is at the discretion of the DMs. If an opportunity does not present itself, you level as normal at the end of the adventure, with any sessions played in excess of that level carried over to your new total
Levelling up as a DM
Some of our players are also DMs, in these cases you can count a session DMed as as session played towards one of your character's next levels.
Levelling Up
| Current Level | Sessions Played | Level Up to Level |
|---|---|---|
| 1* | 2 | 2 |
| 2 | 3 | 3 |
| 3–8 | 4 | 4–9 |
| 9–15 | 5 | 10–16 |
| 16–19 | 6 | 17–20 |
* Optional
Example: Daisy
Dasha creates Daisy - her first character in Kantas - at level 2. After having played 3 sessions with her, Dasha will level Daisy up to level 3 before her next session.
Additional Characters
A player may want to have additional characters to alternate play in higher and lower-level sessions, or to try out a new race and class. Whatever the reason, if an existing player wishes to roll a new character, they may start that new character on any level below the current level of their most recently created character. The Starting Equipment at Higher Levels table shows the equipment available to characters starting in Kantas above level 2. Kantas prices for magic items can be found in the Magic Items table.
A session played with one character does not count towards the levelling of another character. Only the character played in the session gains experience. Juggling multiple characters will therefore slow down your levelling progress overall.
Starting Equipment at Higher Levels
| Starting Level | Equipment (Kantas Prices for Items) | |
|---|---|---|
| 3–4 | Normal starting equipment. 100 gp + 100 gp × level. |
|
| 5–10 | Normal starting equipment 500 gp + 100 gp × level. Can buy one magic item up 1,500 gp using starting gold. |
|
| 11–16 | Normal starting equipment. 2000 gp + 100 gp × level. Two magic items for a total combined value of up to 4,000 gp + 200 gp × (level −10). Max 4,000 gp per item. Can buy one extra magic item up to 2,500 gp using starting gold. |
|
| 17–19 | Normal starting equipment 4000 gp + 100 gp × level Three magic items for a total combined value of up to 6,500 gp + 1,000 gp × (level −16). Max 7,000 gp per item. Can buy one extra magic item up to 6,000 gp using starting gold. |
Example: Mungo Curlyfeet
Guido wants to introduce a second character to Kantas so he brings out an old character concept and shapes them for their time in Kantas.
Mungo Curlyfeet is a halfling rogue, but not just any old rogue! Mungo is an exceptional thief and Guido wants to bring him in at level 13. Since Guido's first character has reached level 14, he can do so. Guido checks the Starting Equipment at Higher Levels Table and determines that Mungo will have normal starting equipment, 3,300 gp and two magic items for a combined value of 4,600 gp (Kantas prices). Guido chooses for Mungo Boots of Elvenkind (3,000 gp in Kantas) and a Rapier, +1 (1,200 gp in Kantas). He then buys Goggles of Night (1,800 gp in Kantas) with part of Mungo's starting 3,300 gp) .
Number of Characters
As our campaign is run with many games available over three nights each week, we have seen many players join several games weekly. In order to make this fair for everyone we have introduced the following rules for the campaign:
- No more than three characters per player are allowed.
- If a player wants to introduce an additional character beyond that limit, they must retire one of their existing characters. Retiring a character is permanent.
- A character can only play in one session per week.
- A player who is also a Kantas DM may attribute their DM session to any of their characters, even if they have already participated in a session that week.
Kantas House Rules
New PC Spell Adjustments
If after the first session with a new character you find that you took a permanent spell or cantrip that just isn't right in practice, you are allowed to exchange it. This is a one time deal per character after their first session.
Drinking Potions
In Kantas potions take one action to administer to self or another character.
Lucky
Given the contained one-shot nature of the Kantas Expanse campaign, the Lucky feat is considered to be overpowered and is therefore not allowed to be taken by player characters.
Shield Master
You cannot bonus action bash with the shield using this feat before having used your attack action for the turn.
New Weapon: Sabre
| Name | Cost | Damage | Weight | Properties | ||
|---|---|---|---|---|---|---|
| Sabre | 25 gp | 1d8 slashing | 2 lb. | Finesse |
Outlander
When creating a new character, you may exchange the Outlander's Musical Instrument proficiency with proficiency in either Woodworking Tools or Leatherworker's Tools. This is an exception to the general rule disallowing background customisation.
Magic In Kantas
Only few known spells have been found to function differently when casted in Kantas. Here we report the ones documented to have unusual effects.
The reasons for these differences are still largely unknown, although it is presumed that the strange quality of the area's Material Plane component plays a role in this phenomenon.
Healing Spirit
2nd-level conjuration
- Casting Time: 1 Bonus Action
- Range: 60 ft (5 ft cube)
- Components: V, S
- Duration: Concentration, up to 4 rounds
You call forth a nature spirit to soothe the wounded. The intangible spirit appears in a space that is a 5-foot cube you can see within range. The spirit looks like a transparent beast or fey (your choice).
Until the spell ends, twice per round whenever you or a creature you can see moves into the spirit’s space for the first time on a turn or starts its turn there, you can cause the spirit to restore 1d4 hit points to that creature (no action required). The spirit can’t heal constructs, undead, or unconscious creatures.
As a bonus action on your turn, you can move the spirit up to 30 feet to a space you can see.
At Higher Levels. When you cast this spell using a spell slot of 3rd level or higher, the healing increases by 1d4 for every two slot levels above 2nd.
Reincarnate
5th-level transmutation
- Casting Time: 1 hour
- Range: Touch
- Components: V, S, M (rare oils and unguents worth at least 1,000 gp, which the spell consumes)
- Duration: Instantaneous
You touch a dead humanoid or a piece of a dead humanoid. Provided that the creature has been dead no longer than 10 days, the spell forms a new adult body for it and then calls the soul to enter that body. If the target’s soul is not free or willing to do so, the spell fails.
The magic fashions a new body for the creature to inhabit, which likely causes the creature’s race to change. The DM rolls a d100 and consults the Reincarnation Wheel table to determine what form the creature takes when restored to life, or the DM chooses a form.
The reincarnated creature recalls its former life and experiences. It retains the capabilities it had in its original form, except it exchanges its original race for the new one and changes its racial traits accordingly.
Reincarnation Wheel
| d100 | Race | Additional Action |
|---|---|---|
| 1–7 | Human | |
| 8–14 | Dwarf | Roll on Table: Dwarf |
| 15–21 | Elf | Roll on Table: Elf |
| 22–28 | Halfling | Roll on Table: Halfling |
| 29–35 | Dragonborn | Roll on Table: Dragonborn |
| 36–42 | Gnome | Roll on Table: Gnome |
| 43–49 | Half-Elf | |
| 50–56 | Half-Orc | |
| 57–63 | Tiefling | Roll on Table: Tiefling |
| 64–67 | Aarakocra | |
| 68–70 | Genasi | Roll on Table: Genasi |
| 71–73 | Aasimar | Roll on Table: Aasimar |
| 74–76 | Firbolg | |
| 77–79 | Goliath | |
| 80–82 | Kenku | |
| 83–85 | Lizardfolk | |
| 86–88 | Tabaxi | |
| 89–91 | Triton | |
| 92–94 | Tortle | |
| 95–97 | Grung | |
| 98–100 | Monstrous | Roll on Table: Monstrous |
| d100 | Aasimar Subrace |
|---|---|
| 1–50 | Protector |
| 46–90 | Scourge |
| 91–100 | Fallen |
| d100 | Dragonborn Subrace |
|---|---|
| 1–10 | Black |
| 11–20 | Blue |
| 21–30 | Brass |
| 31–40 | Bronze |
| 41–50 | Copper |
| 51–60 | Gold |
| 61–70 | Green |
| 71–80 | Red |
| 81–90 | Silver |
| 91–100 | White |
| d100 | Dwarf Subrace |
|---|---|
| 1–45 | Hill |
| 46–90 | Mountain |
| 91–100 | Duergar |
| d100 | Elf Subrace |
|---|---|
| 1–40 | High |
| 41–80 | Wood |
| 81–91 | Drow |
| 92–94 | Eladrin |
| 95–97 | Sea Elf |
| 98–100 | Shadar-Kai |
| d100 | Genasi Subrace |
|---|---|
| 1–25 | Air |
| 26–50 | Earth |
| 51–75 | Fire |
| 76–100 | Water |
| d100 | Gnome Subrace |
|---|---|
| 1–45 | Forest |
| 46–90 | Rock |
| 91–100 | Svirfneblin |
| d100 | Halflin Subrace |
|---|---|
| 1–45 | Lightfoot |
| 46–90 | Stout |
| 91–100 | Ghostwise |
| d100 | Monstrous Race |
|---|---|
| 1–18 | Goblin |
| 19–33 | Hobgoblin |
| 34–48 | Bugbear |
| 49–66 | Kobold |
| 67–84 | Orc |
| 85–92 | Yuan-Ti Pureblood |
| 93–96 | Githyanki |
| 97–100 | Githzerai |
| d100 | Tiefling Subrace |
|---|---|
| 1–2 | Asmodeus |
| 3–5 | Asmodeus with Devil's Tongue |
| 6–8 | Asmodeus with Hellfire |
| 9–10 | Asmodeus with Winged |
| 11–12 | Asmodeus Feral |
| 13–15 | Feral with Devil's Tongue |
| 16–18 | Feral with Hellfire |
| 19–20 | Feral with Winged |
| 21–30 | Baalzebul |
| 31–40 | Dispater |
| 41–50 | Fierna |
| 51–60 | Glasya |
| 61–70 | Levistus |
| 71–80 | Mammon |
| 81–90 | Mephistopheles |
| 91–100 | Zariel |
Equipment in Kantas
Here you can find a complete list of the magic and mundane items from published Wizards of the Coast sources that characters might encounter in Kantas as well as their expected price.
Characters in-game knowledge of a specific price may of course vary. Please also keep in mind that availability of magical and rarer mundane items remains to be confirmed by the DMs. General rules o then trading of items between characters and NPCs are presented in the Trading between Adventures section of this Guide.
Magic items
| Name | Price (gp) |
|---|---|
| Adamantine Armor | 610 |
| Alchemy Jug | 7,300 |
| Ammunition, +1 (each) | 30 |
| Ammunition, +2 (each) | 120 |
| Ammunition, +3 (each) | 490 |
| Amulet of Health | 9,800 |
| Amulet of Proof Against Detection and Location | 24,500 |
| Amulet of Protection from Turning | 3,000 |
| Amulet of the Black Skull | 5,500 |
| Amulet of the Planes | 196,100 |
| Animated Shield | 7,300 |
| Apparatus of Kwalish | 12,200 |
| Apparatus of the Crab | 12,200 |
| Armor of Gleaming (any medium or heavy) | 65 |
| Armor of Invulnerability | 22,000 |
| Armor of Resistance | 7,300 |
| Armor of Vulnerability | 8,000 |
| Armor, +1 | 1,800 |
| Armor, +2 | 7,300 |
| Armor, +3 | 29,400 |
| Arrow of Slaying (ea) | 740 |
| Arrow-Catching Shield | 7,300 |
| Azuredge (battleaxe) | 45,500 |
| Badge of The Watch | 2,700 |
| Bag of Devouring | 10,300 |
| Bag of Holding | 4,900 |
| Balance of Harmony | 170 |
| Balloon Pack | 230 |
| Banner of The Krig Rune | 3,700 |
| Name | Price (gp) |
|---|---|
| Battle Standard of Inf. Pwr. | 40,000 |
| Bead of Force | 1,100 |
| Bead of Nourishment | 22 |
| Bead of Refreshment | 22 |
| Belt of Dwarvenkind | 7,300 |
| Berserker Axe | 8,000 |
| Black Crystal Tablet | 120,000 |
| Black Dragon Mask | 81,700 |
| Blade of The Medusa | 40,000 |
| Blast Scepter | 40,000 |
| Blod Stone | 5,500 |
| Blue Dragon Mask | 120,000 |
| Bonecounter | 8,000 |
| Bookmark (dagger) | 25,800 |
| Boots of Elvenkind | 3,000 |
| Boots of False Tracks | 52 |
| Boots of Levitation | 4,900 |
| Boots of Speed | 4,900 |
| Boots of Striding And Springing | 6,100 |
| Boots of The Winterlands | 12,200 |
| Bottled Breath | 300 |
| Bowl of Commanding Water Elementals | 9,800 |
| Bracelet of Rock Magic | 7,700 |
| Bracer of Flying Daggers | 860 |
| Bracers of Archery | 1,800 |
| Bracers of Defense | 7,300 |
| Brazier of Commanding Fire Elementals | 9,800 |
| Brooch of Shielding | 9,100 |
| Broom of Flying | 9,800 |
| Candle of The Deep | 43 |
| Name | Price (gp) |
|---|---|
| Cap of Water Breathing | 1,200 |
| Cape of The Mountebank | 9,800 |
| Carpet of Flying | 14,700 |
| Cast-Off Armor | 43 |
| Censer of Controlling Air Elementals | 9,800 |
| Charlatan's Die | 69 |
| Charm of Plant Command | 8,000 |
| Chest of Preserving | 200 |
| Chime of Opening | 1,800 |
| Circlet of Blasting | 1,800 |
| Circlet of Human Perf. | 1,000 |
| Claw of The Wyrm Rune | 3,700 |
| Claws of The Umber Hulk | 3,600 |
| Cloak of Arachnida | 6,100 |
| Cloak of Billowing | 86 |
| Cloak of Displacement | 73,500 |
| Cloak of Elvenkind | 6,100 |
| Cloak of Invisibility | 98,000 |
| Cloak of Many Fashions | 77 |
| Cloak of Protection | 4,200 |
| Cloak of The Bat | 7,300 |
| Cloak of The Manta Ray | 7,300 |
| Clockwork Amulet | 86 |
| Clothes of Mending | 43 |
| Conch of Teleportation | 1,500 |
| Crystal Ball | 61,200 |
| Crystal Ball of Mind Read. | 43,800 |
| Crystal Ball of Telepathy | 60,200 |
| Crystal Ball of True Seeing | 68,800 |
| Cube of Force | 19,600 |
| Cubic Gate | 49,000 |
| Name | Price (gp) |
|---|---|
| Cursed Luckstone | 1,000 |
| Daern's Instant Fortress | 91,900 |
| Dagger of Blindsight | 8,000 |
| Dagger of Venom | 3,000 |
| Dancing Sword (any sword) | 2,400 |
| Dark Shard Amulet | 65 |
| Dawnbringer (longsword) | 49,000 |
| Decanter of Endless Water | 165,400 |
| Deck of Illusions | 7,500 |
| Defender (any sword) | 29,400 |
| Demon Armor (plate) (cursed) | 6,400 |
| Devastation Orb (Air) | 6,800 |
| Devastation Orb (Earth) | 9,400 |
| Devastation Orb (Fire) | 8,100 |
| Devastation Orb (Water) | 8,100 |
| Dimensional Shackles | 3,600 |
| Dodecahedron of Doom | 8,000 |
| Dragon Scale Mail | 4,900 |
| Dragon Slayer (any sword) | 9,800 |
| Dragonguard | 8,000 |
| Dragonstaff of Ahghairon | 43,400 |
| Dragontooth Dagger | 4,300 |
| Dread Helm | 47 |
| Driftglobe | 920 |
| Drown (trident) | 56,700 |
| Dust of Disappearance | 370 |
| Dust of Dryness (1 pellet) | 150 |
| Dust of Sneezing and C. | 590 |
| Dwarven Plate | 11,000 |
| Dwarven Thrower (warhammer) | 22,000 |
| Eagle Whistle | 510 |
| Ear Horn of Hearing | 65 |
| Efficient Quiver | 1,000 |
| Efreeti Chain (chain mail) | 24,500 |
| Elemental Gem | 1,100 |
| Elixir of Health | 150 |
| Elven Chain | 4,900 |
| Enduring Spellbook | 86 |
| Name | Price (gp) |
|---|---|
| Ersatz Eye | 65 |
| Eversmoking Bottle | 1,200 |
| Eyes of Charming | 3,600 |
| Eyes of Minute Seeing | 3,000 |
| Eyes of The Eagle | 3,000 |
| Fane Eater | 120,000 |
| Feather of Diatryma Summoning | 510 |
| Feather Token | 8,000 |
| Figurine of W.P. (Griffon) | 9,800 |
| Figurine of W.P. (Fly) | 7,300 |
| Figurine of W.P. (Lions) | 740 |
| Figurine of W.P. (Goats - Terror) | 24,500 |
| Figurine of W.P. (Goats - Travail) | 490 |
| Figurine of W.P. (Goats - Travelling) | 1,200 |
| Figurine of W.P. (Elephant) | 7,300 |
| Figurine of W.P. (Steed) | 156,800 |
| Figurine of W.P. (Dog) | 3,600 |
| Figurine of W.P. (Owl) | 9,800 |
| Figurine of W.P. (Raven) | 6,100 |
| Flame Tongue | 6,100 |
| Folding Boat | 12,200 |
| Frost Brand (any sword) | 2,700 |
| Galder's Bubble Pipe | 8,000 |
| Gamblers Blade | 8,000 |
| Gauntlets of Flaming Fury | 8,000 |
| Gauntlets of Ogre Power | 9,800 |
| Gavel of The Venn Rune | 2,400 |
| Gem of Brightness | 6,100 |
| Gem of Seeing | 39,200 |
| Ghost Lantern | 7,300 |
| Giant Slayer (sword or axe) | 8,500 |
| Glamoured Studded Ltr. | 2,400 |
| Gloves of Missile Snaring | 3,600 |
| Gloves of Swimming And Climbing | 2,400 |
| Gloves of Thievery | 6,100 |
| Name | Price (gp) |
|---|---|
| Goggles of Night | 1,800 |
| Greater Silver Sword | 120,000 |
| Green Dragon Mask | 120,000 |
| Gurt's Greataxe | 57,600 |
| Hammer of Thunderbolts (maul) | 19,600 |
| Handy Haversack | 2,400 |
| Hat of Disguise | 6,100 |
| Hat of Vermin | 56 |
| Hat of Wizardry | 65 |
| Hazirawn (greatsword) | 56,700 |
| Headband of Intellect | 9,800 |
| Hell Hound Cloak | 1,400 |
| Hellfire Weapon | 1,000 |
| Helm of Comprehending Languages | 610 |
| Helm of Devil Command | 40,000 |
| Helm of Telepathy | 14,700 |
| Helm of Teleportation | 78,400 |
| Helm of The Scavenger | 120,000 |
| Helm of Underw. Action | 1,000 |
| Hew | 1,000 |
| Heward's Handy Haversack | 2,400 |
| Heward's Handy Spice Pouch | 86 |
| Heward's Hireling Armor | 40,000 |
| Holy Avenger (sword) | 202,200 |
| Horn of Blasting | 550 |
| Horn of Silent Alarm | 73 |
| Horn of The Endless Maze | 8,000 |
| Horn of Valhalla (Brass) | 10,300 |
| Horn of Valhalla (Bronze) | 13,700 |
| Horn of Valhalla (Iron) | 17,100 |
| Horn of Valhalla (Silver) | 6,800 |
| Horned Ring | 40,000 |
| Horseshoes of A Zephyr | 1,800 |
| Horseshoes of Speed | 6,100 |
| Immovable Rod | 6,100 |
| Infernal Puzzle Box | 1,000 |
| Name | Price (gp) |
|---|---|
| Infernal Tack | 120,000 |
| Ingot of The Skold Rune | 12,900 |
| Insignia of Claws | 1,200 |
| Instant Fortress | 8,000 |
| Instrument of Illusions | 86 |
| Instrument of Scribing | 69 |
| Instrument of the Bards (Anstruth Harp) | 133,500 |
| Instrument of the Bards (Canaith Mandolin) | 36,700 |
| Instrument of the Bards (Cli Lyre) | 42,900 |
| Instrument of the Bards (Doss Lute) | 34,900 |
| Instrument of the Bards (Fochulan Bandore) | 32,400 |
| Instrument of the Bards (Mac-Fuirmidh Cittern) | 33,000 |
| Instrument of the Bards (Ollamh Harp) | 153,200 |
| Ioun Stone (Absorption) | 2,900 |
| Ioun Stone (Agility) | 3,600 |
| Ioun Stone (Awareness) | 14,700 |
| Ioun Stone (Fortitude) | 3,600 |
| Ioun Stone (Grt. Abs.) | 37,900 |
| Ioun Stone (Insight) | 3,600 |
| Ioun Stone (Intellect) | 3,600 |
| Ioun Stone (Leadership) | 3,600 |
| Ioun Stone (Mastery) | 18,300 |
| Ioun Stone (Protection) | 1,400 |
| Ioun Stone (Regeneration) | 4,900 |
| Ioun Stone (Reserve) | 7,300 |
| Ioun Stone (Strength) | 3,600 |
| Ioun Stone (Sustenance) | 1,200 |
| Ioun Stone of Historical K. | 8,000 |
| Ioun Stone of Language K. | 8,000 |
| Ioun Stone of Natural K. | 8,000 |
| Ioun Stone of Religious K. | 8,000 |
| Ioun Stone of Self Preserv. | 8,000 |
| Ioun Stone of Supreme Int. | 8,000 |
| Iron Bands of Bilarro | 4,900 |
| Iron Bands of Binding | 4,900 |
| Name | Price (gp) |
|---|---|
| Ironfang (war pick) | 65,300 |
| Javelin of Backbiting | 40,000 |
| Javelin of Lightning | 1,800 |
| Keoghtom's Ointm. (dose) | 150 |
| Keycharm | 200 |
| Knave's Eye Patch | 20,800 |
| Korolnor Scepter | 54,100 |
| Lantern of Revealing | 6,100 |
| Leather Golem Armor | 8,000 |
| Lightbringer | 1,000 |
| Loadstone | 120 |
| Lock of Trickery | 43 |
| Lord's Ensemble | 4,300 |
| Lost Crown of Besilmer | 19,700 |
| Mace of Disruption | 9,800 |
| Mace of Smiting | 8,500 |
| Mace of Terror | 9,800 |
| Mantle of Spell Resistance | 36,700 |
| Mariner's Armor | 1,800 |
| Marvelous Pigments | 40,000 |
| Mask of The Beast | 170 |
| Mask of The Dragon Queen | 120,000 |
| Master's Amulet | 8,000 |
| Matalotok | 120,000 |
| Medallion of Thoughts | 3,600 |
| Mind Blade | 8,000 |
| Mind Carapace Armor | 1,000 |
| Mind Lash | 8,000 |
| Mirror of Life Trapping | 22,000 |
| Mirror of The Past | 3,200 |
| Mithral Armor (medium or heavy, not hide) | 980 |
| Moon-Touched Sword | 65 |
| Mystery Key | 43 |
| Navigation Orb | 23,200 |
| Necklace of Adaptation | 1,800 |
| Necklace of Fireballs (1) | 370 |
| Necklace of Fireballs (2) | 590 |
| Necklace of Fireballs (3) | 1,100 |
| Name | Price (gp) |
|---|---|
| Necklace of Fireballs (4) | 1,900 |
| Necklace of Fireballs (5) | 4,700 |
| Necklace of Fireballs (6) | 9,400 |
| Necklace of Prayer Beads (Blessing) | 2,400 |
| Necklace of Prayer Beads (Curing) | 4,900 |
| Necklace of Prayer Beads (Favor) | 39,200 |
| Necklace of Prayer Beads (Smiting) | 1,800 |
| Necklace of Prayer Beads (Summons) | 156,800 |
| Necklace of Prayer Beads (Wind Walking) | 117,600 |
| Night Caller | 300 |
| Nine Lives Stealer (Fully Charged) (any sword) | 9,800 |
| Nolzur's Marvelous Pigments | 250 |
| Oathbow (longbow) | 4,200 |
| Obsidian Flint Dragon Plate | 120,000 |
| Oil of Etherealness | 2,300 |
| Oil of Sharpness | 3,900 |
| Oil of Slipperiness | 590 |
| Opal of The Ild Rune | 3,000 |
| Orb of Direction | 43 |
| Orb of Gonging | 200 |
| Orb of The Stein Rune | 2,300 |
| Orb of Time | 43 |
| Orcsplitter (greataxe) | 51,600 |
| Paper Bird | 300 |
| Pearl of Power | 7,300 |
| Pennant of The Vind Rune | 11,100 |
| Perfume of Bewitching | 65 |
| Periapt of Health | 6,100 |
| Periapt of Proof vs. Poison | 6,100 |
| Periapt of Wound Closure | 6,100 |
| Philter of Love | 110 |
| Pipe of Remembrance | 200 |
| Pipe of Smoke Monsters | 43 |
| Pipes of Haunting | 7,300 |
| Name | Price (gp) |
|---|---|
| Pipes of The Sewers | 2,400 |
| Piwafwi | 6,100 |
| Piwafwi of Fire Resistance | 7,300 |
| Plate Armor of Ethereal. | 58,800 |
| Pole of Angling | 43 |
| Pole of Collapsing | 47 |
| Polymorph Blade | 40,000 |
| Portable Hole | 9,800 |
| Pot of Awakening | 73 |
| Potion of Animal Friendship | 250 |
| Potion of Clairvoyance | 1,100 |
| Potion of Climbing | 220 |
| Potion of Comprehension | 200 |
| Potion of Diminution | 330 |
| Potion of Fire Breath | 180 |
| Potion of Flying | 610 |
| Potion of Gaseous Form | 370 |
| Potion of Giant Size | 9,400 |
| Potion of Giant Str. (Cloud) | 1,500 |
| Potion of Giant Str. (Fire) | 1,000 |
| Potion of Giant Str. (Frost/Stone) | 550 |
| Potion of Giant Str. (Hill) | 100 |
| Potion of Giant Str. (Storm) | 6,800 |
| Potion of Growth | 330 |
| Potion of Healing | 50 |
| Potion of Heal. (Greater) | 180 |
| Potion of Heal. (Superior) | 550 |
| Potion of Heal. (Supreme) | 1,600 |
| Potion of Heroism | 220 |
| Potion of Invisibility | 220 |
| Potion of Invulnerability | 4,700 |
| Potion of Longevity | 11,000 |
| Potion of Mind Ctrl. (B) | 1,300 |
| Potion of Mind Ctrl. (H) | 2,100 |
| Potion of Mind Ctrl. (M) | 5,100 |
| Potion of Mind Reading | 220 |
| Potion of Poison | 120 |
| Name | Price (gp) |
|---|---|
| Potion of Resistance | 370 |
| Potion of Speed | 490 |
| Potion of Vitality | 1,100 |
| Potion of Watchful Rest | 200 |
| Potion of Water Breathing | 220 |
| Pressure Capsule | 200 |
| Professor Orb | 8,000 |
| Propeller Helm | 1,000 |
| Quaals Feather Tkn. (Anchor) | 60 |
| Quaals Feather Tkn. (Bird) | 3,600 |
| Quaals Feather Tkn. (Fan) | 310 |
| Quaals Feather Tkn. (Boat) | 3,600 |
| Quaals Feather Tkn. (Whip) | 310 |
| Quiver of Ehlonna | 1,200 |
| Red Dragon Mask | 120,000 |
| Restorative Ointment | 1,000 |
| Ring of Air Elemental Com. | 42,900 |
| Ring of Animal Influence | 4,900 |
| Ring of Earth Elem. Com. | 37,900 |
| Ring of Elem. Command | 172,000 |
| Ring of Evasion | 6,100 |
| Ring of Feather Falling | 2,400 |
| Ring of Fire Elem. Com. | 20,800 |
| Ring of Free Action | 24,500 |
| Ring of Invisibility | 12,200 |
| Ring of Jumping | 3,000 |
| Ring of Mind Shielding | 19,600 |
| Ring of Protection | 4,200 |
| Ring of Regeneration | 14,700 |
| Ring of Resistance | 7,300 |
| Ring of Shooting Stars | 17,100 |
| Ring of Spell Storing | 29,400 |
| Ring of Spell Turning | 36,700 |
| Ring of Swimming | 3,600 |
| Ring of Telekinesis | 98,000 |
| Ring of The Ram | 6,100 |
| Ring of Truth Telling | 120 |
| Ring of Warmth | 1,200 |
| Name | Price (gp) |
|---|---|
| Ring of Water Elem. Com. | 30,600 |
| Ring of Water Walking | 1,800 |
| Ring of X-Ray Vision | 7,300 |
| Robe of Eyes | 36,700 |
| Robe of Scint. Colors | 7,300 |
| Robe of Serpents | 320 |
| Robe of Stars | 73,500 |
| Robe of Summer | 2,400 |
| Robe of The Archmagi | 41,600 |
| Robe of Useful Items | 340 |
| Rod of Absorption | 61,200 |
| Rod of Alertness | 30,600 |
| Rod of Lordly Might | 34,300 |
| Rod of Rulership | 19,600 |
| Rod of Security | 110,300 |
| Rod of The Pact Keeper +1 | 14,700 |
| Rod of The Pact Keeper +2 | 19,600 |
| Rod of The Pact Keeper +3 | 34,300 |
| Rod of The Vonindod | 2,900 |
| Rope of Climbing | 2,400 |
| Rope of Entanglement | 4,900 |
| Rope of Mending | 43 |
| Ruby of The War Mage | 86 |
| Saddle of The Cavalier | 2,400 |
| Scarab of Protection | 44,100 |
| Scimitar of Speed | 7,300 |
| Scorpion Armor (plate) | 1,800 |
| Scroll of Protection | 220 |
| Seeker Dart | 86 |
| Sekolahian Worshiping Statuette | 200 |
| Sending Stones | 2,400 |
| Sentinel Shield | 24,500 |
| Shard of The Ise Rune | 7,700 |
| Shatterspike (longsword) | 1,800 |
| Shield of Expression | 43 |
| Shield of Far Sight | 8,000 |
| Shield of Missile Attraction | 7,300 |
| Shield of The Hidden Lord | 120,000 |
| Name | Price (gp) |
|---|---|
| Shield of The Uven Rune | 40,000 |
| Shield, +1 | 1,800 |
| Shield, +2 | 7,300 |
| Shield, +3 | 29,400 |
| Slippers of Spider Climbing | 6,100 |
| Smokepowder | 270 |
| Smoldering Armor | 65 |
| Soul Coin | 1,000 |
| Sovereign Glue | 490 |
| Spear of Backbiting (javelin or spear) | 5,500 |
| Spell Gem (Amber, Level 4) | 6,800 |
| Spell Gem (Bloodst., lvl. 3) | 3,400 |
| Spell Gem (Diamond, lvl. 9) | 67,000 |
| Spell Gem (Jade, lvl. 5) | 12,900 |
| Spell Gem (Lapis Laz., lvl. 1) | 300 |
| Spell Gem (Obsidian, lvl. 0) | 120 |
| Spell Gem (Quartz, lvl. 2) | 1,200 |
| Spell Gem (Ruby, lvl. 8) | 43,800 |
| Spell Gem (Star Ruby, lvl. 7) | 30,100 |
| Spell Gem (Topaz, lvl. 6) | 17,200 |
| Spell Scroll (Cantrip) | 10 |
| Spell Scroll (Level 1) | 70 |
| Spell Scroll (Level 2) | 150 |
| Spell Scroll (Level 3) | 250 |
| Spell Scroll (Level 4) | 390 |
| Spell Scroll (Level 5) | 780 |
| Spell Scroll (Level 6) | 1,500 |
| Spell Scroll (Level 7) | 3,100 |
| Spell Scroll (Level 8) | 6,200 |
| Spell Scroll (Level 9) | 12,500 |
| Spellguard Shield | 61,200 |
| Sphere of Annihilation | 18,300 |
| Spider Staff | 1,500 |
| Staff of Adornment | 43 |
| Staff of Birdcalls | 60 |
| Staff of Charming | 14,700 |
| Staff of Defense | 2,900 |
| Staff of Fire | 19,600 |
| Staff of Flowers | 43 |
| Name | Price (gp) |
|---|---|
| Staff of Frost | 31,800 |
| Staff of Healing | 15,900 |
| Staff of Power | 117,000 |
| Staff of Striking | 25,700 |
| Staff of Swarming Insects | 19,600 |
| Staff of The Adder | 2,200 |
| Staff of The Python | 2,400 |
| Staff of The Woodlands | 53,900 |
| Staff of Thunder And Lightning | 12,200 |
| Staff of Withering | 3,600 |
| Stone of Ctrl. Earth Elem. | 9,800 |
| Stone of Good Luck | 5,100 |
| Stone of Ill Luck | 340 |
| Stonespeaker Crystal | 3,900 |
| Storm Boomerang | 120 |
| Sun Blade (longsword) | 14,700 |
| Sword of Answering | 44,100 |
| Sword of Life Stealing (sword) | 1,200 |
| Sword of Sharpness (slashing swords) | 2,000 |
| Sword of Vengeance (sword) | 340 |
| Sword of Wounding (sword) | 2,400 |
| Talisman of Pure Good | 87,800 |
| Talisman of The Sphere | 24,500 |
| Talisman of Ultimate Evil | 75,300 |
| Talking Doll | 65 |
| Tankard of Plenty | 200 |
| Tankard of Sobriety | 69 |
| Tentacle Rod | 6,100 |
| Tinderstrike (dagger) | 61,000 |
| Trident of Fish Command | 980 |
| Unbreakable Arrow | 22 |
| Universal Solvent | 370 |
| Veteran's Cane | 43 |
| Vicious Weapon (any weapon) | 430 |
| Vorpal Sword | 29,400 |
| Walloping Ammunition | 26 |
| Name | Price (gp) |
|---|---|
| Wand of Binding | 12,200 |
| Wand of Conducting | 77 |
| Wand of Enemy Detection | 4,900 |
| Wand of Entangle | 250 |
| Wand of Fear | 12,200 |
| Wand of Fireballs | 39,200 |
| Wand of Lightning Bolts | 39,200 |
| Wand of Magic Detection | 1,800 |
| Wand of Magic Missiles | 9,800 |
| Wand of Paralysis | 19,600 |
| Wand of Polymorph | 39,200 |
| Wand of Pyrotechnics | 56 |
| Wand of Scowls | 52 |
| Wand of Secrets | 1,800 |
| Wand of Smiles | 52 |
| Wand of The War Mage +1 | 1,400 |
| Wand of The War Mage +2 | 5,800 |
| Wand of The War Mage +3 | 23,500 |
| Wand of Viscid Globs | 3,600 |
| Wand of Web | 9,800 |
| Wand of Winter | 3,500 |
| Waythe (greatsword) | 53,300 |
| Weapon of Warning | 73,500 |
| Weapon, +1 | 1,200 |
| Weapon, +2 | 4,900 |
| Weapon, +3 | 19,600 |
| Weird Tank | 1,800 |
| White Dragon Mask | 120,000 |
| Wind Fan | 1,800 |
| Windvane | 58,400 |
| Winged Boots | 9,800 |
| Wings of Flying | 6,100 |
| Wingwear | 250 |
| Winters Dark Bite | 1,000 |
Mundane items
| Name | Price (gp) |
|---|---|
| Abacus | 2 |
| Acid Vial | 25 |
| Alchemist's Fire Flask | 50 |
| Alchemist's Supplies | 50 |
| Alexandrite | 500 |
| Alms Box | — |
| Amber | 100 |
| Amethyst | 100 |
| Amulet (mundane) | 5 |
| Antitoxin | 50 |
| Aquamarine | 500 |
| Arcane Focus | — |
| Arrows (20) | 1 |
| Assassin's Blood (Ing.) | 150 |
| Azurite | 10 |
| Backpack | 2 |
| Bagpipes | 30 |
| Ball Bearings (1000) | 1 |
| Banded Agate | 10 |
| Barding | See note |
| Barrel | 2 |
| Basket | 0.4 |
| Battleaxe (mundane) | 10 |
| Bedroll | 1 |
| Bell | 1 |
| Birdpipes | 12 |
| Bit And Bridle | 2 |
| Black Opal | 1,000 |
| Black Pearl | 500 |
| Black Sapphire | 5,000 |
| Blanket | 0.5 |
| Block And Tackle | 1 |
| Block of Incense | — |
| Bloodstone | 50 |
| Blowgun | 10 |
| Blowgun Needles | 1 |
| Blue Quartz | 10 |
| Name | Price (gp) |
|---|---|
| Blue Sapphire | 1,000 |
| Blue Spinel | 500 |
| Bomb | 150 |
| Book | 25 |
| Boomerang | — |
| Bottle Glass | 2 |
| Breastplate | 400 |
| Brewer's Supplies | 20 |
| Bucket | 0.05 |
| Burglar's Pack | 16 |
| Burnt Othur Fumes (Inh.) | 500 |
| Calligrapher's Supplies | 10 |
| Caltrops (Bag of 20) | 1 |
| Camel | 50 |
| Candle | 0.05 |
| Canoe | 50 |
| Carnelian | 50 |
| Carpenter's Tools | 8 |
| Carriage | 100 |
| Cart | 15 |
| Cartographer's Tools | 15 |
| Case, Crossbow Bolt | 15 |
| Case, Map or Scroll | 1 |
| Censer | — |
| Chain (10 feet) | 5 |
| Chain Mail Armor | 75 |
| Chain Shirt | 50 |
| Chalcedony | 50 |
| Chalk (1 Piece) | 0.01 |
| Chariot | 250 |
| Chest | 5 |
| Chrysoberyl | 100 |
| Chrysoprase | 50 |
| Citrine | 50 |
| Climber's Kit | 25 |
| Clothes Costume | 5 |
| Clothes, Common | 5 |
| Clothes, Fine | 15 |
| Clothes, Travelers | 2 |
| Name | Price (gp) |
|---|---|
| Club | 0.1 |
| Cobbler's Tools | 5 |
| Component Pouch | 25 |
| Cook's Utensils | 1 |
| Coral | 100 |
| Crawler Mucus (Contact) | 200 |
| Crossbow Bolts (20) | 1 |
| Crossbow, Hand | 75 |
| Crossbow, Heavy | 50 |
| Crossbow, Light | 25 |
| Crowbar | 2 |
| Crystal | 10 |
| Dagger (mundane) | 2 |
| Dart | 0.05 |
| Diamond | 5,000 |
| Dice Set | 0.1 |
| Diplomat's Pack | 39 |
| Disguise Kit | 25 |
| Donkey (or Mule) | 8 |
| Double-Bladed Scimitar | 100 |
| Draft Horse | 50 |
| Dragonchess Set | 1 |
| Drow Poison (Injury) | 200 |
| Druidic Focus | — |
| Drum | 6 |
| Dulcimer | 25 |
| Dungeoneer's Pack | 12 |
| Elephant | 200 |
| Emblem | 5 |
| Emerald | 1,000 |
| Entertainer's Pack | 40 |
| Essence of Ether (Inhaled) | 300 |
| Explorer's Pack | 10 |
| Eye Agate | 10 |
| Feed (Per Day) | 0.05 |
| Fire Opal | 1,000 |
| Fishing Tackle | 1 |
| Flail | 10 |
| Flask or Tankard | 0.02 |
| Name | Price (gp) |
|---|---|
| Flute | 2 |
| Forgery Kit | 15 |
| Galley | 30,000 |
| Garnet | 100 |
| Glaive | 20 |
| Glassblower's Tools | 30 |
| Glaur | 3 |
| Grappling Hook | 2 |
| Greataxe | 30 |
| Greatclub | 0.2 |
| Greatsword | 50 |
| Gunpowder Keg | 250 |
| Gunpowder Powder Horn | 35 |
| Halberd | 20 |
| Half Plate | 750 |
| Hammer, Simple | 1 |
| Hammer, Sledge | 2 |
| Hand Drum | 6 |
| Handaxe | 5 |
| Healer's Kit | 5 |
| Hematite | 10 |
| Herbalism Kit | 5 |
| Hide | 10 |
| Holy Symbol | — |
| Holy Water (Flask) | 25 |
| Horn | 3 |
| Hourglass | 25 |
| Hunting Trap | 5 |
| Ink (1 Ounce Bottle) | 10 |
| Ink Pen | 0.02 |
| Insect Repellent-Incense | 0.1 |
| Insect Repellent-Salve | 1 |
| Jacinth | 5,000 |
| Jade | 100 |
| Jasper | 50 |
| Javelin | 0.5 |
| Jet | 100 |
| Jeweler's Tools | 25 |
| Jug or Pitcher | 0.02 |
| Name | Price (gp) |
|---|---|
| Keelboat | 3,000 |
| Ladder (10 foot) | 0.1 |
| Lamp | 0.5 |
| Lance | 10 |
| Lantern, Bullseye | 10 |
| Lantern, Hooded | 5 |
| Lapis Lazuli | 10 |
| Leather Armor | 10 |
| Leatherworker's Tools | 5 |
| Light Hammer | 2 |
| Little Bag of Sand | — |
| Lock | 10 |
| Longbow | 50 |
| Longhorn | 2 |
| Longship | 10,000 |
| Longsword (mundane) | 15 |
| Lute | 35 |
| Lyre | 30 |
| Mace (mundane) | 5 |
| Magnifying Glass | 100 |
| Malachite | 10 |
| Malice (Inhaled) | 250 |
| Manacles | 2 |
| Mason's Tools | 10 |
| Mastiff | 25 |
| Maul | 10 |
| Mess Kit | 0.2 |
| Midnight Tears (Ingested) | 1,500 |
| Mirror, Steel | 5 |
| Monster Hunter's Pack | 33 |
| Moonstone | 50 |
| Morningstar | 15 |
| Moss Agate | 10 |
| Navigator's Tools | 25 |
| Net | 1 |
| Obsidian | 10 |
| Oil (Flask) | 0.1 |
| Oil of Taggit (Contact) | 400 |
| Onyx | 50 |
| Name | Price (gp) |
|---|---|
| Opal | 1,000 |
| Orb | 20 |
| Padded Armor | 5 |
| Painter's Supplies | 10 |
| Pale Tincture (Ingested) | 250 |
| Pan Flute | 12 |
| Paper (One Sheet) | 0.2 |
| Parchment (One Sheet) | 0.1 |
| Pearl | 100 |
| Perfume (Vial) | 5 |
| Peridot | 500 |
| Pick, Miner's | 2 |
| Pike | 5 |
| Piton | 0.05 |
| Plate Armor | 1,500 |
| Playing Card Set | 0.5 |
| Poison, Basic (Vial) | 100 |
| Poisoner's Kit | 50 |
| Pole (10 foot) | 0.05 |
| Pony | 30 |
| Pot, Iron | 2 |
| Potion of Healing | 50 |
| Potter's Tools | 10 |
| Pouch | 0.5 |
| Priest's Pack | 19 |
| Purple Worm Poison (Inj.) | 2,000 |
| Quarterstaff | 0.2 |
| Quartz | 50 |
| Quiver | 1 |
| Rain Catcher | 1 |
| Ram, Portable | 4 |
| Rapier | 25 |
| Rations (1 Day) | 0.5 |
| Reliquary | 5 |
| Rhodochrosite | 10 |
| Riding Horse | 75 |
| Ring Mail Armor | 30 |
| Robes | 1 |
| Rod (Focus) | 10 |
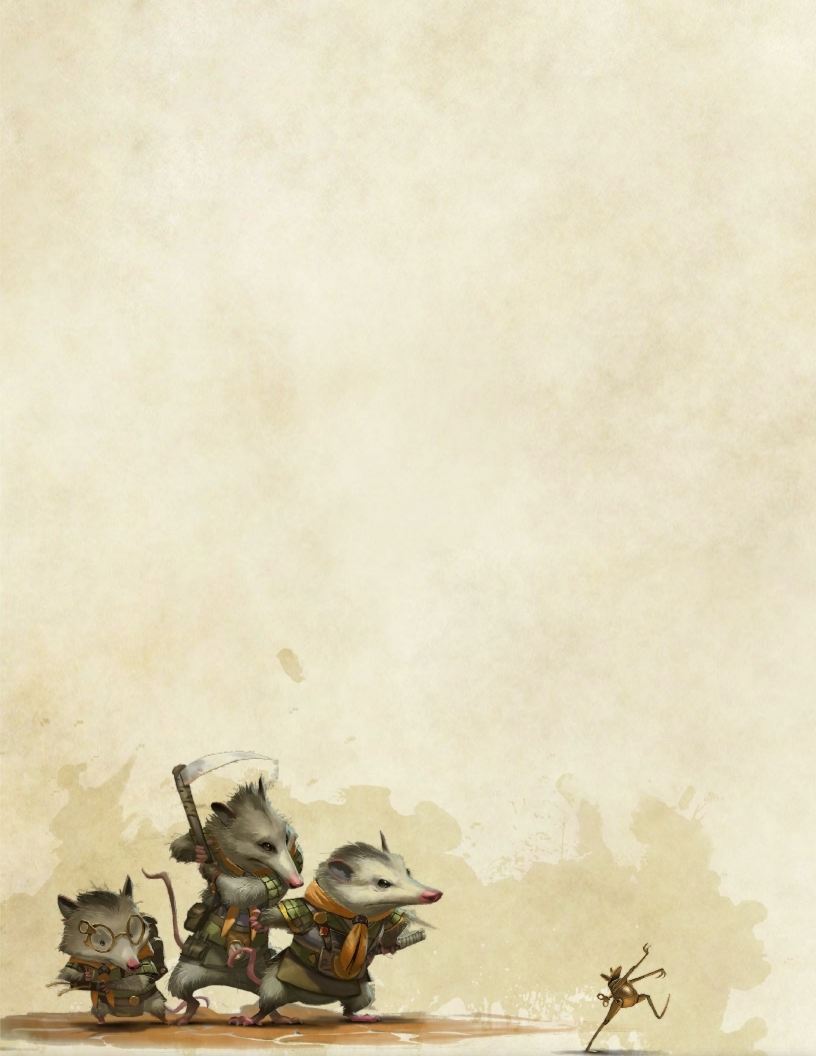
| Name | Price (gp) |
|---|---|
| Rope, Hempen (50 feet) | 1 |
| Rope, Silk (50 feet) | 10 |
| Rowboat | 50 |
| Ruby | 5,000 |
| Sack | 0.01 |
| Saddle, Exotic | 60 |
| Saddle, Military | 5 |
| Saddle, Pack | 10 |
| Saddle, Riding | 4 |
| Saddlebags | 4 |
| Sailing Ship | 10,000 |
| Sardonyx | 50 |
| Scale Mail | 50 |
| Scale, Merchant's | 5 |
| Scholar's Pack | 40 |
| Scimitar | 25 |
| Sealing Wax | 0.5 |
| Serpent Venom (Injury) | 200 |
| Shawm | 2 |
| Shield | 10 |
| Shortbow | 25 |
| Shortsword | 10 |
| Shovel | 2 |
| Sickle | 1 |
| Signal Whistle | 0.05 |
| Signet Ring | 5 |
| Sled | 20 |
| Sling | 0.1 |
| Sling Bullets | 0.04 |
| Small Knife | — |
| Name | Price (gp) |
|---|---|
| Smiths Tools | 20 |
| Soap | 0.02 |
| Songhorn | 2 |
| Spear | 1 |
| Spellbook | 50 |
| Spiked Armor | 75 |
| Spikes Iron (10) | 1 |
| Spinel | 100 |
| Splint Armor | 200 |
| Sprig of Mistletoe | 1 |
| Spyglass | 1,000 |
| Staff | 5 |
| Stake (Wooden) | — |
| Star Rose Quartz | 50 |
| Star Ruby | 1,000 |
| Star Sapphire | 1,000 |
| String | — |
| Studded Leather Armor | 45 |
| Tangler Grenade | — |
| Tantan | 6 |
| Tent, Two-Person | 2 |
| Thelarr | 2 |
| Thieves' Tools | 25 |
| Three-Dragon Ante Set | 1 |
| Tiger Eye | 10 |
| Tinderbox | 0.5 |
| Tinker's Tools | 50 |
| Tocken | 6 |
| Topaz | 500 |
| Name | Price (gp) |
|---|---|
| Torch | 0.01 |
| Torpor (Ingested) | 600 |
| Totem | 1 |
| Tourmaline | 100 |
| Trident (mundane) | 5 |
| Truth Serum (Ingested) | 150 |
| Turquoise | 10 |
| Vestments | — |
| Vial | 1 |
| Viol | 30 |
| Wagon | 25 |
| Wand | 10 |
| War Pick | 5 |
| Wargong | 30 |
| Warhammer | 15 |
| Warhorse | 400 |
| Warship | 25,000 |
| Waterskin | 0.2 |
| Weaver's Tools | 1 |
| Whetstone | 0.01 |
| Whip | 2 |
| Woodcarver's Tools | 1 |
| Wooden Staff | 5 |
| Wyvern Poison (Injury) | 1,200 |
| Yarting | 35 |
| Yellow Sapphire | 1,000 |
| Yew Wand | 10 |
| Yklwa | 1 |
| Zircon | 10 |
| Zulkoon | 30 |
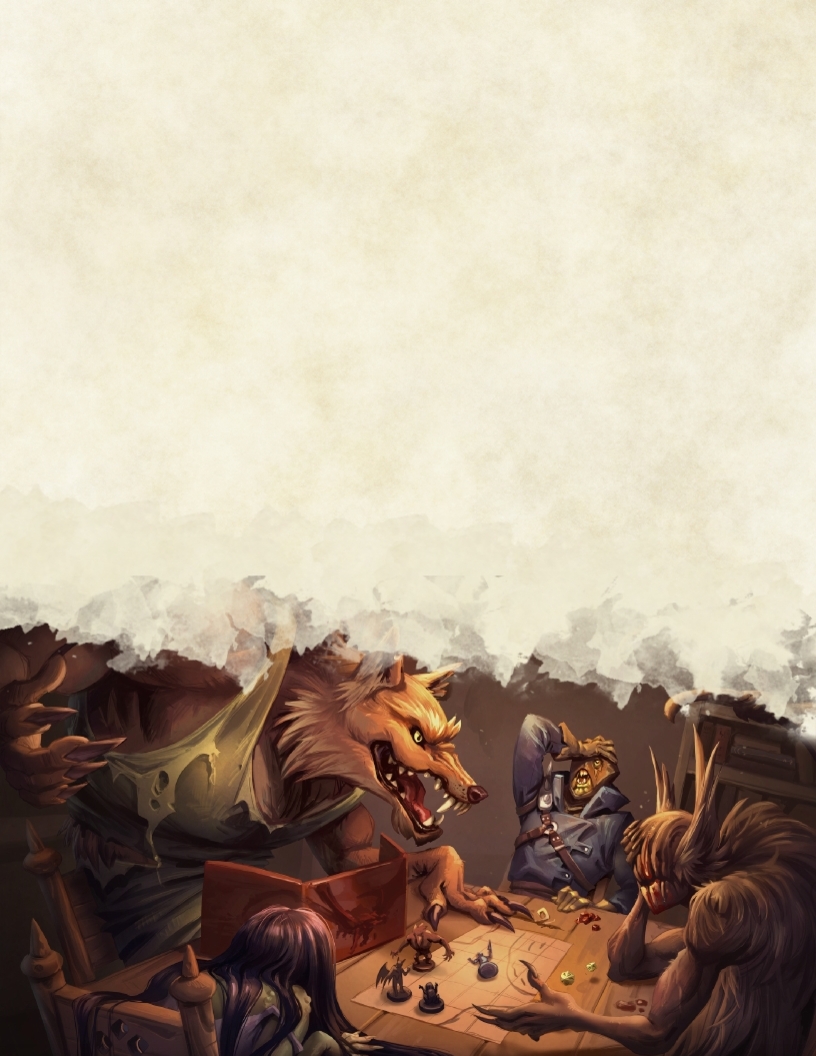
Organisation of Play
Adventure sessions are advertised of the Kantas Forum, where characters can reserve a place for themselves before the session is made live on Meetup. Sessions marked as Beginner Friendly will have reserved spots for players new to the campaign. Rumours include level requirements, date, and location.
Join our Discord and ask for details and links to our forums, rumours, and write ups. All our players and DMs will be there to help you getting started in Kantas.
First-timer Boost
If you haven't played in a Kantas session before, message the DMs on Meetup or on our our Discord ask for a first-timer boost. You can get into the next Beginner Friendly game much faster!
Type and Scope of Play
The Kantas Expanse campaign is a persistent campaign world and adventure seasons are planned by the DMs in a similar way to most episodic television shows; there are a number of key sessions that progress an overarching seasonal storyline among many other intertwined storylines. That said, most of our adventure sessions can be summed up as one shots. For ease of playability, any given adventure is likely to fit into a stand alone session with a complete beginning, middle, and end. There are also times where the adventure spans over multiple sessions.
Time passes in Kantas like it does in real life. In between adventures your characters carry on living and so they do if you do not play for a few weeks. In Part 2 of this Guide rules to help you manage these downtime spells are presented.
Dungeon Master in the Making?
We are absolutely open to having anyone jump in the Dungeon Master's seat! If you're a player with an adventure in mind that you'd like to run, drop a line the the DMs and we'll gladly help you!
The Kantas Forum
The Kantas Expanse forum is where new rumours are promoted, and where post-session write ups are shared for all to read. The campaign world lives and breaths here as players are encouraged to write up the actions of their characters here. Whether it's the recounting of last weeks session, the results of some downtime activity, or a collaborative interaction about a story arc, all are welcome to contribute their stories here and make the Kantas campaign come alive.
Adventure Write Ups
Sharing is caring. Let others know what you got up to in your last adventure. Maybe your character has a unique perspective on the events that transpired? Share it as a write up! Whether it's bullet points, a poem, or a detailed play-by-play of the adventure, we'd all love to read it and find out what happened.
This way your collective knowledge of the region will grow and other characters can follow up on any new rumours you encountered, if you don't do that yourself. It will also keep the DMs up-to-date with what has happened. The DMs also give out inspiration for write ups.
You can sign up to the Kantas Expanse Forum. We encourage narrative and in-character contributions to the campaign there.
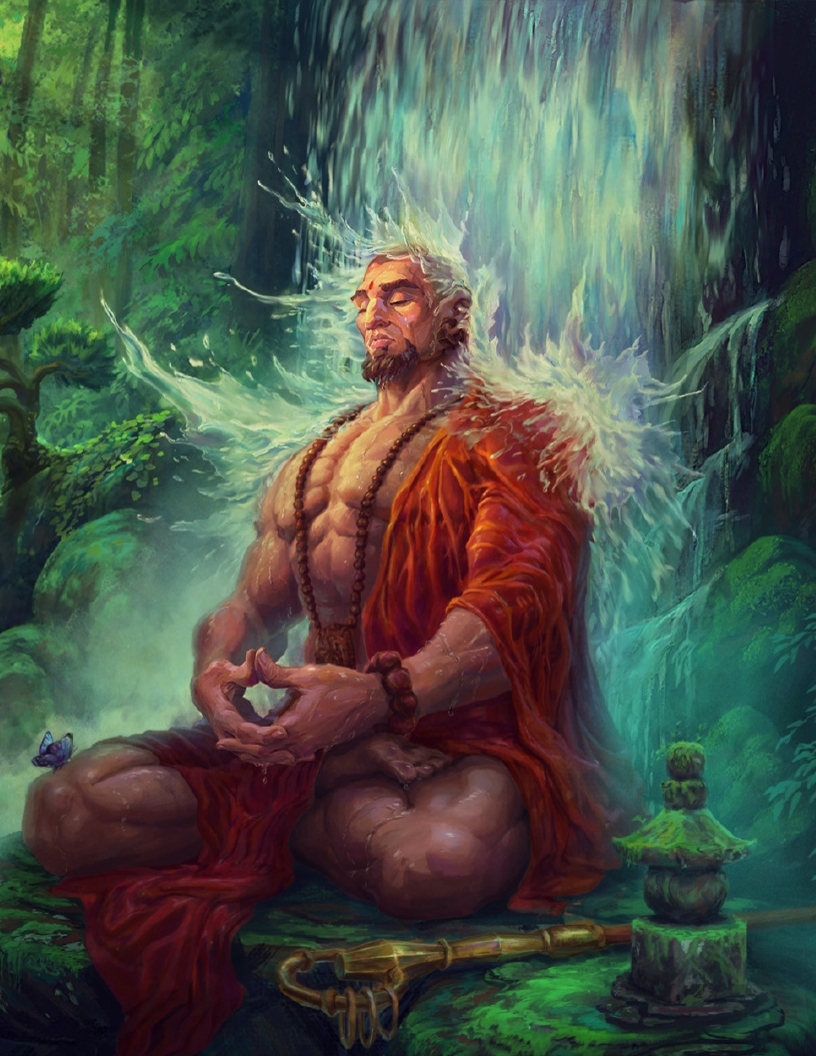
PART 2
Downtime in Kantas

Introduction
Adventures in Kantas usually take a single session and less than an in-game week to complete. In between adventures your character carries on with their daily lives because adventuring, while lucrative, does not necessarily have to be a full-time gig for them.
We present here rules put together to manage the downtime between adventures in the Kantas Expanse Campaign. Whenever needed, players can ask Kantas Downtime DMs (DTDMs) for help. DTDMs work with Kantas DMs and Kantas Worldbuilders to develop these rules.
Downtime Activity Slots
In Kantas, Downtime Activities (DTA) are measured based on the effort and time they are expected to require: a DTA can be Light or Taxing. Two Light DTAs are considered equivalent to one Taxing DTA in terms of time and effort. Each week between adventures, characters have 1 Taxing DTA slot they can spend. Thus, they are able to undertake 2 Light DTA or 1 Taxing DTA. Some Light DTAs also have the option to be increased to Taxing with an associated bonus and extra requirements.
The Downtime Week
A week between adventures (the DT week) is an abstraction that represents the time in between two in-real-life sessions over consecutive weeks. It does not matter whether, for example, your character was in two sessions Tue-Tue, Thu-Tue, or Thu-Thu. In between those sessions, your characters will have 1 Taxing DTA or 2 Light DTA slots to spend.
Specific sessions, or extraordinary in-game events, will exceptionally span over the full in-game week and expend the DTA slots of the characters involved for the week. See the DTA Slot Availability table for more details. The DTDMs ultimately determine the DTA slots available to characters each week.
For example, a session might require the whole following week just for the characters to explore the ruins they found and travel back home, or for them to free themselves from the prison they have been thrown into.
Downtime Safe Zones
Characters are expected to spend their DT week in locations that are considered sufficiently secure and free of immediate dangers. That is why characters can safely rest and complete various activities during the DT week without routinely being attacked or otherwise challenged.
Currently the designated safe zones for downtime are: Daring Heights, Port Ffirst, and New Hillborrow including their very immediate surroundings.
DTA Slot Availability
| Adventuring Time spent in session |
Available DTA slots | |
|---|---|---|
| Up to 2 days | 1 Taxing or 2 Light DTA slots | |
| Between 2 and 3 days | 1 Light DTA slot | |
| More than 3 days | No DTA slots |
When a player declares that their character wants to carry out a DTA that involves anything beyond general narration, they can consult this chapter to see if a ruling already exists and use it to manage the downtime activity for them.
Declaring DTAs and rolling DTA Checks is done on our Discord. Currently DTAs can be declared between Friday and Monday (included).
Downtime Activity Checks
Checks that are required as part of a DTA are not considered regular Ability Checks, but rather DTA Checks. Consequently, the Halfling Trait Lucky, the Cantrip Guidance and a change of Druid Ability Scores via Wild Shape, just to mention a few examples, do not affect them.
Downtime Inspiration
Downtime write-ups are encouraged in Kantas, much the same way session write-ups are encouraged, especially when there is a nice, inspirational or awesome story to tell behind the activity. Whatever the length, sharing a narrative write-up of a DTA will also award your character a +2 bonus to their next DTA check.
Living and Travelling in Downtime
Not all tasks and duties that characters are required—or might choose—to accomplish in between adventures require them to invest DTA slots. Travelling is also possible within limits during the DT week if a character is willing to invest the time.
Travelling in Downtime
Travelling during the DT week is only allowed within the confines of the downtime safe zones. See the Downtime Travelling matrix for allowed trips and associated DTA slot costs. Only in very exceptional circumstances, the DTDMs might allow travelling to other destinations during the DT week.
Lifestyle Expenses
Your characters still existing in Kantas in between adventures means that you will need to consider their living costs every week. Their expenses will be based on the style of life and location they choose. Every week, you should subtract the living costs for your character from their overall wealth as detailed in the Player's Handbook.
The Wretched lifestyle requires a character to spend all their downtime trying to survive. No DTA slots are available for them that week.
Downtime Travelling
| To\From | Daring Heights | Port Ffirst | New Hillborrow |
|---|---|---|---|
| Daring Heights | — | 1 Light DTA 1 Taxing DTA |
1 Light DTA 1 Light DTA |
| Port Ffirst | — | 1 Light DTA 1 Light DTA |
|
| New Hillborrow | — |
One-way downtime travel costs in italics
Example lifestyle expenses and Accomodations
| Lifestyle | Living Cost (per day) |
Living Cost (per week) |
Daring Heights | Port Ffirst | New Hillborrow | Kundar* | |
|---|---|---|---|---|---|---|---|
| Wretched | — | — | Red House | ||||
| Squalid | 1 sp | 7 sp | Red House; Hung Rabbit | Cavernous Seashank | |||
| Poor | 2 sp | 14 sp | Hung Rabbit; Ettin | Cavernous Seashank | M'sh'ls | ||
| Modest | 1 gp | 7 gp | Ettin | The Hearth and Road | |||
| Comfortable | 2 gp | 14 gp | Fair Winds | Flourished Hook | The Hearth and Road | ||
| Wealthy | 4 gp | 28 gp | Fair Winds; Gilded Mirror | Flourished Hook | |||
| Aristocratic | 10 gp (min) |
70 gp (min) |
Gilded Mirror |
* Kundar is outside the DT safe zones and is not a valid option for permanent residence without consultation with the DMs
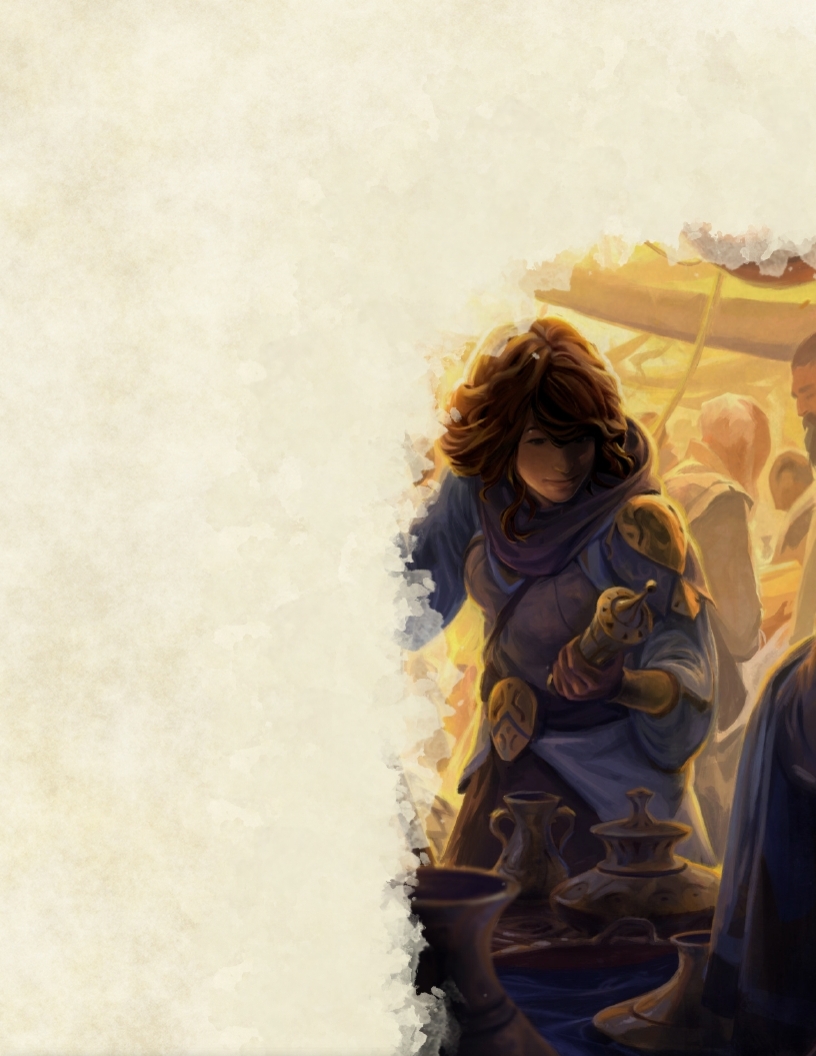
Trading between Adventures
During downtime, characters in the DT safe zones might want to buy and sell gems, jewelry and other goods by interacting with NPCs. Players can use the following rules to do so. Characters that for any reason are away from the DT safe zones have very limited opportunities for trade that have to be exceptionally approved by the DTDMs.
Mundane Items
All items for which prices are provided in the Mundane Items table can be bought in small quantities from NPCs. The only exceptions to this rule are camels, elephants, and waterborne vehicles. They cannot be bought or sold without consulting the DTDMs. All other mundane items can be sold to NPCs for their nominal value if new, or half if used, but not severely damaged. Repairing a damaged mundane item, when possible and allowed, restores the item to a used status for the purpose of selling it on.
Magic Items
Magic items cannot be bought or sold without the approval
of the DTDMs.
If a character would like to buy potions or oils, the DTDMs approval is required. Their availability varies depending on their price. The DTDMs will allow one d100 roll per DT week per potion or oil to determine their availability. The first potio or oil sought by a character will have a 80% chance of being available. Each further potion or oil sought will decrease this chance by 30% for potions or oils worth 300 gp or more, and 20% for potions or oils worth less than that. Potions or oils worth 1000 gp or more are not readily available and might be exceptionally commissioned with the DTDMs’ approval. Potions of Healing (Regular) are an exception to this general rule and up to 3 can be bought per DT week without consulting the DTDMs.
If a character would like to buy a spell scroll, the DTDMs approval is required. The availability of scrolls varies depending on their level (see the Buying Scroll table). The DTDMs in case allow one d100 roll per scroll per DT week to determine availability.
If a character would like to sell magic scrolls, the DTDMs approval is required. Scrolls usually have a certain likelihood of being sold of 100% − 10% × the spell level. Scrolls above level 4 cannot be sold in downtime.
Buying Scrolls
| Scroll Level | Availabilty |
|---|---|
| 1–3 | Always available |
| 4 | 50% |
| 5 | 35% |
| 6–9 | Not available |
Trading with other Characters
Characters are free to trade with other characters without consulting the DMs. However trading between characters controlled by the same player is generally not allowed and needs to be exceptionally approved by the DMs. The lending of magic items is also not allowed in general and needs to be exceptionally approved by the DMs.
Bardic Performance
Where a character is so inclined, they can try to perform and earn a living for themselves in between adventures. This will usually be in the form of a musical performance, but characters can use their imagination and undertake a multitude of activities to put on a show!
Resources:
Getting a Gig
To earn a living, the character will need to spend a Light DTA slot in the venue, carrying out performances over multiple nights. Characters will also need to have proficiency and access to something to perform with, as well as talk their way into being allowed to perform at their chosen venue. A Narrative justification and the DTDMs approval is needed for that.
Resolution:
Putting on a show
Once ready Characters will need to make a Charisma (Performance) Check. The DC for this check will reflect how well-received they are by the audience at the chosen venue as detailed in the Bardic Venues table. If successful, the character will earn enough money from the venue to cover their Lifestyle Expenses for the week up to the same Lifestyle cost as allowed by the venue.
Characters carrying out this DTA with a trained pet might gain extra benefits. See the commands descriptions in the Pet Training section for details.
Performing as a Band
Optionally, characters may decide to perform as part of a band. To do this, there must be a minimum of two characters in the band, all participating characters will need to spend 1 Light DTA slot and be available at the same venue. Each character will then make a Charisma (Performance) Check against the same DC. Playing as a band means you succeed together, or fail together! If half or more of the band members pass the check, each member earns their living expenses. If more than half fail the check, none of the members earns their living expenses.
A Band of Two
A band of two members will require both members of the band to pass the Charisma (Performance) DTA Check to be successful.
Bardic Venues
| Venue | Audience DC | Location | Maximum Lifestyle covered | Earnings |
|---|---|---|---|---|
| Red House | 2d10 + 3 | Daring Heights | Squalid | 5 gp |
| Hung Rabbit | 2d10 + 5 | Daring Heights | Poor | 8 gp |
| Cavernous Seashank | 2d10 + 5 | Port Ffirst | Poor | 8 gp |
| The Cat and Badger | 2d10 + 5 | New Hillborrow | Poor | 8 gp |
| M'sh'ls | 2d10 + 5 | Kundar | Poor | 8 gp |
| Ettin | 2d10 + 7 | Daring Heights | Modest | 11 gp |
| Fair Winds | 2d10 + 9 | Daring Heights | Comfortable | 14 gp |
| The Thirsty Dragon | 2d10 + 9 | Port Ffirst | Comfortable | 14 gp |
| The Hearth and Road | 2d10 + 9 | New Hillborrow | Comfortable | 14 gp |
| Gilded Mirror | 2d10 + 11 | Daring Heights | Wealthy | 17 gp |
| Flourished Hook | 2d10 + 11 | Port Ffirst | Wealthy | 17 gp |

Earning Something Extra
Characters can repeat this activity again on the same DT week, undertaking extra performances either to make up for the insuccess of the first attempt, or to earn some extra spending money on top of their living expenses.
Characters wishing to do this may simply repeat the activity, following the usual rules making a new check against a new DC. If they are successful for the second time in the same DT week, characters earn gold as detailed in the Bardic Venues table.
Complications
The life of a performer can be a tough one. Whether you are struggling to find or gig or fending off adoring fans, one thing is clear: it is not all smooth songs and smoother lines to sway the crowds. Each time you perform, there is a chance something could go wrong. For every Bardic Performance DTA carried out, there is a 10% chance for complication.
Bardic Performance Complications
| d6 | Complication |
|---|---|
| 1 | One of your song choices upsets a patron who starts a fight. You get out without injury but earned yourself a name as a trouble maker. You will need to talk your way back into performing again (DC = 2d10 + 5) |
| 2 | You get a little too enthusiastic during the last performance and accidentally break a few things around the tavern. Before you can perform again, you will need to pay 5d10 gp for repairs |
| 3 | Someone has been impersonating you and taking the credit for your work, and your earnings! Any earnings you had this week have been lost. |
| 4 | You have been upstaged! The act before you completely steals the show leaving your performance somewhat forgettable at best. Your performance check for this performance suffers a −3 modifier. |
| 5 | Your fan base has become somewhat of a nuisance. The tavern you performed in has decided enough is enough and has barred you from performing here again until they can behave themselves. You will not be allowed to perform at this tavern again for 1d4 weeks. |
| 6 | Scandal! Whatever you did in that last performance has ruffled some feathers and now you have made a name for yourself in town. No one in town is willing to have you perform again until they are sure there won't be another incident like last time! You will not be able to perform in this town again for 1d4 DT weeks. |
Brewing
What’s better than sharing a stiff drink
with your friends? Brewing it yourself!
You can use your downtime to take up the art of brewing your own alcoholic drinks, whether you want to share them with you friends, keep your own private stash on hand or fancy your chances at making an honest living on the joyful inebriation of others.
Resources:
Sourcing Ingredients
The perfect brew requires the perfect ingredients. To get started, you will need to source the necessary ingredients to begin. Depending on what you are trying to brew, these ingredients will vary and to make your own unique brew, you will need to gather various spices and flavorings to accompany it.
Conducting this activity requires a safe place to carry out the work. You will not be able to effectively do this DTA if you do not have a regular room in town that you can set up the equipment in. Finally, you will need to have a set of Brewer's Supplies to carry out this DTA.
Undertaking the Brewing DTA requires a total of 2 Taxing DTA slots and 2 Light DTA slots, spread over 4 weeks to complete and a cost of 10 gp for the various materials and bottles needed to create and store your brew. These do not need to be carried out consecutively but each week not spent carrying out this activity, once started, increases the risk for something to go wrong (see Complications for details).
Resolution:
Home-Brewing
First Week
After declaring the activity, the character will be required to pay for the cost of materials before beginning the process of fermenting their ingredients and storing their work into containers. The character will need to spend the first week of this process using 1 Taxing DTA slot.
Second and Third Weeks
The brewing process continues as the character diligently looks after their project. These weeks will require 1 Light DTA slot.
Fourth Week
The final week in the process mainly sees the character bottling or kegging their creation, making it ready for drinking. This week also requires 1 Taxing DTA slot.
The character now makes an Intelligence check with a set of Brewer's Supplies, adding their proficiency if they have it, to establish how successful the process has been.
Alternative Brewing Options
At the discretion of one of the DTDMs a character may attempt to Brew a special drink using special or rare ingredients, distilling down to a single concentrated draft. This will follow the same rules as normal brewing, resulting in a drink with special properties, to be determined by the DTDMs according to the materials used in the process. This single draft will not be available to be sold for profit and any complications may be specific to the individual attempt.
Once complete, the character can choose to try and sell the brew to one of the taverns in town to make a tidy profit. The success of the brew will determine how much they can make from the sale, refer to the Brewing Sales table for results. Alternatively, the character can choose to keep the brew for themselves as their own special reserve to drink from!
Brewing Sales
| Check Total | Sale Value | |
|---|---|---|
| 1–5 | 15 gp | |
| 6–10 | 30 gp | |
| 11–15 | 45 gp | |
| 16–20 | 60 gp | |
| 21+ | 75 gp |
Complications
This activity is largely carried out alone and requires a safe place to effectively complete it, as such, the majority of complications arise in the actual brewing process or with the end product. There is a 10% chance for a complication to occur during the brewing process, however, for every week not spent doing this activity once it has started, the possibility of complications occurring increases by 5% to a maximum of 40%. After the Brewing process has started, a maximum of 6 DT weeks can elapse not furthering it. After that, if an additional week is spent not working on this DTA, the batch is lost.
Brewing Complications
| d6 | Complications |
|---|---|
| 1 | During the fermentation process, there was an accident or mistake made, causing some of the batch to be lost! The value the batch can be sold for is reduced by 2d10 gp. |
| 2 | Some of the materials used in the Brewing process were sourced from a skeptical source or were of dubious quality, creating a brew with a strange taste. The checks made as part of this DTA suffers a −3 modifier. |
| 3 | Someone really liked the drink you made and is now determined to know your secret recipe! Your next 2 DTA rolls are made at disadvantage as they constantly harass you for information. |
| 4 | The equipment you used for brewing is faulty. A leak damages some of your property and the room you used for brewing. You spend 10 gp in repairs and your Brewer’s Supplies are unusable. You will need to buy them again. |
| 5 | Explosion! As you monitor the brewing process, the excessive pressure in one of the tanks causes an explosion. Your Brewer’s Supplies are destroyed. If you are renting the room you used, your Living Expenses for the week are tripled. |
| 6 | Something has gone wrong and your brew now has some strange side effects. When sampling your work, you suffer an unexpected cosmetic change—to be determined by the DTDMs—that lasts for 1d4 weeks. You manage to fix the issue with the batch to stop anyone else being affected but all attempts to rid yourself of this change in the meantime prove unsuccessful. |


 -->
-->
Building a Shelter
Some Characters may find the hustle and bustle of city life not to their liking, preferring to live on the fringes of the DT safe zone in roughly built structures where they can be alone, avoid any unwanted attention or maybe just feel closer to nature.
These types of shelters, due to their isolation, will always be classed as Squalid for the purpose of managing your characters lifestyle and all associated costs of that lifestyle still apply, as you will no doubt need to occasionally buy supplies in the nearby town or make repairs and improvements to your shelter to ensure it remains functional.
By their very nature, these structures are temporary and as such will need to be rebuilt on occasion. How often this will require to be done will depend on how successful your character was in building their shelter.
Resources:
Finding the materials
A shelter can be built using 1 Taxing DTA slot and is carried out in two steps. The first step in building your shelter will be finding the necessary materials to build it. This should be flavoured according to the location you are building in but essence simply requires your character search for the materials they need.
To find materials, your character must make a Wisdom (Survival) check to find materials, the result of which will determine what quality of materials you are able to find. The quality of materials found will impact the potential success of the shelter being constructed as specified in the Shelter Materials table.
Shelter Materials
| Check Total | Quality of Materials | Modifier |
|---|---|---|
| 1–10 | Poor Quality | −2 |
| 11–17 | Average Quality | 0 |
| 18+ | High Quality | +2 |
Resolution:
Building your shelter
Once you have found the materials, the next step is to actually construct your shelter using those materials. Players have some artistic license with describing how they wish their shelter to look but it should still be thematically consistent with the location, materials used and the fact it is still a shelter. You cannot, for example, describe an 18th century Manor house in the middle of a swamp, constructed from nothing but leaves and mud ...
To construct your shelter, you must make an Intelligence check to see if you can successfully combine the materials to form a suitable shelter. If you have Carpenters tools and are proficient with them, you may add your proficiency with those tools to this check. The DMs may allow an alternative tool as an exception if thematically relevant.
Once done, you will need to apply the relevant modifier based on the quality of Materials you managed to find before comparing your results to the Shelter Quality table to establish how successful your shelter is.
Shelter Quality
| Check Total | Shelter | |
|---|---|---|
| 1–5 | Your shelter is barely able to stand and almost immediately collapses. You will need to try again next week! | |
| 6–15 | Your shelter is pretty rough and moves a little more than you’d like, but still stands reasonably well. It will need to be rebuilt in 3 weeks time. | |
| 16–20 | You have built a decent shelter that keeps out most of the weather and seems pretty sturdy. It will need to be rebuilt in 5 weeks time. | |
| 21+ | As temporary shelters go, this is likely the most permanent you can get. It will need to be rebuilt in 8 weeks time. |
Characters carrying out this DTA with a trained pet might gain extra benefits. See the commands descriptions in the Pet Training section for details.
Each time you build a shelter, you must go through the entire process of finding materials and building the shelter each time, from scratch.
Business
Some adventurers might want to pursue a second profession in their downtime, sometimes working with a successful businessperson, other times choosing to start enterprises of their own. The following are a set of rules for establishing and operating your own business in one of the DT safe zones.
Resource:
Start a Business
This might have to do with a tool proficiency your character has, or could be simply an idea you have for something your local town needs. Either way, the first step to creating a business is deciding what the business does. Ideally this will lead to a brief recount of the events leading to the decision of starting a new business.
Premises
You’ll need somewhere to run your business from. This will vary depending on what you are doing. If you want to open a smithy, you will need somewhere with a forge and a shop front. A bakery will need a shop with a properly equipped kitchen. If you want to make and sell potions, you will need space for your equipment. Generally speaking, the larger, better located and more specific your premises, the more expensive they will be.
You have two options when securing your premises: buy or rent. If you buy, you will have to meet the total cost up front, which can be quite significant (a small shop in Daring Heights for example starts at around 2,000 gp). The DTDMs will ultimately determine whether buying premises for your shop is possible and at what cost. If you rent, your business will have a higher Upkeep, meaning a bad month could wind up being very expensive.
The Business Expenses table is a guideline to the costs associated with running your business and includes the value of the property, the monthly rent for each sized property, the minimum number of hired Staff you would need to run the business and a brief description of the kind of space it affords.
Downtime Inspiration and
Monthly Business RollsIf you run your own business, it is important to note that the Monthly Business Rolls do not count as a DTA Check. They are a unique check type, and as such the Downtime Inspiration bonus does not apply to these rolls.
The Downtime Inspiration bonus only applies to DTAs that call for a DTA Check.
Business Expenses
| Property Size | Property Value | Rent Value | Expenses | Staff | Description |
|---|---|---|---|---|---|
| Micro | 500 gp | 12 gp | 5 gp | 0 | A small stall in a market to sell services or products from. |
| Small | 2,000 gp | 50 gp | 25 gp | 0 | Small property with a store area and some small rooms for lodging or storage. |
| Medium | 6,000 gp | 150 gp | 50 gp | 1 | A small workshop, a store area and a couple of small rooms for storage and lodging. Some properties of this size might also include a small yard area. |
| Large | 15,000 gp | 375 gp | 100 gp | 1–3 | A Large building with rooms and a sizable yard. Rooms have a variety of uses from workshops to manufacturing rooms, depending on the business requirements. |
| Huge | 30,000 gp | 750 gp | 300 gp | 3–10 | An expansive property, like a manor house or a complex with land. Likely to include an outer boundary wall. |
| Warehouse | 7,000 gp | 175 gp | 50 gp | 5–20 | Large barn-like structure, likely wooden with simple interior layout, walkways and a mezzanine level. |
Staff
The hired Staff used in your business will be able to help keep things running while you are away on your adventures and you may hire more if you wish. Hiring more will increase your monthly expenses but will also add potential for the business to be more successful. Specifically for the small Property, if no staff are hired, you will need to spend at least 1 Light DTA slot each week to keep the business running. (Your business can not be successful if it’s not open!)
For each member of Staff you hire, they will accrue a wage expense of 10 gp per month. Expenses reflect the costs of materials and/or general maintenance of the property.
Startup Costs and Upkeep
Based on your premises, location and overheads, the DTDMs will determine the Upkeep of your business. Your Upkeep is the most important figure associated with your business, and will be crucial in determining how much you earn or lose operating it. It represents the rent, taxes, staffing costs and materials required to operate your business.
When you found your business, you must pay Startup Costs equal to 4 × Upkeep to cover the initial cost of setting up the business. If you purchased your premises, you must also add the full cost of that purchase to the Startup Costs.
To determine your Upkeep value, you will need to combine the costs of:
- Your monthly rent (based on the property size)
- The wages of your staff
- The associated expenses for your property size
Each month, you must spend this value in order to keep your business running. If you do not make this payment, in full, each month, it may have detrimental effects on your next Running Business Rolls you make, such as a negative modifier or rolling at disadvantage. If you do not pay your upkeep for multiple months in a row, you may be evicted or your business forced to close.
If you have chosen to purchase the property rather than rent, you will still use the rent value to determine your upkeep value when making a Running Business roll, however, when you pay your upkeep each month, it will be deducted from the amount you pay.
Upkeep Example
Arkadius is running his business from a Medium-sized property that he rents, with 2 paid members of Staff. Arkadius' upkeep would therefore be made up of:
- Rent costing 150 gp
- Staff wages costing 20 gp
- Expenses costing 50 gp
Thus, the total Upkeep of Arkadius' business would add up to 220 gp per month.
Running Business
| Roll | Result |
|---|---|
| 1–5 | The business suffers a major catastrophe. It generates no income (though you must still pay its Upkeep cost each month) until you pay 5 x its Upkeep to fix this problem. At the DMs discretion, this may cause further complications, requiring an adventure or some other Downtime interaction to fix, and could permanently alter the Upkeep value of your business. |
| 6–15 | The business suffers a minor catastrophe. You must pay 3 x Upkeep to get things back on track. |
| 16–25 | The business suffers a setback. You must pay 2 x Upkeep to get things back on track. |
| 26–35 | The business makes no profit this month. You must pay its Upkeep cost out of your own pocket. |
| 36–50 | The business covers its running costs, but makes no profit this month. |
| 51–60 | The business has a mildly successful month, covering costs and generating 15% of its Upkeep as profit. |
| 61–70 | The business has a mildly successful month, covering costs and generating 30% of its Upkeep as profit. |
| 71–80 | The business has a modestly successful month, covering costs and generating 60% of its Upkeep as profit. |
| 81–100 | The business has a moderately successful month, covering costs and generating 90% of its Upkeep as profit. |
| 101+ | The business has a spectacularly successful month, covering costs and generating 150% of its Upkeep as profit. At the DTDMs’ discretion, this may have additional consequences, such as a bonus to next month’s roll, a permanent increase to the Upkeep or drawing the attention of thieves or rivals. |
Resolution:
Running your Business
Once a month—on the first Monday of each month—you roll a d100 to determine how well your business did the month before using the Running Business table. There are various activities and circumstances that can modify the Running Business Roll.
The DTDMs might rule that a specific set of circumstances in game modifies your Running Business roll for the month. For example, when Daring Heights was quarantined during the plague known as the Lassitude, it would have been difficult for a smith to receive the materials they needed to perform their work. However, an apothecary or doctor might have found their business increase significantly! Also, during their adventures, characters might curry favor with patrons and influential people that can help their side business.
Business “Hands-On” Involvement
Your staff are far less skilled and diligent than you. If you spend DTA slots taking over the day to day running of your business, you gain a bonus to you next monthly roll. This bonus is equal to +2 for each Light DTA slot spent and +5 for each Taxing DTA Slot spent. This modifier still applies if you are running a small business with no paid staff.
The maximum benefit that can be obtained from this feature is using the equivalent of 4 Taxing DTA slots.
Being Absent
If you are running a small business with no paid staff and do not put time into running your business, your business will suffer as a result.
For each week you do not spend any time on your business, there will be a −10 modifier to your next Running Business Roll. If you spend no time that month running your business, you do not need to roll as the business has been shut but you must still pay your full upkeep.
Contacts
If you have made contacts either through the Carousing Downtime Activity, you can call in a favor from one of these contacts to give you a bonus to next month's business roll. This might be a tip off on your competition’s plans, a better deal on materials or the easing of a particular tariff or tax. The bonus is +3 for a Low-Class Contact, +6 for a Middle-Class Contact and +10 for an Upper-Class Contact. You may call in as many favors as you like in a single month, but keep in mind that the contact is spent and cannot be used again.
Co-Ownership
You may find some NPCs may be willing to enter into business with you when starting your business and become a part owner. When starting up your business, speak with the DTDMs if you would be interested in having an NPC partner for your enterprise.
NPC’s in this position, however, will play a significant part of your business and will expect an equal share. When you start a business with an NPC, they will own 50% of the business with you. When making monthly payments toward your business, you and your partner will split this cost equally between you. Likewise, when the business generates Profit, this will also be split equally between you.
Having an arrangement like this may make starting and running a business easier for you but will also mean there will be a reduced income as a result!
Carousing
The Dawnlands and her cities are a melting pot of interesting people and, to the silver-tongued adventurer, a resource to be used! Drinking in Dive bars, Attending a masquerade Ball, kicking back for a game of chess with the locals or catching a fight at the local fight pit, there are plenty of opportunities to meet new people in the DT safe zones during downtime.
Some examples of carousing could be rowdy partying in the local dive bars (Lower class), buying drinks or enjoying a game of Dragonchess with the patrons of some of the better establishments in town (Middle class), or attending a high profile event and rubbing shoulders with the nobles in town (Upper class).
The motives and scenario of the character should be considered when deciding what this activity is. In any case, this can provide a great opportunity for narrative developments.
Resources:
Ready to Splurge?
Making new friends and earning a favor takes time and practice. Characters wishing to do so can spend either 1 Light DTA or 1 Taxing DTA slot to carry out this DTA and try to gain contacts. A Contact is an NPC you have met while carousing who, through some means, is now friendly towards you and will provide you with a favor. Only 1 Light DTA slot per DT week can be spent for the Carousing DTA.
Depending on the class of people characters choose to carouse amongst, see the Carousing Class table to determine the cost in gold that will be required to complete this activity. The cost is halved if only 1 Light DTA slot is being spent. This cost reflects the various expenses associated with the activity and can be narratively described in numerous ways such as buying a few rounds of drinks in the local dive bar, getting tickets to a show or even buying gifts for your potential new contacts.
Carousing Class
| Class | Cost | Modifier for Contact |
|---|---|---|
| Lower | 10 gp | +1 |
| Middle | 50 gp | +2 |
| Upper | 200 gp | +3 |
Resolution:
Having a Good Time
Once you have decided what class you will carouse with and paid the necessary costs, characters will need to roll a Charisma (Persuasion) Check to see how successful their efforts have been. If a Taxing DTA slot was spent, add a +2 bonus to the roll.
Carousing
| Check Total | Result |
|---|---|
| 1–8 | Character has made one Hostile Contact. |
| 9–13 | Character has made no Contacts. |
| 14–18 | Character has made one Allied Contact. |
| 17–21 | Character has made two Allied Contacts. |
| 22+ | Character has made three Allied Contacts. |
Characters carrying out this DTA with a trained pet might gain extra benefits. See the commands descriptions in the Pet Training section for details.
Carousing Restrictions
Not just anybody is allowed into the kind of establishment that the Upper class entertain themselves in! While Lower and Middle class Carousing can be undertaken by all characters, Upper class is normally only available to Characters with the Noble background.
You may, however, be able to Carouse with the Upper class if the DTDMs rule you have made sufficient contacts or you can attempt to use a Disguise Kit and your Deception skill to pass yourself off as a visiting noble for the chance.
Contacts and Favors
Contacts a character makes are NPCs who are now bonded to the character. Allied contacts view the character in a good light and will be willing to aid them in some way but will stop short of putting themselves in danger. Hostile contacts bear a grudge against the character for some reason and will attempt to hinder them in the future but will stop short of actually committing a crime.
Allied contacts can be used in a few ways. Some other Downtime Activities a character may wish to undertake can be aided by contacts by requesting their help to provide a small bonus to the relevant checks of that activity. The amount of bonus provided depends on the class of contact, as detailed in the Contact Class table. Alternatively, Contacts may also be used to help further narrative development.
Characters may have a total number of contacts equal to their Charisma Modifier (Minimum 1). Any additional Contacts made are after reaching this maximum number are lost.
At the discretion of the DTDMs, some backgrounds may provide advantage or provide +1 to the maximum number of contacts a character is allowed (eg., the Ear to the Ground background feature).
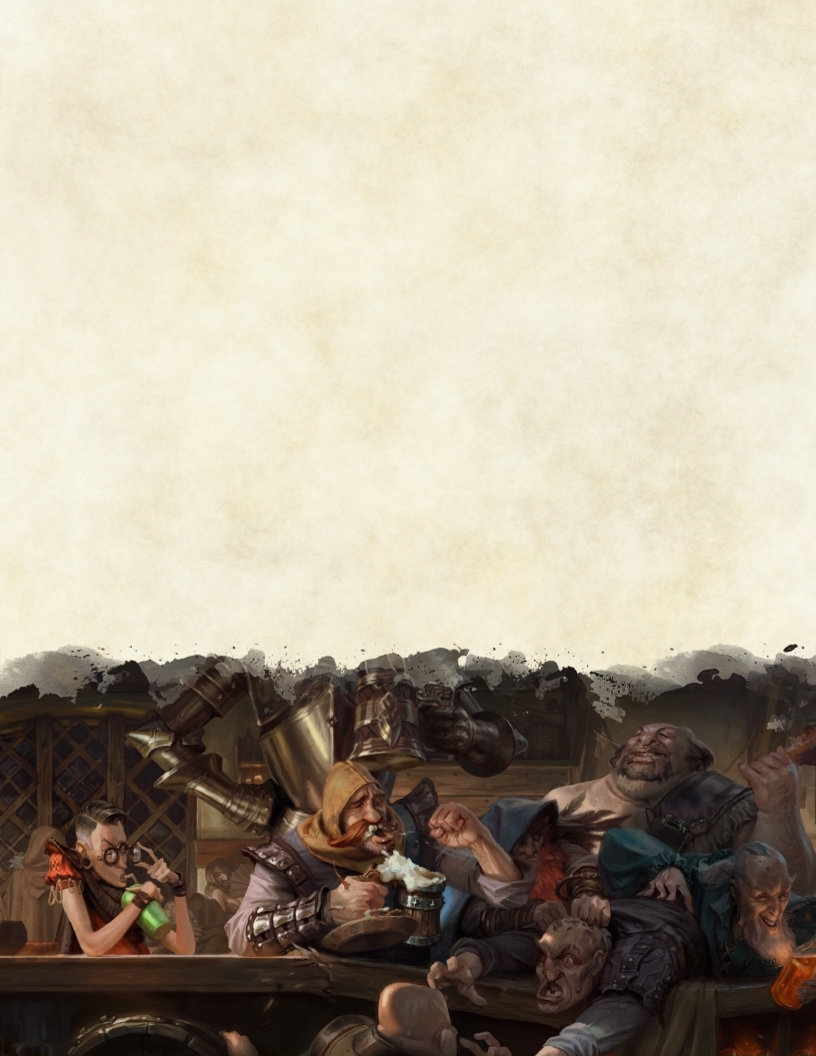
Complications
Sometimes the best intentions just don’t work out. A character risks getting into complicated situations while carousing. Every 1 Light DTA slot spent carousing brings a 5% chance of a complication. Every 1 Taxing DTA slot spent carousing brings a 10% chance of a complication. If a character does incur in a complication, you can use the Complications table for the respective contact class to determine what has happened.
Upper Class Complications
| d6 | Complication |
|---|---|
| 1 | You have agreed to take on a noble’s debts, worth 10d10 x 5 gp |
| 2 | You have been challenged to a joust by a knight. If you refuse, you lose any contacts you have in that city and can not gain any new contacts for 1d4 weeks. If you accept, you will make three competing checks against your opponent, a Wisdom (Animal handling) Check, a Strength (Athletics) check and a special Constitution check using your highest Hit die as a modifier. |
| 3 | You have made a foe out of a local noble. Your next DTA roll will be at disadvantage as they actively try to interfere with your activities. |
| 4 | A boring noble insists you visit each day and listen to long, tedious theories of magic. You lose your next available Taxing DTA slot while visiting them. |
| 5 | You have become the target of a variety of embarrassing rumors. The next DTA you carry out in town will suffer a −2 modifier while people still talk about it. |
| 6 | You have a little too much to drink and make poor decisions. You realise you have spent an additional 200 gp trying to impress people. |
* Might involve a rival.
Middle Class Complications
| d6 | Complication |
|---|---|
| 1 | A social gaffe has made you the talk of the town.* |
| 2 | A particularly obnoxious person has taken an interest in you. Your next DTA Check will be at disadvantage as they continually interfere and obstruct you. |
| 3 | You have made a foe out of a local spellcaster.* |
| 4 | You have been recruited to help run a local festival, play, or similar event. You lose your next available Taxing DTA slot while you help with the planning. |
| 5 | You made a drunken toast that scandalized the locals. The next DTA you carry out in town will suffer a −2 modifier while people still talk about it. |
| 6 | You spent an extra 100 gp trying to impress people. |
* Might involve a rival.
Lower Class Complications
| d6 | Complication |
|---|---|
| 1 | A pickpocket lifts 1d10 × 5 gp from you.* |
| 2 | A bar brawl leaves you with a scar.* |
| 3 | You are banned from a tavern for obnoxious behavior.* |
| 4 | Surprise! You’re married. |
| 5 | Streaking naked through the streets seemed like a great idea at the time. The next DTA you carry out in town will suffer a −2 modifier while people still talk about it. |
| 6 | Everyone is calling you by some embarrassing nickname, like Puddle Drinker or Bench Slayer, and no one will say why.* |
* Might involve a rival.
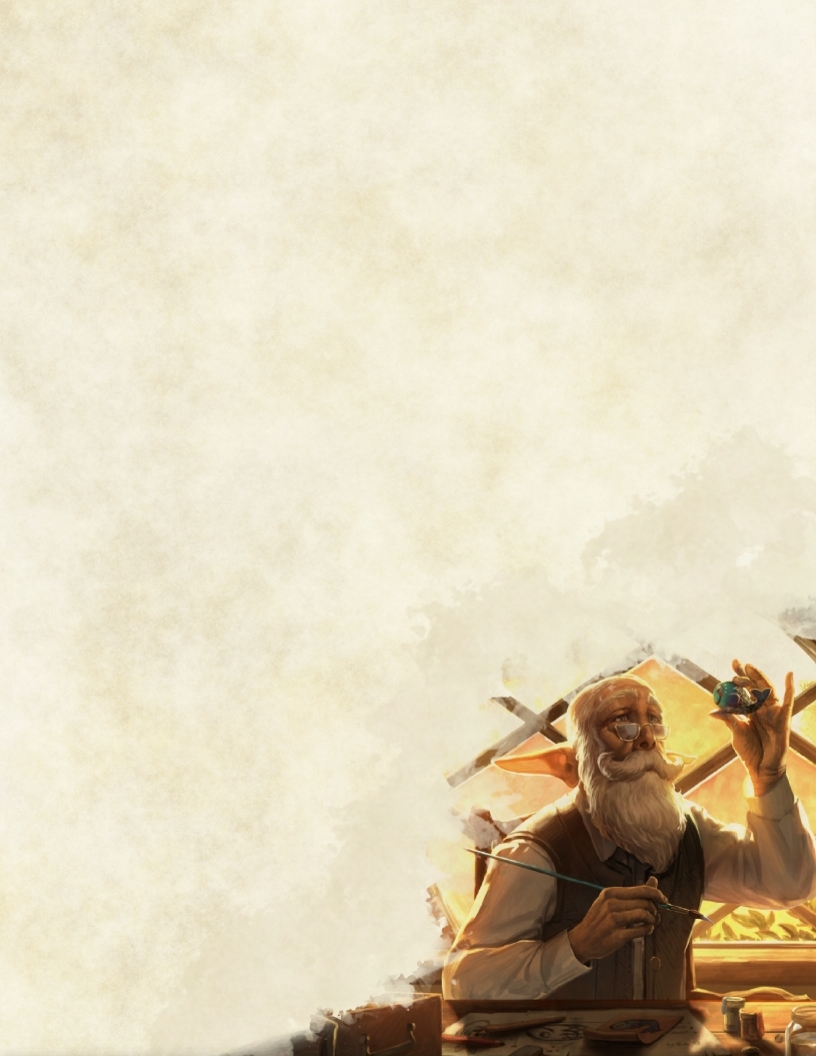
Crafting Items
Some characters might want to use their downtime between adventures to create items, whether for profit or personal enjoyment. These rules provide a framework for the creation of items both mundane and magical.
Mundane Items
Resources:
Gathering Materials and Tools
You can use your DTA Slots to craft mundane items found in the in the Mundane Items table in the Equipment section of this guide. The only exceptions to this rule are waterborne vehicles and Potions of Healing, which follow different crafting rules. Other mundane items may be crafted at the DTDMs discretion. To craft a mundane item you must have access to the appropriate Crafting Tools and be proficient in them. You must also have access to a suitable crafting space and the necessary raw materials.
First, check the cost of the item in Kantas. This will determine how long the item takes to create. You will need raw materials worth half the price. If you do not have access to the required materials you can purchase them. You must pay the Cost of Materials at the start of the process or partly upfront and then in regular instalments every month, depending on the value of the item (see the Mundane Item Crafting table). At the discretion of the DTDMs, up to an extra 10% might be added to the Cost of Materials if the crafter needs to rent a workshop or tools.
Resolution: Get Crafting
You can use 1 Taxing DTA slot to craft up to 50 gp worth of items. You can craft multiple items using a single Taxing DTA slot so long as their total value is equal to or less than 50 gp. You can also use 1 Light DTA slot to craft up to 25 gp worth of items. Again, you can craft multiple items with a single Light DTA slot so long as their total value is not greater than 25 gp.
If the item you are making has a value greater than 50 gp, you must spend multiple DTA slots to complete it. These slots need not be consecutive, but the work must reasonably be able to be left, and you must have a place where you can safely store it. For example, you can take a few weeks off forging your new breastplate as long as you can store it safely. However, if you leave your Poison on the workbench for a month while you do something else, you will need to start again.
To work out how long an expensive item takes to complete, simply divide the price of the item by 50 rounding up. That is the number of Taxing DTA slots required to complete the item. You may spend any combination of Taxing and Light DTA slots to complete the item, so long as you obey
the rules set out above.
Mundane Crafting Example
Milo Brightmane wants to craft a new suit of Split mail. Tom, Milo’s player, checks the price of a suit of Splint mail in Kantas, and sees that it costs 200 gp. 200 divided by 50 is 4, so Milo will need to spend 4 Taxing DTA slots to complete the armor or any combination of Taxing and Light DTA slots equivalent to 4 Taxing DTA slots. He will also need to pay half the items cost in raw materials upfront. In this case, 200 gp halved is 100 gp. Milo pays the gold and gets to work.
Combining Efforts
It is possible for multiple characters to collaborate on crafting an item., The DTDMs will determine how many characters can realistically work on an item at one time based on its size and characteristics (see the Crafting Collaborators table). For example, a large item like a suit of plate mail could probably be worked on by more people at once. A delicate necklace, however, is too small for multiple characters to work on simultaneously.
PCs must have the necessary tool proficiencies to collaborate. Each PC may spend as many or as few DTA slots as they choose, contributing 50 gp worth of work per Taxing DTA Slot spent and 25 gp worth of work for every Light DTA Slot spent. At the discretion of the DTDMs, NPCs might also be hired to help craft the item. Hirelings rates are set by the DMs between 15–50 gp per Taxing DTA slot contributed.
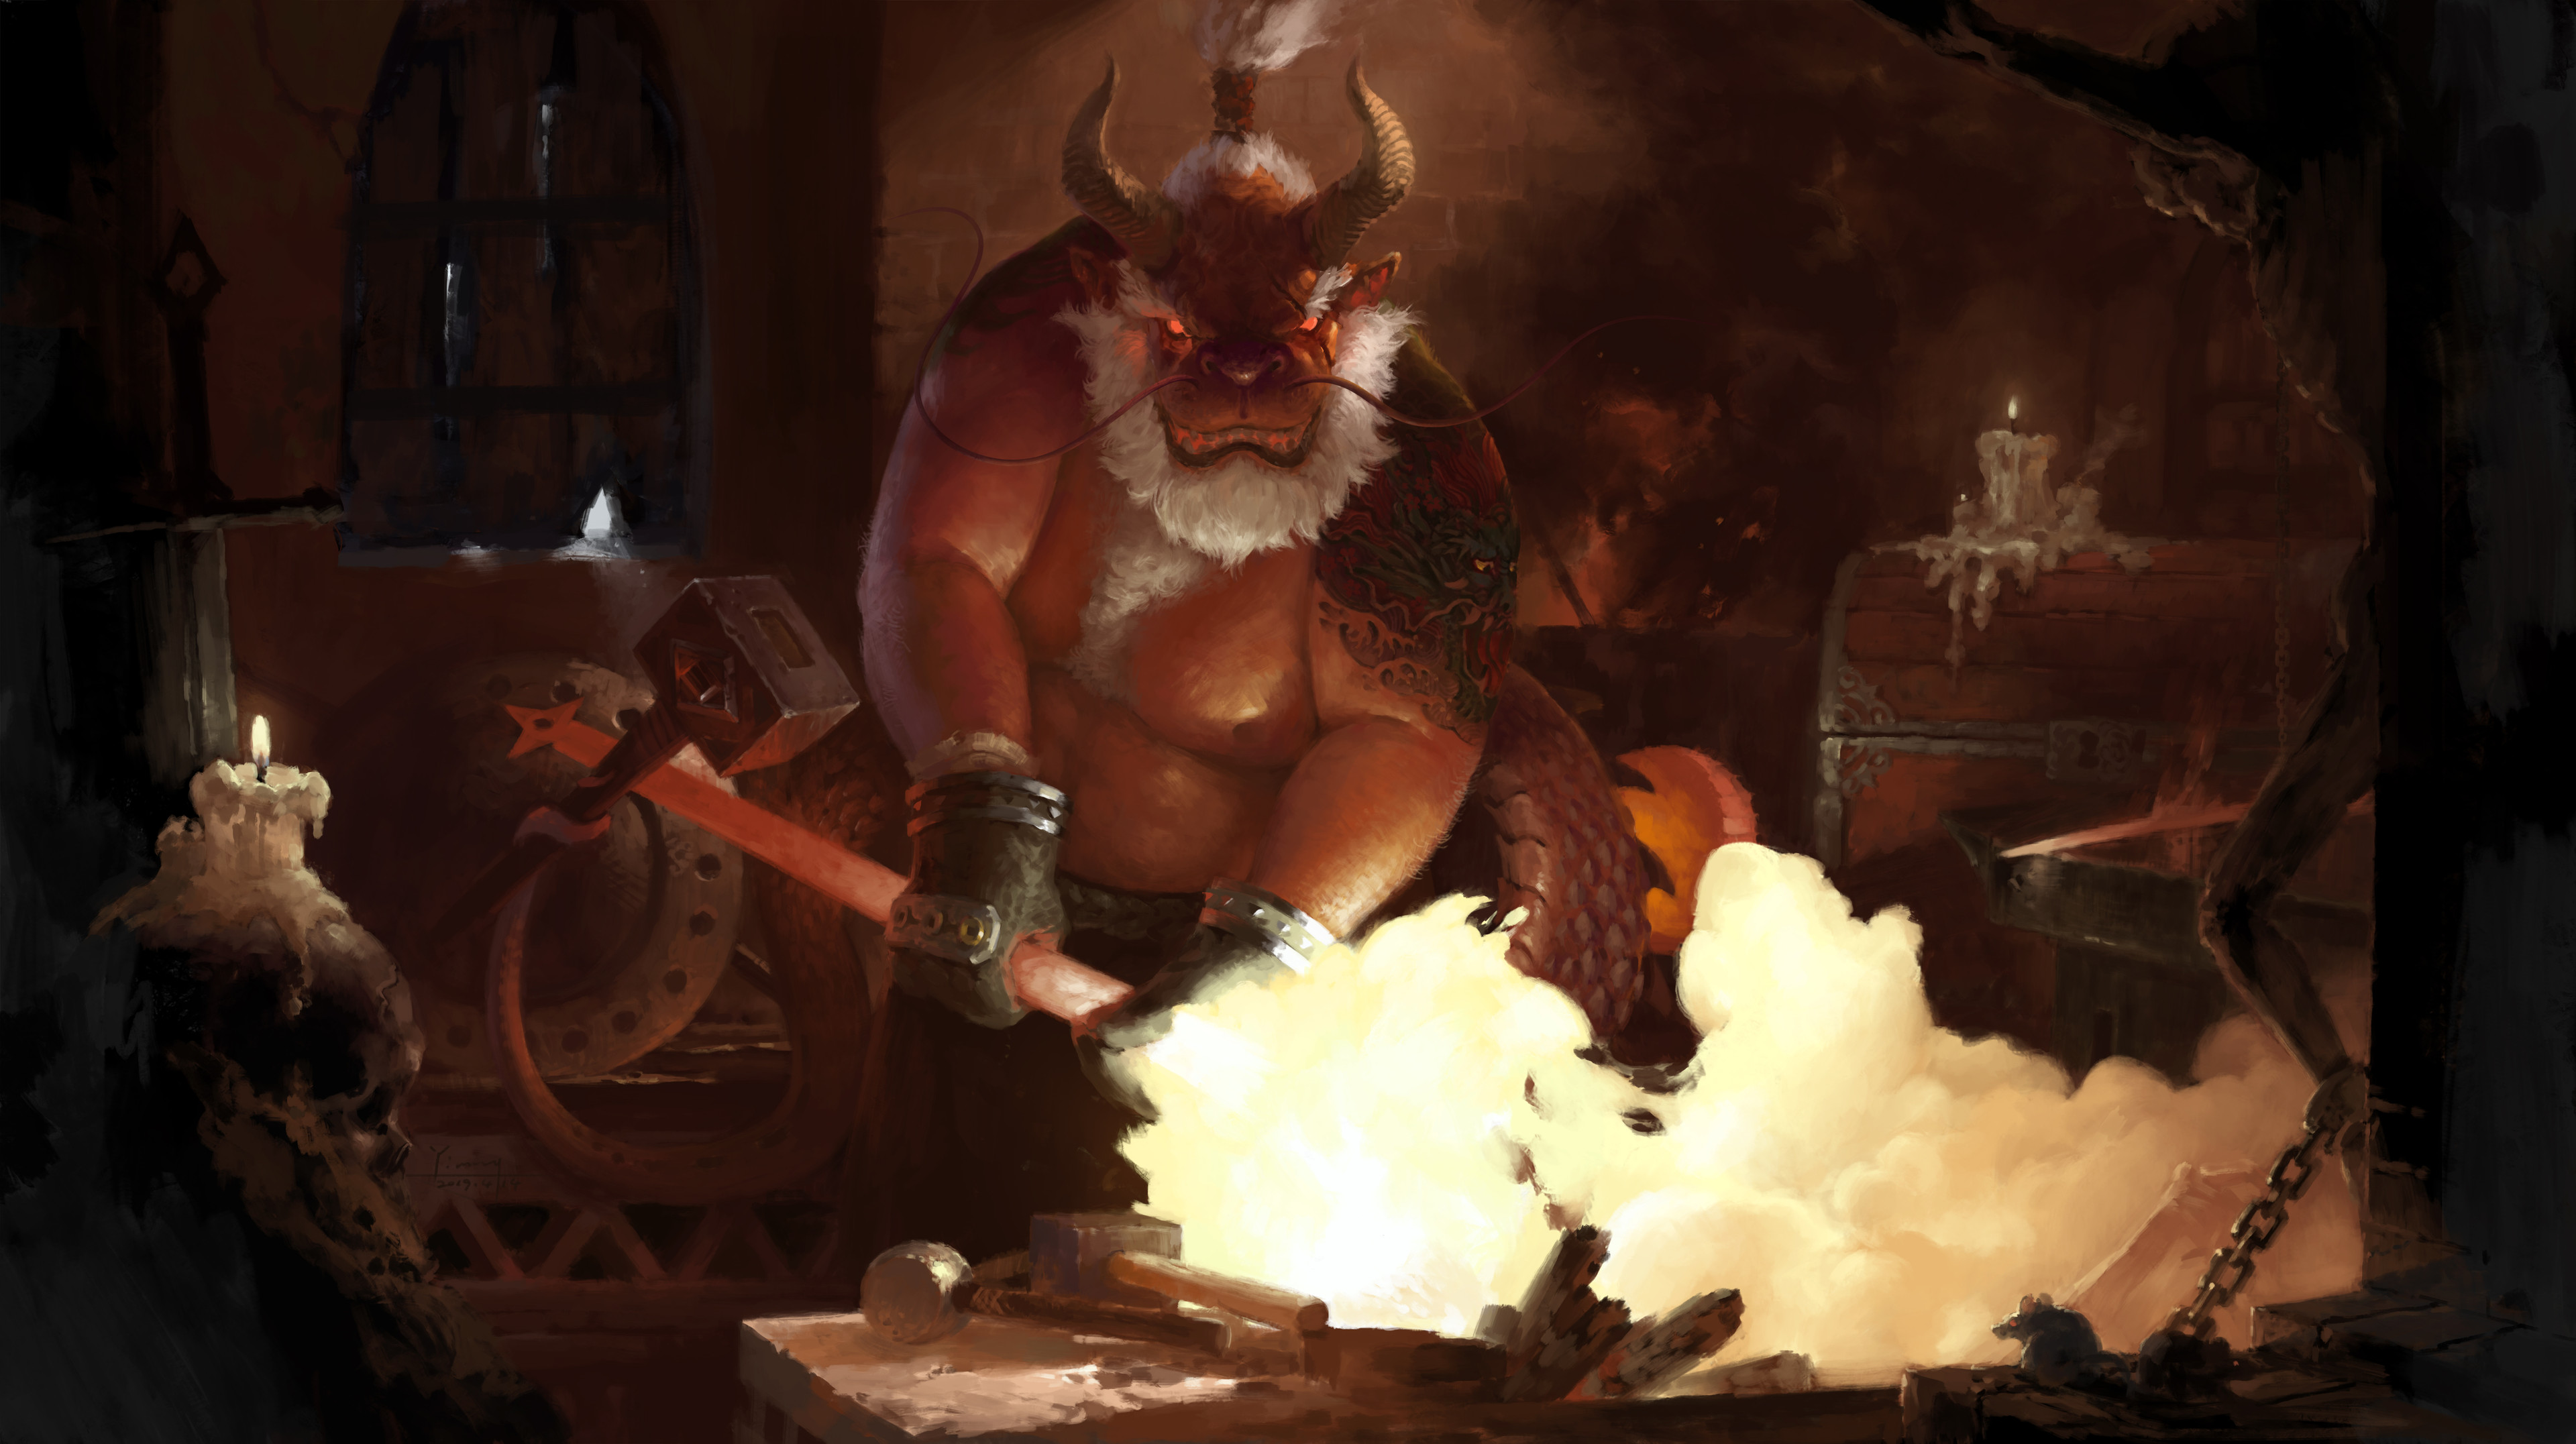
 -->
-->
Mundane Items Crafting
| Mundane Item Kantas Price |
Cost of Materials (as % Price) |
Minimum Upfront Cost (as % of Price) |
|---|---|---|
| 1–1,000 gp | 50% | 100% |
| 1,001–5,000 gp | 45% | 80% |
| 5,001–20,000 gp | 40% | 30% |
| 20,001+ gp | 35% | 10% |
Crafting Collaborators
| Item Size | Maximum Number of Crafters | Examples |
|---|---|---|
| Tiny or Small | 1 | Armour or clothing for a small creature; Boots; Gloves; Jewelry; Potions; Weapons. |
| Medium | 3 | Armour or clothing for a medium creature. |
| Large | 5 | Cart; Horse barding; Tent. |
| Huge | 7 | Row boat; Wagon. |
| Gargantuan | 10 | Galley; Sailing ship. |
Magic Items
Magic items are infinitely more difficult to create than their mundane counterparts. The basic rules outlined for mundane items still apply, but in order to create a magic item several extra resources are required.
The art of crafting magic items is one of extreme difficulty that very few ever truly master.
Resources:
Gathering Materials and Recipe
Firstly, you must have the relevant tool proficiency, to be determined at the DTDMs’ discretion. You must also have either the ability to cast spells—without needing the use of magic items—or proficiency in the Arcana skill.
Secondly, you must meet a minimum character level requirement for the tier of item (see the Magic Items Crafting table).
Thirdly, you must have access to a recipe or blueprint for the item you wish to create. Such recipes are extremely rare, and can likely only be found as part of the reward for quests (see the Magic Items Crafting table for suggested CR), or very rarely purchased at great expense from other artificers.
Finally, you must have the necessary materials. As well as the mundane components (the price of which is listed in the table below), all magic items require specific, magically infused ingredients. Armour of Acid Resistance might require the blood of a Black Dragon, a Frostbrand Longsword might need the gallbladder of an Ice Devil, and the Hat of Disguise might require some skin from a Mimic.
Magic Items Crafting
| Magic Item Kantas Price | Min Level | Taxing DTA slots |
Cost of Materials (as % of Price) |
Recipe CR |
|---|---|---|---|---|
| 1–600 gp | 3 | 2 | 50% | 1–2 |
| 601–1,800 gp | 3 | 3 | 50% | 2–3 |
| 1,801–6,100 gp | 3 | 4 | 45% | 4–8 |
| 6,101–17,400 gp | 6 | 10 | 45% | 9–12 |
| 17,401–31,800 gp | 11 | 20 | 40% | 13–16 |
| 31,801–74,000 gp | 14 | 30 | 40% | 17–18 |
| 74,001+ gp | 17 | 40 | 30% | 19+ |
Magic Consumable Items
The costs and time required to create consumable items such as potions are halved. All other requirements remain the same. Furthermore, brewing Healing Potions and scribing Spell Scrolls have special rules attached to them, outlined here below.
Brewing Healing Potions
Characters can brew healing potions if they are proficient with—and have access to—a Herbalism kit. It is only possible for characters to create Potions of Healing and Potions of Healing (Greater). Anything beyond that requires specialised premises which are beyond the means and knowledge of adventurers.
Healing Potions
| Potion | Time (DTA Slots) | Ingredients Cost | |
|---|---|---|---|
| Potion of Healing | 1 Taxing | 25 gp | |
| Potion of Healing (Greater) | 3 Taxing | 100 gp |
When creating a Potion of Healing (Regular)—and only Regular—characters with the Outlander or Hermit Background can opt to try and source the required ingredients in the wild by making a Wisdom (Survival) check, if proficient. The Healing Potions table reports time a costs needed to brew such potions. The Sourcing Healing Ingredients table reports the possible results.
Sourcing Healing Ingredients
| Check Total | Result | |
|---|---|---|
| 1–9 | You cannot find any ingredients and must pay the full materials cost. | |
| 10–14 | You find some of the ingredients. The materials cost of your Healing Potion is reduced to 20 gp. | |
| 15+ | You find half the rmaterials needed to make the healing potion. The materials cost of your potion is reduced to 15 gp. |
Scribing Spell Scrolls
Scribing a spell scroll takes an amount of time and money related to the level of the spell the character wants to scribe, as shown in the Spell Scroll Costs table. In addition, the character must have proficiency in the Arcana skill and must provide any material components required for the casting of the spell. Moreover, the character must have the spell prepared, or it must be among the character’s known spells, in order to scribe a scroll of that spell.
If the scribed spell is a cantrip, the version on the scroll works as if the caster were 1st level.
Spell Scroll Costs
| Spell Level | Time (DTA slots) | Cost | |
|---|---|---|---|
| Cantrip | 1 Light | 5 gp | |
| 1st | 1 Light | 65 gp | |
| 2nd | 1 Light | 145 gp | |
| 3rd | 1 Taxing | 230 gp | |
| 4th | 2 Taxing | 350 gp | |
| 5th | 4 Taxing | 700 gp | |
| 6th | 6 Taxing | 1,380 gp | |
| 7th | 12 Taxing | 2,860 gp | |
| 8th | 16 Taxing | 5,880 gp | |
| 9th | 20 Taxing | 12,100 gp |
It is worth reminding that a character can only use a spell scroll if the spell is on their class’s spell list. If the spell is of a level higher than they have slots for, they must also make a check against their spellcasting ability (DC 10+Spell Level). If they pass, the scroll is consumed and the spell is cast as normal. If they fail, the scroll is consumed and the spell fails.
Complications
The final step in crafting a mundane or magic item is rolling for complications. If your item requires 5 or less Taxing DTA slots to complete then the chance of complications is 10%. After that, the chances of complications increase by 10% for every 5 Taxing DTA slots spent to a maximum of 30%. The Mundane and Magic Item Crafting Complications tables provide lists of what might happen. Brewing Healing Potions does not involve complications. Crafting a spell scroll is a solitary task, unlikely to attract much attention. Complications that arise are more likely to involve the preparation needed for the activity and are listed in the Scroll Scribing Complications table.
Complications Example
Baine Cinderwoods has just finished creating his new maul in the forge. It took 1 Light DTA slot, so the chance of a complication is 10%. Meanwhile, Varis has just finished the Horseshoes of Speed, which took 10 Taxing slots. Varis' chance of complication is 20%.
Mundane Item Crafting Complications
| d6 | Complication |
|---|---|
| 1 | You hurt yourself while crafting the item. 10 gp in ointments and medicaments will keep you going, but you will have to spend your next available Light DTA slot to have your injury properly checked and treated. |
| 2 | Your tools are stolen, forcing you to buy new ones for yourself and all your collaborators.* |
| 3 | A mistake forces you to buy part of the materials again (30% of the Cost of Materials up to 500 gp). |
| 4 | There is an accident in the crafting of the item and it is ruined in the process. While you can salvage the materials, you will need extra time to complete the crafting. Add 10% of the total Taxing DTA slots needed to the crafting time (rounded up, minimum 1 and maximum 5 slots). |
| 5 | The blueprints, recipe, or instructions you have been following are partially off. You manage to fix the issue at a cost, but at the cost of time and money. Add 10% of the total Taxing DTA slots needed to the crafting time (rounded up, minimum 1 and maximum 3 slots). Also pay 10% of the Cost of Materials up to 250 gp as extra costs. |
| 6 | You complete the item, but something is wrong with the build. You can either keep the item as is and live with the partial defect or fix it for 20% of the total crafting costs incurred up to 500 gp. |
* Might involve a rival.
Scroll Scribing Complications
| d6 | Complication |
|---|---|
| 1 | You bought up the last of the rare ink used to craft scrolls, angering a wizard in town.* |
| 2 | The scroll looks fine upon simple and magical inspection, but when used it will trigger a Wild Magic Surge. |
| 3 | A mistake forces you to buy part of the materials again (30% of the Cost of Materials up to 500 gp). |
| 4 | Due to a strange error in creating the scroll, it is instead a random spell of the same level. You are unaware it is a different spell. The scroll looks fine upon simple and magical inspection. |
| 5 | The rare parchment you bought for your scroll has a barely visible map on it. You have to spend an extra 30% of the Cost of Materials up to 500 gp to make the parchment usable. The map, however, might be of interest. |
| 6 | You scribe the scroll successfully, only for it to be stolen!* |
* Might involve a rival.
Magic Item Crafting Complications
| d6 | Complication |
|---|---|
| 1 | You strain yourself and have one less spell slot of the highest level you have access to. You will have to spend your next available Taxing DTA slot to fully recover. If you do not have access to any spell slots, the recovery time is increased to 3 Taxing DTA slots. |
| 2 | News of what you are making somehow gets out and reaches the ears of someone who wants the item for themselves. You return to your project only to find it has been stolen! You will need to try and get it back! |
| 3 | A mistake forces you to buy part of the materials again (20% of the Costs of Materials up to 500 gp). |
| 4 | An accident in the work process causes a small magical explosion, ruining some of the progress you have made. The cost and time needed to craft the item are increased by 25% from the original requirements, to a minimum of 1 Taxing DTA slot. |
| 5 | Rumours swirl that what you are working on is unstable and a threat. Before you can finish, You are called to answer these rumours and make your case or have the item confiscated and destroyed! You will need to make your case as to why you should be allowed to continue your work, making a Charisma (Persuasion) check. You spend 15% of the Costs of Materials up to 500 gp on a pass or 30% on a fail to put a stop to the rumours (DC to be set by DTDMs). |
| 6 | You cause a small thermodynamic reaction that quickly gets out of hand. You black out from the sudden blast and wake up outside your premises, rescued by passers by, just in time to see the premises go up in flames. The damages amount to 30% of the Costs of Materials up to 300 gp. |
* Might involve a rival.
Crime and Punishment
Sometimes it pays to be bad in Kantas. Only sometimes, mind you. This DTA gives a character the chance to make some extra cash illegally, at the risk of arrest. The punishment for major crimes are however much more severe in Kantas. Given the consequences, only some crimes against property can be carried out as a DTA. For fairness with other players, Crime as a DTA may only be carried out against NPCs.
Other Crimes
Other crimes—and crime against property—might still be committed by characters while adventuring. The Kantas Expanse is home to many different societies and independent settlements. Although no unified codex and policing force is in place against crime, most civilisations have codified the acts that are considered criminal.
If a character commits a crime in the midst of an adventure, its potential consequences will be resolved by the DMs either during or after the session.
Resources:
Planning your crime
A character must spend 1 Taxing DTA slot and at least 25 gp gathering information on potential targets to commit the intended crime. For the brazen few who aim for the biggest hauls, preparation can make the difference between your crime being a failure or a success.
If you have a target in mind, you can carry out the Tailing and Scouting DTA to try and get the edge on your mark. If successful, you can use the pieces of information gained as a modifier for the rolls you make in committing a crime. You can add a +1 bonus to all Crime checks for each piece of information obtained in a previous Tailing and Scouting Downtime activity to a maximum of +3.
The Tailing and Scouting DTA must be carried out spending either a Light or Taxing DTA slot, immediately before the Crime DTA is carried out. If the player decides to do this, the 25 gp needed to carry out the Crime DTA are considered paid if a Taxing DTA slot was used. The cost of the Crime DTA is instead halved in case a Light DTA slot was used.
Resolution:
Executing the Plan
The character must make a series of checks, with the DC for all the checks determined by the the amount of profit sought from the crime (see the Loot Value table). Successful completion of the crime yields a given amount of gold, as shown on the Loot Value table.
To attempt a crime, the character makes three checks: Dexterity (Stealth), Dexterity using Thieves’ Tools, and the player’s choice of Intelligence (Investigation), Wisdom (Perception), or Charisma (Deception).
If none of the checks is successful, the character is caught and jailed. If you are repeatedly caught for your crimes, the DTDMs may rule that other adverse effects may be applied as you become known as a criminal. For example, a permanent +1 to future DC for the Crime DTA, or a permanent −1 to DTA Carousing check.
If only one check is successful, the heist fails, but the character escapes. If two checks are successful, the heist is a partial success, netting the character half the payout. If all three checks are successful, the character earns the full value of the loot.
Loot Value
| DC | Value | Example | DC Increase | |
|---|---|---|---|---|
| 15 | 50 gp | Robbery of a struggling merchant. | +1 | |
| 20 | 100 gp | Robbery of a prosperous merchant. | +2 | |
| 25 | 150 gp | Robbery of a Warehouse. | +3 | |
| 30 | 300 gp | Robbery of one of the richest figures in town. | +4 |
Characters carrying out this DTA with a trained pet might gain extra benefits. See the commands descriptions in the Pet Training section for details.
Complications
A life of crime is filled with complications. Roll on the Crime Complications table if the character succeeds on only one check. If the character has developed a name for themselves or there are other factors involved, the DTDMs might rule that a complication may occur also if the character succeeds on two checks.
Serving Jail Time
If caught and arrested, The character must pay a fine equal to the profit the crime would have earned and must spend the rest of the DT week in jail followed by mandatory public service for each 25 gp of the fine. This service will be spent carrying out unpaid work for the council or Guild in charge in that locale. For the Character, this means they will be available to take part in adventures but will not be able to carry out any other DTAs until their public service is fulfilled.
The DTDMs may exceptionally decide to provide a tailored punishment depending on the nature of the crime committed or other external factors.
Repeat Offenders and Lying Low
Each time you commit a crime in Kantas, you gain some infamy and the chances of being caught or your crime running into complications increases. For each successful Crime DTA you commit, the DC of your next Crime DTA increases by the value shown in the Loot Value table. These modifiers stack and affect your Crime DTA DC until you are arrested and serve jail time.
Alternatively, a Character may decide to lie low and let the attention fade off. For every consecutive DTA week not spent carrying out a Crime DTA, the modifier total is reduced by 1.
Crime Complications
| d6 | Complications |
|---|---|
| 1 | You injure yourself in the process of trying to commit the crime, hampering your progress. You got away but need to spend the next week to fully recover. You lose your next available Taxing DTA slot while recovering. The gold value of your stolen loot is halved. |
| 2 | The stolen loot reserves you an unexpected surprise: a cursed item. The DTDMs will provide you with the item description. |
| 3 | You were seen or otherwise left some tell-tale clue behind that leads the Victim to you. They can’t prove you did it but they know you did. You lose all your contacts, if you have them from previous DTAs, and cannot make new ones for your next 2 available DTA slots. The gold value of your stolen loot is halved due to the extra discretion needed to fence it. |
| 4 | The stolen loot is not what you expected it to be. The items you obtained are extremely recognisable and any attempt to fence them will likely lead back to you. You may add one random trinket item from the Sample Trinkets Table in the Player’s Handbook, but obtain no gold as a result of this DTA. |
| 5 | You targeted someone who was under a local crime lord’s protection, who now wants revenge. You are beaten up by their thugs and your stolen loot is taken away. |
| 6 | Your victim calls in a favour from a guard, doubling the efforts to solve the case. Until you are caught, the DC Increase on your future Crime DTA is doubled and lying low takes twice as much. |
Gambling
Games of chance are a way to make a fortune—and perhaps an even better way to lose one. A character may decide to spend their downtime visiting a gaming den to take part in a game of chance and try their luck against other like-minded people. In the DT safe zone various establishments in which characters can try their luck. Dice games that characters might play are: Highest Watchtower; Ship, Captain, and Crew; Bunco; Greed; Robbing the Djinni; Six Dice Bluff; Orc Dice.
Resources:
Gathering Your Stake
The Gambling DTA can be carried out by spending either 1 Light or 1 Taxing DTA slot. Only 1 Light DTA slot per DT week can be spent for the Gambling DTA. This activity also requires stake of at least 25 gp, up to a maxiumum of 50 gp when a Light DTA slot is spent, or 100 gp when a Taxing DTA slot is spent.
Resolution:
Testing Your Luck
The character must make a series of opposed checks against a named NPC gambler if present or checks with a DC determined at random. Part of the risk of gambling is that one never knows who might end up sitting across the table.
The character and, if present, the named gambler NPC make three opposed checks: Wisdom (Insight), Charisma (Deception), and Charisma (Intimidation). If the character has proficiency with an appropriate gaming set or Dexterity (Sleight of Hand), that proficiency can replace the relevant skill in any of the checks. The NPC rolls using 2d10 instead of 1d20. If a named gamble NPC is not present, the DC for each of the checks is 5 + 2d10; generate a separate DC for each one. Consult the Gambling Results table to see how the character did.
Before rolling for complications and after the Gambling Results are determined, if 0 or 1 successes were achieved, the character can double the stake and Gamble again once. The results of both rounds of gambling add up in this case. The limit for the stake is tripled for this second round of Gambling.
Gambling Results
| Successes | Winnings | |
|---|---|---|
| 0 | Lose your stake, and accrue a debt equal to that amount. | |
| 1 | Lose half your stake + opponent's highest modifier. | |
| 2 | Gain one and a half your stake + opponent's highest modifier. | |
| 3 | Gain double your stake + opponent's highest modifier. |
Complications
Gambling tends to attract unsavory individuals. The potential complications involved come from run-ins with the law and associations with various criminals tied to the activity. Every 1 Light DTA slot spent gambling brings a 5% chance of a complication. Every 1 Taxing DTA slot spent gambling brings a 10% chance of a complication. The Gambling Complications table lists complications that might arise for characters.
Gambling Complications
| d6 | Complication |
|---|---|
| 1 | You are accused of cheating, whether you actually did or not! Any winnings you have and your original wager have been lost as you are kicked out of the game. |
| 2 | An influential person in town loses badly to you and loudly vows to get revenge. Your next DTA is made with Disadvantage as they actively try to hamper your efforts. |
| 3 | A local Crime boss insists you return so they can win their money back. Your next available Light DTA slot must be spent Gambling with a doubled wager than this visit (the wager can go above 50 gp in this case). |
| 4 | You are targeted by local thieves seeing you leave the game. They pick your pockets for 10d6 gp. |
| 5 | The town Guard raid the game and you land in jail. You may attempt a Charisma (Persuasion) or Charisma (Deception) Check to convince the guard you haven't done anything wrong or pay your own bail (10d6 gp). If you fail to persuade them and cannot afford bail, you lose your wager and winnings and must spend your next Taxing DTA slot performing community service (ie., you don’t have a DTA slot the following DT week). The DTDMs to set Charisma (Persuasion) or Charisma (Persuasion) Check (DC 2d10+5). |
| 6 | Someone is accused of cheating and a fight breaks out. You are injured as a result and need to spend time recovering. You cannot perform any DTAs for the next 2 DT weeks. |
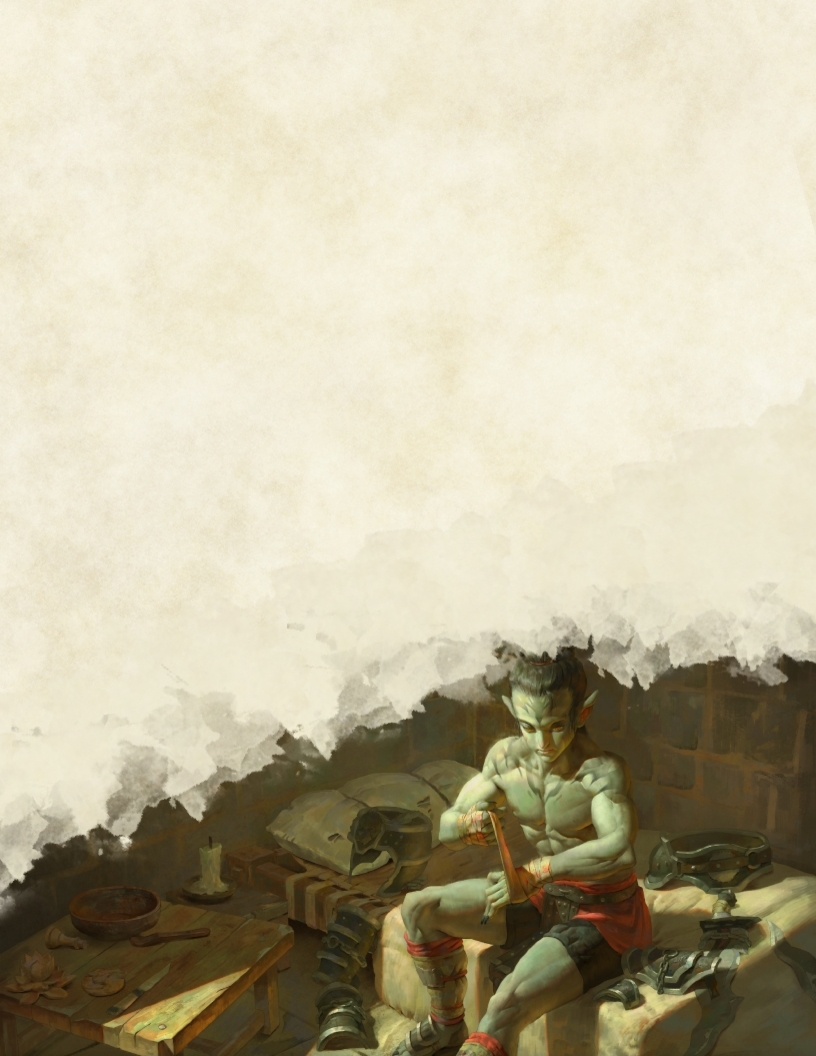
Pit Fighting
As expected in a land full of adventurer’s—almost—everybody loves a good fight! Between adventures, a character may choose to take part in the local fight pits to earn a living for themselves, and maybe a name as well. In the DT safe zone there are fighting arenas a character can compete in. Characters can face off against other combatants wanting to test their abilities.
Resources:
Entering the Pits
The Pit Fighting DTA can be carried out by spending either 1 Light or 1 Taxing DTA slot. Only 1 Light DTA slot per DT week can be spent for the Pit Fighting DTA. The fights here are purely martial, focusing on the combatants ability to fight. No magic is allowed but Magical weapons are permitted.
Resolution:
There Can Be Only One
The character takes part in a series of fights culminating in one last contest against an NPC from a roster of fighters. The character will make three competing checks against their opponent, a Strength (Athletics) Check, a Dexterity (Acrobatics) check and a special Constitution check using your highest Hit die as a modifier. The character can replace one of these checks with a weapon attack.
Pit Fighting Results
| Successes | Winnings | |
|---|---|---|
| 0 | No gold is earned. | |
| 1 | 10 gp + opponent's highest modifier. | |
| 2 | 20 gp + opponent's highest modifier. | |
| 3 | 30 gp + opponent's highest modifier. |
The number of successful opposed checks determines the winnings according to the Pit Fighting Results table. Winnings are halved if a Light DTA slot was spent.
Characters carrying out this DTA with a trained pet might gain extra benefits. See the commands descriptions in the Pet Training section for details.
Complications
Fighting for money naturally may come with its own complications. Shady characters trying to fix fights, accidental injuries and sore losers are not unheard of among the fighters. Every 1 Light DTA slot spent fighting brings a 5% chance of a complication. Every 1 Taxing DTA slot spent fighting brings a 10% chance of a complication. The Pit Fighting Complications table lists complications that might arise for characters.
Pit Fighting Complications
| d6 | Complication |
|---|---|
| 1 | An opponent swears to take revenge on you.* |
| 2 | A crime boss approaches you and offers to pay you to intentionally lose a few matches.* |
| 3 | You defeat a popular local champion, drawing the crowd’s ire. |
| 4 | You defeat a noble’s servant, drawing the wrath of the noble’s house.* |
| 5 | You are accused of cheating. Whether the allegation is true or not, your reputation is tarnished.* |
| 6 | You accidentally deliver a near-fatal wound to a foe. |
* Might involve a rival
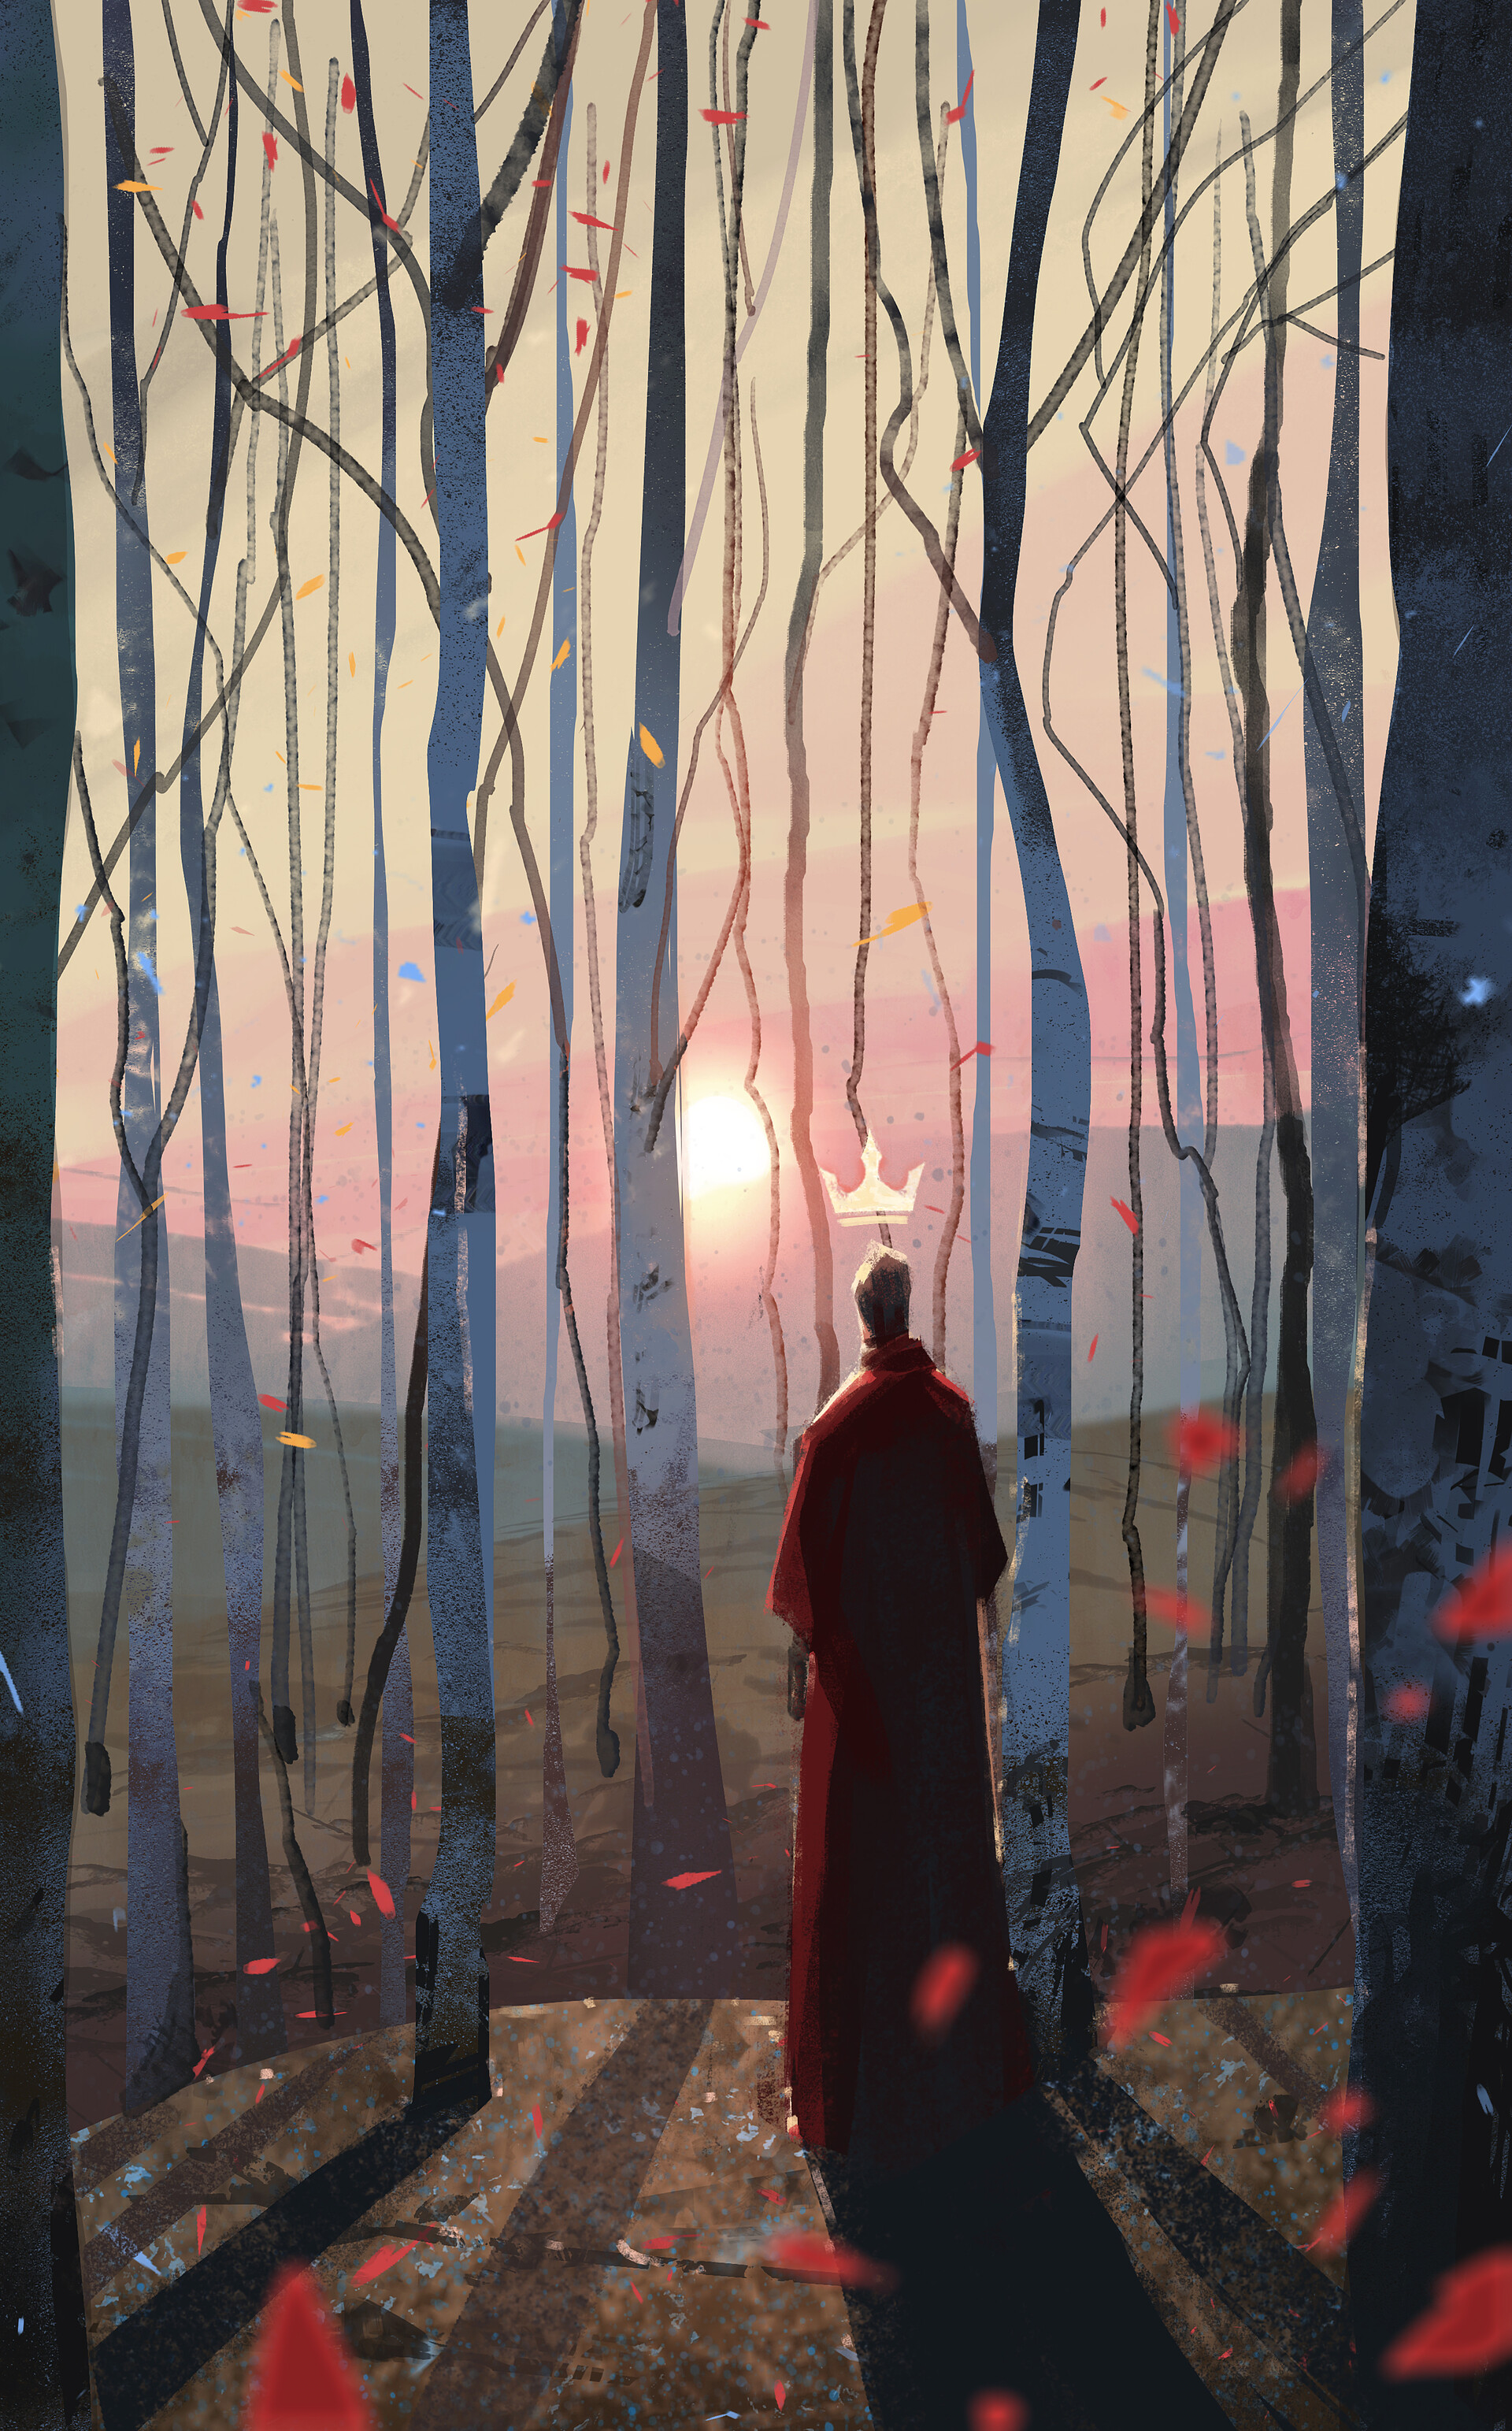
 -->
-->
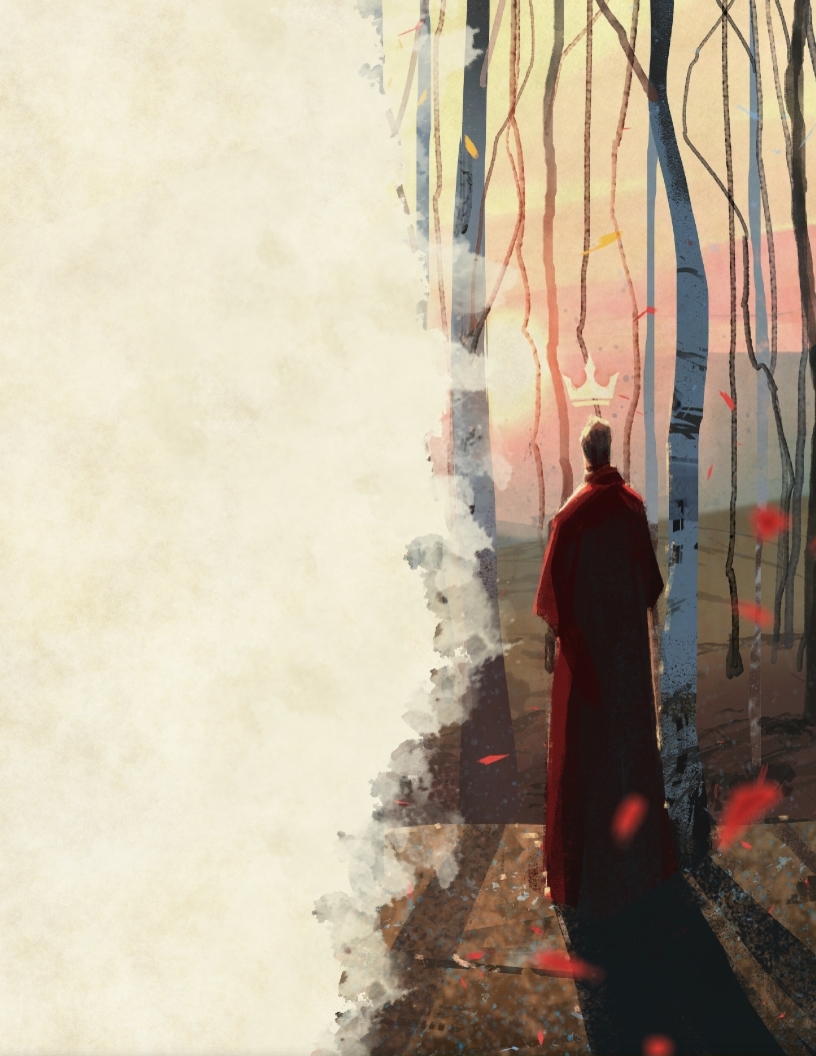
Relaxation
A character may decide to get themselves so good old fashioned Rest and Relaxation in the DT safe zones after a particularly trying adventure, taking some time to rest and recover from the hardships that come with a life of adventure. Daring Heights, Port Ffirst and New Hillborrows have baths and other amenities that can cater to characters looking to unwind.
Resources:
Taking Time Off
Proper relaxation requires you to take your time. This DTA can be carried out spending either 1 Light or Taxing DTA Slot. The character must also be maintaining at least a modest lifestyle for the duration of the DT week to receive the benefits of this activity. Only 1 Light DTA slot per DT week can be spent for the Relaxtion DTA.
Resolution: Unwinding
Characters who maintain at least a modest lifestyle while relaxing gain several benefit.
If a Light DTA slot was spent relaxing, a character gains +1 on their next saving throw. If a Taxing DTA slot was spent, a character can choose to either: gain +2 to their next saving throw; end one effect that keeps them from regaining hit points; restore one ability score that has been reduced to less than its normal value. This benefit, however, cannot be used if the harmful effect was caused by a spell or some other magical effect with an ongoing duration.
Characters carrying out this DTA with a trained pet might gain extra benefits. See the commands descriptions in the Pet Training section for details.
Complications
Complications arising from Relaxation are rare, so no complications roll is required for this DTA, but the DTDMs may decide to introduce one tied to recent events or activities in exceptional circumstances. The Relaxation DTA does provide, however, an opportunity to narratively explore how the character recovers from illness or injury and provide some further insight into character progression.
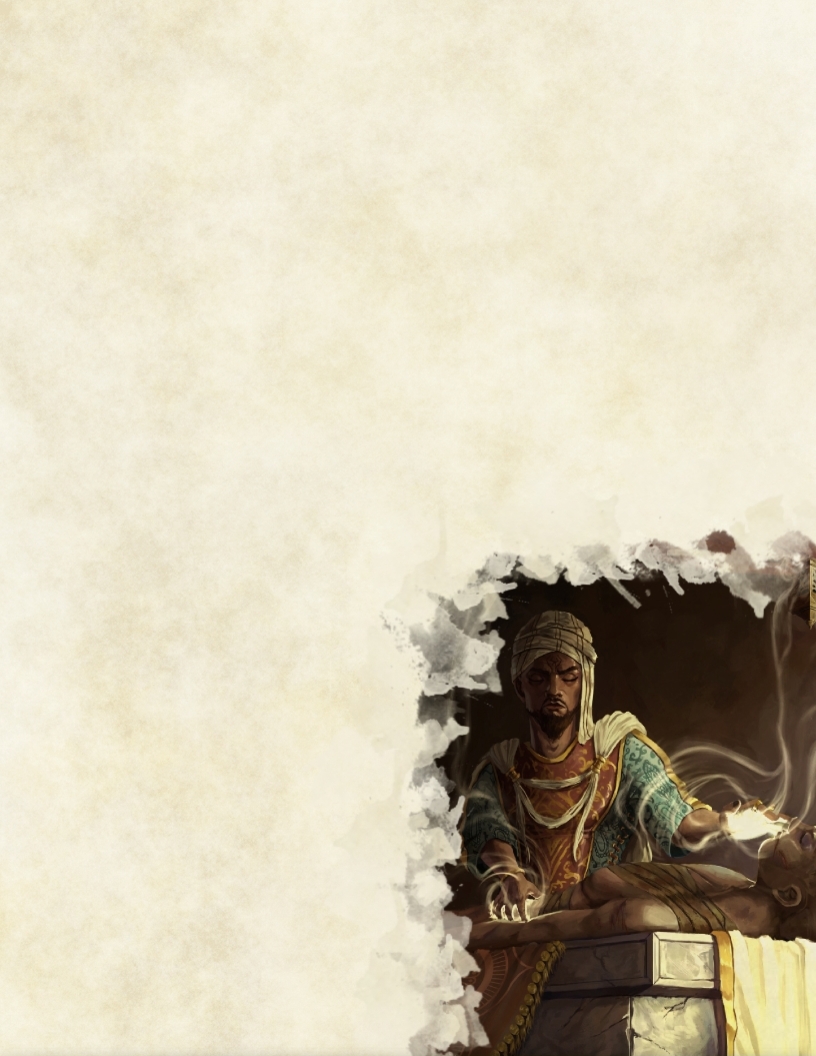
Religious or Civil Service
Characters of a religious persuasion, or those simply wanting to do something good in their community can carry out the Religious or Civil Service DTA and potentially benefit from it. Putting your skills to use for the benefit of the community is likely to be rewarded with kindness in Kantas.
Resources:
Finding Faith
Performing religious or civil service requires access to, and often attendance at either a temple (or a similar place of worship and faith), or a civic institution whose beliefs and ethos align with the character’s. If such a place is available, the Religious or Civil Service DTA can be carried out spending either 1 Light or Taxing DTA Slot. No expenditure of gold is required. Only 1 Light DTA slot per DT week can be spent for the Religious or Civil Service DTA.
Resolution:
Lending a Hand
The character attempts to gain a favour from the institution they volunteer at for a week, potentially helping with services for the institution and the community at large.
At the end of the required time, the character chooses to make either an Intelligence (Religion), a Strength (Athletics), a Intelligence (History), a Wisdom (Medicine), or a Charisma (Persuasion) check. If a Taxing DTA slot was spent, add a +2 bonus to the roll. The total of the check determines the benefits of service, as shown on the Religious or Civil Service table.
Religious or Civil Service
| Check Total | Result | |
|---|---|---|
| 1–12 | Your efforts are appreciated, but this time you have not earned a favour. | |
| 13–21 | You earn one favour. | |
| 22+ | You earn two favours. |
A favor, in broad terms, is a promise of future assistance from a representative of the institution. It can be expended to ask for help in dealing with a specific problem, for general political or social support, or—with the DTDMs approval based on the circumstances of the service—to reduce the cost of cleric spellcasting by 50%.
A favour could also take the form of a deity’s intervention, such as an omen, a vision, or a minor miracle. This latter sort of favor is at the discretion of the DTDMs, who also determine its nature, and is without mechanical implications.
Favors earned need not be expended immediately, but only a certain number can be stored up. A character can have a maximum number of unused favours equal to 1 + Charisma Modifier (minimum of 1 unused favor).
Complications
Temples and civil institutions can be labyrinths of political and social scheming. Even the best-intentioned priests and administrators can fall prone to rivalries. A character risks becoming embroiled in such struggles. Every 1 Light DTA slot spent volunteering brings a 5% chance of a complication. Every 1 Taxing DTA slot spent volunteering brings a 10% chance of a complication, examples of which are on the Religious Service Complications table.
Religious or Civil Service Complications
| d6 | Complication |
|---|---|
| 1 | You have offended a priest or administrator through your words or actions.* |
| 2 | A fistfight is still a fistfight, even if got involved in it by accident. |
| 3 | You accidentally lose the donations of the week and have to reimburse the institution with 4d6 gp. |
| 4 | The administration misunderstands your intentions, thinking you are an undercover investigator. |
| 5 | The administrators implore you to take up a crucial quest to help them. |
| 6 | You accidentally discover that an important person at the institution is a fiend worshiper.* |
* Might involve a rival

Research
Knowledge is power, sometimes. The Research DTA allows a character to delve into lore concerning a creature type, a location, or a magic item. However, the amount of information that can be gained by characters in downtime is often limited. Thus, a narrow research focus is required.
Resources:
Investing in Research
A character needs access to a library or a sage in one of the DT safe zones to conduct research. Alternatively, a character can try to piece together official knowledge with rumors and legends. The DTDMs determine if suitable sources are available to a character given the declared focus.
Conducting Research requires 1 Taxing DTA slot and at least 100 gp spent on materials, bribes, gifts, and other eventual expenses.
Resolution:
Gathering Knowledge
The character declares the focus of the research. The focus has to be either:
- one creature of any of the types specified in the Monster Manual, but not a named individual
- one specific location within a city or in the wilderness
- one magic item
The focus can be existing or legendary. The focus cannot be extended to entire races, countries, or general knowledge fields. For example it cannot be “to learn as much as I can about how to travel the planes”. On the contrary, and acceptable focus could be: “to learn as much as I can about this forked rod I have seen (or heard about) used (or mentioned) as a required component for plane travelling.”
The character makes an Intelligence (Investigation) check with a +1 bonus per 100 gp spent beyond the initial 100 gp, to a maximum of +3. The DTDMs can exceptionally allow other Intelligence-based skills and even Charisma (Investigation) checks depending on the circumstances of the research.
In addition, a character who has access to a particularly well-stocked library or knowledgeable sages gains advantage on this check. A character can also call in a favor from one allied contact gained as a result of the Carousing DTA—thus spending it—to gain a bonus. Determine the information learnt using the Research Outcomes table.
Contact Bonus
The bonuses granted to a Research DTA by using a contact earned through the Carousing DTA depend on the contact class. A Lower-class contact would give a +1 bonus, a Middle-class contact would give a +2 bonus, and an Upper-class contact would confer a +3 bonus.
Each piece of lore
is the equivalent of one
true statement about a creature,
location, or item. Examples include
knowledge of a creature’s resistances,
the password to a sealed dungeon level,
a hidden entrance, or the type of a creature that guards a location. The DTDMs—in consultation with the Kantas DMs and Worldbuilders—determine what is learnt.
Research Outcomes
| Check Total | Outcome | |
|---|---|---|
| 1–5 | You gather no useful information. | |
| 6–10 | You learn one minor piece of information. | |
| 11–20 | You learn one piece of information. | |
| 21+ | You learn two pieces of information. |
Complications
The greatest risk in research is uncovering false information. Not all lore is accurate or truthful, and rival might plant false information, bribe sages to give bad advice, or steal key tomes needed to find the truth. In addition, a character might run into other complications during research. Every 1 Taxing DTA slot spent in Research brings a 10% chance of a complication, examples of which are on the Research Complications table.
Research Complications
| d6 | Complication |
|---|---|
| 1 | You accidentally damage a rare book or anger a powerful local figure |
| 2 | You offend a sage or another powerful local figure, who demands an extravagant gift.* |
| 3 | If you had known that book or trinket was cursed, you never would have opened it or used it as a bribe. |
| 4 | A sage or another powerful local figure becomes obsessed with convincing you of a number of strange theories about your research focus and is angered by your stubbornness.* |
| 5 | Your actions cause you to be banned from a library or inn until you make reparations.* |
| 6 | You uncovered useful lore, but only by promising to complete a dangerous task in return. |
* Might involve a rival
Tailing and Scouting
This downtime activity allows a character to gather information about an individual or—potentially—a suspicious location in one of the DT safe zones. A character needs to be furtive and alert to gather information without being spotted or otherwise noted.
Resources:
Staking Your Target
Tailing and scouting requires 1 Light DTA slot and 10 gp spent on materials, bribes, gifts, and other expenses. The player may also choose to dedicate more time and resources to this activity, thus electing to spend 1 Taxing DTA slot and spending an additional 150 gp to increase their chances for success. The DTDMs might rule the activity impossible given special circumstances or increase the minimum downtime and/or gold required for an attempt.
Resolution:
Gathering Intel
The character declares the focus of the tailing or scouting - namely, a specific individual or place. At the end of the activity, the character makes a Dexterity (Stealth) check against the target Passive Perception or a set DC to be determined by the DTDMs based on the circumstances). You have a +3 bonus if a Taxing DTA slot is being spent. In exceptional circumstances (eg., access to a particularly knowledgeable informant), the DTDMs might award advantage on this check. On a failed check, you are caught in the act and must roll for a complication on the Stealth Check Complication table.
Once you have completed the Dexterity (Stealth) check, you may then make an Intelligence (Investigation) check to determine how much information you learn using the Tailing and Scouting Outcomes table. If a Taxing DTA slot was spent, the +3 bonus will also be added to your Intelligence (Investigation) check. Remember, some complications may affect how much information you gain.
Tailing and Scouting Outcomes
| Check Total | Outcome | |
|---|---|---|
| 1–5 | No information gained. | |
| 6–10 | Only minor or unverified new information is gathered on an individual or place. | |
| 11–15 | You learn one piece of information on an individual or place. | |
| 16–20 | You learn two pieces of information on an individual or place. | |
| 21+ | You learn three pieces of information on an individual or place. |
Each piece of information is the equivalent of one true statement about an individual or place that can help the character further their objectives.
The DTDMs—in consultation with the Kantas DMs and Worldbuilders—determine what information you learn. For an individual, the DTDMs might reveal routines, movements, or meetings. For a place, the DTDMs might reveal secrets about it, such as a hidden entrance, or the nature of a creature that guards the place.
Characters carrying out this DTA with a trained pet might gain extra benefits. See the commands descriptions in the Pet Training section for details.
Complications
The greatest risk in tailing and scouting is getting caught, whether by the target you are tailing or by someone else in the area. Getting caught might have immediate repercussions, or allow the character to be led astray, especially if the object of the tailing is another individual or an entity controlling a place. False information might be gathered in that case, or crucial information on the character’s plans might be revealed inadvertently.
In addition to the complications relating to Tailing a target, a character might run into other complications during their investigation. Downtime spent tailing a subject brings a 10% chance of a complication, examples of which are on the Investigation check Complications table.
Stealth Check Complications
| d6 | Complication |
|---|---|
| 1 | The person or group you are tailing notices you and sets an ambush. You gain no information, and are beaten bloody. You need rest and cannot perform other DTA for your following 2 available DT weeks. |
| 2 | The person or group you are tailing notices you, taking note of your appearance and marking you down as a potential threat. You manage to slip away but now have a new Enemy. You gain no information. |
| 3 | The Local Watch or some other authority catches you tailing your mark and arrests you. You gain one less piece of information. You may also need to talk or bribe your way out of jail. Failing to get out will prevent you from carrying out other DTA in your next available DT week. The DTDMs to set DC for Charisma (Persuasion or Deception) roll or Bribe cost. |
| 4 | A local thieves guild takes notice of you, and attempts to blackmail you with knowledge of your activities. |
| 5 | The person or group you are tailing notices you and begins trying to investigate you! You need to keep a low profile to keep them off of your trail, making your investigation more difficult. When making your Intelligence (Investigation) check, roll with disadvantage. |
| 6 | After a while, you lose sight of your mark and have to return to your lodgings. Upon arrival, you discover that someone has lightened your purse. You lose 2d10 x 5 gp. |
Investigation Check Complications
| d6 | Complication |
|---|---|
| 1 | You discover the person or group you were investigating was expecting to be followed and have set a convoluted system to prevent being discovered. There is a possibility that all of the information you have collected, if any, may be false. |
| 2 | You attract the attention of another individual or group who is investigating your target. They might be persuaded to collaborate (for the right price), or they might want to get rid of a potential rival. |
| 3 | You attract the attention of local thugs and have to pay them off 10 gp to avoid blowing your cover. |
| 4 | The person or group you are tailing notice you and manage to lead you astray. You make any future Dexterity (Stealth) checks for Tailing and Scouting against them with disadvantage. One of the pieces of information you gain, if any, might also be false. |
| 5 | One of your informants is secretly in league with your target. One of the pieces of information you gain, if any, might be false. |
| 6 | One of your informants accidentally lets it slip you are tailing your target. People now know you are out investigating something. The next Intelligence (Investigation) check made as part of a DTA will be made at disadvantage. |
Training: Languages and Tools
It’s never too late to learn something new! In between adventures, your character can spend their time learning something new that might aid them in their future endeavours. Whether it’s learning a new language or learning to use a new set of tools, self improvement is an excellent way to spend time in preparing for the future.
Resources:
Finding a Teacher
In order to learn effectively, your character will need a teacher who is proficient in the desired language or tool set. The teacher may be either another character who agrees to help or a suitable NPC your character has met previously. This DTA can be carried out spending either Light or Taxing DTA slots over multiple DT weeks. Only 1 Light DTA slot per DT week can be spent for this DTA.
When training is provided by an NPC, The DTDMs must authorise use of the NPC prior to starting and will declare the cost your character must pay to them for the training. Typically, this will be 12 gp per Light DTA slot worth of training. The DTDMs may rule this price is increased or decreased based on the specific situation or relationship you have with that NPC.
When training is provided by another character, the terms of the training may be established directly between the two characters. For every DTA slot spent training by the trainee, the teacher must also spend 1 Light DTA slot.
Resolution:
Learning New Skills
Learning a language or new set of skills is a long process and requires consistent effort. Ultimately, the DTDMs will rule how much time is required to learn a language or tool proficiency, however, you can refer to the Language and Tools Training table for a guide on the expected number o required Taxing DTA slots—or Light slots equivalent.
When learning a new language, the learning time is further reduced by 1 Taxing DTA slot if the learner already knows at least 4 languages.
Keeping at it
Consistent learning is required to effectively retain the training you undertake. From the second consecutive DT week away from your training onwards, you will lose one week of progress already made for each week of missed training. A character may spend 1 Light DTA slot practicing without a teacher to prevent the loss of progress, however, this may not be done over consecutive weeks.
Language and Tools Training
| Language / Tool | Examples | Learning Time (Taxing DTA Slots) |
|---|---|---|
| Tool sets / Gaming Sets | Any set | 10 − INT Modifier |
| Language: Material plane / Humanoid | Elvish, Dwarvish | 10 − INT Modifier |
| Language: Bestial / Magical | Draconic, Goblin | 15 − INT Modifier |
| Language: extra Planar | Abyssal, Celestial | 20 − INT Modifier |
Complications
Complications that arise while training typically involve the teacher. Training up to 10 Taxing DTA slots brings a 10% chance of a complication. Each extra Taxing DTA slot spent on training adds a 2% chance.
Training Complications
| d6 | Complication |
|---|---|
| 1 | Your teacher disappears before your training is completed, forcing you to spend time and resources in finding another one. Your learning time increases by 2 Taxing DTA slots or you pay extra 5 gp x Taxing DTA slots required for learning time to quickly find a replacement. |
| 2 | Your teacher has a strange method of teaching that makes it difficult to learn. Make an Intelligence check (DC15) to attempt to adjust to it. On a failed check, your learning time increases by 30%. On a success, your learning time increases by 15% (rounded up). |
| 3 | You agree to help your teacher with a project they are working on without asking for details. Your next available taxing DTA slot must be spent carrying out the crime DTA as you help them "acquire" some rare materials. (Crime DTA DC15). Alternatively you will have to pause the training and wait 3 extra available DT weeks to gain the new proficiency. |
| 4 | Your teacher has taught you a rather obscure dialect of the chosen language or an obsolete set of practices with the chosen tool. Your learning time increases by 2 Taxing DTA slots or you need to pay another teacher 15% of the original full training cost extra (maximum 100 gp) to get you up to speed immediately. |
| 5 | You get into a heated argument with your teacher who now refuses to train you unless you pay 30% of the full training cost extra (maximum of 150 gp). |
| 6 | Your teacher completes your training, but only on the promise that you teach them a new language or tool proficiency too. For the next 1d4 available DT weeks, you must use 1 light DTA slot each week providing training. |
Training: Physical and Martial
When it comes to using a weapon, like most things, practice makes you perfect. A character can choose to spend their downtime by training to give themselves an edge on their next adventure by sharpening the skills they already have.
Training can take many forms and provides an excellent opportunity for narrative development to show progression of the character. You should consider what kind of training they would be doing when taking this activity. Will they be testing their endurance, running or swimming over long distances? Maybe they will diligently practice some form of Kata sequence of exercises? Perhaps it may be sparring with another combatant for a more practical application of techniques?
Resources:
Finding Your Mentor
The Training: Physical and Martial DTA can be carried out spending either 1 Light DTA or 1 Taxing DTA slot. Only 1 Light DTA slot per DT week can be spent for the this DTA.
Access to a person willing to train you is also required. This person needs to be suitable to the training you are undertaking. For example, someone skilled in combat or with proficiency in the weapon you are training with.
The person training you can be an NPC or another character of a higher level than you. If another character is training you, you are free to negotiate the costs and details of this training together with the other player. If you wish for an NPC to train you, you will need to have a narrative reasoning for them to want to help you and should speak to the DTDMs to confirm. The DTDMs will also determine if the NPC requires payment in exchange for the training.
Resolution:
Wax on, Wax off
The character hones their skills practicing under the tuition of their chosen teacher. No Ability checks are needed for this activity.
Once the training is complete, the character gains a +2 modifier to their next attack roll with the relevant weapon they trained with in session in case 1 Light DTA slot was spent, or two attack rolls in case 1 Taxing DTA slot was spent.
Complications
Training like this rarely comes with any complications, the cost and training being agreed directly with the trainer before the activity begins. No complications roll is required for this activity.
Work
When all else fails, an adventurer can turn to an honest trade to earn a living. This activity represents a character’s attempt to find temporary work, the quality and wages of which are difficult to predict.
Resources:
Doing Honest Work
The Work DTA can be carried out by spending either 1 Light or 1 Taxing DTA slot. Only 1 Light DTA slot per DT week can be spent for the Work DTA.
Resolution:
Earning Your Keep
To determine how much money a character earns, the character makes an ability check: Strength (Athletics), Dexterity (Acrobatics), Intelligence using a set of tools, Charisma (Performance), or Charisma using a
musical instrument. If a Taxing DTA slot was
spent, add a +2 bonus.
Consult the Wages
and Earnings table to see how much money
is generated according to the total
of the check.
Wages and Earnings
| Check Total | Outcome | |
|---|---|---|
| 1–11 | Poor lifestyle for the week. | |
| 12–16 | Modest lifestyle for the week. | |
| 17–20 | Comfortable lifestyle for the week. | |
| 21+ | Comfortable lifestyle for the week, plus 25 gp. |
Characters carrying out this DTA with a trained pet might gain extra benefits. See the commands descriptions in the Pet Training section for details.
Complications
Ordinary work is sometimes not free from its own complications. Every 1 Light DTA slot spent working brings a 5% chance of a complication. Every 1 Taxing DTA slot spent working brings a 10% chance of a complication. Consult the Work Complications table to determine which complication arises, if needed.
Work Complications
| d6 | Complication |
|---|---|
| 1 | A difficult customer or a fight with a coworker reduces the wages you earn by one category. |
| 2 | Your employer’s financial difficulties result in your not being paid. |
| 3 | An accident at work resulting in you breaking some important equipment or supplies. You are required to pay 4d4 gp for its repair. |
| 4 | You cause an injury to a coworker and have agreed to cover their shift while they heal. Your next available Taxing DTA Slot must be spent covering their work shift, for which you gain no pay. |
| 5 | You are accused of gross misconduct in the workplace. Stealing stock, leaving work early or possibly indulging in illegal activity while at work. You are barred from working there ever again and won’t find new opportunities for the Work DTA in your next available 2 DT weeks. |
| 6 | You gain a reputation for laziness (unjustified or not, as you choose), giving you disadvantage on checks made for the Work DTA for the next 3 times you perform it. |
 -->
-->
Background Features and Downtime
Some Background Features give characters access to special DTAs. If you think your characters’ background should open up new options for them, you can always ask the DTDMs to consider new additions to this list.
By Popular Demand
You can always find a place to fight for entertainment (such as a gladiatorial arena or a secret fighting club) where, if you perform, you can earn free lodging and food. You are also a bit of a local celebrity; strangers recognize you in a town where you perform, and they regard you fondly when they do.
Resources
In Kantas, only Daring Heights and Port Ffirst have fighting pits that are open to characters without needing DMs approval. 1 Light DTA slot. No rolls required.
Resolution
You do not need to spend gold to maintain a Moderate lifestyle for the DT week.
Harvest the Water
If you have access to a body of water that sustains marine life, you can maintain a moderate lifestyle while working as a fisher, and you can catch enough food to feed yourself and up to ten other people each day.
Resources
1 Taxing DTA slot. No rolls required.
Resolution
You do not need to spend gold to maintain a moderate lifestyle for the week.
 -->
-->
Pet Bonding and Training
These rules are for players who would like their character to have a pet and train them during downtime to have a mechanical impact on the game. A trained pet will be able to help you both in downtime and in adventuring time. If you would like to have a pet exclusively for narrative reasons, your pet will—subject to the DMs’ approval—be considered untrained. Untrained pets will immediately flee from dangerous situation, if they can be convinced to follow you on your adventures at all. Unlike familiars and animal companions all pets trained and untrained are ultimately NPCs under the control of the DMs during a session. They return your love and listen to you for the most part, but maintain an independent will.
Which creatures are capable of creating bonds with other species and becoming pets is ultimately at the DMs’ discretion. Only beasts of up to size medium can become pets. Trained and untrained pets should be manageable to live with so creatures that are large in size or bigger cannot normally become pets. However, not all medium or smaller beasts make for suitable pets. You must also reasonably have the facility to house your pet. Most medium or smaller creatures may be able to share a room with you but when considering a pet, consider what requirements that creature may need. A Frog, for example, will need access to non-salt water to live effectively. Pets also differ from mounts, which are more akin to beasts of burden. Horses and creatures generally used for travel or work purposes should not be considered pets. The Pet Examples table provides some examples of common pets in Kantas.
Obtaining a pet will usually require you finding (or in some cases purchasing) the creature first, unless you brought it to Kantas with you. If you have something particular in mind, speak with the DMs to see if it can be established how you found your pet.
Pets Examples
| Name | Creature Type | Size | Alignment | INT | CR | Monster Manual Page |
|---|---|---|---|---|---|---|
| Ape | Beast | Medium | U | 6 | 1/2 | 317 |
| Badger | Beast | Tiny | U | 2 | 0 | 318 |
| Black bear | Beast | Medium | U | 2 | 1/2 | 318 |
| Bat | Beast | Tiny | U | 2 | 0 | 318 |
| Cat | Beast | Tiny | U | 3 | 0 | 320 |
| Flying Snake | Beast | Tiny | U | 2 | 1/8 | 322 |
| Giant Fire Beetle | Beast | Small | U | 1 | 0 | 325 |
| Giant Frog | Beast | Medium | U | 2 | 1/4 | 325 |
| Lizard | Beast | Tiny | U | 1 | 0 | 332 |
| Hawk | Beast | Tiny | U | 2 | 0 | 320 |
| Hyena | Beast | Medium | U | 2 | 0 | 331 |
| Mastiff | Beast | Medium | U | 3 | 0 | 332 |
| Panther | Beast | Medium | U | 3 | 1/4 | 333 |
| Raven | Beast | Tiny | U | 2 | 0 | 335 |
| Weasel | Beast | Tiny | U | 2 | 0 | 340 |
| Wolf | Beast | Medium | U | 3 | 1/4 | 341 |
Bonding and Standing
The bond between you and your pet determines the quality of your relationship with them. If your bond is strong, training a pet becomes an effortless extension of the time you spend together. If your bond is weak, training will be a constant uphill battle.
Meeting the Pet and Initial Standing
First impressions are important, and the conditions under which you meet your potential pet will determine your initial Standing with them and affect the speed at which you form a bond. At any time, you have five possible Standings with a potential pet, as described below.
Loved
If you meet the creature in dire need of help and provide it, it may imprint on you. For example, you might rescue the creature from dangerous conditions such as a natural disaster or an abusive tamer.
Friendly
If you meet the creature in difficult circumstances or extreme hunger and provide help, it will be friendly.
Neutral
In conditions that do not tend towards hostility or friendliness, a creature will likely regard you with neutral curiosity.
Disliked
If your first interaction with the creature is aggressive, such as laying a trap to capture it in the wild, it will be suspicious of you and guarded.
Hostile
If you meet the creature under hostile conditions, such as the middle of a battle, it will see you as a threat. If the creature is a predator by nature and has not eaten recently, it might tend towards hostility; if the creature is usually prey, it might consider you a threat, and be easily frightened. If you have hurt the creature or a creature of the same species within their line of sight, you are automatically hostile.
Pets that are hostile when you meet them are likely to run away from you until they are fully bonded. If you manage to initiate a bond with a hostile pet, your first interaction with it must be to try and improve your Standing or the DTDMs might call for an Wisdom (Animal Handling) check to see if the pet runs away. The DTDMs might also call for the same check at any point if your standing becomes Hostile after the bonding process is complete.
Initiating the Bond
After you meet a creature and at the first opportunity when you can spend time with it, you must try to start the bonding process.
Resources
Initiating bonding requires 1 Light DTA Slot or 1 short rest if you are adventuring when you meet the creature.
Resolution
You can initiate the bond with your pet by making a Wisdom (Animal Handling) check. The DC is determined by your current Standing with the animal (see the Pet Bonding and Standing table). Animals of a higher Intelligence score tend more towards pack behaviour, and bond with others more easily, but also make better assessments of threatening behaviour, and are more difficult to win back over once you have lost their trust.
Succeeding in this check signals that the bonding process has started. Succeeding by 5 or more also means that your initial Standing goes up by one category. Failing the check means the bonding process has not started, but your initial Standing stays the same. Failing the check by 5 or more, however, diminishes your initial Standing by one category.
Strengthening the Bond
After you spend enough time in close contact with your pet, you can try to strengthen the bond you have with them.
Resources
Strengthening the bond requires 1 Light DTA slot.
Resolution
You can strengthen the bond with your pet by making a new Wisdom (Animal Handling) check. The DC is determined by your current Standing with the animal (see the Pet Bonding and Standing table).
Completing the Bond
The bonding process is completed once you have passed three Bonding Checks (as the result of Initiating the Bond and Strengthening the Bond activities). Once the bonding process is completed the creature has fully become your pet.
Improving your Standing
You can also try to improve your standing with your pet by spending quality time with them.
Resources
Improving your standing requires 1 Light or 1 Taxing DTA slot.
Resolution
You can improve your standing with your pet by making another Wisdom (Animal Handling) check. The DC is determined by your current Standing with the animal (see the Pet Bonding and Standing table). Add a + 2 bonus to the check if a Taxing DTA slot is used. If you succeed, your standing with the animal improves by one category. If you fail, your standing stays the same.
Standing Modifiers
| Standing | Difficulty Class |
|---|---|
| Loved | 12 - the creature's Intelligence score |
| Friendly | 14 - the creature's Intelligence score |
| Neutral | 14 |
| Disliked | 14 + the creature's Intelligence score |
| Hostile | 16 + the creature's Intelligence score |
Alignment
A pet’s alignment is important and can affect the relationship with their owner. Most beasts are unaligned, meaning that they have no particular moral bearings, and can become pets of a creature of any alignment. However, some creatures may tend naturally towards an alignment, and thus will be more difficult to bond with and train, if the trainer does not share their alignment.
If a creature is unaligned or neutral, the DC of the checks required for bonding and improving your standing is unaffected. If the creature has a particular alignment that you do not share, then the DC is increased by 3. If you and the creature share alignment, then the DC is reduced by 3.
Training
Once the bonding process with your pet is completed, you can start teaching them specific commands. When teaching a command requiring multiple DT weeks, you can take one week off without hindering your progress. Stopping the training for more than one DT week will however invalidate all the progress made up to that point teaching the command.
Training Costs
Training comes with increased cost to account for extra food and treats to aid in the training process, the purchase or hiring of equipment, treating any potential injuries, and in some cases, paying for any damages your pet may have caused. Each week of training will cost 3 gp on top of the regular upkeep costs.
Teaching a Command
After you spend enough time with your pet, you can try to teach them a command. When teaching a command over multiple DT weeks, you can take up to two consecutive DT weeks off without hindering your progress. Stopping the training for longer will however invalidate all the progress made up to that point teaching the command.
Resources
Teaching a command requires the DTA slots specified in the command description. Only one Light DTA slot can be spent teaching the same command during one DT week.
Resolution
You can make a Wisdom (Animal Handling) check to attempt to teach your pet a command. Each command has a Difficulty Class assigned to it in the command description. If you succeed on the check, your pet learns that command. If you fail, your pet does not learn the action, but the difficulty of learning that action is reduced by 2, as they retain pieces of the time you spent training together.
The Difficulty Class of the roll to teach a command is also modified by your Standing with the pet as detailed in the Pet Training table. If your standing is neutral, the difficulty is unchanged.
A character performing a DTA with a pet trained in a specific command might receive a bonus to represent the help and support provided by their pet. See the command description for details. The DTDMs ultimately determine if the bonus is granted based on the circumstances.
Pet Training
| Standing | Teaching a Command Difficulty Class Modifier |
|---|---|
| Loved | -3 to Difficulty Class |
| Friendly | -2 to Difficulty Class |
| Neutral | No Change to Difficulty Class |
| Disliked | +2 to Difficulty Class |
| Hostile | Unable to teach any commands |

Command List
Sit / Lie-Down
- Requirement: 1 Light DTA slot
- Learning Difficulty: DC 7
- Downtime: + 1 to DTA Checks for Carousing or Bardic Performance
- Combat: Yes
Command your pet to stop what it is doing and sit in place or lie down. This will generally be used to help promote good behaviour and stop wandering around or will be followed up by another command.
Stop / Move
- Requirement: 1 Light DTA slot
- Learning Difficulty DC 12
- Downtime: + 1 to DTA Checks for Carousing or Bardic Performance
- Combat: Yes
Command your pet to stop whatever it is currently doing and pay attention to you or to move to a specified location they can see within their movement speed—including returning to you. This command is typically something you would teach your pet to help control their actions and prevent them from getting into trouble or wandering. It is also something you may want your pet to do so you can protect them if used in combat. For flying pets, this command can be used to recall them back to you.
Make Noise
- Requirement: 1 Taxing DTA or 2 Light DTA slot
- Learning Difficulty DC 12
- Downtime: + 1 to DTA Checks for Carousing or Bardic Performance
- Combat: No
Teach your pet you make an audible noise on command. In response to a command word, your pet will make a loud noise if they are capable (barking for dogs, meowing for cats, etc.). Aside from being a neat trick, this may potentially be helpful if you need to locate your pet if they are not in sight or for use in narrative situations.
Wait
- Requirement: 1 Taxing DTA or 2 Light DTA slot
- Learning Difficulty DC 14
- Downtime: + 1 to DTA Checks for Carousing or Bardic Performance; bonus for Relaxation DTA applies to the newt two saving throws
- Combat: Yes
Command your pet to wait where it currently is up to 20 minutes or until you say otherwise. In contexts where initiative is tracked, your pet will wait for up to 4 rounds after the command is issued. If left waiting, your pet may become bored or distracted and want to move or do something again. You can repeat this training to double the time your pet will wait before becoming bored.
If your pet should be harmed in any way while waiting, the command will end. Your pet is also unlikely to stay somewhere they do not feel safe.
Recognise
Places or People
- Requirement: 1 Taxing DTA or 2 Light DTA slot
- Learning Difficulty DC 16
- Downtime: No
- Combat: Yes
You can spend time training your pet to recognise a specific place or person and have them seek out that place or person. The first such lesson has to be a ‘home’, your pet can return. Additional locations or people will require separate periods of training each. As this relies on the pet acting alone and away from you, training will need to be very efficient to help prevent your pet getting lost. If your pet cannot find the designated target, they will return home and wait for you. This can be combined with other commands such as Deliver to enable your pet to deliver an object to a target they cannot currently see.
This command can also simply be used to send your pet home while on an adventure if you are concerned for their safety. Your pet must reasonably be able to undertake this task. If you have sailed away as part of the adventure you are on, they will not be able to get back without you!
Carry/Deliver
- Requirement: 1 Taxing DTA or 2 Light DTA slot
- Learning Difficulty DC 16
- Downtime: + 1 to DTA check for Building a Shelter and Work
- Combat: Yes
You can spend time training your pet to to carry something for you. The object they are carrying must be something they can realistically carry. The DMs determine how long the pet can realistically carry an object before becoming too tired. This command can also be used to have your pet take something to someone for you. They must be able to carry whatever they are taking must be able to see the target when the instruction is given or the target must be one they are trained to recognise (see the Recognise Places and People Command)
Push/Pull/Open
- Requirement: 1 Taxing DTA
- Learning Difficulty DC 16
- Downtime: + 1 to DTA Checks for Pit Fighting and Work.
- Combat: Yes
You can spend time training your pet to push or pull something within sight of you and your pet that they would reasonably be able to move. You can also have your pet use this to help you with Strength checks requiring you to push or pull something. Bonus to the check is determined by the size of your pet:
- Tiny = +1
- Small = +2 to check
- Medium = +3 to check
This command can also be used to have your pet open doors or containers with simple mechanisms, like a door handle. Your pet cannot carry out this action on doors or containers requiring keys or something that would reasonably be impossible for them to open.
Find / Retrieve Command
- Requirement: 2 Taxing DTA
- Learning Difficulty DC 16
- Downtime: +2 to DTA rolls for Tailing and Scouting and Crime.
- Combat: No
Instruct your pet to find something in a designated area. Your pet will be unable to find something on a verbal description alone so you must have something for your pet to use as a reference (such as something they can smell or an object they would be able to recognise). Without this, your pet will either find something that they consider interesting or nothing at all. Once your pet has had time to smell or view the reference material you have provided, they will need to make a Wisdom (Survival) or Wisdom (Perception) check using their stats + your proficiency score with advantage to find what you have requested. DMs to set the DC for this check depending on the nature and location of the search. You can use this command also to have your pet collect and bring an object to you. The object should be something they are capable of carrying and within sight of you - if they have not found it themselves already.
Issuing a Command
Once your pet has successfully learned a command, you can instruct it to carry out the associated action. Pets will not carry out commands while their Standing is Hostile. Only some commands can be carried out by pets during combat, as specified in the command description.
Pets in Combat
Here combat is defined as being in initiative order. As clarified before, pets remain ultimately under the control of the DMs - who will use the current Standing to help adjudicate their behavior.
You have two options:
- The pet counts as an extension of your body. In-game, this could be represented by the pet being kept in a bag or on a leash. The pet does not get to act. Area of Effect and fall damage still affect them. No other damage does. They still abide by suffocation rules
- If the pet knows commands that can be used in combat, you may decide to have the count as an ally and act on your initiative count. You can never have more than one pet active in combat as an ally. On your turn, you can use a free action to issue a command to your pet for it to undertake. If no command is given on a turn, the DMs may choose a suitable course of action for the pet.
Pet Maintenance
Your work does not end when your Standing is good, and you have taught your pet every command. Every relationship requires maintenance to stay healthy and strong.
Upkeep Costs
There is an associated cost with keeping a pet in the form of making sure you have food available, basic grooming equipment, toys and housing costs. The upkeep costs for a pet each week is as follows:
- Tiny Creature: 1 sp
- Small Creature: 3 sp
- Medium Creature: 5 sp
Neglect
While the upkeep costs also assume that you carry out the basics of pet care, if you do not spend quality time with your pet, they may begin to feel neglected. A neglected pet is less willing to listen to your commands and might grow surly or aggressive towards you and your party. Serious neglect can even lead to your pet leaving you forever.
Once the bond is established, you will need to spend quality time with them to ensure they do not feel neglected. If you do not regularly spend time with your pet your Standing with them will begin to diminish. For every 3 DT weeks that pass without you spending at least 1 Light DTA slot with your pet, your Standing with them will diminish by one level. Remember that you can increase your standing level with your pet by succeeding in Improving your Standing DTA.
The activities costing 1 Light DTA slot you can do with your pet to prevent neglect are opportunities to narrate your life with your pet and can include options such as walking, grooming, playing with them. Teaching your pet a command will also prevent neglect for the duration of the training.
Depending on your Standing, your pet will begin to show signs of bad behaviour. If your standing becomes Disliked, your pet will start to show anti-social behaviour and bother other people, walking into their rooms, trying to get their attention and generally trying to get in the way. Your pet will also become less willing to learn commands. When you try to train your pet and your Standing is Disliked, add plus + 3 to the Learning Difficulty.

DON'T ADVENTURE ALONE
LINKS
Discord Join our online community right now to learn all about us!
Meetup.com Join the meetup to RSVP to Kantas (or other) games that are open.
Kantas Forum Adventure write ups and in-character introductions.
WorldAnvil Wiki Catch up on the who's, what's, and where's of Kantas.