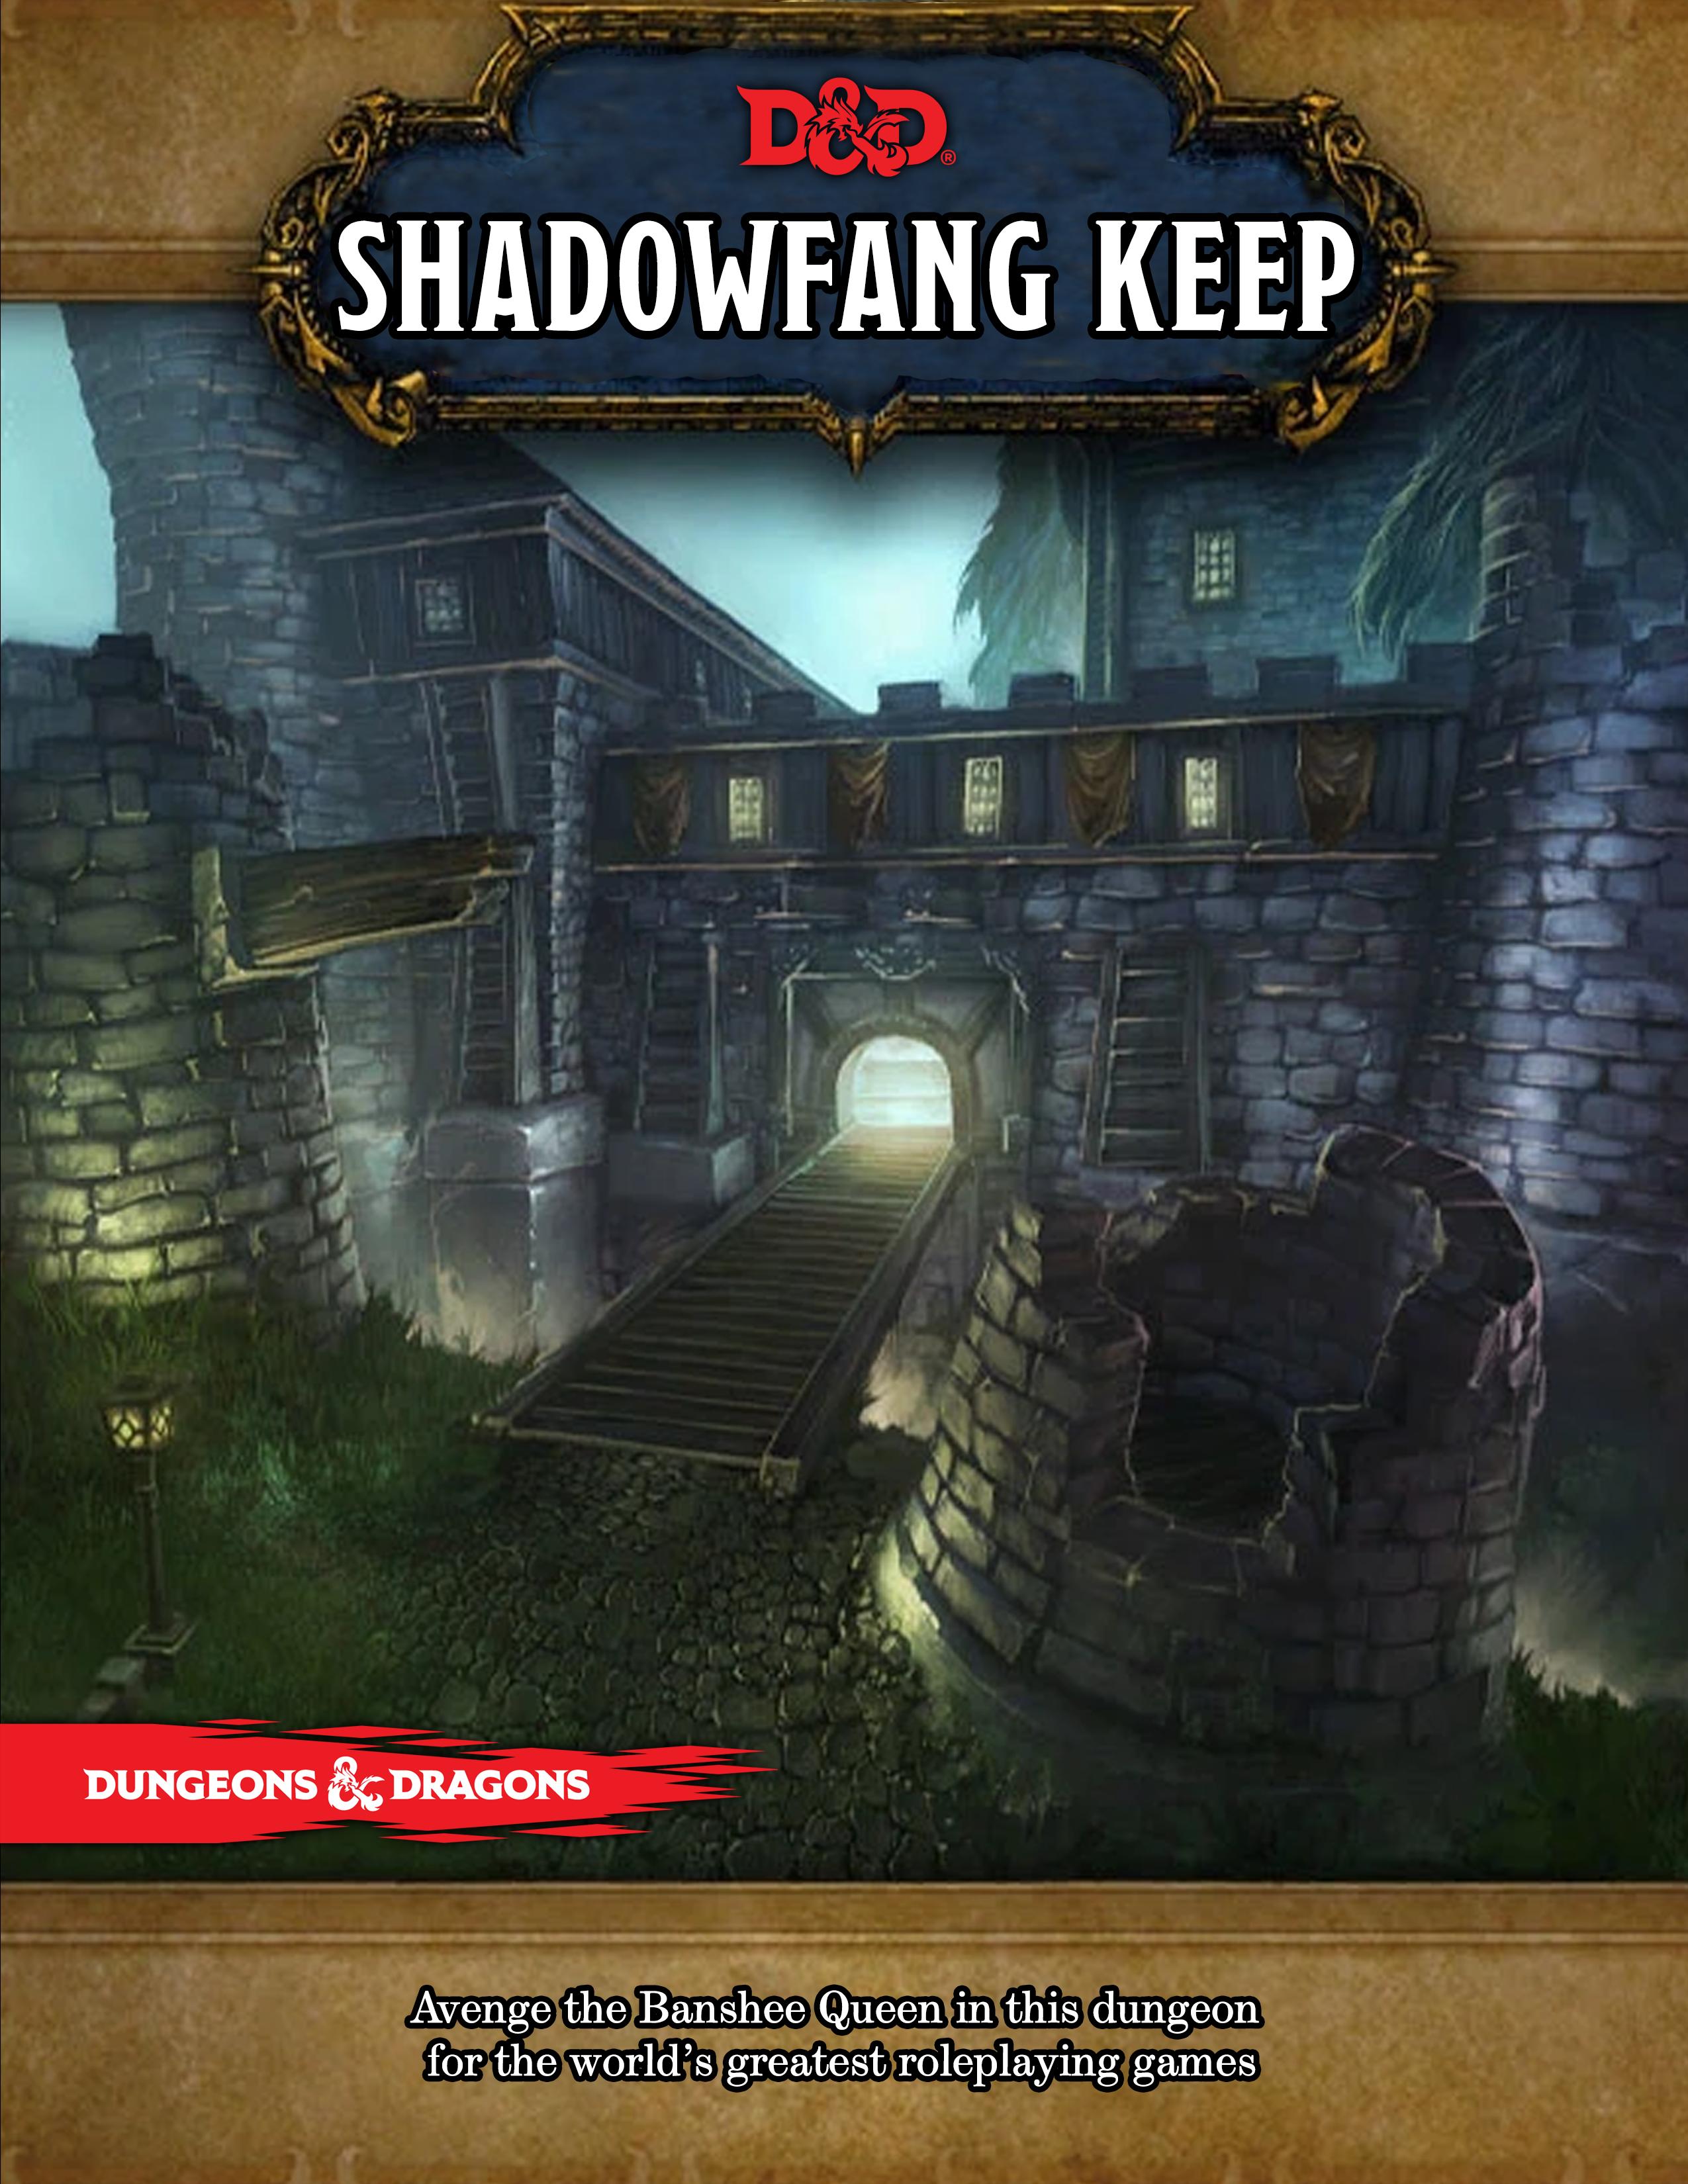
Shadowfang Keep
Punish the Betrayers, Avenge the Dark Lady
- Overview
- Prologue
- For the Horde!
- Pyrewood Village
- The Entrance
Gatehouse
Jail - The Courtyard
- The Barracks
Kitchen
Dining Hall
Corridors
War Council Room - The Ramparts
Southern Ramparts
Upper Gatehouse
Northern Ramparts - The Tower
The Vacant Den
The Observatory
Antechamber
Lord Godfrey's Chamber
Tower Top - Treasure
- Monsters
- For the Alliance!
Created by James Wiken
Special Thanks to
Blizzard Entertainment
Original dungeon design and characters, quest and adventure journal text, art assets, maps
wowhead.com
Dungeon, NPC, and item information, screenshots
GM Binder
Shadowfang Keep
Looming over Pyrewood Village from the southern bluffs of Silverpine Forest, Shadowfang Keep casts a shadow as dark as its legacy. Sinister forces occupy these ruins, formerly the dwelling of the mad archmage Arugal's worgen. The restless shade of Baron Silverlaine lingers while Lord Godfrey and his cabal of erstwhile Gilnean noblemen plot against their enemies both living and undead.
The adventurers have been sent to Shadowfang Keep to punish Lord Vincent Godfrey and his followers for their betrayal.
Overview
Shadowfang Keep is a dungeon designed for characters from levels 3 to 5. It is meant to be standalone and can be inserted into any campaign.
In this dungeon, the adventurers have been tasked with leading the assault on Shadowfang Keep. Inside, the tortured ghosts of the keep's original residents still haunt its halls and rotting undead man its walls, all attacking any who would venture within the fortress.
The traitor, Lord Vincent Godfrey, has recently reclaimed Shadowfang Keep as his own. A seat of power from which he can wrest control of Silverpine Forest and Gilneas from his enemies.
Accompanying Lord Godfrey are Baron Ashbury and Lord Walden, his right and left hand men. Each are dangerous in their own right and must be dealt with before challenging their leader. To make matters worse, the spirits of the original owners, Baron Silverlaine and Commander Springvale, have pledged themselves to Lord Godfrey.
This dangerous coalition must be stamped out before any more damage can be done. The Banshee Queen will have her vengeance.
Prologue
During the Retaking of Gilneas, the Dark Lady, Sylvanas Windrunner, decided to create a secret weapon aimed directly against the worgen. This weapon was Lord Vincent Godfrey.
Lord Vincent Godfrey spent his life defending the kingdom of Gilneas. When the worgen curse ravaged this land, Godfrey was one of the first Gilneans to take up arms against the beasts. It is said that upon discovering that his king was afflicted by the curse, Godfrey took his own life, preferring death above servitude to the very creatures that he had defended his home against.
The bodies of Godfrey and his lieutenants, Baron Ashbury and Lord Walden, were ferried out of Gilneas to the Banshee Queen herself. She raised them up as agents of the Forsaken, offering them to continue their life's work in undeath. They agreed without reservation, quickly turning their talents against the Gilneas Liberation Front and their Alliance allies.
"The irony of what I have become is not lost upon me, Lady Sylvanas. Though as I have always said, better dead than worgen. Or in this case, better undead than worgen." —Lord Godfrey
The town of Ambermill was their first target. Former mages of Dalaran had erected a barrier around the town, hiding an Alliance army in a pocket dimension there. A weakness in the barrier was discovered and then the shield was brought down by slaying the archmage maintaining it. The Alliance forces were scattered, many of the slain being raised as new members of the Forsaken.
Meanwhile, forces of the Alliance's 7th Legion captured Pyrewood Village. The Forsaken forces stationed there were decimated in the attack leaving the main force vulnerable. Lord Godfrey and his men were dispatched to retake the village. Instead, they set it to the flame and killed anyone they found in the burning buildings, Forsaken and Alliance alike.
With the Alliance's expeditionary force defeated, Godfrey and his compatriots were sent to capture the daughter of the leader of the Gilneas Liberation Front. She would be used as a bargaining chip to secure Gilneas' unconditional surrender. Despite wanting to just kill her instead, Godfrey obeyed the Dark Lady's wishes and brought his prisoner back alive.
"I now present you with a choice - a choice that I was never given. I offer you the life of Lorna for your unconditional surrender. Choose your next words wisely, Crowley. Deny me and she will serve me in undeath - forever." —Sylvanas Windrunnner
In a final confrontation, Lady Sylvanas played her trump card, the daughter of her enemy. Seeing no other choice, the Gilneas Liberation Front accepted the terms of surrender and fled the field. Seeing the worgen defeated, Lord Godfrey made his move. At point blank range, he shot Sylvanas Windrunner, killing her instantly. The deed done, he fled to Shadowfang Keep to plot his conquest of Gilneas and all of Lordaeron.
Only through the sacrifice of her dear val'kyr was Lady Sylvanas returned from the dark nothingness that awaited her. More resolute than ever before, she set her sights on Shadowfang Keep. Those that betrayed her would pay for their crimes.
Licking their wounds from their recent defeat, the Gilneans also looked towards Shadowfang Keep. Lord Godfrey would pay for his treachery and the many worgen he had slain in both life and undeath.
For the Horde!
This dungeon is written based on the Horde version of Shadowfang Keep. The Forsaken posted a bounty for Lord Vincent Godfrey and his collaborators and have put Deathstalker Commander Belmont in charge of defeating them. If you would prefer to play the Alliance version, see "For the Alliance!" at the end of this dungeon for a description of changes.
Pyrewood Village
Built on the banks of the River Arevass, Pyrewood Village was once a Gilnean settlement. Towering over it is the intimidating walls of Shadowfang Keep. For some time, the village was an Alliance holdout in an otherwise hostile land.
A series of hardships have plagued the village since then, starting with the mad Archmage Arugal unleashing the worgen curse upon its residents. In an effort to oust Arugal, agents of the Forsaken dismantled the leadership of Pyrewood Village. They eventually went on to slay Arugal, himself, and claim Pyrewood Village as their own.
More recently, Pyrewood Village became a battleground. Alliance forces supporting the Gilneas Liberation Front wrested control of the village from the Forsaken to use it as a staging point against the Banshee Queen's forces. In a counterattack led by Lord Godfrey and his lackeys, much of the village was burned to the ground and the Alliance forces scattered.
The ruins of Pyrewood Village now act as a smoldering reminder of Lord Godfrey's ruthlessness, both to those who visit its charred remains and to Godfrey, himself, as he looks down from his new bastion of power, Shadowfang Keep.
The adventurers can climb the bluffs to the south of the burnt-out ruins of Pyrewood Village to reach the gates of Shadowfang Keep.
1. The Entrance
Ascending the ramp to Shadowfang Keep, the party can see undead patrolling the tops of the walls. The front gates have already been broken open and the forces sent to take down Lord Godfrey are waiting just inside.
Deathstalker Commander Belmont is standing in front of a heavy iron portcullis emitting a sickly green glow. The gate has been enchanted with a deadly poison that will kill any who touch it. The party must fight their way through the gatehouse to find another way in.
No matter, Belmont informs the adventurers that their first target will most likely be found in the gatehouse anyways. The keep's jail is within the gatehouse and Baron Ashbury, one of Lord Godfrey's top lieutenants and known for his cruelty, is probably torturing those held inside its cells.
See the quest, "This Land is Our Land", for Commander Belmont's instructions on finding and defeating Baron Ashbury.
This Land is Our Land
Description
Did you think that a handful of worgen vermin could stop me? Hah!
Shadowfang Keep was part of the Lordaeron kingdom in life, so it is quite fitting that it should belong to the Forsaken in death. Godfrey and his accomplices are minor obstacles at best, and of course we're all happy to take them out for their treachery against the Dark Lady.
Ashbury has positioned himself near the front of the keep, leaving him wide open to attack. Start us out on the right foot, would you?
Mechanics and Rewards
Find and defeat Baron Ashbury within the gatehouse. Take his keys and proof of his demise and bring them back to Deathstalker Commander Belmont.
The party can collect the bounty on Baron Ashbury's head (150gp or an appropriate amount for your campaign) once they return from Shadowfang Keep. Belmont will use the keys to open a door in the gatehouse that leads out into the courtyard of Shadowfang Keep.
Once this quest is completed, Belmont will immediately offer the quest, "Plague...Plague Everywhere".
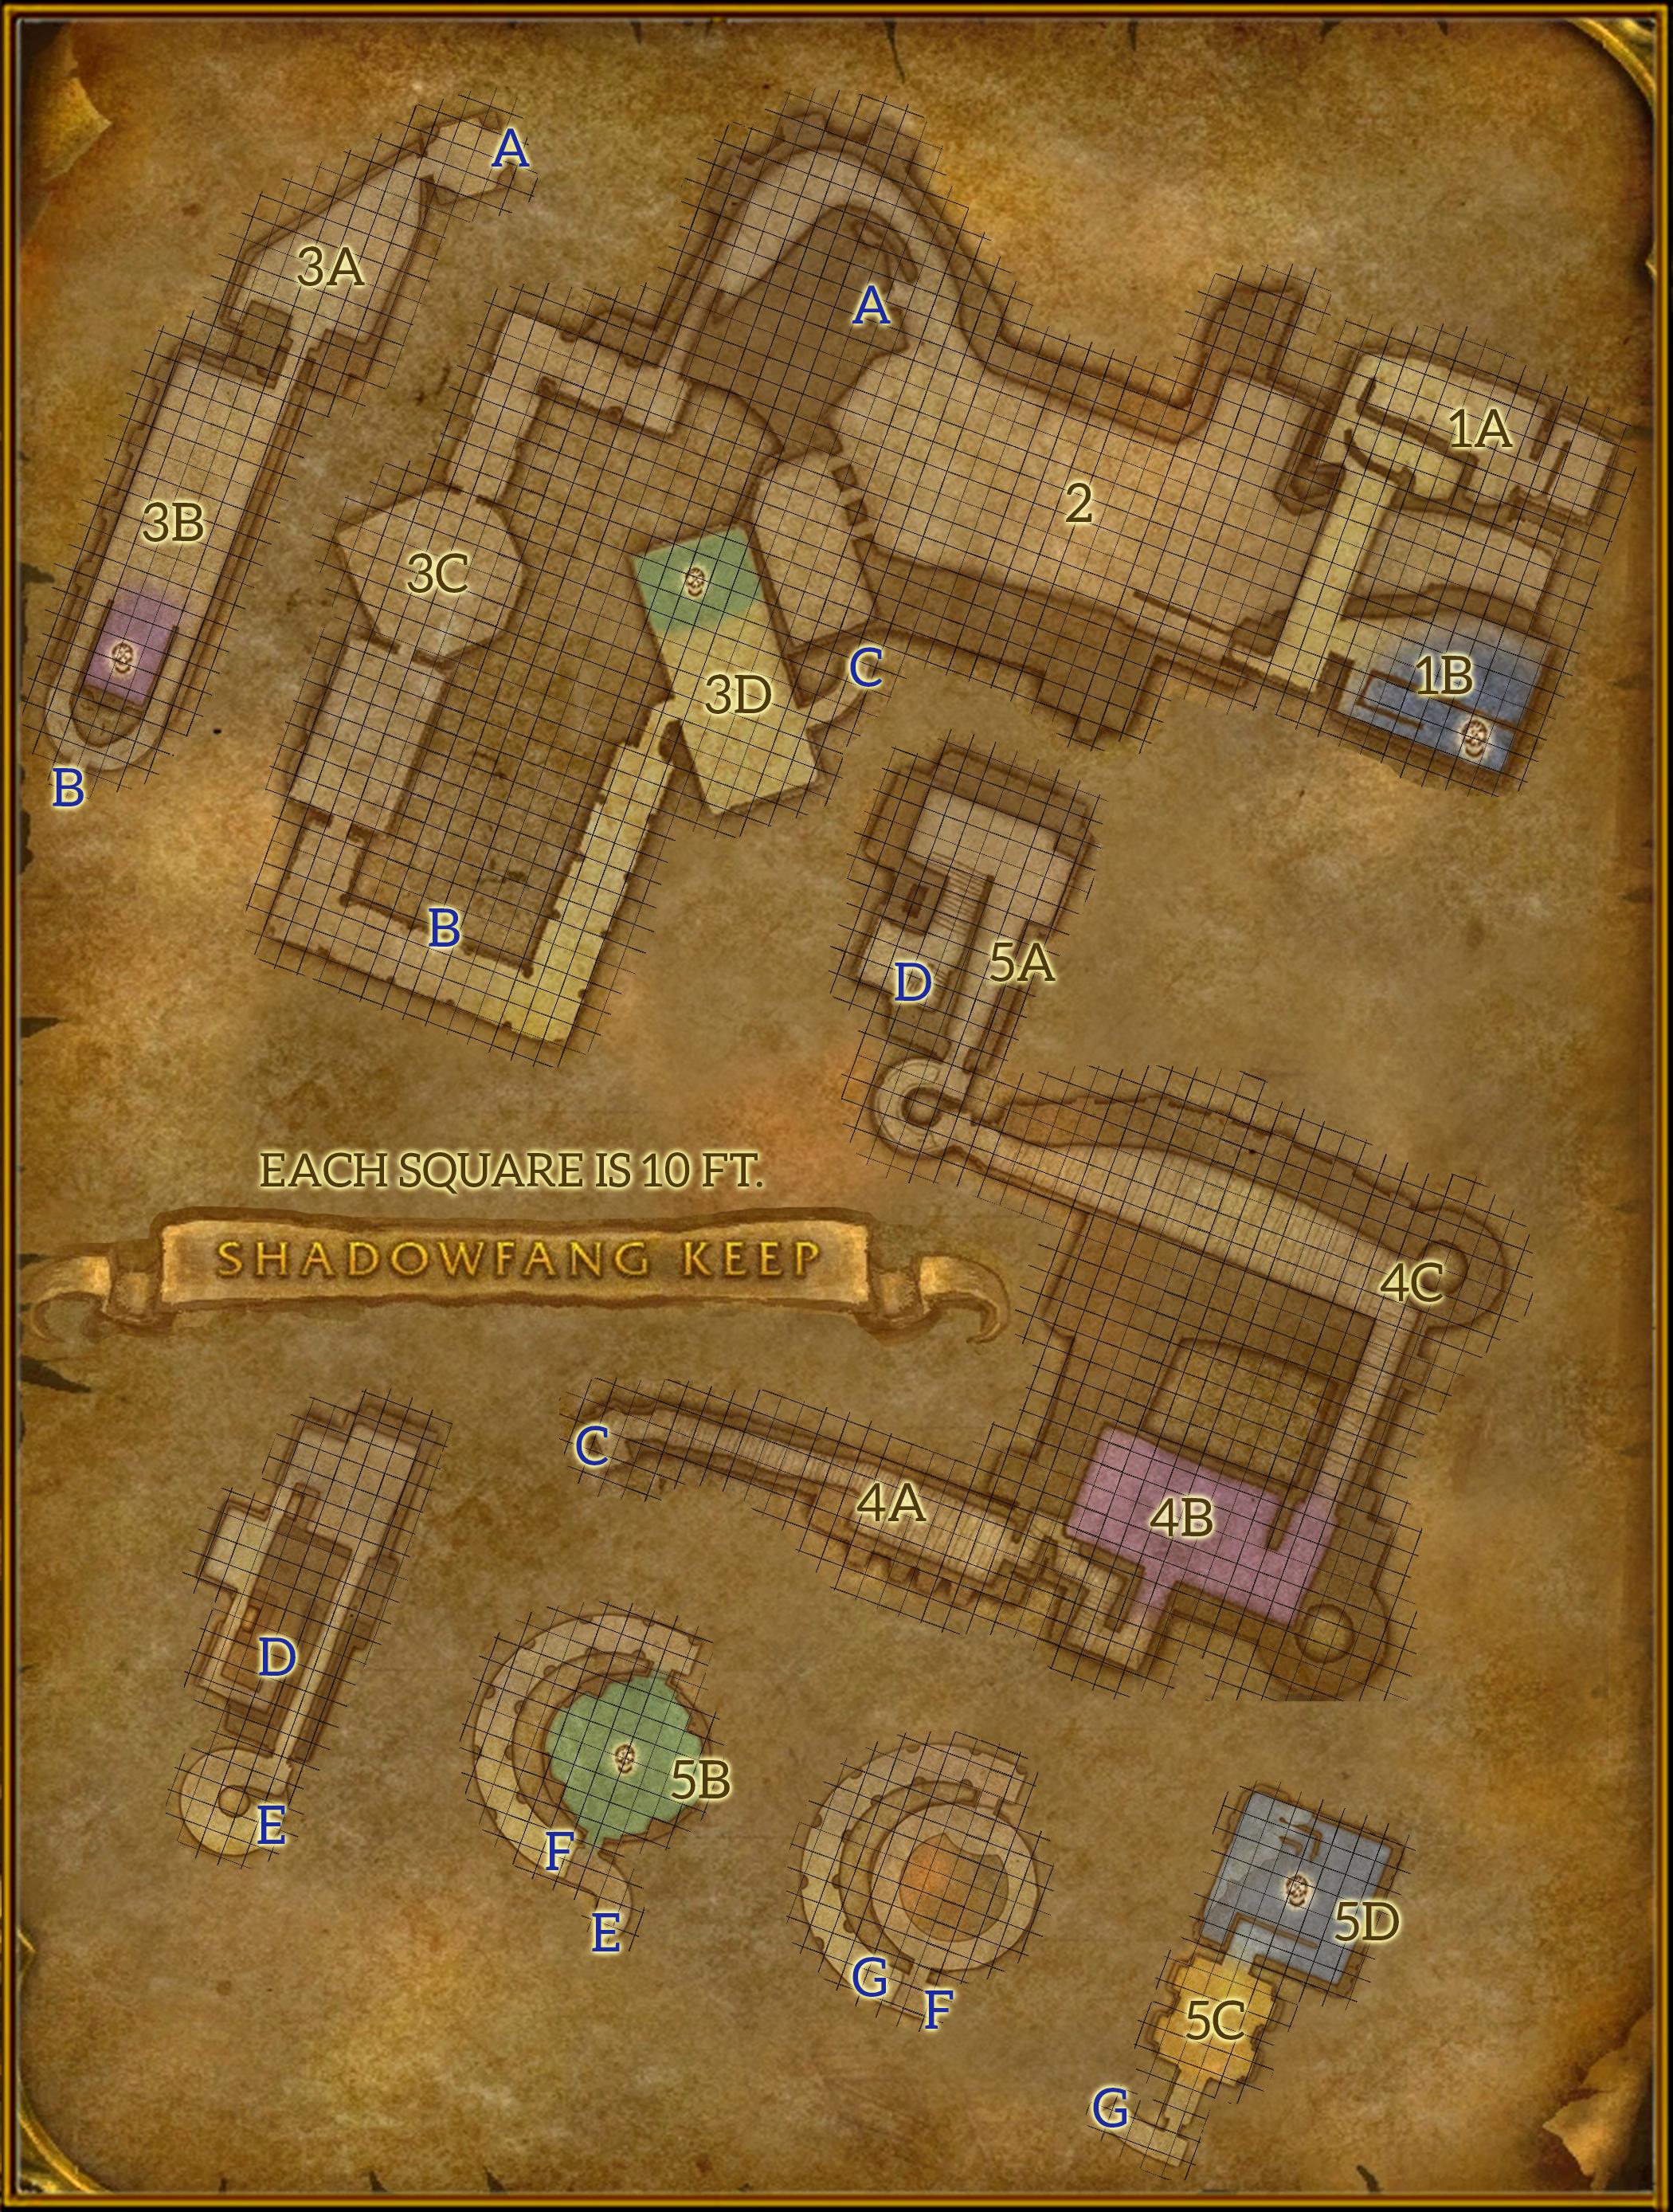
1a. Gatehouse
A door to the north leads into the gatehouse. Inside, undead wander aimlessly amongst decomposing chairs and cloth. Light streams in from broken stained glass windows casting the room in an eerie glow. Roll from this section's Random Encounter Table to determine the undead in this room.
Random Encounter Table
| Roll | Monsters |
|---|---|
| 1 | 1 Frantic Geist, 2 Fetid Corpse Eaters |
| 2 | 2 Frantic Geists, 1 Fetid Corpse Eaters |
| 3 | 3 Frantic Geists |
| 4 | 3 Fetid Corpse Eaters |
On the other side of the room is a set of stairs to a platform which overlooks the area you just came from. A second set of stairs brings the party into a hallway leading over the deadly portcullis below. Another group of undead are in this hallway (roll from the Random Encounter Table). This brings the characters to the Shadowfang Keep's jail.
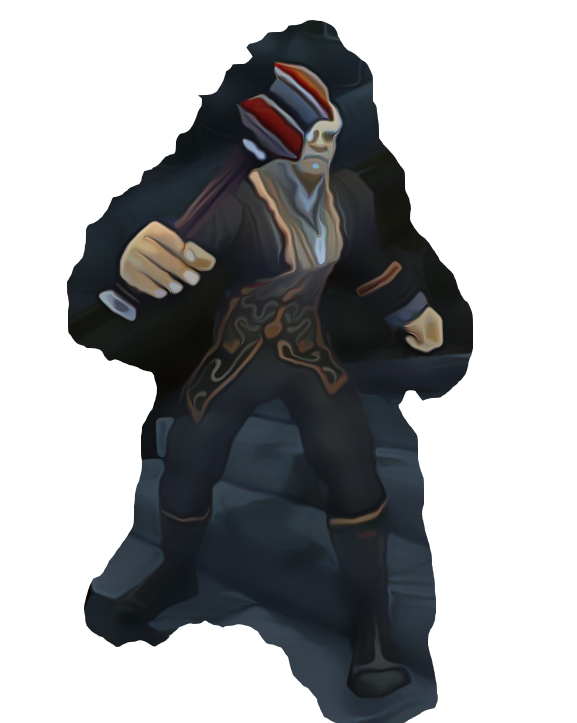
Baron Ashbury
Medium undead, chaotic evil
- Armor Class 13
- Hit Points 65 (10d8+20)
- Speed 30 ft.
STR DEX CON INT WIS CHA 11 (+0) 14 (+2) 14 (+2) 16 (+3) 14 (+2) 10 (+0)
- Damage Immunities poison
- Condition Immunities charmed, exhaustion, poisoned
- Senses darkvision 60 ft., passive Perception 12
- Languages Common
- Challenge 3 (700 XP)
Actions
Pain and Suffering. A hostile creature within 40 feet now takes 5 (1d10) psychic damage at the end of each of its turns. It may make DC 14 Constitution saving throw at the start of each of its turns. On a successful one, end this effect.
Asphyxiate. All hostile creatures within 20 feet must succeed on a DC 13 Constitution saving throw, or be Restrained. If a target is still Restrained at the start of Ashbury's next turn, its hit points are reduced to 1. On his next turn, Baron Ashbury's speed is reduced to 0 and he must use Stay of Execution as his action.
Stay of Execution. Baron Ashbury has pity on you, but only so he can continue inflicting pain! All hostile creatures within 20 feet regain hit points equal to half of their maximum hit points.
1b. Jail
Located at the southern end of the gatehouse is Shadowfang Keep's prison. The party enters the room on a platform overlooking the prison cells below. Looking down into the room, the party can see Lord Ashbury tormenting the inhabitants of the three cells. From left to right, the cells contain a pack of rabid undead mastiffs, a group of captured Forsaken soldiers, and a worgen in the garb of a Gilnean magistrate.
Once Ashbury is defeated, Commander Belmont and his Forsaken lock down the room. The party may now use this room as a safe place to rest. When the characters are ready, Commander Belmont uses the keys the adventurers found on Ashbury to open a door out to the courtyard.
Baron Ashbury
"I'm trying to convince Godfrey to just kill all of you to end your misery, but he keeps telling me no. More pain and suffering for the lot of you, then!"
Slain by worgen and raised into undeath by the Forsaken, the traitor Baron Ashbury toys with his foes, keeping them alive so he can inflict maximum pain and suffering.
Baron Ashbury (marked by a blue skull on the map) is one of Lord Godfrey's top lieutenants and is the first to pay for his treachery. He will toy with the adventurers, prioritizing applying Pain and Suffering on a couple of them and then finishing them off with Asphyxiate.
When Baron Ashbury is defeated, the party can loot Robes of Arugal and the gatehouse keys.
Plague...Plague Everywhere!
Description
The best part about this plague is that even when it visually fades away, the remaining residue is still quite potent! However, we still have an enormous area to cover before we're done, with plenty of Godfrey's defenses in the way.
It appears that the spirits that served Baron Silverlaine and Commander Springvale in life now guard them in death, and Godfrey is using them to deter us. Show them all the iron will of the Forsaken!
Mechanics and Rewards
Assault the barracks and defeat Lord Godfrey's ghostly allies, Baron Silverlaine and Commander Springvale. Once the two spectral leaders are defeated, Belmont and his Deathstalkers will occupy the barracks.
Once this quest is completed, Belmont will immediately offer the quest, "Orders Are For the Living".
2. The Courtyard
The door from the gatehouse leads down a set of stairs into the eastern end of the courtyard. The courtyard is entirely paved with flagstones and open. In the center of it is a crumbling fountain adorned by a life-size statue of the party's next target, Baron Silverlaine.
Monstrous undead horrors and wandering spirits patrol around the courtyard below. They pay little mind to the abandoned crates and dilapidated carts that also dot the plaza. Roll from this section's Random Encounter Table to determine which undead are currently in the courtyard.
Random Encounter Table
| Roll | Monsters |
|---|---|
| 1 | 4 Frantic Geists |
| 2 | 3 Haunted Servitors |
| 3 | 2 Frantic Geists, 2 Haunted Servitors |
| 4 | 1 Mindless Horror, 2 Haunted Servitors |
| 5 | 1 Mindless Horror, 2 Frantic Geists |
| 6 | 2 Mindless Horrors |
Abutting the western end of the courtyard is the barracks where Lord Godfrey's ghostly allies maintain their haunt. Built into the side of this building is a stable. Skeletal and ghostly horses stand amongst damp rotting hay paying little attention to any intruders unless provoked.
The party can find two entrances into the barracks. On the northwestern end of the courtyard there is a ramp that wraps around the northern end of the barracks. Going up this ramp will lead into the corridors on the second floor of the building. Near the bottom of the ramp is another door leading directly into the kitchen and dining hall of the barracks.
3. The Barracks
Built into the western wall of Shadowfang Keep is the stronghold of the ghostly inhabitants of the keep. Cracked stained glass windows and tattered ochre banners make up the facade of this two-story building. A grand dining hall, currently hosting Baron Silverlaine and his spectral servants, makes up most of the first floor. Much of the second floor is a series of corridors connecting the various rooms in the building, including the war room. A ramp leading up to the southern ramparts is accessible via the war room.
3a. Kitchen
Upon entering the kitchen, the party is presented with a grisly scene. Bloody chains hang from the ceiling ending in hooks loaded with chunks of flesh and bone. Across the room, massive cauldrons filled with a putrid broth boil over on roaring fires. Huge wooden casks filled with ales long rancid line the western wall. At the tables 2d2 Ghostly Cooks chop rotting meat, eternally preparing for a feast that will never occur. Upon seeing the adventurers, the Ghostly Cooks will immediately attack. A door in the southern wall of the kitchen leads to the dining room.
3b. Dining Hall
The focus of the room is a long table set with candle centerpieces and plates of rotting food. However, the only diners seem to be the rats scampering across the floor and table. Broken chairs and benches are strewn about the room and the stained-glass windows have been boarded over.
Two Shadowy Attendants and Two Haunted Servitors move about the room, continuing the service in life as service in undeath. At the head of the room stands Baron Silverlaine, dressed in his finest clothes and seated at his own table. Flanking this table are two sets of stairs leading up to the corridors on the 2nd floor.
Upon seeing intruders in his dining hall, Silverlaine first sends his servants against them. Once the party has defeated his servants, Baron Silverlaine decides to deal with the interlopers himself.
Once Baron Silverlaine is defeated, Commander Belmont and his forces enter the room, spreading their plague to dissuade any pursuers. At this time, High Warlord Cromush, a heavily armored orc, reveals himself. He reminds Belmont that the Warchief has expressly forbid the use of the plague. Despite Belmont's attempts to assuage his doubts, Cromush decides to accompany the Forsaken troops to make sure they keep the Horde's best interests in mind and follow the Warchief's orders.
Baron Silverlaine
"Leave this accursed place at once!"
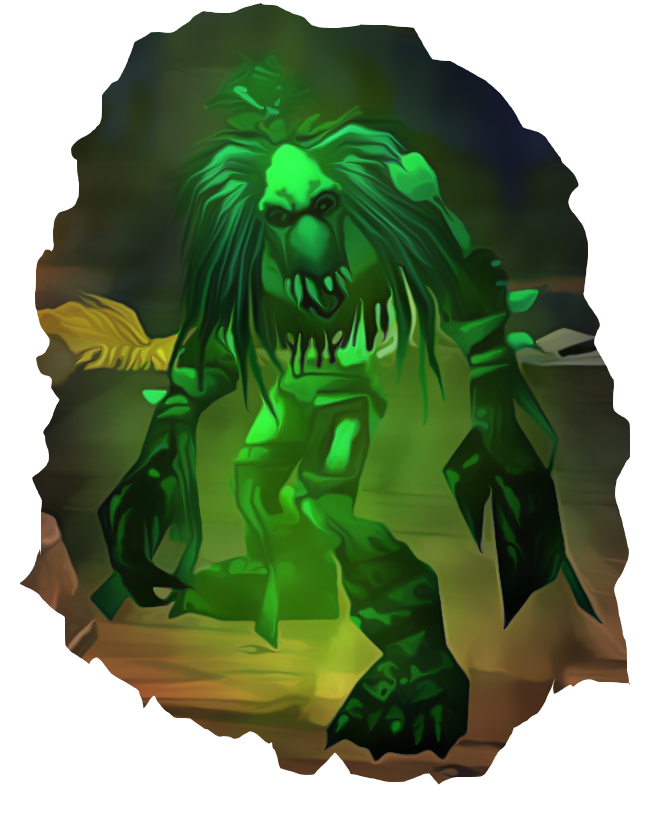
Baron Silverlaine was master of the keep before it fell to Arugal's worgen. Now his cursed spirit calls upon the very wolf-beasts that slaughtered him to punish further trespassers into his home.
Baron Silverlaine (marked by a purple skull on the map) prefers to get into melee with his enemies. He becomes especially bold when protected by the Worgen Spirits he summons.
When Baron Silverlaine is defeated, the party can loot Silverlaine's Family Seal. For each Worgen Spirit defeated, the party can roll a d20. On an 11 or higher, the party can loot the corresponding item in the table below.
| Worgen Spirit | Item |
|---|---|
| Odo the Blindwatcher | Girdle of the Blindwatcher |
| Razorclaw the Butcher | Butcher's Cleaver |
| Rethligore | Rugged Spaulders |
| Wolf Master Nandos | Wolfmaster Cape |
Baron Silverlaine
Medium undead, unaligned
- Armor Class 13
- Hit Points 52 (7d8 + 21)
- Speed 30 ft.
STR DEX CON INT WIS CHA 12 (+1) 11 (+0) 16 (+3) 13 (+1) 14 (+2) 16 (+3)
- Damage Resistances bludgeoning, slashing, and piercing from nonmagical sources
- Damage Immunities necrotic, poison
- Condition Immunities charmed, exhaustion, frightened, grappled, paralyzed, petrified, poisoned, prone, restrained
- Senses darkvision 60 ft., passive Perception 12
- Languages Common
- Challenge 2 (450 XP)
Summon Worgen Spirit. When Baron Silverlaine takes damage that brings him to or below 70% (35) or 40% (20) of his maximum hit points, he immediately summons one of four random Worgen Spirits
While a Worgen Spirit is alive, Baron Silverlaine is resistant to all damage types. If two Worgen Spirits are alive, Baron Silverlaine is immune to all damage types.
Roll from the table below to determine which spirit is summoned. If the rolled spirit has already been summoned, roll again.
Roll Worgen Spirit 1 Odo the Blindwatcher 2 Razorclaw the Butcher 3 Rethligore 4 Wolf Master Nandos Actions
Scepter. Melee Weapon Attack: +4 to hit, reach 5ft., one target. Hit 5 (1d6 + 2)
Cursed Veil. (Recharge 5-6) All targets within 15 feet must succeed on a DC 13 Wisdom saving throw or take 11 (2d10) necrotic damage and the next time they would regain hit points the amount regained is halved.
Worgen Spirit
Medium undead, unaligned
- Armor Class 13
- Hit Points 39 (6d8 + 12)
- Speed 40 ft.
STR DEX CON INT WIS CHA 16 (+3) 11 (+0) 14 (+2) 12 (+1) 14 (+2) 10 (+0)
- Damage Resistances bludgeoning, slashing, and piercing from nonmagical sources
- Damage Immunities necrotic, poison
- Condition Immunities charmed, exhaustion, frightened, grappled, paralyzed, petrified, poisoned, prone, restrained
- Senses darkvision 60 ft., passive Perception 12
- Languages Common
- Challenge 2 (450 XP)
Howling Rage (Odo the Blindwatcher only). When Odo the Blindwatcher hits with a melee attack, he gains a +1 bonus to attack and damage rolls. This effect can stack 5 times and all bonuses are lost if he does not hit a target during his turn.
Butcher Drain (Razorclaw the Butcher only). When Razorclaw the Butcher hits with a melee attack, he deals an additional 2 necrotic damage and regains 2 hit points.
Summon Lupine Spirit (Wolf Master Nandos only). When Wolf Master Nandos is summoned, he summons 1d4 Lupine Spirits. These spirits use the Haunting Spirit stat block, but look like ghost wolves.
Actions
Multiattack. The spirit makes two claw attacks.
Claw. Melee Weapon Attack: +5 to hit, reach 5 ft., one target. Hit: 6 (1d6 + 3) slashing damage.
Blinding Shadows (Odo the Blindwatcher only). Ranged Spell Attack: +4 to hit, range 45 ft., one target. Hit: 5 (1d10) necrotic damage and the target must succeed on a DC 13 Constitution saving throw or be Blinded until the end of their next turn.
Spectral Rush (Razorclaw the Butcher only). Razorclaw leaps at the furthest away hostile creature within his remaining speed. The creature must succeed on a DC 13 Strength saving throw or be knocked prone. He then makes two claw attacks against this creature.
Soul Drain (Rethilgore only). Ranged Spell Attack: +4 to hit, range 45 ft., one target. Hit: 5 (1d10) necrotic damage and heals for twice the damage dealt.
3c. Corridors
The corridors can be entered from two locations, directly from the courtyard via a ramp or through the dining hall.
If entering using the ramp outside, the party finds itself at the northern end of the corridors. The halls lead south through a pair of small rooms. The corridors and rooms are lit by an array of candles and torches. The halls are littered with broken furniture, bones, and ransacked supplies. Amongst this debris, armored skeletons and ghosts patrol up and down the corridor. Roll from this section's Random Encounter Table to determine the patrollers.
Random Encounter Table
| Roll | Monsters |
|---|---|
| 1 | 2 Wailing Guardsmen, 2 Shadowy Attendants |
| 2 | 2 Wailing Guardsmen, 2 Haunted Servitors |
| 3 | 1 Wailing Guardsman, 1 Shadowy Attendant, 1 Haunted Servitor |
| 4 | 1 Spitebone Skeleton, 2 Wailing Guardsmen |
| 5 | 1 Spitebone Skeleton, 2 Shadowy Attendants |
| 6 | 1 Spitebone Skeleton, 2 Haunted Servitors |
At the southern end of this hallway, the party can turn left to an intersection. To their left are stairs descending to the dining room below. Continuing straight leads to another hallway that will bring the adventurers into the War Room. More undead and ghosts (roll from the Random Encounter Table) patrol this section of the corridors as well.
3d. War Council Room
The corridors lead into a large room with a vaulted ceiling. Much like the hallways the party just went through, bones and broken furniture a strewn about the room. Silhouetted by light streaming through blue and violet stained glass behind him, is Commander Springvale. His soldiers, loyal even in death, flank him on both sides.
Springvale tasks his soldiers with dispatching the party. One Tormented Officer and 2d2 Wailing Guardsmen follow his orders and attack the adventurers. Once the characters defeat these soldiers, Commander Springvale and his remaining soldiers, one Tormented Officer and one Wailing Guardsman, attack the party.
Once Springvale is defeated, Commander Belmont enters the room. He informs the party that he has sent Cromush and his forces along the rooftops to surround and secure the area around Lord Walden to prevent his escape. The party can now use this room as a safe place to rest. The adventurers are to continue along the ramparts and infiltrate the tower he is hiding in. A door on the eastern side of the room leads out onto the southern ramparts.
Commander Springvale
"Intruders in the keep! To arms!"
A loyal soldier, the ghost of Commander Springvale haunts the council room, using unholy strikes to avenge his lord, Baron Silverlaine.
Commander Springvale (marked by a green skull on the map) will focus on getting charges of Unholy Power. Once he has three he attempts to hit as many enemies as possible with Shield of the Perfidious.
He is also accompanied by a Wailing Guardsman and a Tormented Officer which will attack anyone hostile to him. They both gain the following action:
Unholy Empowerment. If the ghost has not been attacked or taken damage since the end of its last turn, it makes a DC 12 Charisma check. On a success, Commander Springvale regains 3 (1d6) hit points and gains one charge of Unholy Power.
When Commander Springvale is defeated, the party can loot Commander's Crest.
Orders Are For the Living
Description
Unsurprisingly, we aren't going to listen to Cromush about the plague. However, his brute strength will come in handy for muscling my men through the many foes ahead on the path to Godfrey, the most powerful being his right hand man, Lord Walden.
I'll meet you in Walden's chamber after you finish him off. Then, at long last, we can completely take Shadowfang Keep for the Forsaken!
Mechanics and Reward
Find and defeat Lord Walden within the observatory. Bring proof of his demise to Deathstalker Commander Belmont.
The party can collect the bounty on Lord Walden's head (150gp or an appropriate amount for your campaign) once they return from Shadowfang Keep. Belmont will then send Cromush and his forces to take down Lord Godfrey.
Once this quest is completed, Belmont will immediately offer the quest, "Sweet, Merciless Revenge".
Commander Springvale
Medium undead, unaligned
- Armor Class 16
- Hit Points 60 (8d8+24)
- Speed 30 ft.
STR DEX CON INT WIS CHA 16 (+3) 12 (+1) 16 (+3) 10 (+0) 12 (+1) 16 (+3)
- Skills Perception +3
- Damage Resistances bludgeoning, slashing, and piercing from nonmagical sources
- Damage Immunities necrotic, poison
- Condition Immunities charmed, exhaustion, frightened, grappled, paralyzed, petrified, poisoned, prone, restrained
- Senses darkvision 60 ft., passive Perception 13
- Languages Common
- Challenge 2 (450 XP)
Unholy Power. Commander Springvale can store up to 3 charges of Unholy Power. Each charge gives him a +1 bonus to attack and damage rolls. When he reaches max charges, he must use Shield of the Perfidious on his next turn.
Actions
Multiattack. Commander Springvale makes two Malefic Strikes.
Malefic Strike. Melee Weapon Attack: +5 to hit, reach 5 ft., one target. Hit: 6 (1d6+3) slashing damage and Springvale gains a charge of Unholy Power.
Shield of the Perfidious. Springvale expends 3 charges of Unholy Power in a shadowy blast from his shield in a 10 foot cone. Creatures in the cone must succeed on a DC 14 Constitution saving throw or take 10 (3d6) necrotic damage. On a successful save it takes half as much damage. Springvale also gains a +3 bonus to AC against melee weapon attacks until the start of his next turn.
Desecration. Commander Springvale desecrates the ground (10-foot circle) underneath a hostile target within 30 feet of him. When a creature enters this area for the first time on a turn or starts its turn there, it must make a DC 13 Constitution saving throw. On a failed save, the creature takes 9 (2d8) necrotic damage and its speed is halved. On a success, it takes half as much damage. This effect lasts for 30 seconds.
4. The Ramparts
Having made their way through the ghost infested barracks, the party finds itself on the ramparts of Shadowfang Keep. The wall wraps around the southern and eastern sides of the keep, leading first to a chamber above the gatehouse. The ramparts continue north then west to Shadowfang Keep's tall tower, and Lord Godfrey within.
4a. Southern Ramparts
The southern ramparts lead southeast, back towards the gatehouse. Looking north, the party can see down into the courtyard below. To the south, the broken and breached Greymane Wall, last defense of the now conquered Gilneas, can be seen poking through the mists. More ghostly soldiers patrol this stretch of the walls. Roll from this section's Random Encounter Table to determine the patrollers. If the party defeats the Deathsworn Captain, they can loot Haunting Blade.
Random Encounter Table
| Roll | Monsters |
|---|---|
| 1-2 | 3 Wailing Guardsmen |
| 3-4 | 1 Tormented Officer, 2 Wailing Guardsmen |
| 5-6 | 1 Deathsworn Captain, 2 Wailing Guardsmen |
At the end of this stretch of walls, a series of wooden stairs and platforms leads into the upper gatehouse.
Deathsworn Captain
Medium undead, unaligned
- Armor Class 15
- Hit Points 52 (8d8+16)
- Speed 30 ft.
STR DEX CON INT WIS CHA 18 (+4) 12 (+1) 14 (+2) 10 (+0) 12 (+1) 12 (+1)
- Damage Resistances bludgeoning, slashing, and piercing from nonmagical sources
- Damage Immunities necrotic, poison
- Condition Immunities charmed, exhaustion, frightened, grappled, paralyzed, petrified, poisoned, prone, restrained
- Senses darkvision 60 ft., passive Perception 11
- Languages Common
- Challenge 2 (450 XP)
Actions
Cleave. Melee Weapon Attack: +6 to hit, reach 5 ft., two targets. Hit: 11 (2d6+4) slashing damage.
Hamstring. Melee Weapon Attack: +6 to hit, reach 5 ft., one target. Hit: 11 (2d6+4) slashing damage and the target's speed is reduced to 10 until the end of their next turn.
4b. Upper Gatehouse
The adventurers leave the open walls and enter an enclosed room on top of the gatehouse. From the light of the torches within, the party can see piles of decomposing hay and rotting flesh. Cobwebs sway in the wind entering through the caved in roof of the chamber. Inside is a group of undead hiding in the shadows that attack the party once it enters this room. Roll from this section's Random Encounter Table to determine the undead lying in wait. Continuing through the room leads out to the northern ramparts.
Random Encounter Table
| Roll | Monsters |
|---|---|
| 1-2 | 3 Fetid Corpse Eaters |
| 3-4 | 1 Sorcerous Skeleton, 2 Fetid Corpse Eaters |
| 5-6 | 2 Sorcerous Skeletons, 1 Fetid Corpse Eater |
4c. Northern Ramparts
The adventurers must cross the eastern and northern ramparts to reach Shadowfang Keep's main tower. On each stretch of the wall there are 2d2 Stone Sleepers currently posing as statues. if the party is not attempting to be stealthy as they pass by each group, the gargoyles will rise to attack them. Use their passive perception against any stealth attempts by the adventurers.
Additionally, a group of 2d2 Frantic Geists run back and forth along the northern rampart. They will attempt to lead the adventurers into the gargoyles when fighting them. A door at the western end of this wall leads into the tower.
5. The Tower
Shadowfang Keep's main tower looms over the keep and Pyrewood Village below. Inside the tower is the library of the late Archmage Arugal as well as the party's final targets, Lord Walden and Lord Godfrey.
5a. The Vacant Den
From the ramparts, the party descends a spiral staircase into a vacant den. Piles of hay littered with animal bones cover much of the ground. A series of wooden stairs and three platforms wrap around the room leading generally upwards (look at the map for the exact layout). Distributed about these platforms are several groups of undead. Roll from this section's Random Encounter Table to determine which undead are in the room and divide them as you see fit.
Random Encounter Table
| Roll | Monsters |
|---|---|
| 1 | 3 Fetid Corpse Eaters, 3 Frantic Geists |
| 2 | 6 Frantic Geists |
| 3 | 5 Fetid Corpse Eaters |
| 4 | 1 Spitebone Guardian, 4 Frantic Geists |
| 5 | 1 Spitebone Guardian, 4 Fetid Corpse Eaters |
| 6 | 1 Spitebone Guardian, 2 Fetid Corpse Eaters, 2 Frantic Geists |
Above the party's heads is a suspended staircase leading from the uppermost platform to a door high on the southern wall. Through this doorway is a circular stairway leading up to the observatory.
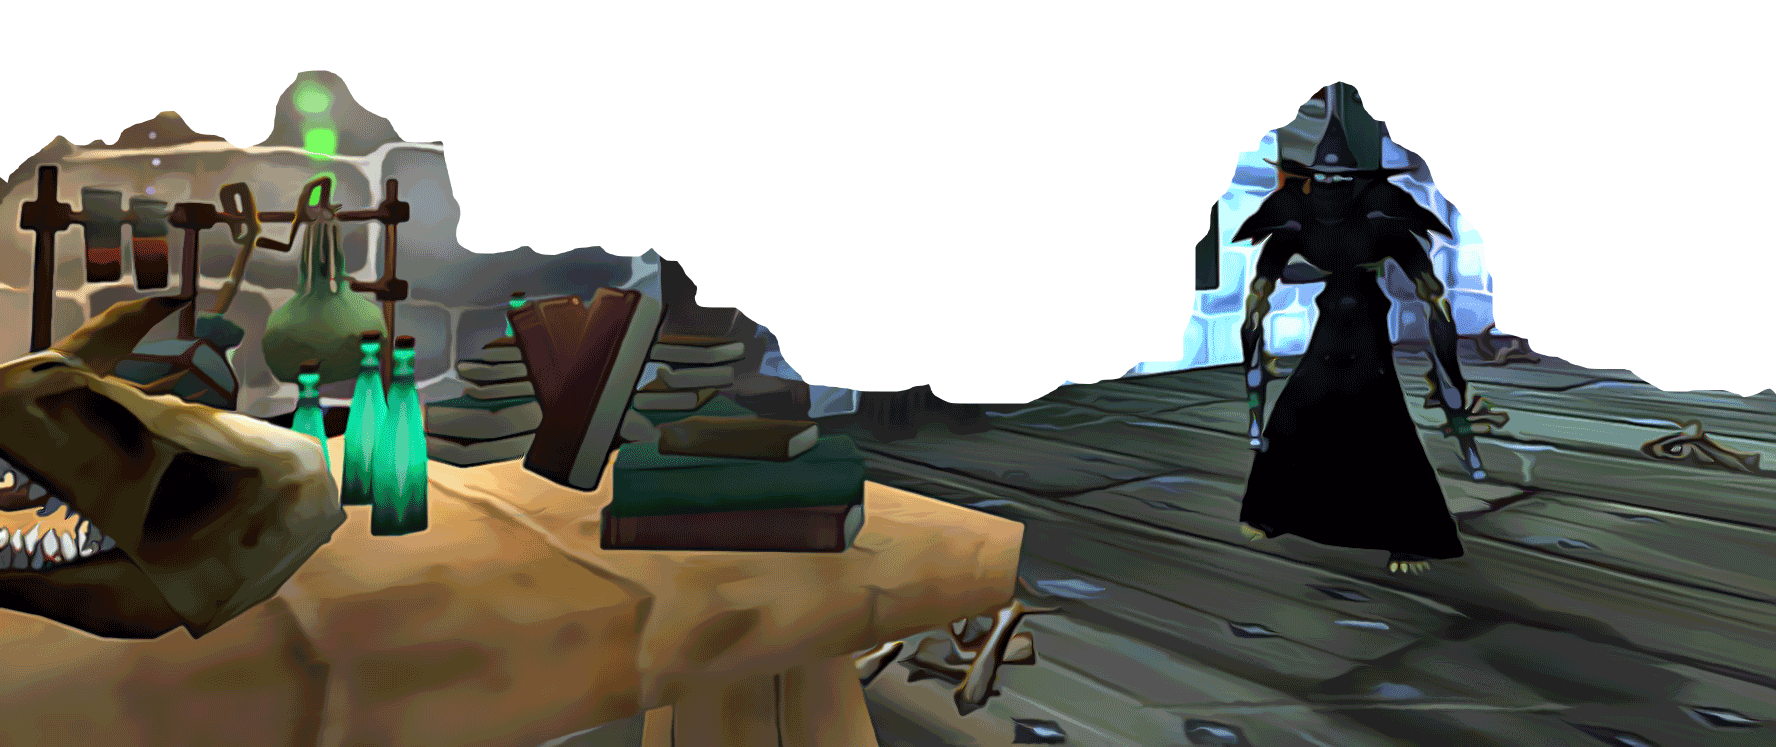
5b. The Observatory
At the top of the staircase is a door leading to the observatory. Inside this circular room is the remains of late Archmage Arugal's library. Every wall is covered with shelves holding tomes, bottles, and other trinkets all illuminated by magically lit braziers, giving off an unsettling purple glow. Lord Walden moves about the room looking at the various contents of the shelves and often returning to a mysterious cauldron in the middle of the room. Wooden platforms, suspended about 20 feet in the air, ring the room and on the far side of the library is an iron portcullis, currently closed.
Once Walden is defeated, Belmont, Cromush, and the Forsaken forces will enter the observatory. Belmont opens the gate using the keys you gave him before and sends his soldiers and High Warlord Cromush on ahead to take down Godfrey.
Through the gate is a set of stairs leading to the upper platforms which are illuminated by the same off-putting purple lights. Across the platform is another set of stairs leading up the antechamber of Godfrey's sanctum.
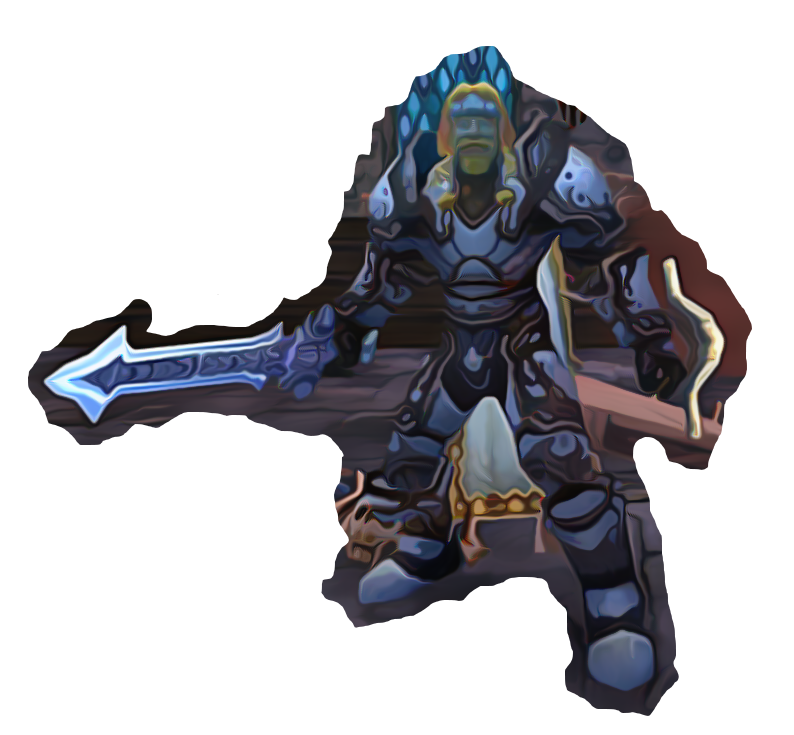
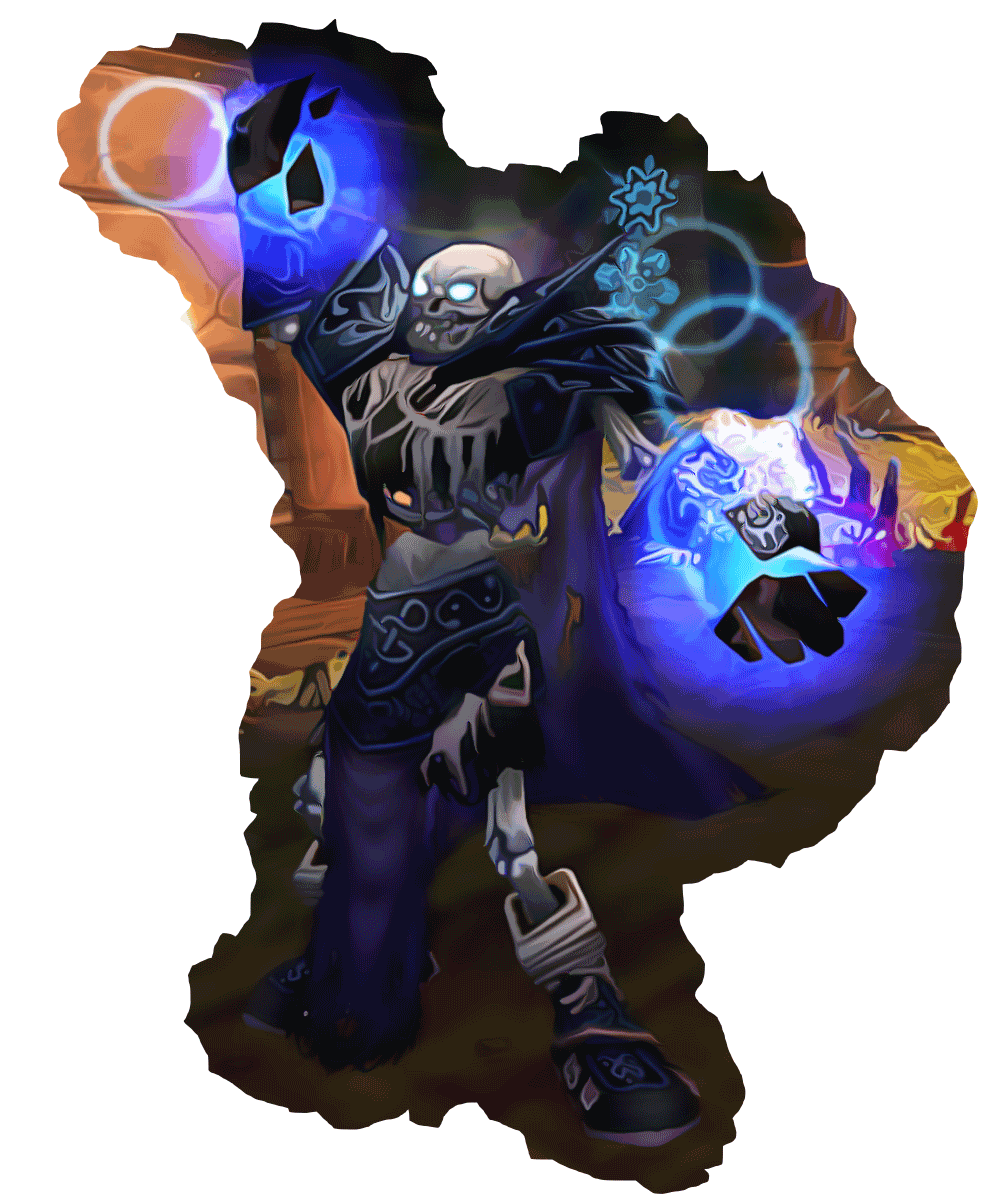
Lord Walden
"This library should prove to be useful to my own research."
Godfrey's right-hand man, the arrogant Lord Walden vowed to pay any price, including death, to serve his compatriot. Now among the undead, Walden intends to keep his word, attacking adversaries with ice and venom.
Lord Walden (marked by a green skull on the map) will immediately cause his cauldron to start spewing toxin as soon as he is attacked. Make a roll for the Mystery Cauldron at the start of combat.
When Lord Walden is defeated, the party can loot Phantom Armor.
Sweet, Merciless Revenge
Description
If all goes well you'll just be able to walk right into Godfrey's personal domain and take a reward fitting for such an eager adventurer.
Godfrey is a cunning foe, though, so it may be wise to head up there quickly just in case you're needed. He will pay for what he did to the Dark Lady!
Mechanics and Reward
Find and defeat Lord Godfrey at the top of the tower. Bring proof of his demise to Deathstalker Commander Belmont.
The party can collect the bounty on Lord Godfrey's head (300gp or an appropriate amount for your campaign) once they return from Shadowfang Keep. They will also be given a token to demonstrate the adventurers are champions of the Banshee Queen.
Lord Walden
Medium undead, chaotic evil
- Armor Class 13
- Hit Points 65 (10d8+20)
- Speed 30 ft.
STR DEX CON INT WIS CHA 11 (+0) 14 (+2) 14 (+2) 16 (+3) 14 (+2) 10 (+0)
- Damage Immunities poison, fire, cold
- Condition Immunities charmed, exhaustion, poisoned
- Senses darkvision 60 ft., passive Perception 12
- Languages Common
- Challenge 3 (700 XP)
Mystery Cauldron. At the start of Lord Walden's turn, roll from the table below to determine which toxin is active until the start of his next turn.
Roll Toxin Color 1-2 Toxic Coagulant green 3-4 Toxic Catalyst red The toxin affects all creatures within 60 feet of the cauldron.
Toxic Coagulant. If a creature doesn't move at least 5 feet during its turn while inside this toxin, it takes 7 (2d6) poison damage.
Toxic Catalyst. If a creature moves at least 5 feet during its turn while inside this toxin, it takes 7 (2d6) fire damage.
Actions
Ice Shards. All creatures within 60 feet must succeed on a DC 13 Dexterity saving throw or take 7 (2d6) cold damage.
Conjure Mixture. Roll from the table below to determine which deadly mixture Walden summons.
Roll Mixture 1-2 Poisonous Mixture 3-4 Frost Mixture If he makes a poisonous mixture, he throws it at a target within 30 feet. All creatures within 5 feet of that target must succeed on a DC 13 Dexterity saving throw or take 13 (3d8) points of poison damage and have disadvantage on any Constitution saving throws until the end of Walden's next turn.
If he makes a frost mixture, he throws it at his feet. All creatures within 10 feet of Walden must succeed on a DC 13 Constitution saving throw or take 13 (3d8) points of cold damage and have disadvantage on any Dexterity saving throws until the end of Walden's next turn.
5c. Antechamber
At the top of the staircase is another room filled with decomposing hay and tattered banners. Unexpectedly, it is not Forsaken soldiers that greet the party but a group of undead loyal to Lord Godfrey. Roll from this section's Random Encounter Table to determine what undead are lying in wait.
Random Encounter Table
| Roll | Monsters |
|---|---|
| 1 | 1 Sorcerous Skeleton, 3 Frantic Geists |
| 2 | 1 Spitebone Guardian, 2 Sorcerous Skeletons |
| 3 | 1 Spitebone Guardian, 2 Frantic Geists |
| 4 | 2 Spitebone Guardians |
At the other end of the room is the door to Lord Godfrey's chamber. It is currently sealed and Cromush and the Forsaken troops are nowhere to be found. Once the undead in this room are defeated, Commander Belmont catches up with the party. Seeing that the door to the next chamber has not been open he moves to unlock it using the keys the party gave him earlier.
5d. Lord Godfrey's Chamber
Upon opening the door, the adventurers are hit by the acrid scent of blood and decay. A gasping Cromush, currently prone on the platform near the door, reveals with pained breaths that he and the Forsaken were led into a trap. After imparting this information, he then falls unconscious. Commander Belmont goes to move the orc from the from and tells the party that he will guard their flank from any other undead Lord Godfrey may call to him.
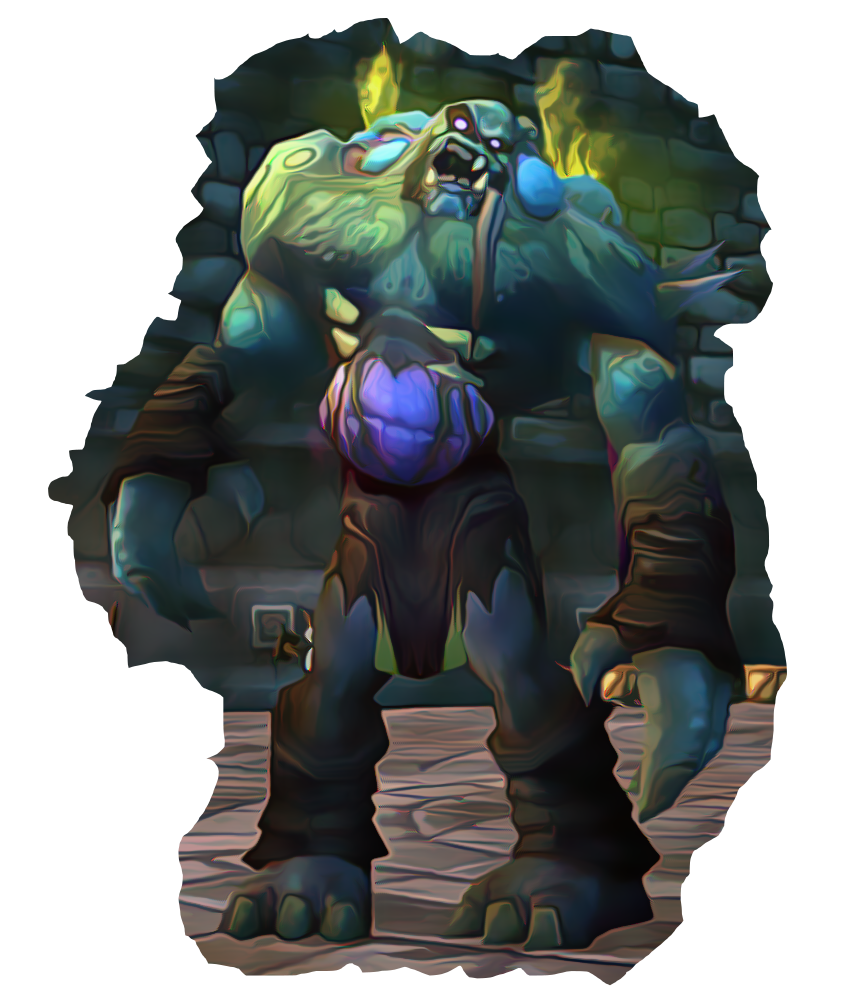
Peering down into the room below, the party sees that the Forsaken troops have been torn apart. A Mindless Horror, illuminated by more of the magically burning braziers, lumbers over their scattered bodies.
Across the room, Godfrey stands on a crumbling platform overlooking the room brandishing two deadly pistols. He taunts the party and will instruct the Mindless Horror to attack you while he fires Cursed Bullets from across the room. There is a set of stone stairs leading down to where the horror currently stands and another set leading up to his platform from the space below him.
Once Godfrey is defeated the party can return to Commander Belmont and Warlord Cromush.
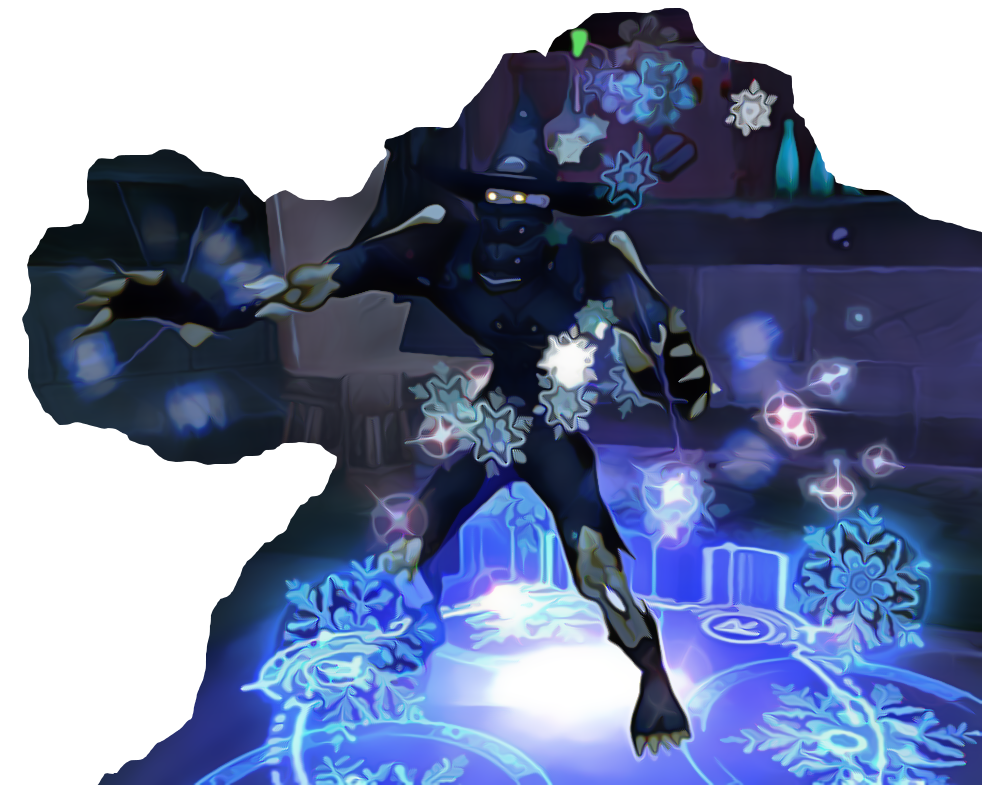
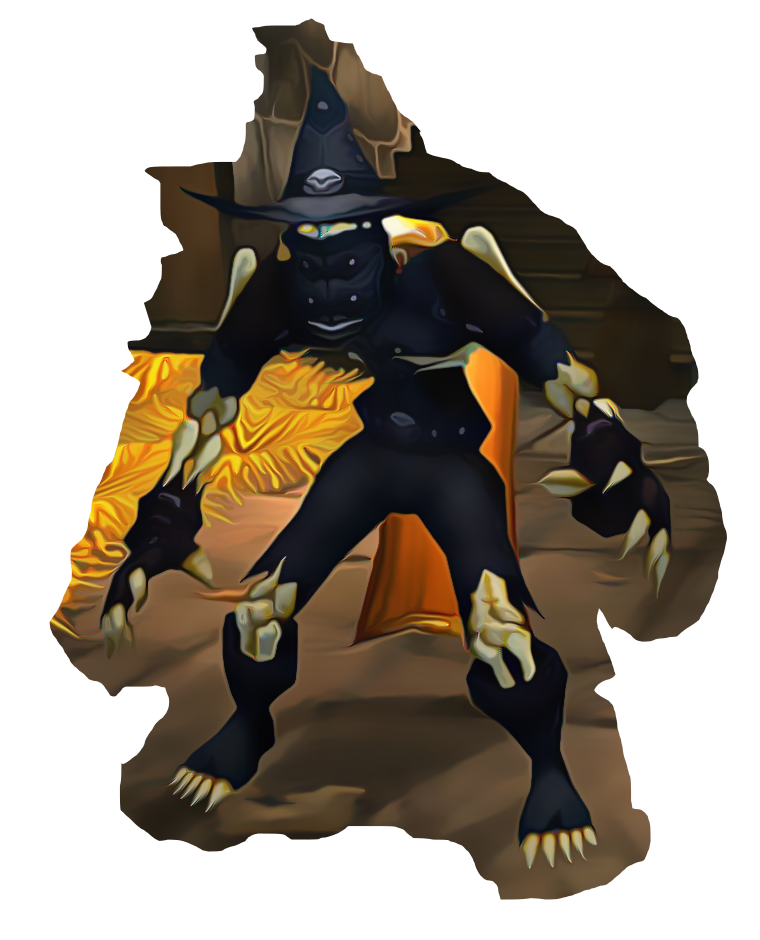
Lord Godfrey
"That bitch Sylvanas sent you too, did she? No matter, your journey ends in agony."
Drawing from his past as a Gilnean noble and Forsaken agent, the cunning and resourceful Lord Godfrey wields dual pistols and commands relentless flesh-eating ghouls.
Lord Godfrey (marked by a blue skull on the map) begins the fight by shooting Cursed Bullets at the party while his Mindless Horror engages them. He does not have any other actions until the Mindless Horror is defeated, he is forcibly moved from his platform, an adventurer comes on his platform, or he is reduced to 60 hit points or fewer.
When Lord Godfrey is defeated, the party can loot Meteor Shard.
Lord Godfrey
Medium undead, chaotic evil
- Armor Class 14
- Hit Points 75 (10d8+30)
- Speed 30 ft.
STR DEX CON INT WIS CHA 12 (+1) 16 (+3) 16 (+3) 16 (+3) 14 (+2) 10 (+0)
- Damage Immunities poison
- Condition Immunities charmed, exhaustion, poisoned
- Senses darkvision 60 ft., passive Perception 12
- Languages Common
- Challenge 3 (700 XP)
Actions
Multiattack. Lord Godfrey makes two weapon attacks.
Mortal Strike. Melee Weapon Attack: +5 to hit, reach 5 ft., one target. Hit: 6 (1d6+3) slashing damage and the target's maximum hit points are reduced by the damage taken until it takes a short or long rest.
Cursed Bullet. Ranged Weapon Attack: +5 to hit, range 30/90 ft., one target. Hit: 6 (1d6+3) piercing damage and 2 (1d4) necrotic damage. The target has a -1 penalty to its AC until it takes a short rest. This effect stacks.
Necromantic Bullets (Recharge 4-6). Lord Godfrey fires a volley of 1d6 necromantic bullets into the air around him, and where each bullet lands (within 30 feet) a Bloodthirsty Ghoul rises out of the floor. Godfrey may immediately use Pistol Barrage as a bonus action.
Pistol Barrage (only after Necromantic Bullets). Lord Godfrey points at a hostile creature and unleashes a barrage of bullets in a 30-foot cone towards it. Creatures in the cone must succeed on a DC 14 Dexterity saving throw or take 16 (3d10) piercing damage. On a successful save it takes half as much damage.
Bloodthirsty Ghoul
Medium undead, chaotic evil
- Armor Class 11
- Hit Points 11 (2d8+2)
- Speed 30 ft.
STR DEX CON INT WIS CHA 14 (+2) 10 (+0) 12 (+1) 8 (-1) 10 (+0) 6 (-2)
- Damage Immunities poison
- Condition Immunities charmed, exhaustion, poisoned
- Senses darkvision 60 ft., passive Perception 10
- Languages Common
- Challenge 1/8 (25 XP)
Bloodthirsty. The ghoul will attack the hostile creature in range with the lowest hit points.
Actions
Claw. Melee Weapon Attack: +4 to hit, reach 5 ft., one target. Hit: 4 (1d4+2) slashing damage.
Tower Top
With Lord Godfrey slain, it is time to leave. Belmont is tending to Cromush when the party returns, newly slain undead laying nearby. The still unconscious orc will have to be revived or carried.
Echoing up the spiral staircase is the sound of more undead ascending to the adventurer's current location. Commander Belmont leads the party further up the staircase towards the apex of the tower. Moving through a small hatch, the party finds itself at the highest point of Shadowfang Keep. Looking below them, the characters can see what is left of Godfrey's undead and ghostly forces streaming into the tower.
Belmont produces and lights a magical flare and the party must wait. Just as the first few undead start making it to the hatch, a flight of Forsaken Bat Riders arrives. They throw incendiary bombs and plague vials down into the hatch while quickly collecting Belmont, Cromush, and the party.
As they fly away, Commander Belmont looks back at the now smoking tower top. He vows that he will return and claim Shadowfang Keep for the Forsaken.
The party is taken to The Sepulcher where they are given the bounties and praise they are owed. The Banshee Queen has been avenged this day and she will remember those that carried out her vengeance.
Treasure
This section provides descriptions for the treasure found within Shadowfang Keep. The source of each of these items is given in the above sections.
Butcher's Cleaver
Weapon (battleaxe), rare (requires attunement)
You gain a +1 bonus to attack and damage rolls made with this magic weapon. After defeating 100 creatures while wielding this weapon, this bonus is increased to +2.
Once per long rest you can use a bonus action to apply a brand to a hostile creature for 30 seconds. Once per turn when you hit the branded creature with an attack using this weapon, regain hit points equal to your proficiency bonus.
![]()
Commander's Crest
Armor (shield), rare (requires attunement)
While holding this shield, you have +1 bonus to AC. This bonus is in addition to the shield's normal bonus to AC.
Once per short rest, you can bolster a nonhostile creature you can see within 30 feet of you. Whenever it makes an attack roll or a saving throw, it can add a d4 to its roll. This effect lasts for 30 seconds and ends if you are incapacitated.
![]()
Haunting Blade
Weapon (greatsword), rare (requires attunement)
You gain a +1 bonus to attack and damage rolls made with this magic weapon.
Once per turn when you hit with a creature with this weapon, you both gain an additional +1 bonus to attack rolls against each other. This effect stacks (max +3) and all bonuses are lost if you go an entire turn without hitting it. While this bonus is at +3, you must make a DC 15 Wisdom saving throw to attack a different creature.
Girdle of the Blindwatcher
Wondrous item, rare (requires attunement)
As an action you can activate or deactivate the girdle. When active, you are blinded but your other senses are heightened. You gain tremorsense 40 ft., blindsight 20 ft., and advantage on checks based on smell and hearing.
Meteor Shard
Weapon (dagger), rare (requires attunement)
You gain a +1 bonus to attack and damage rolls made with this magic weapon.
The weapon has 3 charges and regains all expended charges daily at dawn. When attacking with this weapon, you may spend any number of charges before the attack roll. Add 1d4 fire damage to the damage roll per charge spent.
If all 3 charges are spent on a single attack and you roll a 5 or lower on the attack roll, the dagger explodes, destroying it and dealing 6d4 fire damage to you and the target.
Phantom Armor
Armor (chain mail), rare (requires attunement)
Ever-shifting illusions and colors dance across the surface of this armor.
When wearing this armor, you gain a +1 bonus to AC. Once per long rest, you can cast blur.
Robes of Arugal
Wondrous item, rare (requires attunement)
The robes of the late Archmage Arugal are midnight black and edged with the color of moonlight. While you wear the robe you gain the following benefits:
- You gain a +1 bonus to spell attack and damage rolls when you are under moonlight.
- You can see as well in moonlight as you can in daylight.
- Once per long rest, you may cast moonbeam.
Rugged Spaulders
Armor (hide), rare (requires attunement)
This shoulder armor is made from the leather of giant worgs, and imbued with their strength.
When wearing this armor, you gain a +1 bonus to AC and +1 bonus to your Strength score. This bonus cannot make your Strength score exceed 20.
Silverlaine's Family Seal
Ring, rare (requires attunement)
The spirits of the worgen who first assaulted Shadowfang Keep are bound to this ring.
This ring has four charges and regains all expended charges monthly during the full moon.
Once per day, while wearing the ring you may spend a charge and an action to summon a Worgen Spirit that obeys your commands. Roll from the following table to determine which spirit is summoned. If that spirit has already been summoned since the last full moon, roll again.
| Roll | Worgen Spirit |
|---|---|
| 1 | Odo the Blindwatcher |
| 2 | Razorclaw the Butcher |
| 3 | Rethligore |
| 4 | Wolf Master Nandos |
Wolfmaster Cape
Wondrous item, rare
This cape is sown from the furs of many wolves. While wearing it, you gain the following benefits:
- You can speak to and understand dogs and wolves.
- You can advantage on animal handling checks
Monsters
This section includes stat blocks for all non-boss monsters found in Shadowfang Keep. These monsters can be used either by using the Random Encounter Tables found in each section or building your own encounters.
Fetid Corpse Eater
Medium undead, chaotic evil
- Armor Class 13
- Hit Points 27 (5d8+5)
- Speed 30 ft.
STR DEX CON INT WIS CHA 14 (+2) 14 (+2) 12 (+1) 6 (-2) 10 (+0) 6 (-2)
- Damage Immunities poison
- Condition Immunities charmed, exhaustion, poisoned
- Senses darkvision 60 ft., passive Perception 10
- Languages Common
- Challenge 1 (200 XP)
Disease Cloud. The ghoul emits a cloud of disease in a 5-foot sphere around it. When a creature enters this area for the first time on a turn or starts its turn there, it must make a DC 13 Constitution saving throw. On a failed save, the creature takes 7 (2d6) poison damage. On a success, it takes half as much damage. This cloud persists when the ghoul is defeated.
Actions
Consume Flesh. Melee Weapon Attack: +4 to hit, reach 5 ft., one target. Hit: 5 (1d6 + 2) piercing damage. The ghoul regains hit points equal to half the damage done by this attack.
Rotting Bile. Ranged Weapon Attack: +4 to hit, range 20/60 ft., one target. Hit: 5 (1d6 + 2) poison damage, and the target gains a -2 penalty to its damage rolls until the start of the ghoul's next turn.
Frantic Geist
Medium undead, chaotic evil
- Armor Class 12
- Hit Points 22 (5d8)
- Speed 40 ft.
STR DEX CON INT WIS CHA 13 (+1) 16 (+3) 10 (+0) 8 (-1) 14 (+2) 6 (-2)
- Damage Immunities poison
- Condition Immunities charmed, exhaustion, poisoned
- Senses darkvision 60 ft., passive Perception 12
- Languages Common
- Challenge 1 (200 XP)
Mob Tactics. The geist has advantage on attack rolls if at least one other geist is within 5 feet of it and neither geist is incapacitated.
Frantic Leap. If the geist moves at least 20 feet straight toward a creature and then attacks it with a slashing claw attack on the same turn, the geist makes another slashing claw attack on it..
Actions
Claw. Melee Weapon Attack: +5 to hit, reach 5 ft., one target. Hit: 8 (2d4 + 3) slashing damage.
Ghostly Cook
Medium undead, chaotic evil
- Armor Class 12
- Hit Points 27 (5d8+5)
- Speed 30 ft.
STR DEX CON INT WIS CHA 14 (+2) 12 (+1) 12 (+1) 10 (+0) 12 (+1) 8 (-1)
- Damage Resistances bludgeoning, slashing, and piercing from nonmagical sources
- Damage Immunities necrotic, poison
- Condition Immunities charmed, exhaustion, frightened, grappled, paralyzed, petrified, poisoned, prone, restrained
- Senses darkvision 60 ft., passive Perception 11
- Languages Common
- Challenge 1 (200 XP)
Actions
Cleave. Melee Weapon Attack: +4 to hit, reach 5 ft., two targets. Hit: 5 (1d6+2) slashing damage.
Tenderize. Melee Weapon Attack: +4 to hit, reach 5 ft., one target. Hit: 5 (1d6+2) bludgeoning damage and the target has a -1 penalty to AC for one minute. This penalty can be applied multiple times to the same target.
Haunted Servitor
Medium undead, unaligned
- Armor Class 12
- Hit Points 27 (5d8+5)
- Speed 30 ft.
STR DEX CON INT WIS CHA 11 (+0) 12 (+1) 12 (+1) 14 (+2) 12 (+1) 10 (+0)
- Damage Resistances bludgeoning, slashing, and piercing from nonmagical sources
- Damage Immunities necrotic, poison
- Condition Immunities charmed, exhaustion, frightened, grappled, paralyzed, petrified, poisoned, prone, restrained
- Senses darkvision 60 ft., passive Perception 11
- Languages Common
- Challenge 1 (200 XP)
Actions
Drain Life. Ranged Spell Attack: +4 to hit, range 30 ft., one target. Hit: 4 (1d8) necrotic damage. The ghost regains hit points equal to half the damage done by this attack.
Haunting Spirits (Recharges after a Long Rest). A target must succeed on a DC 13 Wisdom saving throw or become cursed. After 1d10 minutes, the curse is broken and 1d4 Haunting Spirits materialize around and attack the target.
Haunting Spirit
Medium undead, chaotic evil
- Armor Class 11
- Hit Points 9 (2d8)
- Speed 30 ft.
STR DEX CON INT WIS CHA 12 (+1) 12 (+1) 11 (+0) 8 (-1) 12 (+1) 10 (+0)
- Damage Resistances bludgeoning, slashing, and piercing from nonmagical sources
- Damage Immunities necrotic, poison
- Condition Immunities charmed, exhaustion, frightened, grappled, paralyzed, petrified, poisoned, prone, restrained
- Senses darkvision 60 ft., passive Perception 11
- Languages Common
- Challenge 1/8 (25 XP)
Actions
Spectral Strike. Melee Weapon Attack: +3 to hit, reach 5 ft., one target. Hit: 3 (1d4+1) necrotic damage.
Mindless Horror
Large undead, chaotic evil
- Armor Class 14
- Hit Points 52 (7d10+14)
- Speed 30 ft.
STR DEX CON INT WIS CHA 16 (+3) 10 (+0) 15 (+2) 4 (-3) 10 (+0) 4 (-3)
- Damage Immunities poison
- Condition Immunities charmed, exhaustion, poisoned
- Senses darkvision 60 ft., passive Perception 10
- Languages Common
- Challenge 2 (450 XP)
Actions
Smash. All targets within 5 feet must succeed on a DC 13 Dexterity saving throw or take 10 (2d6 + 3) bludgeoning damage.
Cowering Roar (Recharge 4-6). A loud spine tingling roar erupts, forcing each hostile creature within 20 feet of the horror to succeed on a DC 13 Wisdom saving throw or become Frightened.
If the creature ends its turn in a location where it doesn't have line of sight to the horror or if it takes damage from any source, the creature can make a DC 12 Wisdom saving throw. On a successful save, the effect ends for that creature.
Shadowy Attendant
Medium undead, unaligned
- Armor Class 11
- Hit Points 22 (5d8)
- Speed 30 ft.
STR DEX CON INT WIS CHA 11 (+0) 12 (+1) 12 (+1) 14 (+2) 12 (+1) 10 (+0)
- Damage Resistances bludgeoning, slashing, and piercing from nonmagical sources
- Damage Immunities necrotic, poison
- Condition Immunities charmed, exhaustion, frightened, grappled, paralyzed, petrified, poisoned, prone, restrained
- Senses darkvision 60 ft., passive Perception 11
- Languages Common
- Challenge 1 (200 XP)
Actions
Shadowy Touch. Ranged Spell Attack: +4 to hit, range 30 ft., one target. Hit: 6 (1d12) necrotic damage, and shadowing hands grip the target. At the start of the ghost's turn, any targets gripped by these hands take 5 (1d10) necrotic damage. This grip is broken if the target moves out of range of this spell.
Shadow Vortex (Recharge 4-6). A dark pool (10-foot circle) forms on the ground within 50 feet of the ghost. When a creature enters this pool for the first time on a turn or starts its turn there, it must make a DC 13 Constitution saving throw. On a failed save, the creature takes 9 (2d8) necrotic damage. On a failed save it takes half as much damage. This pool lasts for 30 seconds.
Sorcerous Skeleton
Medium undead, chaotic evil
- Armor Class 12
- Hit Points 27 (5d8+5)
- Speed 30 ft.
STR DEX CON INT WIS CHA 11 (+0) 12 (+1) 12 (+1) 15 (+2) 12 (+1) 10 (+0)
- Damage Vulnerabilities bludgeoning
- Damage Immunities poison
- Condition Immunities exhaustion, poisoned
- Senses darkvision 60 ft., passive Perception 11
- Languages understands Common but can't speak
- Challenge 1 (200 XP)
Actions
Frostbolt. Ranged Spell Attack: +4 to hit, range 60 ft., one target. Hit: 6 (1d12) cold damage, and the target's speed is halved on its next turn.
Living Bomb. Ranged Spell Attack: +4 to hit, range 45 ft., one target. Hit: 3 (1d6) fire damage, and at the end of the target's next turn all creatures within 10 feet of the target (including the target) take 4 (1d8) fire damage.
Spitebone Guardian
Medium undead, chaotic evil
- Armor Class 14 (natural armor and shield)
- Hit Points 60 (8d8+24)
- Speed 30 ft.
STR DEX CON INT WIS CHA 16 (+3) 11 (+0) 16 (+3) 6 (-2) 8 (-1) 5 (-3)
- Damage Vulnerabilities bludgeoning
- Damage Immunities poison
- Condition Immunities exhaustion, poisoned
- Senses darkvision 60 ft., passive Perception 9
- Languages understands Common but can't speak
- Challenge 2 (450 XP)
Actions
Longsword. Melee Weapon Attack: +5 to hit, reach 5 ft., one target. Hit: 7 (1d8+3) slashing damage.
Bone Shield (Recharge 3-6). The skeleton gains 10 temporary hit points until the start of its next turn. If the skeleton takes damage such that all the temporary hit points would be lost, all targets within 5 feet of the skeleton take 5 (1d10) piercing damage.
Stone Sleeper
Medium undead, chaotic evil
- Armor Class 15 (natural armor)
- Hit Points 45 (7d8+14)
- Speed 30 ft., fly 60 ft.
STR DEX CON INT WIS CHA 15 (+2) 11 (+0) 15 (+2) 6 (-2) 12 (+1) 7 (-2)
- Skills Perception +5
- Damage Resistances bludgeoning, slashing, and piercing from nonmagical sources
- Damage Immunities poison
- Condition Immunities exhaustion, petrified, poisoned
- Senses darkvision 60 ft., passive Perception 15
- Languages Terran
- Challenge 2 (450 XP)
False Appearance: While the gargoyle remains motion less, it is indistinguishable from an inanimate statue.
Actions
Gargoyle Strike. Melee Weapon Attack: +4 to hit, reach 5 ft., one target. Hit: 9 (2d6+2) slashing damage.
Night Terror (Recharges on Long Rest). The gargoyle can cast fear with a DC 12 spell save. This spell targets a single creature instead of a 30 foot cone.
Tormented Officer
Medium undead, unaligned
- Armor Class 16
- Hit Points 32 (5d8+10)
- Speed 30 ft.
STR DEX CON INT WIS CHA 16 (+3) 12 (+1) 14 (+2) 10 (+0) 12 (+1) 12 (+1)
- Damage Resistances bludgeoning, slashing, and piercing from nonmagical sources
- Damage Immunities necrotic, poison
- Condition Immunities charmed, exhaustion, frightened, grappled, paralyzed, petrified, poisoned, prone, restrained
- Senses darkvision 60 ft., passive Perception 13
- Languages Common
- Challenge 1 (200 XP)
Actions
Longsword. Melee Weapon Attack: +5 to hit, reach 5 ft., one target. Hit: 7 (1d8+3) slashing damage.
Shield Wall (Recharge 5-6). The ghost gains a +4 bonus to AC and advantage on saving throws until the start of the ghost's next turn.
Wailing Guardsman
Medium undead, unaligned
- Armor Class 14
- Hit Points 32 (5d8+10)
- Speed 30 ft.
STR DEX CON INT WIS CHA 14 (+2) 12 (+1) 14 (+2) 10 (+0) 12 (+1) 10 (+0)
- Damage Resistances bludgeoning, slashing, and piercing from nonmagical sources
- Damage Immunities necrotic, poison
- Condition Immunities charmed, exhaustion, frightened, grappled, paralyzed, petrified, poisoned, prone, restrained
- Senses darkvision 60 ft., passive Perception 12
- Languages Common
- Challenge 1 (200 XP)
Actions
Halberd. Melee Weapon Attack: +4 to hit, reach 10 ft., one target. Hit: 7 (1d10+2) slashing damage.
Screams of the Past (Recharge 4-6). A piercing scream rings out, forcing each hostile creature within 15 feet of the ghost to succeed on a DC 13 Wisdom saving throw or they are unable to cast spells until the start of the ghost's next turn.
For the Alliance!
This section describes the general changes from the written dungeon if the party is playing from the Alliance side.
The party is working with worgen forces from the Gilneas Liberation Front led by Packleader Ivar Bloodfang. Replace any references to Deathstalker Commander Belmont with Packleader Ivar Bloodfang and any references to Forsaken soldiers with Bloodfury Berserkers. Remove any references to Warlord Cromush.
Sniffing Them Out
Description
I could smell Godfrey and his companions a mile away from here. They did an exceedingly poor job covering their tracks in flight. It will be the mistake that puts the final nail in their coffins.
One of them is very close, and though the scent has changed slightly in undeath, I'm fairly certain it's Ashbury's. Go inside and tear him to pieces, we'll ensure the Forsaken do not intervene with our task.
Mechanics and Rewards
Find and defeat Baron Ashbury within the gatehouse. Take his keys and proof of his demise and bring them back to Packleader Ivar Bloodfang.
The party can collect the bounty on Baron Ashbury's head (150gp or an appropriate amount for your campaign) once they return from Shadowfang Keep. Ivar will throw away the keys and tear open a door in the gatehouse that leads out into the courtyard of Shadowfang Keep.
Once this quest is completed, Ivar will immediately offer the quest, "Armored to the Teeth".
Armored to the Teeth
Description
We've hit an unexpected snag in our assault on the keep, adventurers. It seems the servants that tended to Baron Silverlaine and Commander Springvale in life do so now in death as well, and Godfrey has placed them directly between us and him.
Not to worry, we won't let them be anything more than a minor inconvenience. Eliminate Silverlaine and Springvale both and not only will their guards no longer have masters to direct them, it will place us that much closer to our final goal.
Mechanics and Rewards
Assault the barracks and defeat Lord Godfrey's ghostly allies, Baron Silverlaine and Commander Springvale. Once the two spectral leaders are defeated, Ivar and his pack will occupy the barracks.
Once this quest is completed, Ivar will immediately offer the quest, "Fighting Tooth and Claw".
When leaving the dungeon via the Tower Top, the party is rescued by gryphon riders and flown to Alliance ships off the coast of Gilneas.
The quests throughout this dungeon are replaced using the following table:
| Horde Quest | Alliance Quest |
|---|---|
| This Land is Our Land | Sniffing Them Out |
| Plague...Plague Everywhere! | Armored to the Teeth |
| Orders Are For the Living | Fighting Tooth and Claw |
| Sweet, Merciless Revenge | Fury of the Pack |
Fighting Tooth and Claw
Description
It appears that Lord Walden has finally taken notice to our presence and has heightened his defenses. It's worthless really... nothing will deter our pack.
The path ahead to him is rife with powerful Scourge minions, but I trust that you will be able to clear the path for the rest of us to follow in. Once we kill Walden, it should be a straight shot to his cowardly leader.
Mechanics and Reward
Find and defeat Lord Walden within the observatory. Bring proof of his demise to Packleader Ivar Bloodfang.
The party can collect the bounty on Lord Walden's head (150gp or an appropriate amount for your campaign) once they return from Shadowfang Keep. Ivar will then send his forces to take down Lord Godfrey.
Once this quest is completed, Ivar will immediately offer the quest, "Fury of the Pack".
Fury of the Pack
Description
Ah, the sweet scent of victory! My men should be tearing Godfrey to pieces even as we speak. Go up to his domain and collect your share of the spoils - you've earned it!
You'd think that he would have been more difficult to defeat...
Mechanics and Reward
Find and defeat Lord Godfrey at the top of the tower. Bring proof of his demise to Packleader Ivar Bloodfang.
The party can collect the bounty on Lord Godfrey's head (300gp or an appropriate amount for your campaign) once they return from Shadowfang Keep. They will also be given a token to demonstrate the adventurers are champions of the Gilneas Liberation Front.